

M65 Atomic Cannon


Comments
1 4 February 2016, 23:29
Today I'm starting this new build from the old Renwal kit. I expect a lot of tweaking to be done...
4 February 2016, 23:32
Will you be tweaking it into being a fully functional atomic gun ??😉 😄
5 February 2016, 01:23
I'd be taking cover in my 1/32 atomic bunker if I were you, Choppa...
5 February 2016, 23:36
lol... I'll let 1/32nd scale me know we're under atomic cannon attack !! 😄
5 February 2016, 23:39
The first step, making 8 leaf springs of 19 leafs each, being hand-cut. Not the most inspiring job to do, but if you get hollow blocks for springs it can't be avoided.
8 February 2016, 23:19
"Or he could crawl into the nearest 1/32 fridge..."
lol, reckon I'll make do with taping the windows and getting under the table 🙂
8 February 2016, 23:31
Crawling into a fridge only works if your wearing a Fedora and Leather Jacket!!
9 February 2016, 02:16
I once bought one but it was made in China.
The album for today shows the surgical removal of the two tread plates aft of the truck, in the first pictures you see the model compared to a useful picture printed at 1/32 scale. You also notice an error in the leaf spring mounting, it's way too low. My correction will lead to an increased model height of about five mm.
12 February 2016, 00:43
Today you see a replica of the bumper in sheet metal to compare to the real thickness. Then the toolbox right is remade because of underscale dimensions. I have to intersect 5 wheel hubs to obtain the correct volume, which calls for some very precise sawing...
15 February 2016, 16:31
That's some impressive "Sawsmanship" !! 😄
You should take castings of your modified pieces and send them back to Renwall so they can get it right for future kits 😄
15 February 2016, 17:02
Thanks, Choppa. And then they can charge us double with a "new tooling"... Just finished the double hubs, now for the single ones.
16 February 2016, 00:19
Now I'm adapting a lot of suspension pieces that looked too flat. When this is finished, I'll be stuck with a shoe box of ground cannon powder.
20 February 2016, 21:23
The preparations are done to attach the springs to the first truck. A lot of leafs had to be cut and drilled.
25 February 2016, 00:03
You can see the result in my next pictures. By glueing the Evergreen strips to each other with Tamiya Extra Thin, they are laminated in the right curvature. A print-out in 1/32 unveils again some bugs in the kit.
25 February 2016, 16:33
I corrected the front fender angle, reshaped the frame and scratched a new front bumper.
27 February 2016, 00:39
I decreased the bumper's width and detailed the inside. The cannon arm was dryfitted and will need to sink deeper into the chassis.
1 March 2016, 00:08
...... "Set Teaser To Stun !" 😄
some lovely scratch building work going on here 🙂
2 March 2016, 17:38
"To boldly scratch where no one scratched his head."
Thanks, Choppa. I just added another funny part.
3 March 2016, 00:32
If I Borg a hole in them, they will. Just added metal straps to the springs.
7 March 2016, 17:50
Next Generation of differentials, I chopped a slice off them and started to reproduce the pictures. Some pictures show reference material that requires scratching in the future, like the gun rifling, the walking platforms and the kit .50 held near a 1/35 AFV example.
11 March 2016, 01:56
I upgraded the driver's seats and found some counter wheels for the aft differentials. Today I also bought Alliance diamond plate and Meng bolt heads.
13 March 2016, 23:37
Some work on the rear axles and the driver's cab is done. Everyting has to be carefully compared to a scaled-down picture.
21 March 2016, 23:19
Some dryfits actually start to show something you can recognise as the front truck. As expected, the front plate is not accurate enough to use.
23 March 2016, 14:56
Headlights are relocated to a fresh piece of styrene, not infected with the wrong number of rivets.
24 March 2016, 01:42
The cab is getting all kinds of corrections. It looked as thick as if it were a tank.
26 March 2016, 19:46
Now the other cab is changed. I couldn't have done much of this build without the Airwaves micro-saw, used without the grip.
28 March 2016, 22:18
Work on the inside of the cab and on the engine cover, full scratch this time.
2 April 2016, 09:21
The other engine cover is done, but the winch won't be easier. It's totally overscale.
4 April 2016, 21:27
Thanks, guys. I wonder if I'm near half way, with the dreaded gun still untouched.
5 April 2016, 05:04
The winch is connected to the right toolbox and dryfitted to the frame. It almost fits. Some sanding can do the job. The first figures are cut from the sprue and given an undercut on the sleeves.
10 April 2016, 22:40
Thank you, Spanjaard. Today I scratched the dashboards for both of the trucks.
11 April 2016, 22:17
Scratching the hydraulic oil tank and the Allison TX500 transmissions combining the scaled down section drawings and the manual airbrush illustration.
13 April 2016, 22:49
The front and backside will be the only visible parts of the transmission housing, so they receive a lot of detail.
17 April 2016, 15:36
Well (insert swear word)! Great effort and build so far! coming to Modelforce '16 this year with some of your dio's?
17 April 2016, 16:37
Finally the two transmission houses look acceptable. Now the transfer case still waits. Only one needed, but quite intricate to scratch.
18 April 2016, 21:15
Well that's some serious scratch building ! I can remember building this kit when I was 13, thats 51 year ago ! I will certainly follow this one.
19 April 2016, 07:36
Thanks, Lex. It must have been an impressive toy back then. I just laid out the cannon parts between the two trucks and they totally dwarf an 1/35 Ford Mutt model held next to them. You can see the pictures in the album.
25 April 2016, 21:23
Some errors in the side plating have to be rectified. The damage can be nullified with the Airwaves sawblades, but it's a tedious job without the handle. That's the only way to reach every corner. Then everything is put back correctly. The pillars will be replaced with thin Evergreen.
27 April 2016, 23:09
Surely it was a big kit. My father served by the Dutch airforce and got a nice discount on kits.
If my memory serves me well, there was this big handwheel on one of the sides that when you turned it the barrel would first move forwards and than elevated? Nice progress by the way
28 April 2016, 07:11
I have not worked on the cannon elevation yet, but it has articulation and several gears. For now I just repeated the last step for the other 3 sides.
28 April 2016, 23:11
Some details are partially correct but a lot of parts have to be cut up and put back together to resemble to the pictures. Here the elevation gear housing is cut in half and adapted according to the book. The figures are assembled up to the shoulders to be able to adapt them to the steering wheel. The sides of the cannon have ribs that need to be shelled from the sides. This is done by copying them to 0.35mm styrene before removing them.
4 May 2016, 22:56
Steve, I also had this monster, (the biggest kit of the day) when I was a wee boy too, I am now 69. 🙂 Watching with keen interest. 👍
4 May 2016, 23:09
Thanks for your interest and amazement, my fellows. I just had to destroy one of the last additions, the gearbox for the elevation, because it appeared to lack a flange on the model. After carefully removing the top I filed an offset to the box edge in the base plate and glued a strip of styrene in it. I also fixed the 16 ribs to the carriage.
5 May 2016, 20:34
The hinge holes from the kit are closed up. I received some really fitting lenses from a friend. Then I removed the side steps because they were made up from overscale elements. I replaced them with pieces of styrene foil, Add-On chain and metal hand grips.
11 May 2016, 21:20
I adapted the dimensions to the front of the gun. Then the rails for the hydraulic cylinders could be fixed.
19 May 2016, 20:46
Adapting the supports for the maintenance platforms. I also noticed that they are a bit off to the left.
22 May 2016, 08:59
One detail had to move on the flat side of the gun. It was symmetrical, so a rectangular cut was made around it. I shelled the rectangle with thin styrene to make up for the sawdust, rotated it and put it back where it belonged.
22 May 2016, 23:00
The platform supports are cut out of styrene sheet and located using the reference picture.
23 May 2016, 21:43
Wich Brand you use for the nut and bolt details? You made good and impressive progress!
24 May 2016, 06:29
Thanks, Lex. They're in the project list, it's the A small set from Meng.
24 May 2016, 15:41
The missing inside of the carriage is made up from thick styrene sheet. I reused the discarded pieces of a tank track set as spacers for holding the styrene level. It's only a dryfit but already the girth of the gun shows. I included aerial photography as some crude reference, they're all there but for the Watervliet specimen not being on public display. Also the site plans of the atomic cannon page are used as reference.
25 May 2016, 23:22
I made new hinges for the gun elevation. The kit ones are way too small.
29 May 2016, 23:17
Thanks, Lex. I hope it never topples and gets bent. For now I adapted the recoil tube's travel lock contacts.
31 May 2016, 22:51
I think that when you finish this kit it will be about 75% scratchbuild? Incredible what you accomplish!
3 June 2016, 07:00
Thanks for the attention, Lex. Some of the large pieces still count for a lot of kit parts, but it will approach that number. Today you can see the reconstruction of the breech and recoil assemblies. The kit plate had the height wrong so I made a new out of two welded styrene foils. Some of the parts on the last pictures are dryfit.
9 June 2016, 22:43
The gun cradle has a lot of detail that can be added by just cutting out simple geometric shapes.
13 June 2016, 23:12
Improving the looks of the elevation system. Allthough it's still too small on diameter, the toothing is tilted some degrees to the front. A lot of ribs are added for strength.
15 June 2016, 23:00
I had to decrease the width of the carriage to make the axle fit. Then I installed the elevation drive assembly.
16 June 2016, 22:59
all good stuff Steve,
you really should set the teaser pic to your latest photos otherwise to the person browsing the feed it doesn't look like you're making progress😉
16 June 2016, 23:35
Thanks for the tip, Choppa, but if it keeps popping up daily they should know better. Today I scratched the actuator arms for elevating the gun.
17 June 2016, 21:48
I had to remove the undersize kitpart for the elevation gear and scratch the cog from 1mm styrene foil. I assumed it would be impossible to find a 4,5cm-radius plastic cog with 150 teeth on it. Luckily there are some unique, very useful section drawings on S.Berliner III's website for the Atomic Cannon. Now the gearing connects with the carriage.
19 June 2016, 23:01
People can be fickle and having the teaser set to the latest pics gives us a quick insight to your progress😉
and what great progress it is too, loving the sheer effort and work you're putting into this, awesome work bud 🙂
20 June 2016, 10:35
Thanks, guys. Today I made the spacer plate between the two arms of the front truck. It had tot be drilled, so I chose brass for material.
23 June 2016, 23:29
I do have one question, mostly about the diameter of the barrel from breach to muzzle. In the images I am seeing here, there seems to be the one piece of brass tubing from breach to muzzle you are using, though, in the images of the genuine article, I am seeing a 'step tapering' of the overall barrel diameter from breach block to muzzle. I am wondering if you will be incorporating this 'tapering' as you progress further into the build. ?
24 June 2016, 00:19
The tapering is happening only on one location in this gun, because of the necessity to retract the barrel during transport. I provided a picture of a dryfit in transport mode. In that case the tapering piece is hidden by the retraction tube. This piece had to be relocated, being placed a lot too far in front in the kit barrel. I used an enlarged picture of the gun at Junction City, which has the barrel relatively lowly elevated, to locate the tapering part. Even the front narrow section doesn't seem to taper, for which I am quite happy. Only a milling device would be able to get that at this scale.
24 June 2016, 05:18
Here's a clear picture of it: M65 Atomic Cannon | Album by StevenVD (1:32)
24 June 2016, 05:22
All my concern have been beautifully answered Steven. 🙂 Thank you for all of that. Now, I don't have to worry any more. 🙂 👍 Cheers. 😉
The build and the extra effort you have included is a real credit to your skills and dedication. Salute. 👍
24 June 2016, 05:30
You've made good progress. The contours are becoming clear now. I think dat Evergreen or whatever Brand of styreen you're using will be glad with such a costumer.
24 June 2016, 07:00
Thanks, guys. I continued on the rammer, that has some wrong dimensions. The trough is scratched from aluminum tube, having a larger diameter than the kit trough.
28 June 2016, 22:37
I wanted to correct the angle of the carriage extremities and therefore had to detach all four sides. Quite some detail had to go too because of changes in dimensions. Today a lot has been put back, but the seams still show too much.
4 July 2016, 22:28
The carrying arms were mated to the new carriage end points by sawing the side off and putting it back in an angle of about 2 degrees. This omission in the kit was hard to find out but logical after the dryfit.
6 July 2016, 23:25
A dryfit of the arms to the carriage is now possible. The fitting works perfect. Now the sleeves for the arm tips can be shaped on the carriage.
9 July 2016, 09:42
Because the engines are absent i'm using the V12 engine block of an M47 Patton to procure 2 boxer 6-cylinder engines. Only the sides are visible through the mesh.
10 July 2016, 19:58
I´m wondering why you bothered with the kit anyway, you not really using much of it...😉
Quite impressive what you can do whit a bit of plastic sheet.
11 July 2016, 08:50
Thanks! Today I attacked the oversize turning plate. I discovered that the lid of a Red Band jar resembles eerily such a 1/32 plate. Sadly the profile doesn't match.
13 July 2016, 22:42
Thanks, Choppa. I updated it but had little better pictures. Today I was able to thermoform the turning disc using some cooking ware and an ornamental steel can. I'm very pleased with the result because I never used this technique before.
14 July 2016, 23:20
Arrr, Lex. Today I embossed and cut out the valve housings, 12 in number for the two engines. In the next update they will be detailed further.
19 July 2016, 21:10
This rather obscure part of the gun has been reproduced in styrene as far as the pictures allow for it. The plan shows more features but I can't locate them in the other dimensions.
28 July 2016, 19:10
Thanks, Choppa. Today my cutting mat was haunted by the sudden apparition of an eerie smiley with a lot of teeth. It couldn't dissuade me from finishing the first half of the carriage support clamps.
29 July 2016, 15:18
Another stellar project from you. Will follow the rest of this huge project
29 July 2016, 17:23
The rear floor of the carriage is heightened to strengthen it with Evergreen as in the real cannon. I also added an interior housing part.
4 August 2016, 00:19
This should be a nitrogen tank for the stabilisator. I keep this as a dryfit, to be able to get the primer everywhere.
18 August 2016, 22:17
The clamp parts made earlier are fixed to the turning baseplate.
21 August 2016, 18:31
Finally the gun stands on its own legs. The distance to the ground is levelled by filing the axis of the turntable.
21 August 2016, 22:58
..... with all this awesome scratch building I'm not really sure why you even bothered buying the kit ? 😄
21 August 2016, 23:28
"Well, it had a large box to put all my spareparts in it..."
haha that and you got some decals with it !! lol 😄
22 August 2016, 12:52
hilarious comment Steven!.....Just looked at all the pictures from the start again and this really is another great build from you
22 August 2016, 13:59
Thanks for the appraisal. I threw some little wheels in, made out of 4mm brass tube.
25 August 2016, 23:32
The cannon turntable is now connected to the float trunnion housing via some Albion Alloys tube.
28 August 2016, 23:41
The levelling jacks have a handle from Aber brass tube. From now on, extra care is necessary.
29 August 2016, 22:41
I see the pictures weren't loaded. Now that the uploading button is as green as the banner right below on my tablet, I seem to mistake the button to add images for loading the selected pictures.
30 August 2016, 16:44
Your support is also appreciated. New details keep ever emerging, like these two anchor points on the after platform, or new Meng boltheads.
31 August 2016, 21:50
And the list goes on and on, but wow, as always, just a stunning result all round. 👍. 🙂
31 August 2016, 22:49
I do agree Kerry. He just keeps going and going and......................
1 September 2016, 09:58
Yup, add infinitum. 🙂 That is what I love about this hobby, the ideas and remedies never stop. Mwahahahahaha:-O
1 September 2016, 11:03
I want to see a picture of all the remaining parts from the kit .....
which by the looks of things is going to be pretty much the whole kit 😄
or at least enough for a burnt out wreck diorama😉 😄
1 September 2016, 11:05
Your wish is my command. You also see a picture where I have leveled the amount of plastic sawdust in my atomic dustbin, so you can read the level. At last, a look on the travel locks for the rectangular baseplate.
3 September 2016, 21:20
yep that's a lot of left over greeblies, perhaps a hover bike next ? 😄
would be good to see a dry of fit of everything together all in one go as a summing up of progress thus far.
just a wish😉
3 September 2016, 21:35
The atomic cannon won a gold medal on KMK Scaleworld 2016 in class "naked kit"
11 September 2016, 21:39
Congrats mate! Can't imagine that there was anyone who deserved it more than you.
12 September 2016, 06:24
Thanks for the praise, I just made another atomic cannon part. The grenade hoist had to be made full scratch.
28 September 2016, 23:22
I used some Voyager TE16 anti-skid plate to reproduce the lid of the hatch in the rear platform.
2 October 2016, 23:35
At the IPMS Nationals in Affligem the cannon earned another medal, silver this time. Afterwards I added the hydraulic rammer connections. The rammer can still be removed for painting.
12 October 2016, 20:53
And again well deserved! Congratulations. Do you have a shelf free for all those prices? I've would have liked to go to Affligem but was on holidays in Italy. Are you perhaps going to the IPMS nationals in Nieuwegein?
13 October 2016, 06:31
Thanks. It should be there, if I have some spare room in my car alongside the Bismarck.
13 October 2016, 15:18
certainly, I will be looking for it at Nieuwgein, fantastic to see it face to face
13 October 2016, 21:29
I'm glad the model could enter the competition, they were not accustomed to naked kits. As you can see, the category was full scratch and this model is only half. For today, the equilibrator engine was a tough little addition.
15 October 2016, 00:11
een merkwaardig model met een verdiende prijs, ik zag het staan in Affligem, en je kan er nog jaren mee doorgaan ...
18 October 2016, 07:12
Bedankt, Erik.
For today I have drawn one half of the carriage platforms in Inventor. Some people tell me to etch them, others to laser-cut.
6 November 2016, 22:46
The drawings of the platforms are finished. Now finding a producer...
9 November 2016, 23:57
If I recall correctly there is an option in shapeways.com to have a drawing printed by them. Could be worth to check the site.
10 November 2016, 06:05
Goover.be in Duffel doet aan 3D printen . En ik zag onlangs in Aalst in de Pieter Van Aelstpassage een "winkel" waar ze 3D printen en lasersnijden aanleren "popup FabLab"
11 November 2016, 19:31
I agree with Erik that Fablabs is indeed a great idea. Under that name you can find undoubtly multiple bussineses in België. Probably they can give you advice about the best way to make your platforms.
12 November 2016, 09:52
Yesterday I went on a shopping spree and bought the necessary ingredients for a brutal support base. It's not assembled yet, but you get a preview.
20 November 2016, 10:08
Thanks, Patrick. I already prepared the support blocks by drilling the holes and making slots for the tensioning nuts on the underside. I also drew AutoCAD blueprints for the maintenance platforms. I already had one laser-cut and it looked fine.
1 December 2016, 00:51
The base pair has been connected with metal rods in aluminium tube. They have been screwed onto scratch pedestals. An extended dryfit shows the eventual setup.
3 December 2016, 22:43
The front axles are well visible so the steering knucles and spindles have to be scratched out of tube material. The hub inside was reshaped with a circular saw turned by hand.
5 December 2016, 22:06
The front axles can now be dryfitted to the hubs. The tyres now have locator pinholes on the bottom, destined to receive some nails cut in half. The rear hubs are connected with aluminum tubes and can be dryfitted. The trucks stand straight now.
7 December 2016, 10:57
The trucks are pinned to the base, this sunday they will be starring at BSMC like this. Only the cannon has to be connected now.
9 December 2016, 20:13
The cannon won bronze in the category Naked Kit, masterclass. This week I improved the axles.
16 December 2016, 23:40
Another axle is made, this one complete with flanges and every bolt-head because it will be visible from above. Also the next figure is created and a quite complicated part is reproduced in 0,5mm styrene card.
19 December 2016, 00:38
What an epic project....browsed through all the pics again and it is simply impressive
19 December 2016, 07:27
I like this a lot. Any blog of you with more info available? Love the detailing!
19 December 2016, 07:48
And again you made some wonderful details. I also like to open up the universal joints when you can see them.
Probably not the first time asked, but I would like to import a picture here, but don't know how.
19 December 2016, 14:46
Thanks, guys. The full build blog with some more pictures but originally in Dutch can be found at modelbrouwers.nl/php...php?f=2&t=47448. An overview of other projects and links to their logs is to be found at modelbrouwers.nl/builds/user/328/, that dates back to some years before I came to Scalemates. To import a picture, I think you just have to copy the Scalemates photo url in your textbox.
19 December 2016, 16:16
I made the air pressure tanks for the hydraulic system with a convex hammerhead and a brass tube.
22 December 2016, 00:45
The tanks are connected with scratch aluminum strips. These are perforated to put some wire through.
23 December 2016, 22:59
I made the front brakes and torque rods out of styrene tubes, after removing the former rods that will be reused in front. These fit better the heavy rear axles.
25 December 2016, 22:39
Finally these front brakes sit on the axles. I had to scratch the steering arms and the brake cylinders.
27 December 2016, 21:58
Thanks, Holger. Today I added the steering rods and completed the stabilisers on the front axles.
28 December 2016, 23:23
The auxiliary leaf springs and the hind axle U-bolts are scratched. The bolts had to be flattened on top, so I hammered them between a flat pincer. The end nuts were provided by Meng.
30 December 2016, 18:21
Now the front axles also have their Meng attachment bolts. I had to superimpose a nut on a bolt to attain the correct height.
30 December 2016, 23:35
And to think that al this beautiful handwork will be covered by a coat of Olive Drab. At least, I think it will?
31 December 2016, 07:57
Well, at least you have a comprahensive photo documentary as silent witness 🙂 And by the way, have a happy new year!
31 December 2016, 08:32
Prosit! And a little update on the leaf springs and some remnant parts of the front axle I had to reproduce.
1 January 2017, 21:38
Holy cow, what a carnage! That's an insane level of scratch building. Hats off to your patience and dedication!
3 January 2017, 18:18
Thanks, Alexander. I just added the air pressure cilinders for the M250, after discovering the cause for their fitting problems on the old "Big Picture" recordings. The chassis decreases in width after the rear axle. I also installed the rear transfer case.
5 January 2017, 00:51
The power steering unit has to be manufactured for both trucks. Also the fuel tank sustaining strap is remade.
6 January 2017, 22:55
The steering cylinder takes place in the module that was already fixed under and partly through the cabin.
11 January 2017, 17:14
Thanks, Wim. Today more steering components are added. Some bent parts can be made out of rejected kit parts.
16 January 2017, 00:54
The M250 got some of its innards fixed. A lot of pushing and pulling to get everything straight.
18 January 2017, 00:39
Thanks, Gary. A Crumb fan, I presume? Today I added the rear brake cylinders.
21 January 2017, 01:43
The sidewalls of the engine are detailed with brass thread fuel ducts as this is the only view you'll be getting from the engines.
25 January 2017, 22:41
And still more details. The choke is made from sprue rounds. Actually they are overscale but will be hardly visible.
31 January 2017, 00:46
Hi Steven, what the hell.....awesome detailling. So when you're ready you wanna start the engine an driving away.....
31 January 2017, 05:41
Thanks for the comments! Choppa, if you might want to build a gun like this on insect legs, you got my endorsement. Norbert, I could also build an atomic dragster with them.
31 January 2017, 06:17
The air cleaner and the steering fluid tank are added to both engine compartiments. Also the aft tool box is detailed with brass foil.
17 February 2017, 01:04
The windshield frame of the M250 is cut out of 0.2 mm thickness aluminium and bent in shape.
18 February 2017, 11:02
Nice metal work Steven 👍 Reminds me of my sheet-metal/tinsmith days...🙂
18 February 2017, 13:08
Thanks, Gary. What did you forge those days? Today I finished the clutch while melting my cutting mat with an uncontrolled gush of Tamiya glue. Also the spare tyre jack was made.
25 February 2017, 02:11
🙂 I worked 13 years in a small shop with the owner. We did everything one could think of in the way of sheet metal. We built water "cisterns", ductwork, rain gutters, standing seam metal roofs, stove-pipe and flues, roof flashings and "all points in between". (in other words, custom work of any description) 🙂
25 February 2017, 12:44
That sounds awesome, Gary. I could use those skills myself now, not for the cannon but some of the rain gutters here are getting leaky. I ultimately solved that problem this year by buying a new house...
In this update you see some of the anti-slip added and I lined the model base with an ornamental woodpiece.
26 February 2017, 09:45
More anti-slip and the muffler from the M249 are finished. I wonder why the exhaust on the extant examples has been covered up completely.
27 February 2017, 00:11
The fan gratings for the heat exchange vent are made from Alliance mesh.
28 February 2017, 01:06
The last piece of drive axle is made, consisting of more than 20 pieces of Evergreen for 1 cm. Also the spare tyre winch is installed, near to a scratch jerrycan holder.
2 March 2017, 00:20
The driver steps are replaced by some folded metal. For the aft ones, I can't even use this.
3 March 2017, 00:57
Thanks. It will be little bits from now on, with one exception. I still have to add 4 hydraulic cylinders to the gun lifting arms.
3 March 2017, 16:07
Everytime I check in I'm amazed....can't wait to see it finished
3 March 2017, 16:11
Thanks for your enthusiasm! But I discovered today that I had to destroy part of the carrying arms to be able to use the right size of hydraulic cilinder. I also discovered that everything has to be repaired next weekend, because it's MCW Happening 2017 and I subscribed the gun for the contest.
5 March 2017, 01:36
Absolutely stunning!!! Congrats for this nice piece of technical art!!
5 March 2017, 12:38
Thank you, Michael. Today the arms are closed up again with two base plates formed by off-setting the projected shadow on a piece of paper.
5 March 2017, 13:57
"two base plates formed by off-setting the projected shadow on a piece of paper." Whoa.
Word. 🙂
5 March 2017, 14:25
The pictures tell it more clearly, Gary, it's often hard to describe the anomalies I concoct here. Oops, there I go again. Yesterday I installed 4 hydraulic cylinders, but a problem with the turning radius had arisen. The last two pictures show a comparison of the gun being trained straight between the trucks. On the base it has a turning radius and the hydraulics interfere with the trucks on both sides. I'm going to study some videos of the gun turning.
6 March 2017, 20:27
The steps for the second driver are made from wire, but are not yet applied to the truck for painting reasons. It appeared necessary to remove the carriage lifting hooks on one side and to replace the back plate with metal, offering some extra millimeters to the turning space between the components. Also the muffler was shortened in an agonising fifteen minutes of manual brass tube sawing.
9 March 2017, 00:30
I wanted the hydraulics to look finished at MCS Happening. The pictures show that only the air pressure ducts remain to be added. It had to be aligned all to look like it is stretched taut, allthough none of these parts have a locator pin.
11 March 2017, 23:44
I made some handwheels for the gun. The pictures gave problems to upload and this is not the first time, Chrome sometimes seems unable to handle the new upload function.
15 March 2017, 16:20
You're keeping up the good work! I think that you have, untill now, uploaded the most pictures and gathered the most comments of any project placed on ScaleMates!? Maybe you can also win a prize with that? 😉
16 March 2017, 07:30
Every time I view this I am amazed by your handiwork. Less precision probably went into the genuine article
16 March 2017, 09:29
The thousandth picture is coming within reach, it's true. Thanks for the comments, today's update shows some details of the gun cradle and the remaining two lifting arm slots.
16 March 2017, 23:45
Absolute outstanding work, Steven! Straight foreward and beautiful!
17 March 2017, 08:29
Thanks, Holger. I failed to attend the IPMS Antwerp fair but the time was spent fidgeting a bit on the cannon. Three pulleys were scratched and mounted on the front truck and the cradle.
20 March 2017, 20:46
Great scratching work, a nearly neverending story...every time nice to see newly added parts...
21 March 2017, 09:56
You guys always keep me fired up for the next update! Today it's the wedges keeping the gun suspended during the trip. Lots of little Add-On chains to be fixed.
26 March 2017, 11:11
The back plate of the gun cradle needed some interest, a large round hole had to be drilled.
29 March 2017, 22:51
The locking system of the travel lock on the barrel is built on both sides.
31 March 2017, 22:55
I placed the barrel retraction wheels and had to redress the rails on the carriage for them.
5 April 2017, 20:07
I cooked some plastic spaghetti. Also the first lasercut maintenance platform is reviewed.
11 April 2017, 21:57
awesome stuff !! 🙂
any chance of photo of all of it put together for a dry fit so we can see the whole thing so far ? 😄
11 April 2017, 22:31
I think the "Authorities" may be becoming alarmed. !!! 🙂 👍
Most impressive. 👍
11 April 2017, 22:44
Thanks! For Choppa I made a foto series, some stuff is not fitted yet like the breech and an engine hood. Kerry: let them throw wat they have, and then I'll roll in.
12 April 2017, 20:27
It is just so beautifully detailed Steven. The high level of work and eventual outcome will make for a jaw dropping reaction from all who will eventually get to see it on display..Cheers. 👍 👍 👍 🙂
12 April 2017, 20:39
Top notch work !!!
astounding detail !
... and commitment too😉
Great to see most of it together, really helps put the details into perspective, mammoth project.
Impressive work Steven ! 🙂
12 April 2017, 21:29
Astonishing, what a wealth of (self made) details. Can't wait to see the first layers of paint. I think it will take a nice quantity of paint 🙂.
13 April 2017, 06:21
That goes without question, Lex. Today, more tubes were wrenched in. This time it was under the M249's winch.
14 April 2017, 22:21
Fire extinguisher supports are produced. The hardest parts are the embossed locks.
17 April 2017, 00:08
Today it's a floodlight and some kind of supports on the gun lifting arms. These have the size of an ant but have to be bent 5 times and then embossed.
18 April 2017, 22:18
floodlight looks fantastic, well, everything looks fantastic in this build.
18 April 2017, 22:42
Steven, are you sure you are not building a fully functional atomic cannon? This is insane....
20 April 2017, 12:44
Thanks, just added some hydraulic duct joints, containing 60 parts.
20 April 2017, 23:43
Yesterday the wedge holders on the carriage were added, today it's the air pressure ducts on the arms. A job I had procrastinated a bit for.
23 April 2017, 23:21
I think this might be the single largest photo album on SCM !!!!
if you were to stick all these images in a video editor and play them back 25 frames per second you would get a 40 second video !!
awesome work, such a mammoth project !
24 April 2017, 16:45
The first two are a fact now... The air ducts on the rear arms are made.
25 April 2017, 23:47
Thanks, Michael. Today the side of the carriage got some electric wiring.
26 April 2017, 22:56
Thanks, Jeffrey. Now some radio silence until I painted the walls of my special modelism vault.
1 May 2017, 20:48
I proposed you split this album into logical blocks? 906 images in 1 Album is not the best approach. You can have more albums linked to the same project😉
6 May 2017, 13:10
... ah go on, let him reach one thousand pics in one album, it's never been done before😉 😄 😄 😄
but yeah you're right Tim, it's a lot of pics in one go but then it is a mammoth project 🙂
6 May 2017, 13:24
I'm not against 906 pictures 🙂 but splitting it up in multiple albums would be a good idea here. (ps: you can remove these comments once read, no need to comment either)
6 May 2017, 13:34
If it can be done afterward I'll do it. For now 5 new pictures showing the internal hydraulic ducts in the front arms.
11 May 2017, 23:22
@Steven: create a new album first, next go to this Album (edit images) and assign the relevant pictures to the new album
12 May 2017, 04:37
A power cabin is joined to the circuit. Every lock consists of 5 elements of 4 different materials.
22 May 2017, 23:13
Steven, I have never witnessed such a tremendous project! Such amazing work. You got a lot of umph my friend !!! Any time frame for the finish?
23 May 2017, 02:25
And when will be Roll-Out??? I hope you show us the trial in field....
23 May 2017, 14:32
Thanks, guys. When I conclude that every detail is reproduced, I'll start coating it. That can be in a few weeks. But I said things like that months earlier, so don't pin me on that.
23 May 2017, 15:23
You keep to amaze me with your project. I think that you are going to break a few records! 😉
24 May 2017, 06:22
Let's hope so. Another series of details today: The rammer speed lever, the gun bookcase and the travel lock.
29 May 2017, 23:18
Steven, I am anxiously awaiting the day when the actual 'live firing' takes place, as you haven't missed a thing. 👍 🙂
"I tipp's me lid." :-O (salute). 👍
30 May 2017, 03:43
Thanks, Kerry. Today you can almost watch the telescope on the cannon. Only the optics yet to do.
13 June 2017, 00:14
Thanks. I added the rammer trough, made a driving chain by pressing Evergreen strip against a screw and added a lot of ducts.
7 July 2017, 16:57
will you be posting movies of the test firing? and do you need a gun permit for this thing? 😉
7 July 2017, 17:05
Four rear view mirrors are prepared from Earth Metal PE rejects. I decided to cover the sides of the truck fenders with metal to get the "tin can look" the pictures are showing.
15 July 2017, 00:36
Somebody gave me a useful clearpart headlight set. That will shed light on some things. The old set had to be drilled out first.
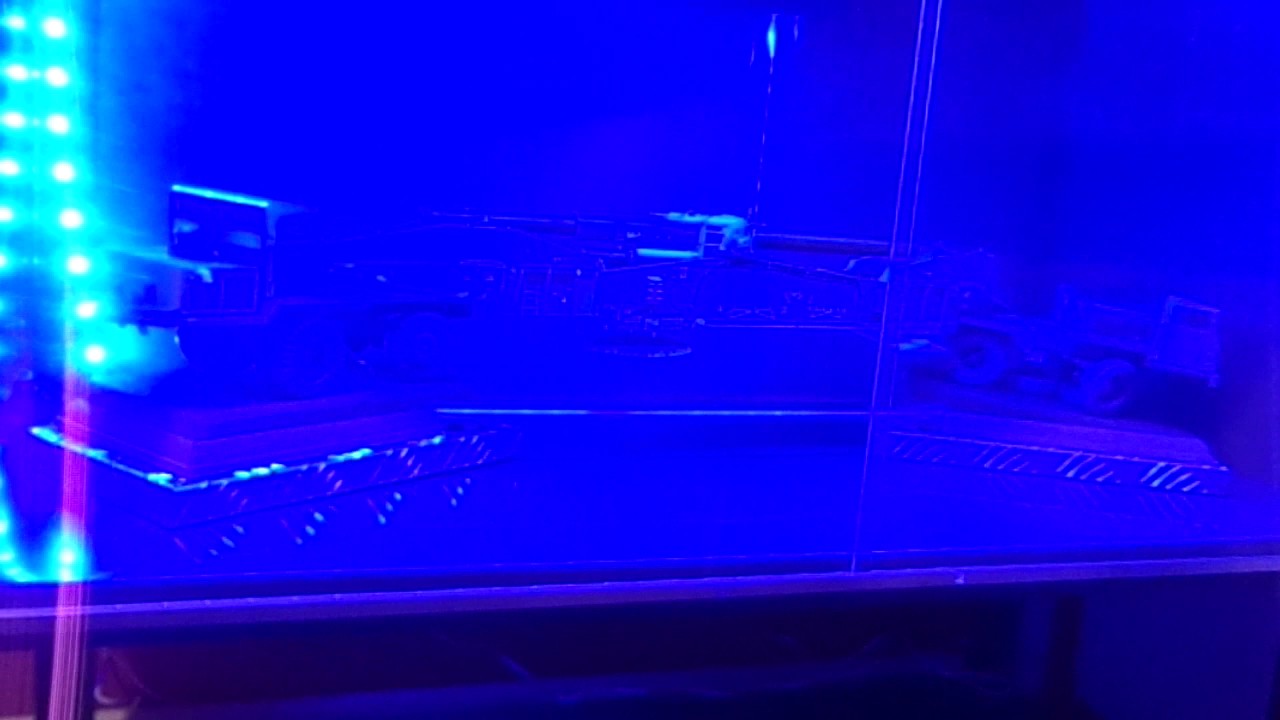
16 July 2017, 23:09
To commemorate the 1000th picture in this album, I made a video of the model in its new color-led showcase of my own device. Youtube Video
Construction of this and of an other selfmade showcase preceding it can be found on modelbrouwers.nl/php..=27602&start=770.
20 July 2017, 22:17
Red Alert !!!
Red Alert !!!
...no wait, green alert !!
. er hold on it's blue alert , no wait 🙂
Looks cool as @$*% !!!
You finally hit the One Thousand pics uploaded into one album !!
that has got to be a scalemates record surely ? 😄
Plus I couldn't think of a better project to do it with 🙂
21 July 2017, 09:30
Thank you for keeping up with funny comments. For now I detailed the inside of the cabin doors. There was no complete reference picture but the two pics shown point out the details.
26 July 2017, 23:06
Some have waited for this moment, some would that it never happened, but today the first traces of paint hit the atomic cannon.
27 July 2017, 21:09
Yea! Cant wait to see it w/some paint. One heck of a project Steven!! 👍
27 July 2017, 23:55
Another pint of black went on the gun, because you guys keep on cheering. I just need to rivet the gun cradle.
31 July 2017, 21:40
👍 LOL !! It's all downhill from here. You're almost to that final happy moment! NIRVANA
1 August 2017, 05:43
I'm trying to get through to you from behind all these clouds of black paint, now the gun cradle has received its riveting. I cut the rivets from a wire that I filed until it had a blunt end. I needed 32 rivets, this took more than an hour of filing and cutting but it looked better than using pinheads. Those were too flat. At last I sorted out the smaller subparts in a hobby case to keep some order.
1 August 2017, 20:43
Make sure to drybrush the hell out of that thing so all the hard work dioesn't get lost in the sea of black😉
1 August 2017, 23:02
Some vivid yellow now adorns the two bumper parts. This will be masked to avoid the kit decals having another yellow color.
6 August 2017, 22:01
First picture was uploaded: February 05, 2016 ..
A thousand plus pictures and a more than a year later of regular updates the painting begins !!
What an incredible journey of dedication, effort and talent, simply amazing !
This has been an absolute joy to watch unfold over the last 18 months or so.
You really have achieved something special here Steven !
your efforts have earned my deepest admiration 👍 🙂
6 August 2017, 22:06
Whoa Steven! 1000+ pics! So much detail! Really enjoying looking a master at work 👍
7 August 2017, 02:19
Yes, we keep on going with both engines painted gun metal and the inside of the cabs post-shaded. Thanks for the support! I hope it's not another year before everything is painted.
7 August 2017, 20:37
haha 🙂
almost there Steven, 90% of the work is done !
......... and only 90% to go till you've finished😉 😄
7 August 2017, 20:39
Today was a green day, but I didn't go basket case. Few parts of the gun remain now unpainted.
9 August 2017, 23:53
OK, now the green has been shadowed. I did an attempt to recreate the tyre lettering by stabbing a piece of scrap metal with a hobby knife and using that as masking. Also the bumper striping turned out rather cool.
11 August 2017, 21:51
And now it's the Silver Surfer, because the barrel had to be painted Tamiya Chrome Silver. Afterwards it was polished with a compound to remove the grainy look. The last parts of the trucks were primered and the engine got a bit rusty.
13 August 2017, 21:00
The cabs are already green. Some parts are accentuated with Tamiya XF-02 white.
14 August 2017, 21:05
To add to the excitement, it may be possible the gun attends KMK Scale World. KMK Scale World 2017 (10. September, Mol BE). Today the decals went on. At least, those that Revell reproduced. Some other I'll have to improvise; the "U.S.A." stencils are rearranged from "U.S. ARMY" decals from a Sheridan tank.
15 August 2017, 23:29
Today I chose the number of the beast. Some spare DANA decals from Toro models could be arranged in two consequent series of four 8-digit numbers. The warning signs of the carrier arms were also a conspicuous touch.
18 August 2017, 23:16
Some nuts were painted white manually. Then the bolts in them were scraped clean again.
21 August 2017, 20:10
A fine day was spent collecting the lasercut maintenance platforms at a friend's house. You can also see the new towing eyes and cable guidance in the bumpers.
27 August 2017, 00:18
The underside of the platforms has some detail to scratch. The tablet can be used as a template by zooming to match the pieces.
30 August 2017, 22:46
Hinges for joining the platforms to the carriage are cut out of metal foil. Every cut had to be straight. I only threw a few examples.
1 September 2017, 22:41
These pictures always seem to please. But the next update also should. Follow the steps to make one set of hinges. Twelve were scratched and the platforms alre almost finished. They remain movable.
3 September 2017, 23:33
Wow, these hinges... i'm speechless 😮
What material did you use for them?
4 September 2017, 08:30
I use old Kodak printing plate for them. I can actually cut out my own etch for free. Today some pictures of platform supports and the elevation brake pedal.
6 September 2017, 23:22
Stencils were reproduced by rearranging spare decals, one from a plane kit and another form a Maultier. The letters are 1 mm high. It needed some careful cutting out and moving around, but it looks the real thing.
7 September 2017, 22:45
The platforms of the gun won it another gold medal at KMK Scaleworld this sunday. A pity that the model itself wasn't ready yet and had to be put out of competition. Next year...
10 September 2017, 21:54
How wonderful for you Steven. I bet this whets the appetite for the outright champion when it is all complete. My hearty congratulations on your hard work being recognised. Yahoooooooooooooooooooooooooooooooooooooooooooo!!!!🙂 🙂 🙂 🙂 👍
10 September 2017, 22:37
Good job Steven!! Can't wait to see the finished model. You did well even though you didn't get the entire model in. Just too bad you have wait another whole year to get the model itself in there, but you've done a super job !!!! Congrats !! 👍
11 September 2017, 04:56
What a shi....
I was on the KMK ,too and recognize too late that it was yours.
I had really want a nice talk with you,Mate....
Perhaps on the SMC in Eindhoven?
11 September 2017, 07:02
Model not finished yet and already an award? 😄 not too bad....
11 September 2017, 09:16
Thanks for your acclaim, people! The winning parts are already painted today. Also in this update: a how-to to make towing rings from sprue pieces. @Alexander: already multiple awards... about the fifth or so. @Markus: I can be recognised by wearing a Modelbrouwers T-shirt. I had plans to visit Veldhoven but not to take part in the contest, if I don't succumb to the gold rush at last.
11 September 2017, 20:00
And they are well deserved, Steven...i have never seen such scratchbuilding madness in my life before 😄
12 September 2017, 11:20
It can only get worse in the next big project. Today the platforms are painted, they can be mounted on the gun now.
12 September 2017, 21:15
Attaching the platforms is not always easy. Some stuff got in the way and had to be knocked or drilled away.
13 September 2017, 23:12
I've thougt to smash more but most of it was already done before the hammer picture. Now the crew has been drybrushed and it takes position on the seats.
16 September 2017, 23:23
I know that when parts don't fit too well, one thinks of a friendly 'persuader', but .........................a ball hammer is just a tad much. hehehe 🙂
17 September 2017, 05:11
It was used to remove the platform supports without damaging the paint. I put a single sharp lancet point after the support and with a few delicate smashes they come off reusable. Only two will have to be redesigned.
17 September 2017, 07:37
Today: production of fire extinguishers and the placing of the windscreens. It appears that mounting the steering wheels will present a challenge...
18 September 2017, 23:11
A CHALLENGE. ??? After what you have done here. LOL. Unheard of. 🙂 🙂 🙂
18 September 2017, 23:21
Still... Rummaged around a bit with the fire extinguishers and the intercom.
20 September 2017, 22:28
Thanks. Here you see them in Tamiya Red. I'm also going to redo the lettering, some found it ugly.
23 September 2017, 23:45
The extinguishers reside in the supports now. I needed a tarp for a quy with short legs. Also, the rear windows are fastened with CA-glue inserted via a sharp lancet point.
25 September 2017, 22:19
Lettering has been redone with a ruler, while towing items were removed temporarily. I added the tarp and other stuff.
26 September 2017, 22:06
Steven,,, It looks like the crew have had a few! lol. Keep up the good work. 👍
27 September 2017, 00:08
I have been loosely following this without comment. Do NOT want to miss the final product. You have put a lot of very good work into this.
27 September 2017, 03:23
Thanks, fellows. Today the pictures are in reverse oreder, but you get to see that I installed the windows with support arms and that one guy got an upscaled Springfield gun.
4 October 2017, 22:40
Today: how to add riveting after you painted your model. Just take a pinvise and drill from inside out until you see a bump appearing on the plastic. I also added the cabins of both trucks, not without some meddling with a Dremel and some cutting discs.
9 October 2017, 17:11
A rusty wash seemed appropriate for the leaf springs. The lighting is almost finished with the aid of a colleague who provided some car lenses.
11 October 2017, 22:36
Now I have wreaked havoc with a Tamiya Flat Earth filter, the gun suddenly making a dusty appearance. The windshield wiper areas are masked off for a clear view. Tomorrow, the gun should star in IPMS Plastic & Steel, so the model should be visually completed. Only the base will need some tweaking with a fitting nameplate.
14 October 2017, 12:17
The gun won't be at Plastic and Steel, it had to be registered on saturday, which is new this year. So my registration was canceled. I had been racing to get it ready for tomorrow, but an unexpected problem with the spare weel kept me from finishing. It appears that this wheel needs a different hub, so I'm scratching it now.
14 October 2017, 21:14
@Patrick: next weekend is too busy to put it in SMC's contest, so I guess it will be BSMC in Putte. @Kerry: I don't really have pictures of a dusted gun like this, but some show the underside caked in mud, or the guns driving long distances on highway roads. An alternative was using snow powder, as seen on one particular pic, but this is a little riskier.
15 October 2017, 08:21
Steven, It still looked amazing mate. 🙂 How did you mask it off, or I should say, what did you mask it with. ? 👍
15 October 2017, 08:58
The tape used is not Tamiya but Hobbycraft, 18mm width. 2 ends on top of each other and cut in shape.
15 October 2017, 16:45
The windscreen wipers are made for both the opened and closed windscreens. A pump had to be added after the hood of the front truck is closed up.
19 October 2017, 21:13
I waxed the wooden base today, after the metal parts were painted NATO green because people objected to the distracting shining. These are not yet the ending pictures, there are still some minor loose ends but tomorrow the gun will attend Artevelde Challenge.
4 November 2017, 00:33
painting the diamond plate green is an upgrade....the build is good it doesn't need any disctractions
4 November 2017, 08:57
Thank you for the appreciation. Today I built a tool assembly from Royal Models. It has got some fine PE straps with it.
5 November 2017, 23:08
Some of the air hoses are added between the front truck and the gun.
10 November 2017, 21:38
The tools and the throttle override lines are mounted. In less than two weeks, the gun will attend IPMS Houten in the Netherlands. I want to add a bit of paint yet.
16 November 2017, 23:17
Thanks for the good luck wishes! I'm trying to have a 3d nameplate on it, but for the colors I'm still consulting my specialist. I also included the heavy transport roadsigns seen on some pictures.
22 November 2017, 23:09
3d lettering is a nice touch......shame I can't make it too Houten to see it in real life
23 November 2017, 08:31
Wim, there will be other occasions next year, like the Brouwersdag or various Belgian events, I hope to see you soon. For today, the lettering is fixed to a piece of tube that will go nicely on one of the two model base connectors.
25 November 2017, 00:05
Thanks, Spanjaard! We'll have to wait for the results of the contest, they're postponed.
25 November 2017, 20:02
You can read about that here, Spanjaard. modelbrouwers.nl/php..t=50166&start=30 They said that it was a hardware problem and that the results will be published online in about a week, and we would be informed via mail.
26 November 2017, 00:13
For BSMC I'll add red flags on the corners, but not the grenades on the name tag, them being totally out of angle.
3 December 2017, 23:53
The corner flags are positioned after being painted Tamiya flat red.
5 December 2017, 21:48
The cannon earned a bronze medal at BSMC in masterclass Military Vehicles 1/35 and on top of that a trader, John Flooren, found it worthy of a special prize and donated a 1/72 Kinetic F-16D Block.
10 December 2017, 22:47
👍 I've seen it at BSMC and well deserved medal! (should have been a golden imho)
11 December 2017, 11:30
Congrats ,too.
IT was a pleasure to meet you Steven (for the first Time)and Zimmi after a long time 👍 🙂
11 December 2017, 15:48
Thank you for the support, Günther! Nice to have spoken to you, Markus. I have added today about 50 pictures of the gun and I might go on a little while with some scenery pics, but the model is now declared finished!
11 December 2017, 23:29
I think everything has been said about this model..this is probably the most lunatic case of detailing a plastic model i have ever seen.
12 December 2017, 11:24
YEA !! Congrats Steven. That is one heck of a project !! It looks terrific !! 1447 pics OMG !! Any guess as to how many man hours you have into it ?
I always considered myself to have a lot of patience, but I'm not sure I could have pulled that one off ! You did a fine job. 👍 What's next ???
12 December 2017, 18:22
To come to a less odd number of pictures, here some that are made outside, rendering the gun in a more natural environment. It will have taken me about 1 hour a day for two years, I guess. While continuing the other running projects like the G6 and the half-tracks, I'm thinking about opening this box up.
scalemates.com/kits/140978-dragon-1055-uss-princeton-cvl-23
17 December 2017, 01:42
Congrats Steven !
this has been one hell of a project !
Really nice to see it completed to such a high standard, great work m;dude ! 🙂
10 August 2018, 17:24
Patience and vision pays off eventually. 👍
A big hearty salute mate. 🙂
Well done. 🙂 🙂🙂
10 August 2018, 17:44
Thank you, guys! The gun will attend KMK Scaleworld in about a month and it will finally participate in the contest.
10 August 2018, 17:58
How many years in the making did this project take in the end ?
at least 2 I'm guessing given the shear amount of scratch building you've done !! 🙂
10 August 2018, 20:16
WOW! Been following this one since the start. Glad to see it finally finished. This is truly a masterpiece by a master builder.
13 August 2018, 12:14
After two years of waiting the gun has participated in the IPMS Nationals Plastic and Steel contest, and it won gold in category "wheeled military vehicles 1/35".
13 October 2019, 18:30
Impressive detailwork on a very interesting piece of artillery! It`s scale 1/32 isn´t it? Congrats anyway for the well deserved gold medal!
13 October 2019, 19:14
Thanks, guys. When I came back, I saw that the running around had created havoc around the pneumatic lines on the fifth wheel after, so it will stay home from now on.
14 October 2019, 05:01
Thanks again everybody. I hope next year its Russian counterpart is ready for the show.
14 October 2019, 21:05


