

Red Rackham's Treasure (Shark Submarine)


Comments
73 9 January 2017, 16:19
And i thought: " Finally someone who will build that 100th scale oldie... oh damn" 😄
9 January 2017, 16:55
LOL Markus! Sorry to disappoint you. I do have an Academy Me262 that I'm planning to build straight up. Hopefully I'll win your approval on this build eventually. 🙂
10 January 2017, 00:52
Thanks Uwe! I finally found a Tintin-themed build that you didn't do first and twice as well! 🙂
13 January 2017, 16:34
Greg, very cool. It does look very much like a Shark and some nice detail work
14 January 2017, 02:09
I allways thought that the Me-262 in plan view had the shape of a shark ,,,, may be we should ask herr M esserschmitt or herr Voigt ????
14 January 2017, 06:58
Nice work Greg and great idea. I did a 262 version of the HYDRA sub from Captain America, the fuselage is perfect for a submarine look.
14 January 2017, 21:24
Thanks guys! There's still some body work to be done, but I'm happy how it's turning out so far. I've tried several options for the canopy before settling on one method I think will work... luckily I have a bunch of blister packs saved up for just such an occasion.
16 January 2017, 05:21
Very Restrained weathering for a Japanese WW2 plane. Looks great.
16 January 2017, 06:45
???? I think you may have commented on the wrong post Dale (I've done it before now).
16 January 2017, 07:30
Wait wait... not so fast now. I take all praise... misdirected, blind or otherwise! 🙂
16 January 2017, 08:24
That's greedy Greg, Dale may have intended his comment for my album (damn! He didn't). 😭
16 January 2017, 14:49
Perhaps. Or perhaps he just meant that the weathering on a scratch built submarine, based on one from a comic book adventure and constructed from the fuselage of an experimental German WWII-era jet fighter IS very restrained for a Japanese WWII plane... we can't be sure. 😄
16 January 2017, 15:51
In other news I glue the frame to the canopy and while I wait for that to dry well enough for me to bend it to fit the shape, I decided to putty up the seams... and while I wait for ThAT to dry, I started cutting and glueing together the base stand.
16 January 2017, 15:54
Yes that is possible Greg (if extraordinary unlikely). I'm sure that all right-minded people would agree that it's more likely his comment was meant for a album he hasn't seen (must have been so good it worked it's way into his subconscious).
(P.S. If you don't agree, you are not right-minded and can therefore, be safely ignored.)
16 January 2017, 16:11
On the other hand... it could just be that Dale has a quirky habit of commenting one build to the left, and that someone else's album received the glowing commentary he meant for mine... somewhere out there someone is scratching his head wondering why Dale is suggesting his OOB soviet battle tank build has "sleek lines" and is "a great display of scratch-building prowess". Poor confused sod.
16 January 2017, 22:17
In the interest of turning this back on topic...I glued together the base after carefully measuring the arms to make sure the sub will sit properly. One problem I had was the curvature of the wing piece I'm kit bashing means one side is a little higher than the other. To compensate, I just shaved the base slightly to make sure the sub sits plumb and level.
I got ahead of myself on the canopy and tried to do too much too soon and completely botched it. Luckily these are all just trial runs and I have lots of do-overs after I figure out what I should've done. I was also extremely pleased with myself for turning an "electric eraser" (gotta love Asia!) that I picked up at a stationary store for less than $3 and successfully modified it into a sanding dremel. Don't you love it when something works just the way you envisioned it!? Sanding was a breeze!
17 January 2017, 16:14
'Electric eraser'!?? As I hate sanding I may forgive you for your earlier jabbering ( 😠 ) if you post a photo of your DIY Dremel. 🤔
The subs looking very good.
17 January 2017, 16:37
Greg, that great about the use of the electric eraser as a sander. I have been doing the same off and on for years. I was an Architectural Designer for all most 30 years and when I first started out in the 1980's I was hand drafting and used the electric eraser all most every day but by the 1990's I started to us CADD and all my drafting tools when into storage but I did pull out my electric eraser to use on models. I use it with tooth paste (not the gel) and polished the plastic. I did little real sanding with it. I still use it from time to time but not as much as I did. BTY nice work on the Shark.
17 January 2017, 19:00
Actually Greg Baker I am starting to like the look of it. It is very different from all the standard kits.
17 January 2017, 22:15
gorbygould - here's a video comparing the $50 fancy schmancy one with the $3 one I've got. The only difference (other than colour) is that mine has the metal clasps like the fancy one. I originally bought the one just like in the video, but ran across the metal tipped one and bought it because I thought it might be easier to load sandpaper, however with a bit of ingenuity either will work I think. I've seen similar battery-powered dremels (Mr. spin or somethingorother) at the LHS but they've always been too expensive to justify. This worked like a charm and I was giggling like a school girl as I was happily (and precisely) sanding away the seams on my sub. Youtube Video

17 January 2017, 23:54
I also notice you can get one with the metal tip for $5 on Amazon.com - amazon.com/Ambielly-..ords=Electric+eraser there are slightly cheaper ones ($3 or so) but they have a non adjustable plastic tip.
18 January 2017, 00:01
John - That's a great idea to use it with toothpaste to polish. I actually used the eraser itself to polish up the canopy for my C.714 build. I was also thinking about cutting the surface material off the "6-step" nail buffing stick I got at the dollar store and glueing it to one of the eraser refills and using that for fine polishing. Haven't tried it yet, but seems like it might work.
18 January 2017, 00:07
Oh, and I'm very glad that Dale's coming to senses. You should check out some of gourbygould's builds I haven't seen any, but I hear (mostly from him) that he's quite good.😉
18 January 2017, 00:09
Looking great mate! But here's some thoughts. I would like to see your canopy quite a bit lower, the height is too much when you compare it to the drawings. It shouldn't be that much problem to take some of the base of the canopy in order to make it look more like the drawing.
18 January 2017, 00:18
I've started taking my sanity pills (LOL). Gourbygould does a nice job.
18 January 2017, 00:18
Thanks for the feedback Urban. I haven't really posted a pic of the final canopy yet. The two that I've included so far have been "proof-of-concept" attempts. One was just to get an idea of what glueing some styrene strips to a pill blister pack would look like and the other was if it could handle the cuts required to do an open cockpit. The actual canopy will be quite a bit lower and more in-scale. As you can see in image no. 22, I've painted 0.5mm tubes (2cm long) with Tamiya chrome enamel and once it's cured I've used super glue to attach one end to the side of the blister pack. Once that's set, I'm carefully bending and glueing each strip over the top and down the other side. It works, but yesterday I tried to do too many at once and between all 5 of the little tubes sticking up in the air and my sausage fingers, I couldn't find enough room to attach them in the right place without smearing glue all over the clear parts. So I've decide to do them one at a time... a more tedious process, but one that should pay off in the end. After that I will trim the canopy/cage to fit and then add more styrene around the perimeter of the cockpit to hide any rough edges from the cuts. Hopefully this will work.
18 January 2017, 02:08
Thanks Greg. If I don't blow my own trumpet, no one else will (that wasn't meant to sound as seedy as it did). Maybe if you ask nicely Dale might send some of his sanity pills, although you may need a stronger dose.😉
What's after the sub Greg? Tintin's electric scooter or his stair-lift? He must be getting on a bit now – he isn't fooling anyone with that hair style.
18 January 2017, 10:58
gorbygould it sounded very seedy. I only have enough pills for me and they barely work as it is. I think the blimp out of the movie up with the house would be awesome.
18 January 2017, 13:12
The canopy is giving me a bit more trouble than I thought, but we're still soldering on. I've been able to get one cut to fit, now I just have to attach the frame to it. It's very difficult to glue and bend because the super glue won't hold it secure before it sets, so the bends keep lifting off. I made a putty canopy mold and will try to heat bend the styrene strips to fit before I glue them. More on that later.
In the meantime, I got the top fin in place and scratched up a propeller out of a rocket nose and some carefully cut plapaper.
19 January 2017, 15:42
Thanks guys. After trying and not really being happy with the results of putting the strips in boiling water, I decided to go another way. I used a bit of 1mm wire and bent it to my will. I'm happy enough with the results... if only I could glue it without getting CA glue all over the clear parts. 🙂
20 January 2017, 23:03
Thanks John. I'm glad to have it "done", but I do feel like I accomplished something with that canopy. I'm now on to sanding and priming... and then more putty and more sanding. I seem to have trouble getting the transition between plastic/putty to be as invisible as I know others are able to. I wonder if I'm switching sand paper grits too soon/late.
22 January 2017, 22:17
nice thing, but I think I'd loose the round bars around the dome, for fine strips you can also work with fine strips of paper, made harder with thin CA. I also think it is a bit too high with regards to proportion. That said, it still is a marvel to follow
23 January 2017, 08:24
Great work so far Greg. I have to ask, did this inspire you too?
dailymail.co.uk/trav..veiled-Brussels.html
23 January 2017, 10:38
oh man... Once found these decals... happy as a kid, unfortunately these were never sent, and it was impossible to get into contact with the seller ever after...
23 January 2017, 12:51
Hmmm...wonder if Dale's got any of those pills left... seems Bart might need a couple too.😉
Still, he has a point about the canopy frame... and it just so happens my wife walked in the door with metallic tape - basically metal foil with adhesive already on it. Told good not to try, and now I'm not quite sure which way to go. The wire was hard fought, but the tape might actually make for a better, more in-scale frame. Sigh... I dipped it in Future to make sure the foil's not going to fall off, so we'll see. Added a new pic of the test fit.
23 January 2017, 15:11
I could be wrong (it has been known to happen) but I assumed that Bart was referring to decals like J W's link for the dailyfail.
23 January 2017, 15:32
you're completely correct Gorbygould... it was about the decals of the A320.
23 January 2017, 15:54
I stand corrected. Perhaps Dale could share with me.😉 In my défense though, it did seem impossible that decals that cool would actually exist.
23 January 2017, 22:10
Pills Sent. Many cool decals in the world. Look at those from the Hudson Hornet.
24 January 2017, 07:15
Thanks for hooking me up Dale! They kicked in jus in time for me to figure out I'd almost forgotten to add a mouth to the front of the shark sub. Whew!
25 January 2017, 01:01
Whelp. I finished my Tintin Shark Sub. Thanks for all the support... you can find the completed image gallery here - scalemates.com/profi..bums&album=32412
28 January 2017, 14:55
Greg, outstanding work. Is your Shark stand homemade? It's also really nice
28 January 2017, 18:08
Thanks John! Yes, the stand is also homemade. I used the underside of the wing/supports from an Academy 1/72 Spad XIII (trimmed into a rectangle) for the main bit. Then I used a bit of Everygreen siding to make a little planter box for it to sit in. Then I used a tiny bit of "pleather" fabric, sliced off the backing with a razor, and then made little wraps for each of the support posts. There's also one small bit of trickery. Because I used a wing, the surface wasn't flat or symetrical. So, to offset the slight curve from the leading edge of the wing, I trimmed the backside of the box to allow it to sit plumb and level (ish). 🙂
28 January 2017, 23:34
Ok. So, since the Great Shelf Disaster of 2023, I've been quietly repairing, reworking, and just plain redoing, many of my Tintin models. After the relative success of replacing my earlier scratchbuilt efforts with 3D modeled/printed updates, including my Armoured Car (The Blue Lotus (Wolseley Armoured Car) | Album by strobez (1:72)) from the Blue Lotus, and the Udet Flamingo (Tintin in the Congo (Udet U-12 "Flamingo") | Album by strobez (1:72)) from Tintin in the Congo, I've decided to go after the very first Tintin model I ever did... the Shark Submarine from Red Rackham's Treasure!
Although I didn't design the actual model itself, I had to do extensive reworking to enable it to be printed at 1:72 scale. So far so good, the biggest challenge has been to try and make sure the two part fuselage doesn't warp during the final curing stage. Rubber bands were too tight, so I tried to warp it in bits of wire to keep the edges at least SOMEWHAT close together. After the resin is fully cured, there's not much bend in it, so I think this is a crucial stage in the project. We shall see!
28 October 2023, 18:06
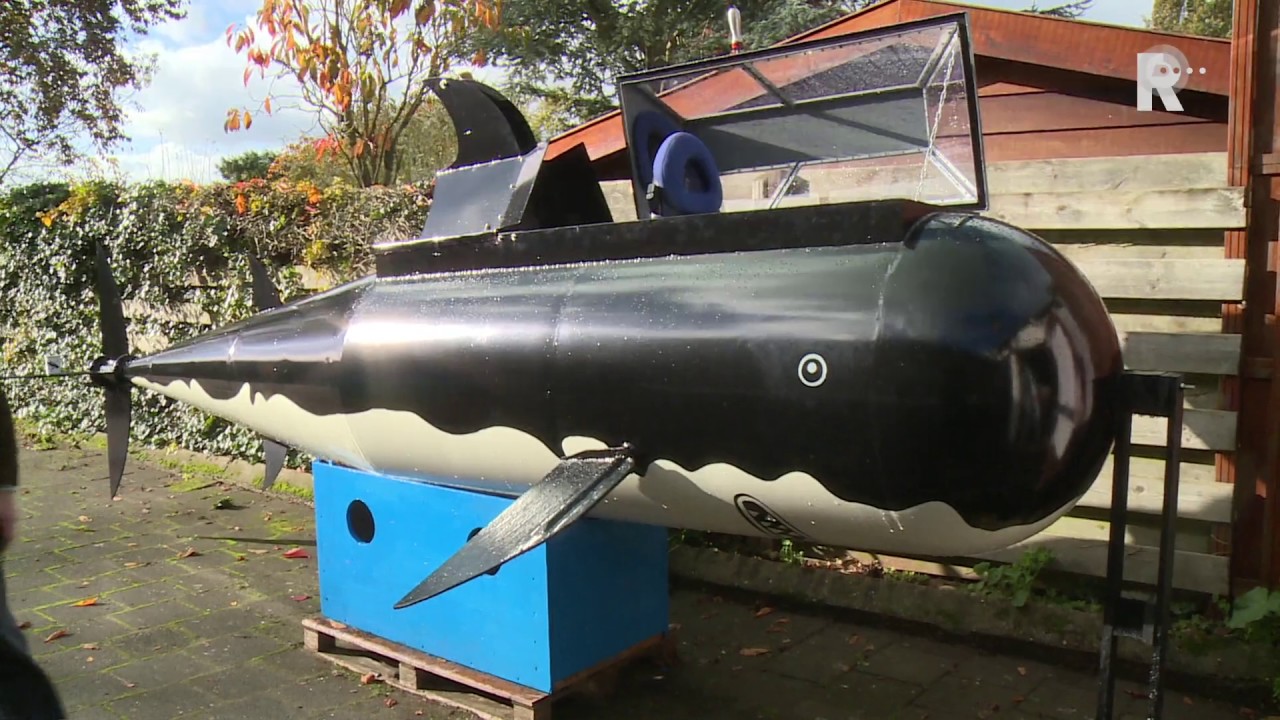
Great job replicating this one.
In Holland someone made one in 1:1 scale, which doesn't look as good, nor is capable of diving.
Youtube Video
29 October 2023, 12:27
Thanks guys. I seem to have forgotten to take a pic after installing the motor. It was tricky to get a dc motor connected to a bit of wire to spin the propeller down a shaft. You need to put enough resistance on the circuit to slow the motor down, but not so much that the friction inside the shaft tube will cause it to stall. I also need to redesign the propellor, but live and learn. The join along the wavy joint didn't quite work. I still need to do a bit of putty/sanding, but at least the imperfections SHOULD be hidden by the transition zone between the white and the black.
29 October 2023, 15:55
I already snapped off one of the fins (not saying which one!) while sanding the putty... so then I got to add MORE putty and sand the break down too! Yay!
31 October 2023, 15:36
Every project involving 3d printing has a step where you coat everything in putty and sand it off several times.
31 October 2023, 20:53
Never thought a project could take longer than my trawler 😄 Following, cool topic indeed 👍
31 October 2023, 21:01
You're right on that, Ben. After plenty of sanding and putty, I finally felt like I could get a coat of paint on it... only to drop it and have 3/4 of the tail section break off. Luckily it was a relatively clean break... just more putty and sanding required.
7 November 2023, 14:57
Thanks Matthew! I was pretty careful on the masking, so I think it worked well - just a couple of touch ups required! I'm also pleased that my "canopy plug" seems to have done the trick for a "heat and smash" molding of the clear canopy part. It only took me 3 tries (and one singed finger) to get one I was happy with.
11 November 2023, 17:03
Thanks guys! Getting the clear canopy to fit was a bit of a challenge, and there's still a tiny gap, but I think it's about as good as it's going to get. I also had a tiny bit of light overspray with the white paint as I was touching up the underside. I've still got the masking tape, so I might try to re-touch up the touch up with black. It's a slippery slope. I also might have to actually clean up the workbench. I can't find the propellors I put "in a safe spot for when I need them". 😉
16 November 2023, 15:13
Greg, one fo my favorite albums. Amazing to how you manage each time to transform regular kits into something that doesn't exist, only on paper
27 November 2023, 06:54
Sigh... Thanks Lode. Your well-timed comment gave me a bit of a boost. When I was going to solder the final bits of wire to the USB plug last night, the soldering iron cord caught one of the fins as I was trying to plug it in... and the whole thing went flying off the work bench and all of the fins broke off - some into multiple pieces. After a good cry, I decided to salvage what I could and try again. Stay tuned~!
27 November 2023, 15:10
@Nikola - I believe the similarly afflicted know why Greg does this to himself.
@GB - love the implementation of your imagination
30 November 2023, 08:18
Finally put the finishing touches on this one. I thought the propellor would be the end of me, but I can prove it works!
Youtube Video

4 March, 02:34
It was already awesome, but that detail really completes this beautiful build.
4 March, 06:51
Thanks Lode! I'll let you in on a secret... the one problem with this one is that... Tintin is too big! But I didn't have the bravery required to pop open the canopy again.
4 March, 06:53
Damn! I forgot the eyes! That was actually my plan, Łukasz, but after redoing the paint job 3-4 times... I forgot! Hmmm... stay tuned. 🙂
4 March, 15:05
Łukasz - Thanks for pointing out my mistake... We now have eyes!
And, just because I couldn't take Lode's disapproving look, I decided that I couldn't live with an oversized Tintin in the pilot's chair. So, I popped open the canopy very carefully and replaced him with a normal-sized boy. 🙂
8 March, 15:24
Me, an disapproving look? I never thought you would notice it 😉 lol. You're a perfectionist which is the reason to adapt the build. Tricky to do, but the result is there. Congrats
12 March, 06:47
I'm hardly a prefectionist... but my collector instincts would drive me crazy every time I saw an oversized Tinitin on my shelf. I've actually spent quite a bit of time trying to determine the perfect 1/72 scale size of Tintin and his friends. It took a bit of trial and error, but I've more or less settled on it now. The trick to making sure all the figures are more or less the same is done by comparing the relative size of his egg-shaped head~
12 March, 14:25
Album info
A kit bash of a Messerschmitt Me262 fuselage into the Shark Submarine from the Tintin adventure "Red Rackham's Treasure".

