

Wooden Airscrew for recovery of Mojo


Comments
99 11 January, 20:25
My mojo was in the cellar for a while and I couldn't find it again despite several thorough searches. So I haven't shown anything for two months. To recover it I tried a new wooden air screw as wood work is always fun and relaxing.
This is an air screw made by the Niendorf brothers in Luckenwalde. It is only shaped and primed so far. Later it will get decals and darkened with clear paints.
The bearing is also done. As this air screw is very filigree the bearing is made from 0.8mm piano wire and 1.0mm brass the first time.
11 January, 20:37
Last year, while visiting friends, I also visited Halberstadt to photograph this special church from the logos of the "Halberstädter Flugzeugwerke" (airplane factory). No, the short tower is not bomb damage, it already looked like this over 100 years ago. Across the street was a much larger and more impressive cathedral, but it looks just like the others. So this smaller church with its towers has a much higher recognition value and is probably why it ended up on the logos (two variants here).
Three years ago, I already built a biplane from this company - it's time for another one!
12 January, 16:35
Thx Spanjaard! I hope to have it finished until the Euro Model Expo in March.
13 January, 10:46
Beautiful work on the propeller Frank and a very unusual church, which I've not seen before.
Hope your mojo recovers soon.
14 January, 12:16
The kit provides seat belts as PE, but I prefer the Eduard belts (made together with HGW). Real fabric with steel colored buckles looks better and can be applied more realistic.
Eduard made them 10 years ago for the Siemens-Schuckert kit so they are very cheap now. But they match for nearly all German planes of that time (also valid for the Spandau MGs). Three cheers for standardization 👍
14 January, 19:25
Oops, nearly overlooked your comment Marcel as we typed in parallel. Welcome to the show and thank you very much. I hope I can bring this into a good end in one go.
14 January, 19:28
Thanks Guy!
I've heard a lot of bad things about the Lukgraph kits and the quality lately, so I thought it was time to see for myself and build one myself.
On the box is stated: "For experienced modellers" so let's see if I'm experienced enough.
What I have see so far is not bad. Ok, the mistake with the airscrew direction I have also seen from other manufactures (e.h. Special Hobby) and the replaced seat belt are just a personal preference (the PE belts are ok).
14 January, 22:16
Continued with the seat and worked on the wings.
At first I wanted to do a green/ red brown scheme (the kit offers decals for two serials), as usual on this type and time. But then I came across a nice blue gray livre with pale blue lower surfaces. The kit offers a complete pale blue one, but this is not the same as a photo exists with both. For completeness: a linen colored one is the third option.
I think the blue gray/pale blue is a nice spot of color in the collection. Luckily the small white serial numbers are painted over, so I do not need decals for that.
16 January, 20:01
"The regular crowd shuffles in ..." (Billy Joel - Piano Man) Welcome mates!
Thanks for the confirmation Marcel! Lets see, how it looks like if the fuselage is done and painted (will will take a moment with all that resin).
16 January, 22:28
The wings are now mostly finished. Some details needs to be added, but I should continue with cockpit and engine.
17 January, 17:13
I'm about to paint my first "ribs" on an early aircraft. I noticed you didn't do lighter ribs on the top surface? Is this because the blue fabric would have been largely opaque?
17 January, 18:42
Welcome Christoph and Ben, great that you discovered my build log!
Ben, this depends on plane and painting. See photos of original planes.
If light is going trough (typical linen, without painting), the rib from below looks dark. In top view light is going into the wing, but it is reflected on the ribs, so the ribs look brighter. See two examples of a BE2c here, same aircraft.
jamesfahey.smugmug.c..2c-early/i-MXG9bZC/A
jamesfahey.smugmug.c..2c-early/i-HdTxqC9/A
If the wing is painted, e.g. with dark PC10 on this SE.5a, then no light can go trough the wing from top, so then the ribs looks also brighter on lower side.
jamesfahey.smugmug.com/SE5a/i-B3T3zVJ/A
So the best is to look on pics of the original plane. I my case I have picture of a flying D.II and it shows dark ribs, even with a camouflage paint on top. May be still some light going trough? So it painted the ribs dark here.
17 January, 19:33
A lot of work was spend for the cockpit but this time mostly kit parts were used. Only some wires added, as described in manual.
Apropos manual: The manual shows, how the parts are fitting together but do not glue them as shown! For example if you glue the Spandau MG the frame you cannot fit the frame into the fuselage.
This kit has nice details, but it is not a Tamiya! So a lot of dry fit is required. The removing of print steps is not easy as the resin is very hard and brittle. So I may be failed here and there.
Most of the inside will be hidden forever as the cockpit opening is very small. Before I can close the fuselage halves the instrument panel and the engine needs to be prepared and mounted.
18 January, 21:30
Late to the party but taking a seat. Looking like a fabulous build as ever 👍
19 January, 06:32
Very nice - I´m flashed by the prop ... the result of the different wooden texture/color is awesome. Also the cockpit looks stunning. Thumbs up 👍👍👍
19 January, 07:37
Welcome Gary and Thomas!
I have to admit that this will _not_ be the first finished Halberstadt from this brand new kit, although I started as soon as I received it. Lukgraph showed the first finished one on their FB page (linked from homepage), but it is in 1:32. May be this will be the first finished one in 1:48? Let's see how far it goes.
@Thomas I could claim that the wooden propellers are a trademark of my models, but in reality I'm just too stupid to paint the plastic realistically. Especially the many thin layers on the hub. 😉
I like building with real materials, because in some places plastic is not the best realization of the original. A sailing ship is also more beautiful in real wood than in plastic. And it is pure fun!
19 January, 15:48
Deine Fähigkeiten sind einsame Spitze, und wir haben den selben Flugzeuggeschmack 🙂. Meine Halberstadt ist noch auf dem Postweg.
19 January, 16:49
Danke Dir! Ordered mine as Preorder last November.
This build is very challenging! At the moment I try to modify the Mercedes engine so that I'm able to close the fuselage at the front. 🤔 😳 😠
19 January, 17:31
Thank you Jennifer!
I hope to be able to show some new pictures later today.
23 January, 15:43
Oh, new visitors: Welcome and thank you very much!
Some new pics are added now. I decided to replace the 3D ABS resin printed struts by metal.
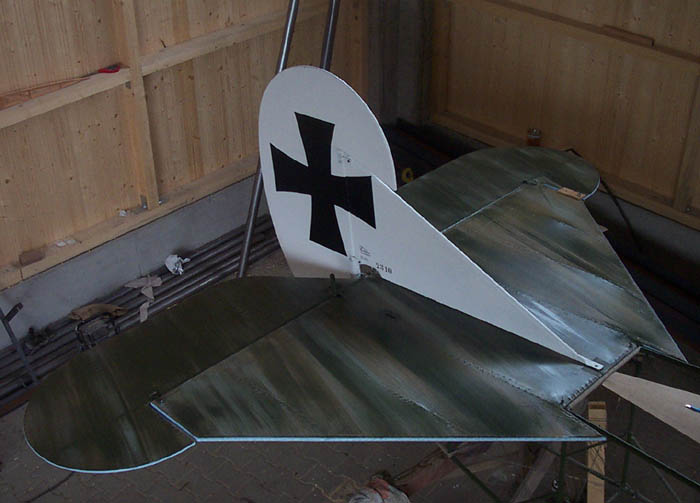
If someone else owns the kit: could you please check both halve of the tail planes? I seems to have two identical ones with the same flat side. Is that the same on your kit?
I asked Lukgraph, but no answer yet.
23 January, 20:50
I too love those brass struts. Question: how do you manage to squeeze the tube over the rod without deforming the tube? It's just a perfect oval shape 👍 I used this process on my Hansa project for the landing gear support and ran into this issue.
25 January, 12:07
Thank you mates!
Alec, I rolled the pipe with a scalpel to cut the desired length. Then place it on the inner wire (long, not yet cut) and let the tube hang on the wire between your fingers and put it in a small vice with flat! jaws. Not the fingers, only the brass 😉 Or support the wire on both sides in some other way. And then close the vice.
I use a little Proxxon vice, but any other will do too. If the jaws are not flat you can add a metal angle bracket on both sides.
25 January, 13:29
A new full scratched landing gear is finished now and I like the outcome. Another small step towards creating a downscaled original. 🙂
The drawing in the Windsock Datafile and a careful study of many photos in the references helped a lot!
25 January, 18:04
Thank you very much Kyle!
I hope that pictures of the engine can be shown today ...
26 January, 16:53
Thank you Juergen! Unfortunately, it no longer looks _that_ spectacular with paint.
26 January, 18:48
The instrument panel and the engine are done, so all the inner parts are finished and the fuselage halves can be glued together as next step.
Damn, that was a huge amount of work on that little pieces!
26 January, 19:35
As usual a great show! Struts: the ends is „chamfered" at the back. Are you sanding before or after squeezing?
27 January, 06:35
Thanks for stopping by and leaving a comment!
@Kyle I worked on it will full power as I want to have it finished for the next club meeting. I still have a week to go, but I also have my doubts as to whether it will work out with rigging etc.
@Bernhard After squeezing, I removed the wire and shaped the ends. Then I put the wire back in and soldered it. I then only used sandpaper to clean up the solder joints.
27 January, 16:48
Thanks Michael!
The fuselage is closed now! So please don't complain about parts or paint that should be in there and I've forgotten 🤔 😳 😎
27 January, 17:55
Ich bin wirklich gespannt wie es weitergeht,…gab es eigentlich noch weitere Ungereimtheiten?
27 January, 20:10
Geduld du haben musst, junger Padawan! - Patience you must have!
As promised in the kit manual you have to check often and remove a little bit resin here and there, as the fit is very tight. But also this is original, as the plane was built around the engine.
28 January, 07:54
Thanks you Ludvik!
For the impatient among you, I've put together (without glue!) a few parts to create a little teaser. I hope this will emerge into a nice little bird.
28 January, 16:27
The mount and control fittings for the tailplane are added.
I'm currently stuck in a primer-sanding loop of the fuselage ....
29 January, 20:55
Primer sanding loop. My favorite. 😐. Anyways, everything is looking wonderful.
30 January, 01:22
The design of the tail surfaces in your rendition looks great. 👍
One oddity (but not at all unusual) is that floating tail surfaces were used on this aircraft.
As the aircrafts evolved further, the tail surfaces were replaced by a fixed (non-movable) tail surface design with movable control surfaces. And with the advent of fast jet aircraft, designers returned to floating horizontal tail surfaces.
It is interesting to see how history repeats itself. 🙂
30 January, 08:23
Kyle, I learned in the IT world, that a loop need an exit criteria - in my case that criteria is called "good enough" and I'm very close to that. I had already problems with my favourite Alclad primer (on plastic) with adhesion to resin. I was recommended to try the primer from MRP and it adheres really well!
Ludvik, to understand the engineering solutions, the history and to see how a new solution was "traveling" from one manufacturer to the next is for me a fun part of the hobby!
One more word about this special case: the surfaces in front of the pivot point act as a "servo" and reduce the control forces during a deflection. Even later, with your mentioned fixed damping surfaces of the horizontal stabiliser, there were parts in front of the pivot point. See for example this picture of a Fokker D.VII: [img1]
30 January, 09:54
I have to ask. How did you fabricate the tail strut linkage in photo #60? both sides appear to be identical. What material did you use?
30 January, 13:56
Thank you Alec for your support!
Michael, I created that assembly earlier, please see pic 30 and 31. There are 4 kit PE parts, 2 control horns and 2 fittings, to be folded back to back. But since the holes were different I reworked this using brass pipes. It could not be mounted because the fuselage was still open at that time.
30 January, 14:53
On the Lukgraph page the PE set is only shown in this picture, the bigger set in 1:32, the other 1:48
[img1]

30 January, 15:10
Thank you gorby!
Sometimes it's good to start with a new kit in one go. And in this case with a brand new one - that motivates too. And finally I want to have something to show at the club meeting next Monday 🙂
30 January, 17:20
I added now pics of the fuselage. It is now prepared for the main paint job with blue gray.
30 January, 18:25
Fuselage and tail parts are painted now, but I will not touch it or take pictures yet as the Gunze paint dries slowly.
31 January, 11:36
The fuselage is painted now and all markings were applied using self created masks. Not perfect, but it looks like painted on and that was done by hand on the original plane, so I'm happy with the look. During the drying time I have prepared some other parts.
1 February, 18:47
Oh yes Kyle, you are so right 👍 Thanks!
But there is still a long way to go before we reach the finish line.
2 February, 17:01
Yea indeed. I'm looking forward to watching as you elevate this kit even further.
2 February, 21:16
Thanks mates, new pictures uploaded!
I have only PE prop boss plates with 8 bolts. I used them anyway on my Piper end of last year. For the finished model I got the comment that the Piper airscrew is only bolted with 6 bolts. Yes, I know, but I didn't have the right plate!
The same problem on this bird and before using 8 bolts I tried to create them myself.
2 February, 22:16
Thank you Alec! If the radial run-out of the dividing head wasn't so bad, it would have been even easier.
3 February, 20:24
Alec I suspect that the dividing head is running true, but the jaws are not clamping in the centre 🙁
I uploaded new pictures as the exhaust and more parts are mounted on the fuselage.
4 February, 20:13
Due to the little size of this biplane and its filigree nature it was not easy but now the fuselage struts are in place. They can hold the upper wing without glue. All the hard work with the struts has paid off.
Some more details added too. I need to prepare the rigging (drilling holes etc) before the wings can be fixed finally.
Have fun with the new pictures!
6 February, 20:35
Your photo stories are the best. Wonderful update and I also enjoyed the teaser of a biplane at the end. Fantastic.
7 February, 03:55
Thank you my friend!
In the meantime, I'm a little annoyed! The tail skid is wrong.
On the D.II it is held by a tripod, not by four struts as on the kit. Due to that the suspension is different too. I guessed it from many photos, but the tail is often in the dark shadow of the tail unit. And I have to defend Lukgraph, because all the drawings (in the Datafile and in Herris' book) are wrong here. The D.II was developed from the Trainer B.II, and this one had four struts, which is proven by a very good photo. And as it happens, I only found confirmation after the detail on the model was completed 😠 The British dismantled and analysed a captured Halberstadt D.II and made beautiful sketches of some of the details - and one of them confirms my assumption. Actually, this would have been easy to change before painting the fuselage, but now the mounting brackets on the outside of the fuselage are interfering.
7 February, 09:51
Now all you need is a tiny pilot to fly that thing away.. It's an amazing build.
7 February, 12:05
Amazing details added. Regarding that 3D printed radiator in the wing: how wide would you say the spaces and the actual ribs are?
7 February, 12:32
Thank you!
Alec, I measured the inside area of the radiator: 11.7mm for 20 spaces/ 19 ribs. The seems to be equally distributed so 0.3mm per space or rib.
7 February, 12:49
Because I have received a PM, a word on my own behalf.
It would be boring to see another WWI project from me. Because I might lack the imagination?
If you feel the same way, please filter out or ignore my postings and I apologise for the annoyance. I have also created a feature request for a mates-ignore-list so that my postings can be filtered out easier. Feel free to vote for it: SCM Newsfeed
If that's the general request, I may as well stop with my build logs. Some may prefer to pay for such detailed build logs on Patreon site.
8 February, 10:43
Bughunter,
I wouldn't worry about someone complaining. It's unfortunate that this is what society is today. If you don't like something, don't watch/read it. It's simple. There are many postings on here that I don't pay attention to because I'm not into the subject matter.
I for one enjoy your build logs. It helps me out and makes me strive for more detail in my own work. It would be a loss to the rest of us if you stopped. I'm also starting to lean more towards the bi-wing era of aircraft, they seem simple, but not. So, please do not stop.
Have a wonderful day.
8 February, 11:53
I love your build logs. It is one of the ways that I learn. Don't stop.
8 February, 12:31
I'm sorry, are people really that bored on this great website that they're directly complaining to others about their build choices? Part of what makes this hobby great is you can do exactly what you want to, so who cares if people don't like it? They can scroll past.
Please don't feel discouraged to post your great build logs. Most modelers such as myself get a lot out of seeing others' work, it's part of why I enjoy Scalemates so much. Sorry to get on a soapbox. I don't necessarily disagree with the feature you're suggesting, but it's just weird to me that people would complain. They can skip sending me messages after my 10th Vietnam navy jet build.
8 February, 12:44
Frank,
your models are little works of art and your modeling is top notch. I always enjoy seeing your new projects. The skills you show here are a great inspiration to me. And I'm sure most modelers involved in Scalemates who follow your work feel the same way.
Don't be distracted by "shouts in the dark". Occasionally there will be someone who will try to spit on your accomplishments. It's just plain envy. These "last righteous" usually know exactly what others should do, but can never do it themselves.
As Michael wrote, if someone is bothered by your posts, they can avoid them and may not read them at all. Everyone here has that option.
I wish you much joy in working on your models and please don't stop!
I look forward to your next interesting posts!
Ludvik
8 February, 13:04
Frank, for me it is always a pleasure to follow you build logs and learn so much from such a master. Keep calm and carry on! 😉
8 February, 14:31
I agree 100% with sentiments expressed above. It's truly sad to see such behavior, but sadly the anonymity of social media empowers unbalanced individuals to take potshots at others with impunity. The intent was clearly to hurt you, only an unwell person could expect such comment to be taken constructively. I don't know which option is sadder…
Your work is outstanding and I for one look forward to your continued contributions. One quote comes to mind when something like this occurs: "Don't let the bastards get you down!".
Thank you btw for measuring that radiator. 🙂
8 February, 14:38
Frank, I have to agree with everything everyone else is saying. Your photography and build logs are among the best I have encountered and it would be a real shame if one persons (probable jealousy) bad attitude ruins it for you. I hope you continue as you are and post your wonderful and inspirational builds for all of us to enjoy. I myself have never built a WWI aircraft but I could never be bored or upset about looking at anything you build. For the most part this is a wonderful community we're a part of but there is certainly one in every crowd. Thank you for sharing your fantastic knowledge and skill with us all.
8 February, 16:12
Mein lieber Frank, was muß die Welt bekloppt sein, wenn sich wer-auch-immer zu solchen Aussagen bemüßigt fühlt. Örgs
Ich kann mich den vorherigen Antworten nur anschließen. Bau einfach weiter diese wunderbaren Doppeldecker. Da bist Du der Maßstab an dem sich andere messen lassen können.
Ulf hat deine Modelle einmal als Referenzklasse bezeichnet und in meinen Augen hat sich Dein Level definitiv noch gesteigert.
Mit schönem Gruß
Christoph
8 February, 22:10
Thank you very much for your supportive comments from each of you 👍 That is the real community and not that now ignored user.
And yes, I still have a few unbuilt biplanes in my stash. 🙂
8 February, 22:25
I was shocked when I read about the PM. Such a petty action is no doubt caused by jealously. Your builds getting the love rather than theirs, and there's a damn good reason your builds get so much attention – because they are amongst the best on Scalemates. It's what the Scalemates forum is intended for, to display builds of every member. It's no mystery why the cream rises to the top.
Please continue with your builds on here Frank. They both teach and inspire, and because of your builds I was considering adding my build progress on Scalemates for the first time. Hopefully that will annoy them as well. 🙂
We're 99.999% behind you mate. 👍
9 February, 07:57
Actually, our mates already said it all and said it well. So here is just a short Thumbs Up from me too. Keep it up. You bring a lot of pleasure and an occasional awe to quite a few of our fellow modellers (me included). 🙂
9 February, 09:05
I just walked through the comments and can´t believe that this really happened to you. I don´t understand .... even if I´m not totally into WWI planes or biplanes, I enjoy watching the progress on your builds and skills you show. Keep it up please! Maybe these people are just jealous - try to see it as a compliment 😊 stay positive and happy modelling
9 February, 09:51
Bughunter, everyone here is free to watch or not to watch your contributions. I´ll watch them - for good reason. 🙂
9 February, 11:40
The great support continues 👍 Thank you very much to each and everyone of you!
So back to work.
The last days I used my imagination to create new strut mounts and prepared the rigging. That was a lot of work, but due to that good preparation the rigging task itself was done within some hours this afternoon. I am very pleased with the look of this scaled-down original. 🙂
There are only two rigging lines missing in the front, but I want to add missing water pipes before. And the control wires to the ailerons (also with turnbuckles) needs to be added.
9 February, 22:12
Thank you Jennifer!
Due to the 8 wing struts instead of the usual 4 more rigging lines were needed - so more effort and turnbuckles. Apropos turnbuckles - I forgot to mention, that the turnbuckles needs to be aligned with the rope. I have done this with a small amount of CA and wait some seconds until it holds but in gel consistency. Move then the turnbuckle in the correct direction and secure it finally with additional CA drops.
10 February, 14:06
Another beautiful machine. Well built with great attention to detail. I look forward to finishing the model.
10 February, 21:08
Yeah mates, yesterday this build was running one month but the end is near!
In meantime I added more details so I think all parts are in place now. Pictures later.
Some paint fixes, steel on the rigging, wash, weathering .... are still on the ToDo list.
11 February, 15:54
Next batch of pics added! From the detail work it is finished, no parts left anymore.
Now to the remaining paint work ...
11 February, 18:33
The rigging looks great. Do you make your own turnbuckles or use ready made ones from one of the manufacturers?
11 February, 19:26
Thank you Dietmar and Ludvik!
@Ludvik please click on the project, there you can see the used types of metal turnbuckles from Gaspatch Models (Greece). There are more types.
Overall a big amount: 20 Albatros, 12 type C, 28 anchor points
11 February, 19:31
The stencils look great. At this point I can appreciate how hard they are to do. The rigging is an absolute work of art.
11 February, 20:33
Thank you Jennifer! Next time I'll try to leave a small "handle" for the tweezers and just remove the carrier film in that area. I could hardly hold the decals if I trimmed around them and the decal liked to fold over onto the back.
11 February, 21:54
Stacking of decals on the back can be avoided.
I successfully use a simple method when applying small decals. I place the decal paper face down on a very thin transparent film. I then wet the decal and remove the decal paper when the decal is released.
I place the transparent film with the decal on the surface to which the decal is to be applied. I press the decal film on and then carefully remove it. In doing so, I check that the decal remains stuck in its place.
This is the same principle as using transfer film when transferring spray masks.
11 February, 23:03
Thank you Ludvik, that is good to know. I have been struggling especially with all the small decals on my bomber.
12 February, 02:06
Once again a beautiful build with step by step walk through of both the kit and your methods. I've learned a lot watching your builds
12 February, 13:37
Thank you very much mates!
It's true that it's quite late to show up at the party now, because this bird is almost done. But that doesn't matter here, because nothing is lost (I hope the backup is running ok 😉) and you can read everything later at your leisure.
Yes, I like this D.II, but masterpiece? I think other models are still ahead of it.
PS: After the last pictures I have shortened the loose ends of some rigging lines.
12 February, 21:42
Thank you very mates for visiting and commenting during this one-moth journey!
This chunk of resin parts has now been converted into a scaled-down original, and I'm happy with the result so far.
Don't miss the new album with the final shots: Finished Halberstadt D.II | Album by bughunter (1:48)
13 February, 20:13
Glad to be a part of the journey, even if it was from the sidelines. Amazing build.
13 February, 20:27
That was not my last project of an aircraft made by the Halberstädter Flugzeugwerke! More to follow on day and I hope that many of you follow again the journey.
15 February, 17:01
Album info
This is a build log of the brand new Halberstadt D.II from Lukgraph. I preordered it in November 2023, it was shipped in the last days of the 2023 and arrived in January. I started it immediately as I had heard various things about this company's kits and wanted to try for myself. What I can say: The box says "For experienced modellers" - that's definitely true!
It provides much more compared to the old Blue Max kit, which was the only kit of this type so far.


