Full scratched cockpit from wood and metal

An instrument panel made from real wood and metal.
The dials are Eduard PE. That is an interesting detail: the dial could be folded out for maintenance reason. I made that plates from another wood veneer and sanded it down to 0.12mm!
The scratched oil pulsator on the right is not yet mounted.
On top a piece of map will be added. Leftover from the Halberstadt build, some moire effect with the print, with naked eye it looks ok.

A lower panel with switches, also full scratch. Magneto switch turned on lathe.
Please note the brass labels of the switches!
Please note the brass labels of the switches!

The base of the switches is 0.4mm alu micro tubing, with 0.2mm NiSi axle. The handles are 0.3mm copper wire, with drilled hole.

Two fuel and oil gauges are also created, with wooden base, brass tubes, stretched clear sprue and 0.2mm copper wire for the connections.

A wooden floor. Some alu panels added and cut outs for control linkage added.

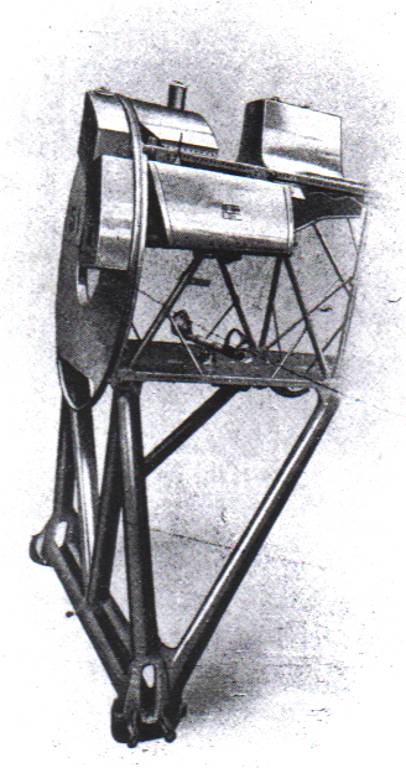
The cockpit strut framework was soldered from brass.

And mounted to the floor. Aluminium stripes are glued also into the control linkages cot outs.

Now all parts together 😉

Another top view from different angle.

On fuel gauge sits on the left side, ...

... the second one one the ride side. Should be visible later from cockpit opening.

Another shot from top, but camera focus on the floor.

One of the rare side views, which are only possible if not mounted yet in fuselage.

As usual - if not already provided in the kit - I separate the ailerons from the wing for more life in the model. Then I immediately provide them with new hinges.
Very nice: rotary tube control! This way I don't need to add rudder horns later.
Very nice: rotary tube control! This way I don't need to add rudder horns later.

Again on the other side, and the quite prominent ribs also somewhat sanded.

Then primed the wing white, sanded it and painted on the shadows.

After a layer of clear lacquer, I applied 3D decals from HGW (481013 to be precise). After drying, you had to remove the carrier film, see in the middle, so that the black "stitching" is really raised.

That was a lot of work, but it looks great so far. Here is the top side, ...

... and the underside. This is also a little more heavily shaded.

And also in detail. So you don't need to mask off the ribs when shading.

So, now I was wondering if I can spray Alclad metallic paint on decals? Why the hell would you want to do that? I want the underside to have an aluminium paint.
Sure, you could protect the decals with clear varnish, but I wanted to preserve the textures as much as possible. So I carefully tested Alclad Semi Matt Aluminium on one aileron first, it worked. Then I applied a thin layer to the entire underside of the wing.
The result is more or less as I imagined it!
With the light in the back, the tapes still shimmer like lines, the seam is raised.

Against the light, everything shimmers like aluminium, but in different degrees of gloss. This would not have worked so well with clear lacquer!

That is my cockpit on a reference picture.

Front side of the wooden propeller. Already primed.

Back side.

French brown, made form Gunze H406 and clear paints like red brown and orange.

Again the back side.

Same airscrew, just different light and viewing angle. The layers are somehow visible.

My wooden airscrew in comparison to the kit ones. As some reviews mention, the rotation direction of both kit props is wrong.

The shape of the kit prop is not bad, but the angle of incidence is invers.

That is the Eduard Gnome N rotary engine of the Brassin Print series, related to their new Camel.

3D sprues removed, a center hole drilled and created my usual bearing.

The new Gnome compared to the kit parts. I still prefer the Small Stuff rotaries, but this type is not the the product line.

Engine is painted with Alclads now and some weathering and oil added with oil paints.

Together with the airscrew, which has now bolted on bub plates on both sides.

After turning a new cowling on lathe (no pic) I used my mill and the indexing head to drill the front holes.

In vertical position the indexing head allows also to cut cooling slots.

The finished cowling in comparison to the two kit parts, made of very thick plastic!
The thin small cut on the top must be made by hand on the kit part. The dimensioning for this is included in the manual.
The thin small cut on the top must be made by hand on the kit part. The dimensioning for this is included in the manual.

With the identical outer diameter the rotary engine has now enough space, due to the thin wall.

My creation corresponds to the drawing as far as possible for me.

A new air intake for the engine. The upper one shows the kit representation, on the other half the first brass parts are scratched.
I failed to do the frame with my thinnest brass foil. Then a 0.08mm brass foil was rigid enough to file it into shape.
I failed to do the frame with my thinnest brass foil. Then a 0.08mm brass foil was rigid enough to file it into shape.

To avoid light going trough I closed the pipes on back side with heated black sprue.

Both sides are prepared for later mounting.

The PE frame of the kit offers a PE seat, beside a plastic one. It matches the drawings, but then I found a reference picture showing a wicker seat base with a wooden backrest. So I used a seat base from a PART set.

Seat in soldered from back side.

That is a frame soldered from flat brass to hold the seat on the wooden floor. After the picture I fixed the fine crack and soldered to the seat.

The soldered seat in comparison to the kit one.

I added a layer of flat beige with airbrush as base for the wood.

After a wood paint with acrylic paints I added a final layer with Clear Yellow/Orange. The frame is painted to, so prepared for mounting.

I created a stick from brass.

Like my Sopwith planes the stick has open pipes, here in comparison with the original.

Some PE parts from a PART set and wires are used for engine control.

As next I turned and milled a socket for the pedal assembly.

The socket is on the globe of the cent.

It looks nearly like the original 😉

The pedal is made from brass.

Finished with paint and control wires.

All new parts are mounted into the cockpit. On the seat I added belts from a Eduard set: French STEEL belts.

The stick has also a socket, which is a PE frame for instruments from HGW.

This is the view from above, so this is the rest you can see of all the work.
But we know it's there!
But we know it's there!

The engine control parts are mounted on the left side.

I created some half balls with heated sprue squeezed through a hole.

With the help of the sharp Single Blade Nipper I cut the ball heads and glued them on a thin sheet.

After separating them, I put them on tape for painting.

Primed and painted.

Bolted them onto the wing with 0.2mm NiSi wire.

A closer view.

To be able to the outer strut sockets the cockades needs to be applied.
But damn: I forgot to add aluminium stripes to form a case for the ailerons! I found this on a picture of the real wing. The decal rip tapes stopped before as this was planned, but later simply forgotten. Finally I added the Alclad alu paint.
But damn: I forgot to add aluminium stripes to form a case for the ailerons! I found this on a picture of the real wing. The decal rip tapes stopped before as this was planned, but later simply forgotten. Finally I added the Alclad alu paint.

I added the stripes also on top side.

The kit contains decals, but I drawn masks in Inkscape (according to a contemporary dimensioned sketch) to cut masks with my plotter. Interestingly the cockades in the normal drawing looks different.

It is a bit risky to mask on top of the decal and alu stripes, but with a bit of care and a lot of luck it works.
For the white I used a thin layer MRP Insignia White on top of normal white.
For the white I used a thin layer MRP Insignia White on top of normal white.

Since I had the paints in the airbrush, I have also sprayed on the cockade on the top side, in the same session.

And finally the top side in a closer view.

I got a question regarding seating position, so here a pilot (painted by a friend and given as a gift). Can't force hin into the cockpit due his leg position, but you get the idea.

The were some strips on the walls, but also to far forward into the metal area. So I decides to remove them, thinned some wall areas, primed, painted linen and aluminium.

The cockpit is now mounted into one half.

I added more parts: the trigger cables from stick to guns before mount and a wooden plate in the back of the pilot after mount. There was a little storage on the original one.
In the back of the pilot I will add a metal cross. Missed this before.
In the back of the pilot I will add a metal cross. Missed this before.

The fuselage is about to be closed, but I think I is easier to handle the gun mounts before. As I will do the MoS.29.C1 it needs the two guns option.

By the way, that are the kit parts for the cockpit 😉

The first paints are on the top side of the wing. Only the black area is missing.
There is a bit much paint on the dark area, but that was due to an additional layer necessary to cover the Gunze paint change of H58.
There is a bit much paint on the dark area, but that was due to an additional layer necessary to cover the Gunze paint change of H58.

The remaining sockets are mounted on the cockades.

All four camouflage colors are now applied on the wing. Used NATO Black instead of Black.

Since I am building the MoS.29, I need the cover with the two recesses. It was a bit too short, but with a bit of padding I was able to glue it in on one side. Then I asked myself, where was the fuel filler cap?

So I checked the drawing: the fuel cap was in the front, between the MGs. But there is no space at all! The MGs are too close together, compared to the drawing. The photo on the right confirms it.

So I broke out the lid again, sawed through the middle and inserted some plastic.

The Vickers MGs existed in many variants. I had some from GasPatch Models in the drawer, but of course not the matching French variant 13-48038.
It could be ordered, but I didn't want to wait and had this PART set.
It could be ordered, but I didn't want to wait and had this PART set.

Here I soldered some assemblies, added 0.6mm brass tube as barrel. However, I didn't solder the rear box, you won't see much of it under the wing.
On the left is the very slim kit MG, so I used the boxes below from the Eduard SE.5a.
On the left is the very slim kit MG, so I used the boxes below from the Eduard SE.5a.

There is a hole in the top of the etched part where the synchronising linkage goes through. Here it is made of 0.3mm brass rod, at the front a piece of 0.5mm tube and a self made spring (coiled wire).

All assemblies mounted with superglue. The boxes are painted with Alclad Steel.

And put it on the fuselage for a test, now I like it.

The resin MGs from GasPatch cannot offer that: Light passes through the open slits, even at the muzzle.

The tail unit parts did not withstand rough force with tools for long and fell apart into their individual parts, whereupon I redesigned them to be reassemblable using metal parts.

I have now painted them with Alclad Gun Metal. Now they can be safely put aside until assembly.

I had assumed that I wouldn't have to fit rudder horns and steering cables to the rear, as the steering is internal. But I rejoiced too soon! The mechanics have to get to it somehow, so I made maintenance flaps. The "hinges" are soldered on from the inside.

Here: the large flaps will get quick-release fasteners. The two hinges on the rear flap are not a mistake: the opening was to pull the wire out of the hinge on one side - simple and clever solution!
On the original, the bearing bushes also peeked through the fabric.
On the original, the bearing bushes also peeked through the fabric.

In the last update there was no crosshair on the Vickers (yes, a small etched part would be included in the set from PART), because there was a gun sight. Here the is heated stretched clear sprue, polished at the ends, with four brass rings with brass wire as holders.

It looks nicer with a little paint. Unfortunately I didn't manage to photograph the light coming through.

On the lathe I also turned the fuel filler neck with cap.

Here he is allowed to try out the sitting between the Vickers. You can also see the tension cross behind the seat. And yes, the fuselage is also glued.

And now a little teaser!
The connection between fuselage and wing consists of 22, in words twenty-two, wooden struts! This has the potential to look spectacular, but first it means a lot of work for me.
The first of their kind in raw form are placed here for testing and can already hold the wing on their own. Even the assembly itself is not an easy task.

After primer and sanding I painted "metal panels" in aluminium and added the prepared details.

The covers are also on the tail. In the picture you can also see the shape of the hull, which was covered with fabric on strips. But the fuselage had a strange round shape. Since it is difficult to sand it flat, I scraped off the rounding with a sharp blade and then sanded it down. The thick short-run plastic must have a reason 😉
Not perfect, but better than before.
Not perfect, but better than before.

Here again in the general view. The lacing is already on. At the bottom I have also extended the "metal" with thin sheet.

On the floor, a maintenance cover that had been sanded away has been replaced, and as on the wing, the underside of the aluminium has been given a semi-matt finish. You can see a slight colour difference due to the paint on the aluminium (sheet metal base) and the white primer (fabric).

Two more paints are also on it, after a lot of masking.

There is also a colour difference in the light green. The MS logo here has not yet been sanded free again.

And once again the tail. Half of the paint job is done, three more colours will follow.
Since I now have to wait before I can mask off for the dark green, I have devoted myself to the tail skid.
Since I now have to wait before I can mask off for the dark green, I have devoted myself to the tail skid.

I had 1x1mm hollow brass profile, with quite a thick wall. I needed 1x0.8mm, but there I could easily thin out the sides. Drilled on the mill and soldered on a sliding shoe, more parts are ready.

Prepared for assembly. This will then also be painted blue-grey.

Let's continue with the painting. First it was the turn of dark green.
Here is the Maskol's aforementioned attack on the light green paint.
Here is the Maskol's aforementioned attack on the light green paint.

In the meantime, the paintwork is complete. Chocolate brown and NATO black are also on it.

This is the right-hand side.

The two Morane-Saulnier logos as etched parts (top right) alone are worth buying this kit. However, since the logo was sheet brass, I polished off the dark metal before gluing it on.

After painting, carefully scrape off the paint again and polish.

After gloss varnish and appropriate drying time, I applied the decals. Printed by Aviprint - they need some care when applying.
Three serial numbers are possible, but the lower text block is only included for the 29C1. The text is printed on the red/white/blue decal, but nicely the text block is included a second time for the self-painters.
Three serial numbers are possible, but the lower text block is only included for the 29C1. The text is printed on the red/white/blue decal, but nicely the text block is included a second time for the self-painters.

The swallows and the number are now also on the fuselage.

Yesterday I was thinking: how bad is it that the yellow decal, which tends to be too big, is lying exactly on the lacing? But then I am always amazed at what a softener can achieve!

Here I still have to help with softener on the lacing.

I had also got softener on the near masking of the underbody. But relief after removal: everything is ok!
I then mounted the rudder (pin from below through the bushing) and then the tail skid.
I then mounted the rudder (pin from below through the bushing) and then the tail skid.

The underbody in complete view, looks good in comparison with the colours

The rudder is slightly deflected.

And also in the view from above the position of the decals is ok.

First I added the plates. The part had some inscriptions on engraved brass plates. You can hardly read the text on the original on color pics (the legible graphics of all the signs are in the windsock), so brass will do. I had removed the moulded elevation and glued on brass plates instead.

Two on the left side.

On top behind the cockpit there was a non-brass tin plate, nicely the kit had an etched part for this.

Now to the undercarriage. Instead of tubes on the flying original, the data file also shows a closed part between the struts with a width of 2mm. I had a U-profile (someone must have shooed a milling cutter through 2x2mm square, bought like that) with 1mm inside. I then milled side parts and soldered them hard (with 610° silver solder) to a piece of U-profile.

I have now heavily modified the U-profile, flattened it considerably.
I completed it with 0.6mm pins for the spring cables and 0.5mm brass wire for the struts.
I completed it with 0.6mm pins for the spring cables and 0.5mm brass wire for the struts.

Fitted/attached with attached pieces of crimped 1.2mm brass tube. The "true length" drawing of this detail in the Datafile was helpful.

The tubes are soldered and the inner V is adjusted. This is a bit tricky, because the landing gear is extremely stable afterwards and has to fit exactly into the fuselage holes.

With washers on the pins to prevent the "spring cable" from slipping, the undercarriage is complete so far. The thick brass of the U-profile is now also aerodynamically shaped on the underside.

On the upper side, the axle can move in the lateral slot.

After painting in the same Alclad as the underside, at least inside, I glued the undercarriage into the fuselage holes.

In the previous picture you can see another new detail, this one. A step made of a tube open at the side and brass wire, instead of the lump of the kit.

On the outside, the chassis is painted in the respective camouflage colour, fortunately I did not mix up the sides 😉

Two axle stubs made of 1mm nickel silver tube were soldered with nickel silver limiters.

After a burnishing (some variation in the colour) I was able to mount the axles ...

... and wound in the spring cables from stretched sprue. The 1.2mm brass bushings will go in the wheels, but they are freshly painted.

I added two ignition wires per cylinder to the engine.

After oil-wash on the rear wall, I glued in the engine together with the bearing.

And also the cowling is now finally on, but the airscrew is only plugged on.

The maintenance flaps already had holes. Since I had super glue gel open, I drilled holes and glued in the quick-release fasteners made of 0.3mm brass.

And finally, the current status in the view from the right.

If in a car the union before the chassis and body is called marriage, I call the union of wing and fuselage the same.
For this to be possible, however, other things are still missing.
First the cowling has got its fastening rope, just before the end a very thin wire. The prepared Vickers MGs including telescopic sight are now also attached. And you can see the first four wooden struts together with the "line tape" wrapping.

More struts are prepared. They are tiny, see an aileron linkage rod on the globe of the cent piece!

After inserting the aileron linkage rods, I attached the wing, carefully aligned it and glued it to the four struts.

Then I adjusted the slanted struts and glued them in place. Now, at the latest, the wing is stable!
You can also see from the thumb how small the model is.
You can also see from the thumb how small the model is.

Then I adjusted the roughly prepared middle struts and also finished them with linen tapes and varnish.

I inserted and glued the middle struts.
Behind them you can also see the aileron linkage. For this I made a lever out of nickel silver sheet and inserted it into the long prepared slot of the wing.
Behind them you can also see the aileron linkage. For this I made a lever out of nickel silver sheet and inserted it into the long prepared slot of the wing.

Die vier Streben halten die Fläche nun zusätzlich, aber es fehlt noch eine schräge Strebe zum "N".

With the propeller plugged in, this is now the current state in which I can safely take the Morane-Saulnier to the exhibition in Ried.

The model is far from finished! For example, there are still 12 struts missing that have not yet been made.

The tailplane is not yet on either.

Even with the struts, my scaled-down original corresponds to the large original! After installing the long outer struts, I noticed how flexible they still were. Only the support in the middle stabilised the whole thing, but could still be moved back and forth. This was then remedied by the middle connection between the two long struts.
Really amazing: no strut too much and none too little!
Really amazing: no strut too much and none too little!

It worked quite well with careful adjustment, only one long strut I had to make twice. Again, one side alone.

In the end, the many line wraps were almost more annoying than the struts themselves. Sockets are soldered into the main struts for the intermediate struts.

That was an exorbitant amount of work, I underestimated that before, but the impression on the model compensates for everything!

And again a detail added: the mirror. I didn't get chrome foil on an etched part strip properly smooth until I noticed that the nickel-plated back of the etched part looked almost better. I then shaped some nickel silver sheet and polished it up to 12000 grit with sanding pads

Mounted on the wing. A real mirror would probably look unrealistic on the model.

Here again in detail. This time I used fishing line, although it is difficult to stretch...

The rigging in its completed state, whereby I have limited myself to the variant of the machine flying today. There are also pictures of machines with further tension ropes, possibly field supplemented?

... because the rigging was also painted French Field Grey.

Once again in detail.

The propeller is attached and a small tube is added.


The kit comes with a small frame as an etched part for the windscreen. Provided with the "glazing" and inserted, somewhat difficult to photograph. In the back of the pilot you can still see a gap.

For this I shaped a small piece of polystyrene and painted it leather-coloured.

This gap has now also been filled.

12 leftover pieces of 0.07mm brass sheet drilled with 1.3mm and soldered on the drill shank to form a block. This allowed me to file the block into shape and drill four times 0.22mm.
Don't let the macro fool you, the part is tiny!
Don't let the macro fool you, the part is tiny!

I have now de-soldered 12 metallic mounting plates and tacked them to masking tape. The mounting holes are now in the grid of the strut holders, with a reserve piece underneath for comparison.

Painted and fixed with 56 pieces of 0.2mm nickel silver as "bolts". I also bolted the caps of the aileron linkage.

Again from close up. Some of the paint has come off, but this way I have the used look right away.

The tail is also rigged.

I tried hard to match the position of the holders under the wing. I like the result!

The last two wooden struts support the tail unit from below.

The current overall impression, after a slight weathering.


A final look at what made this project so special.

As the very last picture of this building report I show the unused parts.
The resin parts stayed right in the bag, a bag full of small parts and still many parts, mainly struts, on the sprue.
And yes, it still made sense to use the kit!
The resin parts stayed right in the bag, a bag full of small parts and still many parts, mainly struts, on the sprue.
And yes, it still made sense to use the kit!
Comments
87 9 September 2022, 17:29
To recover my mojo I scratched instrument panels and related parts for a future project in scale 1:48.
The only used plastic parts are stretched clear sprue, the rest is real wood and metal!
I have not mentioned the type of aircraft, perhaps some of you will recognise this design.
And I hope, this time it is spectacular enough for Greg 😉 , because I was not able to do it more real and precise. That is damn small! I can take it with me to Ried next month and show it as WIP.
9 September 2022, 17:49
Thank you Spanjaard! In the macro shots it looks a bit coarse, but with naked eye I like the outcome.
No one an idea regarding the type?
10 September 2022, 10:09
Maybe an early SPAD - S.A.2 or 4? Whatever it is, the work is just brilliant!
10 September 2022, 13:45
Thank you very much!
Good catch Uwe! Not SPAD, but you are right with french.
So now also some struts in french blue. With some more parts the cockpit framework is mounted together. Need to add more details: engine control, seat, stick and rudder pedals ...
Such scratch work is a lot of fun for me 😉
10 September 2022, 14:28
Thank you mates!
David, the Nieuports do not have this wooden layer on top, as visible on my Nieuport 11
Nieuport Ni-11 | Project by bughunter (1:48)
It will evolve into a Morane-Saulnier 😉
10 September 2022, 18:50
Thank you very much for your comments and likes mates!
Now I was wondering if I can spray Alclad metallic paint on decals without protective coat? Why the hell you want to do that?
The answer are the pictures 21 and 22. Note: the difference is only the direction of light during photography!
The upper side will later be painted in camouflage colours together with the fuselage. And yes, that is the first kit part involved here 😉
11 September 2022, 10:16
Yes David, full hit! I linked already the existing project to this album.
It has been on my wish list to build this kit for a long time, but the Gnome N 160hp is a rotary engine which is not on the Small Stuff product list. However, Eduard released this type as a 3D print in the context of the new Camel kit 👍 So I bought some of these engines for other projects than Camels 😉
11 September 2022, 12:14
A little late, but taking a seat and watching with interest. Fantastic work so far!
11 September 2022, 12:38
You are welcome Robert! You are not late, yesterday I put the the first pictures online 😉
11 September 2022, 12:53
Q. When you attach the aerilons are they movable? or do you glue them in place ?
11 September 2022, 12:59
The ailerons (and the control surfaces at the tail) are removed only for a more realistic look. Modern kits provides them often as individual parts. So I add hinges, but keep them separate for easier painting and handling. Finally I will glue them into a non-straight position matching the stick position in the cockpit.
11 September 2022, 13:06
Just uploaded a picture of my cockpit on a reference picture (yesterday it failed, so I took a new shot today).
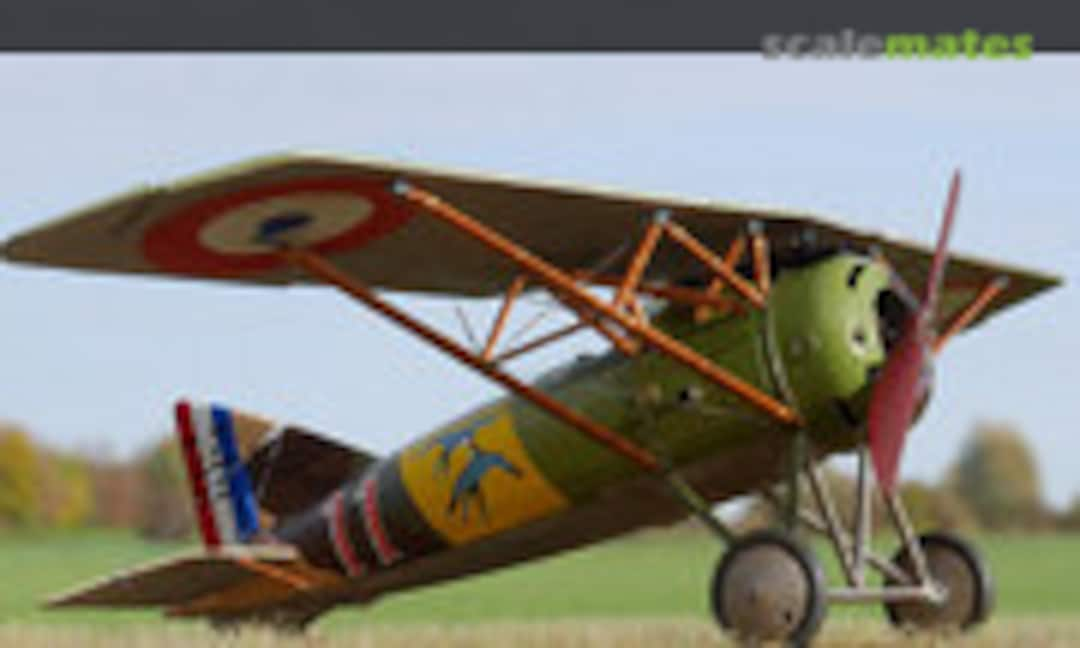
There was no survivor of this aircraft type, but a framework of the fuselage. So this was enhanced with new parts according to drawings to an new aircraft in airworthiness condition. First flight 1993.
storage.mfa.free.fr/MoraneAIuk.html
11 September 2022, 18:27
Added today pictures of the airscrew made again from real wood. The metal hub plates are not yet added.
Creating a new propeller is definitely necessary here, because the two airscrews from the kit turn the wrong way round 🙁
12 September 2022, 16:23
Thank you very much mates!
After I know the final position of the engine I will add a little piece of tubing in the middle of the airscrew.
13 September 2022, 15:31
WOW! Next step is a fully scratch built aircraft. 🙂
I know you can do it - for Bughunter it'll be easy.
13 September 2022, 16:16
You'll laugh, I really have an idea. In my bookcase there is a book with great coloured 3D views and plans about a rare WWI aircraft that has no chance of being realised as a kit. Even with a rotary engine! 😉 That would be a good candidate for a scratch build.
But I really have to think about how to realise it, because it's not that easy. A few experiments have already failed.
But until then, I still have a lot of kits to build from stash!
13 September 2022, 16:51
If it was easy, it wouldn't be worth doing. Go for it Frank, you've got the skills. 🙂
14 September 2022, 10:06
The new batch of pictures shows my new aluminium cowling. My previous created cowlings are polished in natur metal, but here I need to paint it. I experimented with Hammerite "Spezial Haftgrund" and Gunze Mr. Metal Primer. Since the Gunze product will dry to a thin film I think I will go with that one.
14 September 2022, 12:03
Hi Bughunter, it's looking beautiful. The cowling especially... really nice! Looking forward to seeing more.
Cheers! F_IV aka Feathered_IV 🙂
14 September 2022, 13:38
Thank you very much for such nice words, from the master of the smallest biplanes 👍
14 September 2022, 18:52
I've said it before - at some point you won't need kits any more. 😄 Great work! 👍
15 September 2022, 13:35
Thank you mates!
Erik, some small parts are somehow easy, but wings and fuselage from a kit are always great help.
15 September 2022, 15:02
I'm not 100% sure about the next created parts of pic 41-43.
There were at least three main variants: the MoS.27C1 fighter with one Vickers, the MoS.29C1 with two Vickers MGs (both with typically the 150hp Gnome N engine) and an unarmed MoS.30C1 trainer (with 110hp Le Rhone engine).
The rebuilt flying aircraft (using original parts) is using a Clerget rotary. I will do the MoS.29C1.
So the different engines and variants causes different panel layouts and intakes, where the assignment to the variants is not clear. But since I've mostly had round intake tubes in the showcase so far, I'm taking the artistic freedom and using the beautiful variant with the oval intakes here.
15 September 2022, 15:59
What?! A build album with no plastic in sight until pic 14… must be a Bughunter extravaganza! Following, of course 🙂 👍
16 September 2022, 12:11
Thank you Kyle! I'm glad that you love it!
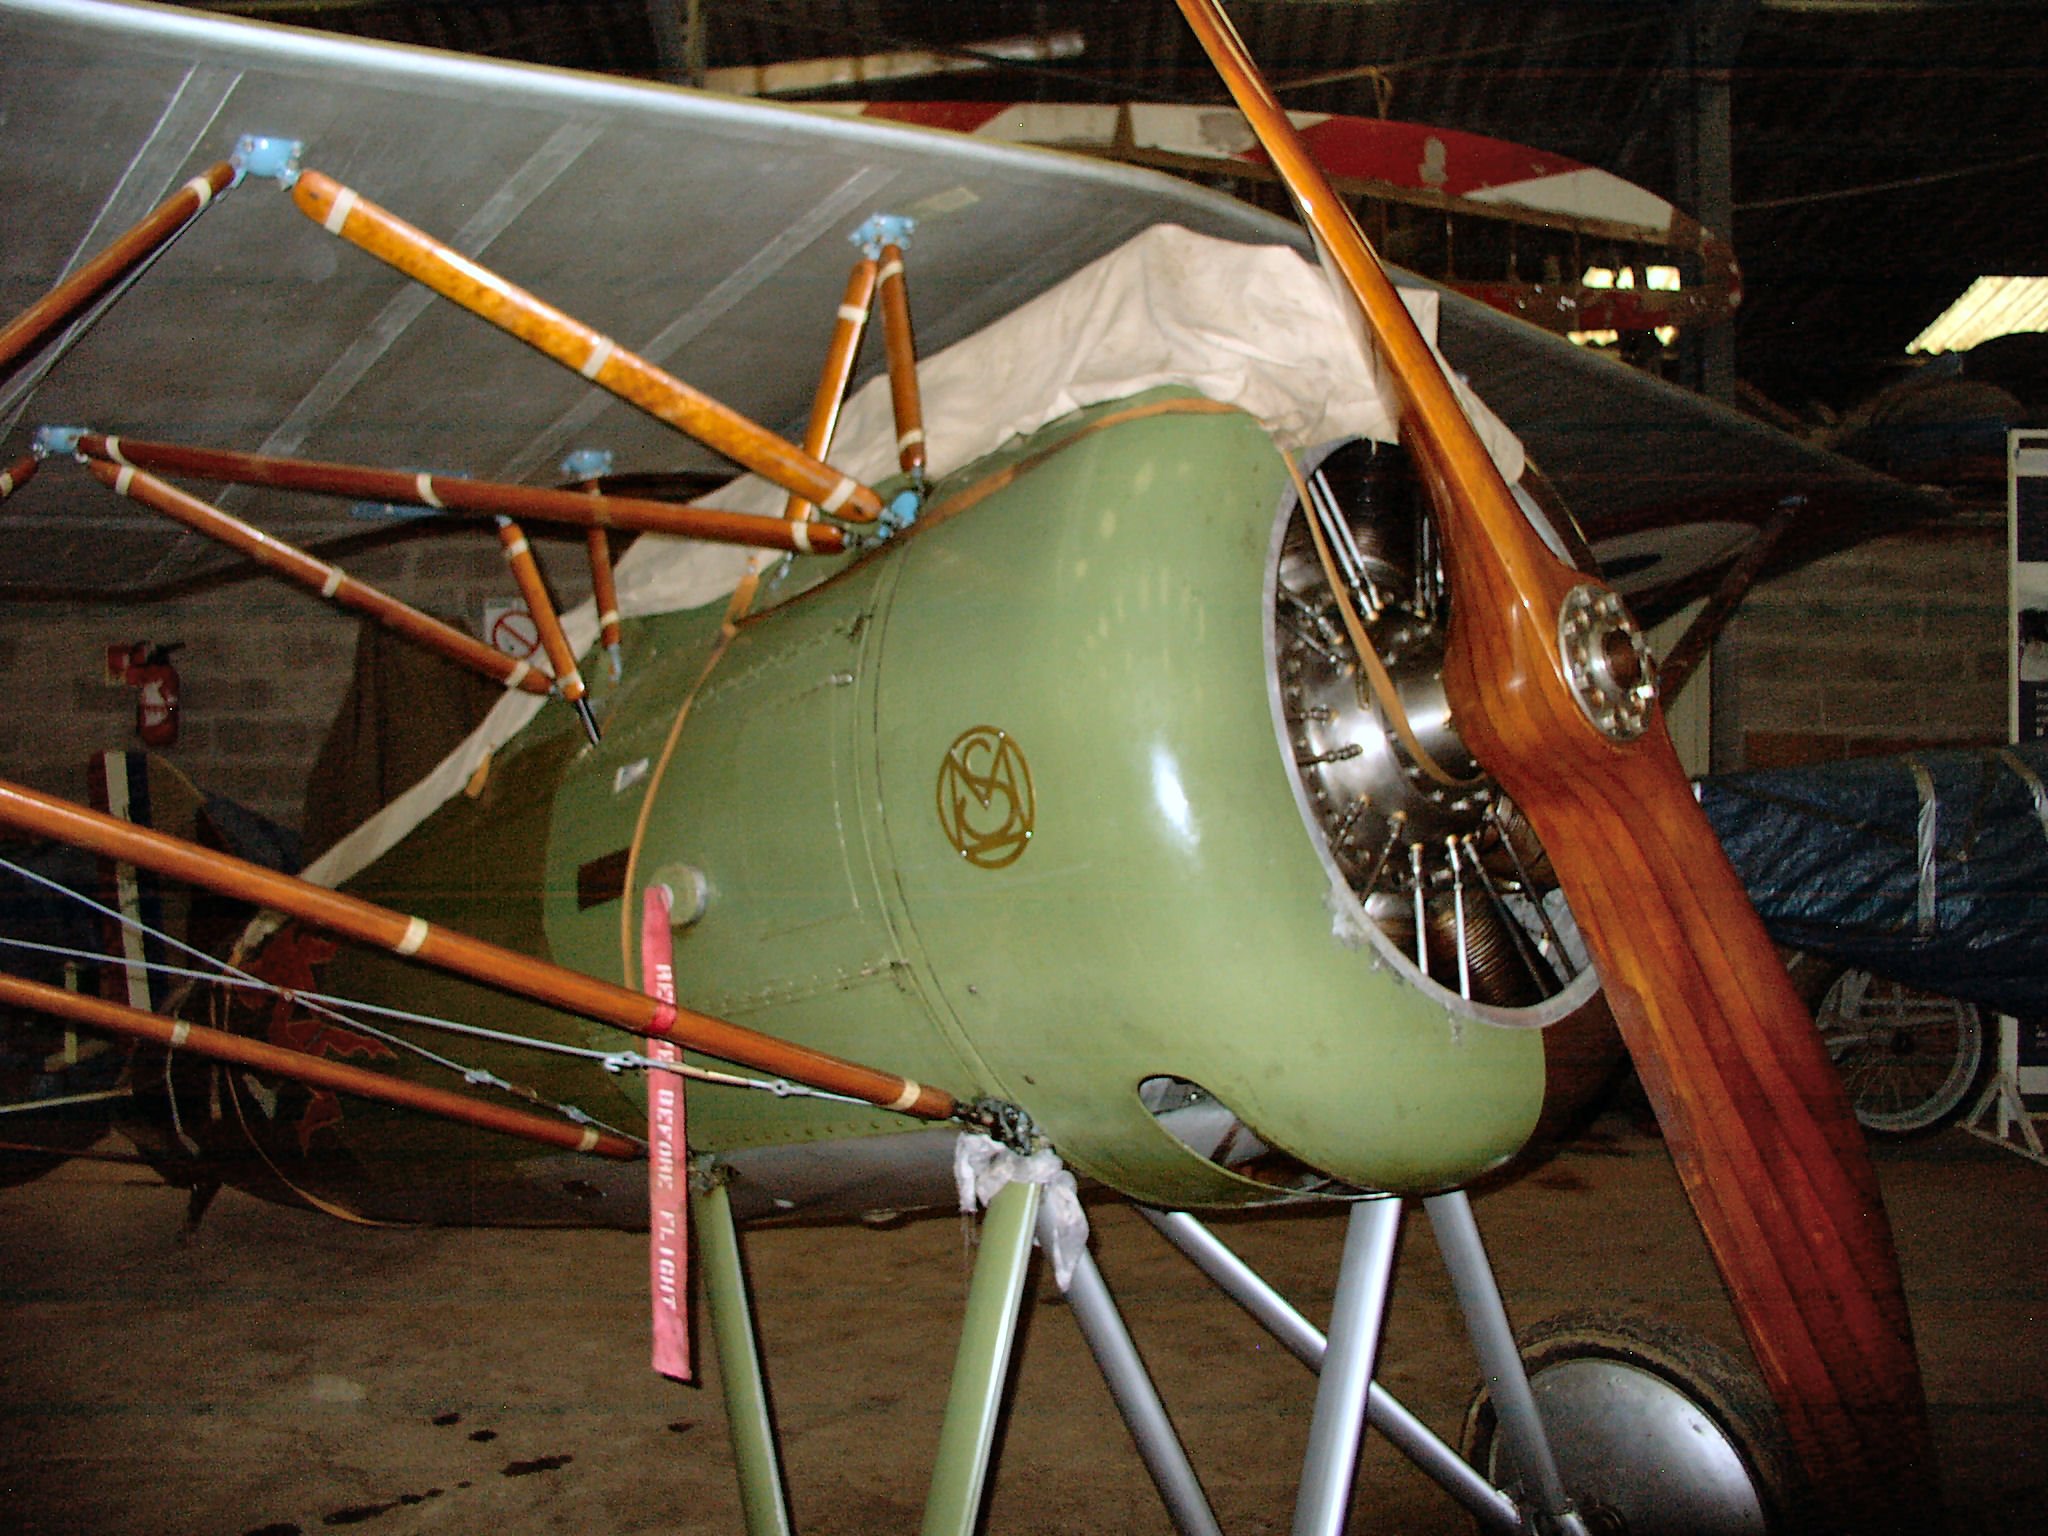
Sometime I ask myself, if this is going to far ... but what me invited to this build was the walk around on Primeportal linked here in SM, especially the struts. There is a lot of work in front of me!!!
[img1]

16 September 2022, 12:12
Oh, I missed your post Alec! Welcome to the show!
To be fair: the level indicators on picture 4 are plastic and not glass 😉
16 September 2022, 12:16
If I haven't forgotten anything, the cockpit is complete. I have just uploaded more photos.
16 September 2022, 17:49
Incredible job and very inspiring! The cockpit looks very complete.
Small omissions are easy to do though. I spent 8 months doing a DH.2 from scratch and at the end realised I forgot to make a control stick.. 😅
17 September 2022, 08:44
That isn't surprising for one of your builds F_IV. In 1/144 you have to have pretty good eyesight to see the aircraft let alone the details. 😄
17 September 2022, 08:59
As usual a work of art in the making. I admire your skills and talent bughunter. Always a pleasure to see your ww1 models.
17 September 2022, 10:12
Great work as we all expected from you, since i started same kit and stuck with parasol wing , can't wait for that part to come,all that kit's struts and suports are a bit hard to handle, they are to small to drill and a very fragile. I supose, as i follow your work for a time, that you are planing a scratch build there,am I correct?
17 September 2022, 13:09
Oh yes, I will definitely not use the kit struts! The struts will be done with a brass core, as developed during the DH-2 build this year. I'm not sure yet if I'm doing the struts and glue the structure together, or soldering a brass framework and plate that with wood, at least for the main struts.
In this respect, this type of aircraft is really a challenge, but has the potential to look absolutely impressive if the build succeeds. Of course I will not paint the struts so it should look like the actual flying one (see walk around above). If you want to have it easier: 100 years ago on some planes the struts were painted in the lower surface color.
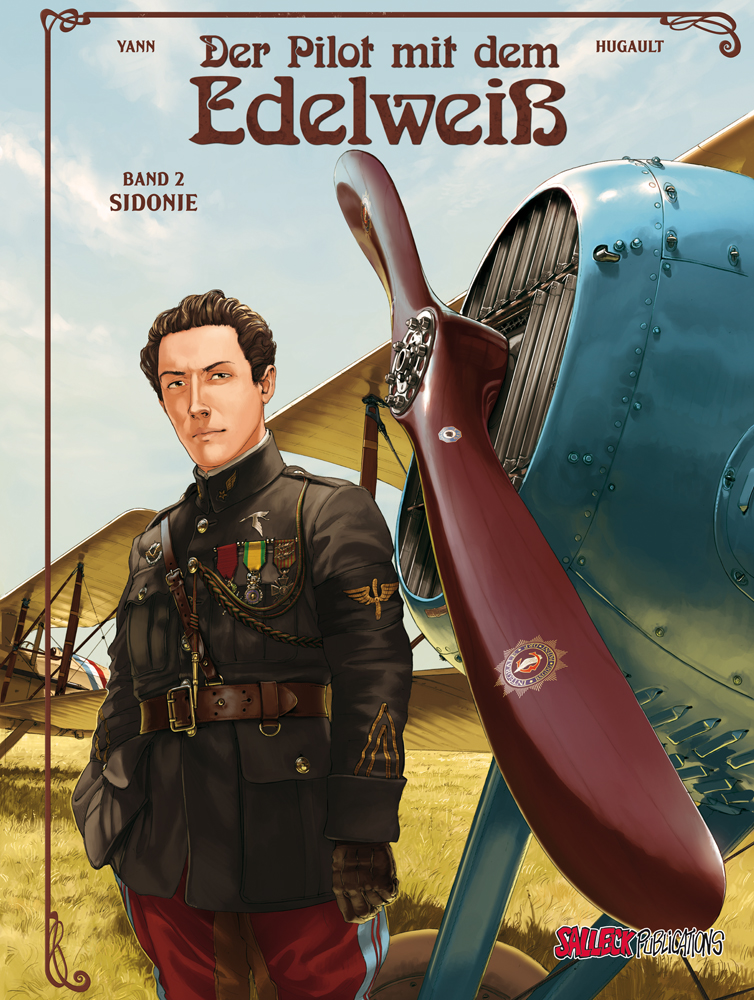
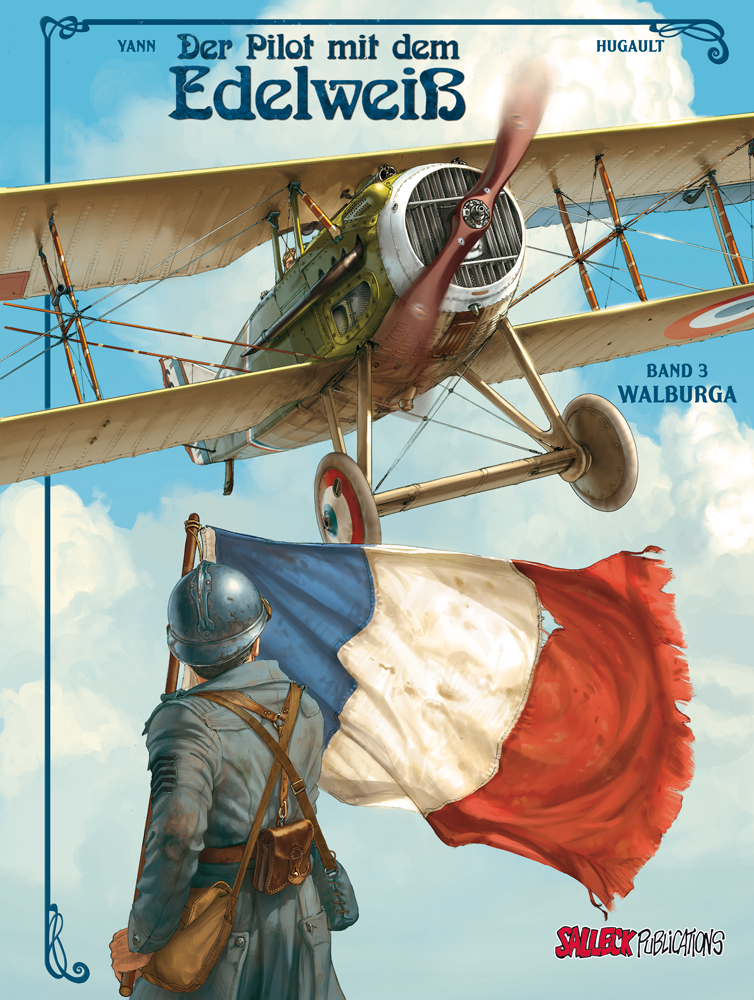
BTW: There is a really wounderful painted WWI comic in 3 books by Roman Hugault "Der Pilot mit dem Edelweiß". In the 3rd book "Walburga" this plane plays an important role and is wonderfully drawn on 4 pages! And yes, also with wooden struts 👍
[img1]
[img2]
[img3]

17 September 2022, 13:43
Today some (damn small!) scratch work in plastic. The struts has some special mount points on the wing. The kit has nothing like that.
[img1]
I was just flowing so nicely and wanted to mount the four outer ones as well. Just in time I noticed that the cockades were still missing and stopped early enough 😉
18 September 2022, 20:22
That's damn impressive work on those mounting points Frank.
Do those single blade nippers leave a completely flat surface/cut?
19 September 2022, 13:17
Thank you very much gorby! With every working step I lost one/some of those little buggers, but luckily I started with enough parts.
To gut the heads I used my sprue cutting tool (please note: there is a version 3.0 out now)
Single Blade Nipper 2.0 (DSPIAE ST-A 2.0, No)
Yes, it leaves a flat surface since it cuts only from one side, please see the linked reviews.
")
But in my case I was not able to cut them in same thickness, so I sanded them a bit further (moved on sanding paper with finger head).
I experimented a bit to create this mounts, until I was happy with the result.
19 September 2022, 15:49
Thanks Frank. Those cutters are a bit too far out of my budget. I might be able to afford them if it wasn't for all that packaging. 😄
19 September 2022, 16:15
I had bought mine in 2019, since then the price has almost doubled on ebay! + tax and customs on top.
Very bad with the logistic problems and inflation. Some importer in NL mentioned on his page, that the company in China was affected by lock downs and this year no cutters were produced. May be the prices are going down a bit if we come into normal business again.
BTW about packaging: DSPIAE had problems with cheap illegal copies, so there were special markings on the box to detect a real product.
19 September 2022, 16:34
Now the cockades are done! That was a lot of masking work. Special care was needed due to the decals below.
19 September 2022, 17:28
I am a bit pissed off!
There was a colour research by a French modeler, but I had a totally different result. What the hell happened? Gunze changed a colour! There are two different H58 !!! The new one is much brighter, which has of course ruined the mixing guide.
24 September 2022, 10:23
Deep breath, Bughunter..... I'm sure your experienced 'eye' will guide you.
24 September 2022, 11:14
Thank you Bruce! After the color looks the strange I looked into the famous internet and found this picture on britmodeller. I'm not the first to get screwed over. [img1]

24 September 2022, 11:55
Amazing work, sir!
Love it all but the cowling work is beautiful, and the soldering at that size, wow, that's some skill.
25 September 2022, 13:11
Thank you John! Oh yes, soldering is pure fun for me 😉
In my projects you can find also some of the nice Eduard Stripdown planes in 1:72, which are soldered too.
25 September 2022, 14:13
The tail skid: Well, was it probably made of wood? Or tubular steel? I already have many in the display case. You can't usually make out anything under the dark tail in reference pictures, but several of today's pictures show a perforated hollow profile. That's something different, even if only today's machines might have it.
And yes, 50% of the camouflage painting is done 😉
5 October 2022, 18:39
Step by step, she comes to life ... Pure perfection in your creation's every component. As always, so much to enjoy 🙂👍
5 October 2022, 19:24
Thank you Bruce!
Pure perfection: at least not for the paint job! Such camouflage painting is another thing I have never done.
Today I ran into trouble: I masked off the light green with "Mr Maskol" and applied the next colour. Afterwards I removed it again, but the masking fluid attacked the 24-hour-old paint underneath within half an hour! Luckily there will be a decal later.
I had a small hope to get this plane ready for the exhibition in Ried next week, but it will be very tight! Already because of the drying times of the colours, decals etc.
6 October 2022, 16:28
I agree with B. Huxtable - a joy to watch and see how it all comes together perfect 👍 Thx for the show!
9 October 2022, 20:36
Thanks Juergen! See you next week in Ried 👍 This bird will also be there, but may be not yet complete.
I think I should take care of the undercarriage so that the thing can get on its own feet. I experimented with it before my summer holiday, but I didn't like the result yet.
9 October 2022, 20:46
My new possibly masterpiece now has an appealing and robust undercarriage that matches the original. That was some heavy special work (after some failed ideas) based on a contemporary sketch in the Datafile: [img1]
See also the walkaround pics in comparison:
[img1]
[img2]


11 October 2022, 19:26
Thank you gorby! I wasn't sure if my new pictures were visible until your response.
That was the most complicated undercarriage I have ever done. Three tries to solve this problem failed, but I learned with every try to do the final one 😉
12 October 2022, 17:17
Thx Christian! I guess you are not in Ried this Weekend? Then you have to wait until March for the EME in Lingen to see this bird in real 😉
12 October 2022, 19:53
Neat scratch building. The painting is also coming along nicely.
12 October 2022, 21:05
Thank you Villiers! The painting could be done better, I need to improve here. All the many colour borders allow for a large number of faults. I have never made such camouflage painting.
May be I have another update later today.
13 October 2022, 12:37
Wing and fuselage are married now. That's the look I was hoping for! 👍
13 October 2022, 18:58
Loooking all great - can't wait to see the bird in real, See you tomorrow at the show.
14 October 2022, 06:55
I am glad that you like it too!
All models are safely packed now. Juergen, see you tomorrow at a great show 👍
14 October 2022, 13:42
She is a thing of great beauty, in this fine livery 🙂 I'm sure she will draw lots of attention at the show. Have a great day out, both of you 🙂
14 October 2022, 14:09
Thank you mates!
@Neuling Not in this unfinished state as Work In Progress, may be next year. At least the jury would notice the missing tailplane 😉
14 October 2022, 17:57
Thank you very much Chris and Elias!
Chris, maybe I am insane, but I suffer from AMS (Advanced Modeling Syndrome). And it gets worse with every model!
As I'm working on the struts my wife is saying I'm a "Streber" (in German language). That means someone is working on struts but also swotter 😉
18 October 2022, 19:05
Thank you Kyle!
What is typically part of an aircraft of this era that puts many modellers off? Correct, the rigging!
I'm happy, that this is done now.
23 October 2022, 17:21
Everything is as should be, when Mr. Bughunter make models. Thank you for a god reference, now i should try to get closest to your work as i can . Your work is a great inspiration for WWI modelers, keep it going!!
24 October 2022, 17:38
It's always a pleasure to read you nice comments mates 👍 Thanks!
gorby, the great look of this aircraft with the wooden struts in the walkaround appealed to me and made me start this project.
Predrag, that is a high praise, thx! But even that could be improved, I need to improve my masking and painting skills when it comes to those camouflage livres. The wing is ok as I could used masks (cutting plotter), but the fuselage is not perfect. I have now masking putty, may be this works better.
But the main modeling rule is still valid: there is no perfect model, and the next one will be better. 😉
24 October 2022, 19:34
When I prepared the wing for the rib bands some time ago, I had removed moulded details - the details of the strut holders on the upper side. Actually my model should also show these details, if even already shown in the kit.
I had then also shaped 12 metal sheets as shown in a photo of an original wing, but they had become too large (already the hole too large) and I did not attach them. I didn't feel like making them again and continued the construction.
Now the AMS has won and I have started another attempt ...
And yes, this would have been easier before the wing was mounted than on the finished model, but what one doesn't do for beautiful details 😉
25 October 2022, 17:14
Thank you gorby and Alec!
Now some attention to the tail and I'm done with details. Then only a bit of paint for weathering etc and this project come to the end.
26 October 2022, 18:45
It is done! 😎 It was a very special and extremely work intensive project, but it was worth it, because I am happy with the result.
The final pictures for the gallery album will hopefully follow in the next few days, if there is good weather and I have time.
Thank you very much for following and your comments!
27 October 2022, 18:41
Unbelievable what you have conjured up again in terms of details 👍
28 October 2022, 08:18
Wow mates, thank you very much for your nice comments!
Don't miss the chance to see the new reference pictures, äh, no , my model outdoor pictures, which I uploaded to a new album: Morane-Saulnier Type AI | Album by bughunter (1:48)
28 October 2022, 16:46
A masterpiece by the man who utilizes real trees as "3D printers" for his modeling parts... 😉 👍 👍 👍
Probably worth a book, so many techniques in this one - fascinating work, and again this unique handwriting where the super-detail and the whole are in this rare perfect balance...
True top masterclass + the reason why Chuck Norris avoids building WWI scale models... 😉
17 March 2023, 19:34
Thank you very much!
Slavo, your wonderful comment put a smile on my face! 👍
19 March 2023, 21:10
Album info
Tried a scratched little instrument panel and cockpit parts. Scale is 1:48, and a WWI fighter.