

Scalemates F-14 Tomcat Group build 2020


Next up: Seeing as I HAVE to finish the wings, before I can finish gluing the big hull parts, I might as well start looking at cutting the plastic to make the slats and the flaps. Probably somewhat simplified, not sure.


I ordered some Kitty Hawk supercarrier 'tie downs', for USS America, which looks like a simple cross, I hope I will have enough of them. I ordered two packs, 220 pcs. with two packs (I checked the amount just now).
I was thinking, I could maybe try out what some other guy on Scalemated did, using fine sand paper for the carrier deck. 🙂 Hopefully making holes in the sandpaper is not too difficult, by punching tools.
I don't yet know how many tie downs " would be required" for covering this portion of the deck.
Hm, I just checked, if using Evergreen sheet styrene, they cover the whole width, but I would need four of them, which isn't too bad. I could use a wooden board or something I guess, but I would have to make a hole in it for the jet blast deflector cavity. I should probably use a solid base anyway under any styrene to make it all more solid and good and flat. Hm, maybe I could use some foam in between a thin wooden plate and styrene on top, assuming the foam plate is actually flat.


Beige (nose) + Off white + USAF Light Grey


I am not sure, but I suspect that polishing too dry, creates some heat that disforms the platic ever so subtly, so I will try keep it more wet. Also, I made sure to NOT try use some really coarse grit on the sanding sponges, or I would maybe neverhave cleared the streaks.


The bubbles is perhaps because of there being TWO layers of liquid glass. I used Microscale Industries' 'Micro Kristal Klear' to create the glass, but I ended up using two layers, because I needed the goo to rise above the top so that I can sand that down flush with the plastic. Unfortunately, there are some bubbles. I might end up re-doing this, unsure. Only looks bad for this one of four nav light glass. Word of warning: I don't actually know if it is possible to sand down this stuff.

I used Microscale Industries' 'Micro Kristal Klear' to create the glass, but I ended up using two layers, because I needed the goo to rise above the top so that I can sand that down flush with the plastic. Btw, I had no idea there was this tiny bubble in this section, until I took a photo of it with the macro setting. I suspect my final photos will end up being brutal, but ofc, I should make sure to take some photos way off to hide the flaws for some of the photos at least. :]


The four nav lights filled with liquid glass was ripped out. I'll try again, until I get some more liquid glass that is more flush with the plastic. This stuff doesn't seem to dry hard and can't be sanded down it seems.


Comments
I have an idea for this group build project: Scratch build a portion of the deck incl. the blast shield. Should be easy enough. And just large enough to cover the model. Also, that way, the Tomcat is lowered into launch position which should make the model more interesting to look at. I will try find some replacement decals, as the typcial US decals in the kit is not in register. I could airbrush over the decals and fix it, but seems like maybe a hassle, unsure. Unfortunately, there are no detailing on the wings, for slats and flaps in this cheaper Acadmey kit. Nose also has to be fixed, and some minor re-scribing.
Loadout: 4 phoenix + 2 sidewinder + 2 sparrow missiles + 2 fuel tanks
Cockpit closed. Good thing the kit has two pilots included with the model.
Will try to incorporate some other minor fixes if I figure that stuff out.
Sounds like an ambitious plan, I am also pondering if I should do a cat on the jump...
Be warned though, the fit of this kit might give you nightmares😉
taking a seat of course
I will just dip the whole thing in a bucket of putty, and voila!
Feel free to add any tips btw. I am aware of some issues, but haven't yet started on this kit.
I am tempted to buy some aftermarket nozzles, in photo etch. I already have the Aires cockpit, and some nice wheels where you can paint the wheel cap separately. 🙂 Ideally I would have wanted some photo etch for the external part, but I don't think I will bother.
Also.. it is 10. May and it is snowing. 🙂
Oh yeah Treehugger is in the building...already curious for your idea to make a scratchbuild carrier deck. My plan is also to display it on carrier deck but my first struggle is for start, whether the canopy open or closed...?
Btw, I figured out that the ramp behind the jet is called the "jet blast deflector", and that the "shoe" is called a "shuttle" that pulls on the front wheels to catapult the jet into the air.
There is a nice Italeri 1:72 kit of all of this but wrong scale: Carrier deck section (Italeri 1326, 1:72)
")
I did find some interesting photos/drawings on the Shapeways website via image search, for 1:48 scale deck with dimensions I think, so that will be helpful:
shapeways.com/produc..for-modern-carrier-1
I found two resin Aim-9L missiles I can add to the project. And I think I can maybe cut off the flaps to make them angled down, but adding slats is too tricky I think.
This kit from Kinetic contains a jet blast deflector in 1/48 scale.
Nimitz Deck (Kinetic K48057, 1:48)
")
Oh wow I had no idea there was such a Kinetic kit. Out of my reach though.
I think now I can probably scratch build the slats, because the wing is basically two large pieces, making it easy to split the plastic top/bottom. 🙂
Have to research:
Take off configuration for F-14A, with regard to stabilizer fins (or whatever), flaps, slats and front landing gear, and whatever else.
The nose gear strut actually compresses when the bird is on the cat. And the stabalitors are usually in the full up position. Flaps and slats are extended, Nice cut job on the flaps, looking nice.
Phoenix discussion for experts here... up to 80's, Tomcats were equipped with AIM-54A, which is all white, with the radome in light gray. Questions:
1. I've seen also full white AIM-54A's... is there a system behind or just photo issue?
2. I've seen AIM-54A's with full blue stripes, but I think they were also with brown-yellow. Or no? Help pls... Is there a standard?
Blue stripes are for training/dummy missiles. Brown and yellow stripes denote a live (and deadly) missile. Brown for a real warhead and yellow for a real rocket motor present.
Thanks, Maciej, I was thinking it was something like that, but didn't know about the warhead/motor stripes. 👍
Btw, I have learned that there is a C variant that was used long time ago I think, but decals show this F-14A to be using the A variant, so I guess I'll be sticking to the A variant. I've tried figuring out if there is any noticeable difference between the A and C version, but I couldn't find any or I missed it. 🙂
I will replace all the fins on the Phoenix missiles, sand down the aweful bumpy parts to something much "thinner", and I will add a rotating joint for the rear fins, and fill and drill out the end, and add sprue goo to create this concave shape I think I've seen in photos (some membrane perhaps). The membrane was colored brownish red, but I only saw that in one photo. I think I will also try fill the panel lines on the missiles as they don't align well on the two halves anyway.
Pic 14+15: Oh the memories, oh the nightmares😉 But looks like you're having fun with it, the fun in overcoming obstacles I guess 🙂
pic 19: Just to confirm: I was to do the same, made a makeshift shim out of plasticard to elongate the nose after an article I read about it being too short. It looked weird. Made a direct comparison and it was the perfect length oob, just a bit too fat. Sanded the bottom just as you noticed and was quite satisfied. Really enjoy watching your tinkering 👍
Wow you are really giving this kit a lot of patience and attention! I will watch this with interest. As for your uneven canopy situation. I do not think it would be possible to sand down. There are guides on how to cast and vacuform a new canopy which would definitely be a lot less work. Also I believe there are vacuformed canopies available on the market.
I have only been able to find one product, so not much to choose from it seems: hpmhobbies.com/falco..-4-accessories-1-48/ (not in stock it seems)
This produc linked above is a pack of canopies. I think I can make it fit, even though it says for Hasegawa. I don't like how little info there is on this. :| Anyone know of any other vacuum canopy in 1:48 for the Tomcat?
avax-models.cz/detai..vacu-canopy-for-has/
this one is for HAS too but in stock and very cheap. Let me know in PM if they do not ship to your country and I can order it here and send it to you (guess the shipping would be a few times the cost of the part tho)
Wow, that is a lot of work. But looks like you are getting there with it. I have built 2 of those kits, I do not remember having huge ejector pin marks in the intakes. How I did the wins, was I cut the "gears" off and notched the bottom where the hole is that slips over the wing mounting post. That way I was able to finish the fuselage and wings separately. Then when all painting and decaling was done I just slid the wing in until it snapped into place over the mounting pin. They have never come loose.
Not sure what you meant, did you simply shorten that huge wing hinge shape inside the kit, so that you could just snap the wings back in at the end?
Btw, I have to make sure I test fit the wings before trying something like that. Would be bad if I tried to get the wings in, but those "saw tooth" shapes not blending properly.
Oh, I see now there are two more pins on the inside, I wonder what those are for. I guess I'll find out now that I will be test fitting the wings.
I cut those saw tooth gears off, and cut a notch in the bottom part of the wing root where the big hole is where the wing fits over the wing pivot pins. I was then able to slide the wing into position over that pin once painting and decaling was done. I assembeled the fuselage minus the wings.
I can say only one thing: You are brave tackling that Academy kit! 😮
It is fun tinkering with this kit. 🙂
Btw, I found an aftermarket 1:48 carrier deck kit, but too pricey: USN Nimitz Deck (Skunkmodels 48020, 1:48)
")
I will be building the same kit. Watching your improvements with much interest.
This is what I love about group builds... all those lovely ideas just lounging around, ready to be scooped up. 😄
I found photos (apparently) showing an all white intake, so that should make it easier to paint the two big air intakes. A little difficult finding relevant photos.
I drilled out the holes for the four nav lights around the front root of the wings, but.. people at Academy don't have a sense of symmetry, so they didn't bother place the lights symmetrical top/bottom. :| I will correct that. Not sure how to create the clear parts as the shape required is more elaborate than a circule or square.
Btw, an illustration I found seem to show that the nose gear can be 100% compressed at launch, presumably the moment the jet flies forwards, but maybe that is too much, and then heh the shiny bit wouldn't show.
I also caved in recently, when buying some other stuff, it was too tempting, and bought four Eduard Aim-54A missiles. I think I deformed too much of the rear to make it fun fixing the kit missiles, when I added so much sprue goo into the plastic cavity of the missiles. 🙂
I must say that you are very optimistic about a kit with so many flaws ... I am convinced of your craftsmanship and dedication that it will become a stunner...👍
I don't quite like your use of ellipsis there, but hopefully you think I can make it look good and not obviously terrible. 😄
I have high confidence of fixing this, tricky part imo is not screwing up wiht the paint job or other things. Like, the re-shaped canopy can't simply be glued on, because the plastic edge is so thin at the front, glue would likely creep up inside or something unexpected would happen I am sure. I have to be very careful when gluing that thinned front canopy.
The not-that-great panel lines is a problem, will have to see if I can either fix it, or at least scribe some of the lines to make things look better.
Don't get me wrong my friend, I respect your work and I enjoy good builders who have a lot of experience to make imperfections a success!
I really enjoy watching this, really good job on improving the kit! 👍 I used clear epoxy for the nav lights, but kept them seperate. Drilled through and closed the hole on the inside with sheet.
The Sparrow fin is indeed in a slot inside the pylon there
The D Tomcat uses the same hull and tanks, so no prob using this as reference 🙂
The Tomcat "kneels" down after entering position above the cat, the front gear is fully compressed, see here at 3:20 after he makes the "smack down" motion
Youtube Video

Thanks for the feedback! Though I can see at 4:20 that one of the F-14's nose gear aren't fully compressed, seems the shiny metal isn't visible when viewed directly sideway, but can be seen from the front apparently. I can see a little bit of shiny metal. Anyway, I get to use some metal on the rear landing gear, and then I guess a little bit on the nose gear.
A project by Bernhard Schrock gave me an idea for the nav lights. I could simplly use a round piece of clear plastic, and then.. add a shaped piece of masking tape to shape the light. 😄
aires cockpits looks simply amazing... but they tend to be a hell to fit... my experience with them? they look great, but you need sanding, sanding and more sanding..... and the more
Putting the Aries cockpit in my Lighting was a nightmare. I like Neo Mega cockpits, they almost drop right in.
In my limited experience, preparing the resin parts is fairly trivial but one must be careful. One really have to use the right tools, like a thin saw intended for such purpose (I think the saw I have is for sawing resin figures' feet off the molded base or something).
A challenge, and some tedious work with resin canopies, seems to be this work that goes into cutting away the excess plastic on the model, such that you get to replace the plastic with resin detailing. Little by little, is my advice, and optionally glue styrene back on if you end up with gaps, and try again.
I think I will paint the major resin parts separately, and then use superglue to fit them all together before installing into the main kit part. Obviously, dry fitting is important to avoid making a mistake.
I just remembered, I had to sand some of the larger Aires parts thinner, to fit inside the largest resin cockpit part. I believe it is common that resin tend to shrink a little, so maybe difficult to always make all resin parts fit with themselves.
@ Spanjaard, I think they are. They just don't do quite as many as Aries, but the ones they do are nice and usually about 1/2 the price or less than Aries. I used one on my Viggen, and I have several for my SU-27's both single and twin seat. As well as for my Jaguar's Mirage F-1's and 2000's.
Looks like I am a little late to the party, but what a cool build this is! Very nice progress so far, and I really enjoy reading your album comments as you go along. I think I will stick around here for awhile and watch the show go on!
Looking at these pictures, the 1:72 2019 tool version of academy Cat is much more detailed and better fitting than this...
You are doing an excellent job on this kit. Puts mine to shame. I noticed in the reference pictures, the blue on the vertical fins is quite a bit lighter than the kit decals. I did not notice this before building mine.
Interesting. I will check that out Clifford. 🙂 I have been wondering if I should try airbrush on some of the decal patterns, because the decals aren't very good, but good enough I guess.
According to a website, there is the ALQ-126 (ECM) Mid- & High-Band Antennas, with two small bulbs on either side of the intakes, but I haven't figure out of maybe some of the earlier F-14A's didn't have them, so I left them on for now. I will be using the old style nose tip, which doesn't stick out.
Source: anft.net/f-14/f14-detail-ecmfairings.htm
As for the nav lights on the sides, four of them, I am not sure, but I think I will use some liquid glass, and then sand the surface flush, then mask it off when airbrushing. Hopefully it will look nice.
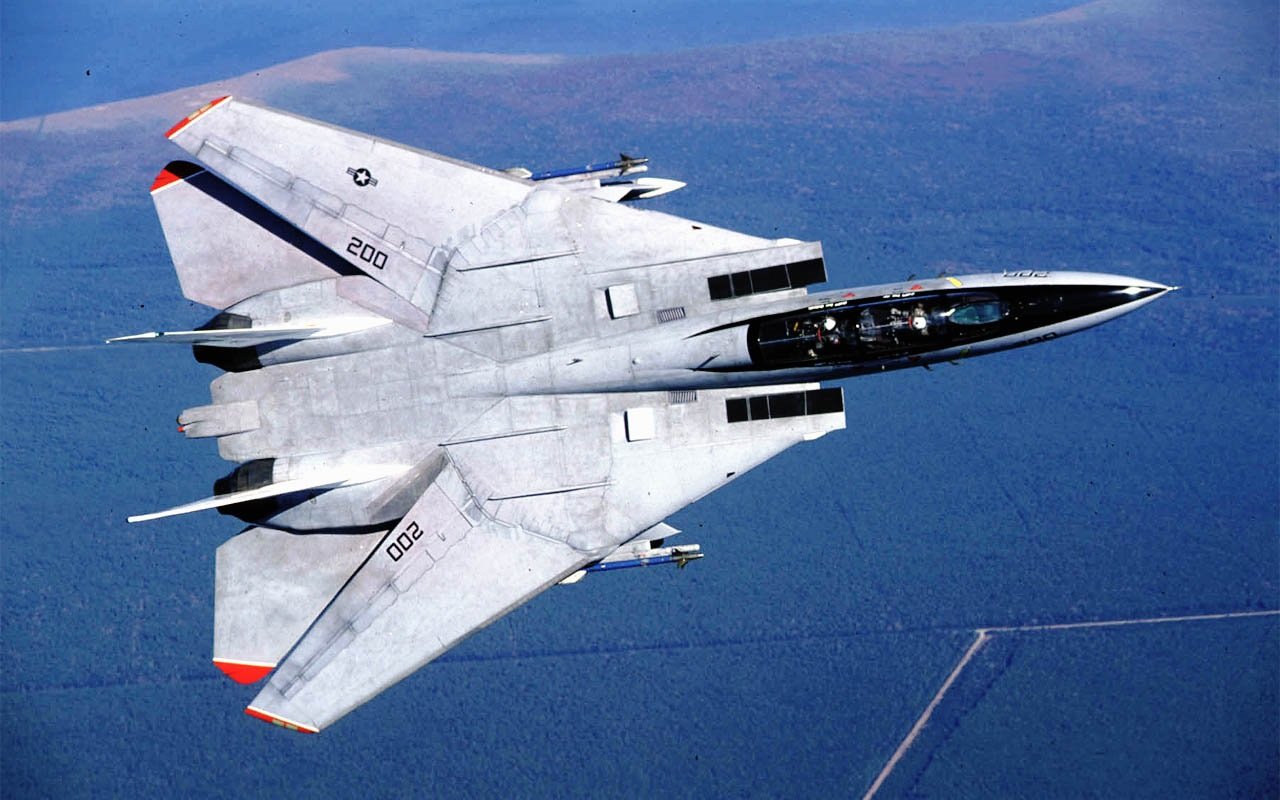
The shape of the navigation lights is different on the top compared to the bottom. The bottom shape is a half hexagonal while the top ones have one corner covered by sheet metal. Might have something to do with blinding the crew when they look over their shoulders.
Oh, interesting. Hm, too late to fix that now, but.. I guess I can just fix it with masking tape, and re-shape it with masking tape when I airbrush primer over it.
I tried to find a good photo of the top nav lights. This was the best I found: [img1]
I just used some 'Micro Kristal Klear' to create the clear parts for the four nav lights. I wonder if this stuff will sand down nicely, or not. 🙂
Hm, I just jammed a blade into one of the glass parts I need to re-do, but it was soft. I wonder how long I have to wait for this to go hard, if ever. Luckily, ripping out the soft clear goo was easy enough, leaving no residue. I applied the goo with a pointy wooden rod of sorts.
Product in question: ibb.co/wC64t63 (image upload)
You are really teaching the kit how a Tomcat should look like... And having good success at that so far!😉 👍
You are too kind. 🙂 I just can't try correct everything, nor do I want to for this cheap'ish kit.
I think the F-14 wings with all its details is typically problematic with such kits, or so is my impression. I will try make the top nav lights, look correct, seems fairly simple with simple masking.
Oh, some progress on the academy front line! Looks like a nice light solution 👍 though I highly doubt this stuff will be sand-able...
An idea might be to glue a silver sheet from the inside, might support the "glass" and also give a nice glow to the light.
(btw, as I just noticed the bumpy part in pic 36, I believe the early cats didnt have that antenna, I forgot that on mine, so just saying 🙂 )
First, apologies to everyone for this slow build. 🙂 I am doing some garden stuff and also camping, and gaming and relaxing.
Yes, I thought I could add silver on the inside of the nav lights, seems simpler than adding a sheet of something. The green and red color is afaik fairly dark, so I am guessing the silvery part won't be much noticable.
If the liquid glass isn't sandable. :|, I will have to yank them out and try inserting hard clear plastic sanded into shape. I hope I don't have to do that, might be simple, but seems fairly tedious.
I've been wondering about the ECM pods, the four small bumps. I found only one photo of them missing, but couldn't figure out if these were actually missing on the early F-14A's.
I will consider removing them, but I wish I knew more about this. No big deal, but I just wish I knew more about that. As mentioned, I am using the early nose thingy, so I should perhaps remove the ecm antennas. Unsure.
Gluing on the front canopy will be super tricky, no idea if it will turn out well. I trimmed the plastic so thin, there is basically no flat surface for the glue to grab, just a sharp shape. I hope to apply minimal glue, so the glue stays down on the thin edge, but ugh, it will be super tricky. Never done something like that before.
gardening, camping, gaming, relaxing - all sound very nice 🙂 👍
Judging from sergejs reference photos: no antennas
Scalemates F-14 Tomcat Group build 2020 | Album by Vargbrujo (1:72)
should be the same time frame I suppose
I did the lights by closing the hole with a silver sheet part from the inside and applying a drop of colored epoxy later, turned out quite neat. Good thing about it is that it does not shrink.
The canopy sounds tricky!...If there is direct plastic-on-plastic contact along the whole "Blade" I think a drop of extra thin running along it should do the trick
Interesting! It seems also that the upper nav lights are not covered in the early version. 🙂 Ok, knowing this I think I will remove the ECM antennas.
Looking at Sergej's pictures, that's a very early (mid 70's) bird without the ECM bumps and covers over the navigation lights. Your own picture shows a very late F-14A (judging by the crew helmets, ECM bumps and BOL Sidewinder launchers), so that's where those covers come in. If your paint scheme is the same colorful one as in Sergej's and Clifford's builds, just follow along those details and you should be good.
Ok, I have now cut off the ECM parts from the main fuselage near the air intakes.
Re. the two triangluar canards on the F-14A. I did a search and found some info that might be correct. So the carnards aren't on the B's and the D's on the tomcats.
"A feature on the F-14A, which has, since been phased out of the B and D models is a pair of triangular vanes, which retracted into the leading edge of the wing gloves. These vanes deployed automatically at Mach 1.4, providing extra lift to the nose of the aircraft, unloading the tailplanes to some degree. As a result, they assisted the F-14 in pulling up to 7.5 g at Mach 2. The vanes were rendered inoperative if the angle of the wings were less than 35 degrees. Below that sweep angle, the effect of the vanes on the tailplanes led to pitch instability at the speeds associated with that angle of wing. With the B and D models these vanes were eliminated from the design in order to provide additional space for avionics in the wing-glove area."
Nice work on the light there! First practice round is there, now you can practice further on those other three. 😉
I feel good about this. 🙂 Doesn't look good with the glue and the protruding plastic, but when flush I think it will look very nice. We'll see. 🙂 I finished the four custom clear parts, wasn't difficult at all. What made me think "ugh" was the prospect of doing something wrong, and having to re-make ONE such part lol.
Btw, it looks like some of me earlier comments on an earlier uploaded photo, is off by 1mm. I wanted at first widen the upper side of the air intakes by 1 + 0.5 (photo 32), but now I am certain it should be just + 0.5 mm added, on the insides. The width I think, should match the lower part of the air intake, so to make a square like cross section sort of.
Other things: The build manual says cut off this one round light on back behind the canopy. Done. Seems to match photos. Also, I noticed that the flappy things on the fuselage that lie down on the rotating wings, isn't correct so I'll try fix that.
The really big "ugh" will certainly be the entire canopy glass area, because I will have to add plastic with sprue goo and sand things into shape, very tedious. I've never done something like that convoluted before I think. So even if I am happy with the clear parts, I have to create a matching surface on the fuselage part.
Looks like you're definitely on a Galdhøpiggen learning curve then. Good luck! 👍
I do not know much about the Galdhøpiggen learning curve and I am not sure I want to know more... 😄
I see the kit is being reduced to a rough "guideline" for a Tomcat model. Hope all your intentions will bear fruit as you want them too, you´ve invested quite a bit of effort into this horse & it´d be a shame if it would suffer a critical incident now. Good luck with the canopy & looking forward to see the next steps!
I do like try doing my best, but if it isn't as good as I hoped in the end, I got some needed practice. I am often humbled by how difficult it seems to get rid of sems and other pits and dents in the plastic. 🙂
TODO: 1) Figure out how to add the wings so that they slide or snap into place, because I need to have them loose for painting. 2) Figure out the two big air intake areas. 3) Clean up the two fuselage parts just inbetween the two air intakes. 4) Various clean up. 5) Figure out how to add canopy and nose wheel well. I'll probably glue on the canopy by itself, then somehow glue on the wheel well by itself and then I guess try glue on the smaller bottom part of the fuselage where the wheel well is. Then.. add the nose, and try clean up the nose without scratching the now glued on clear parts on the canopy. :|
I will have to try see if I have any spare decals, because the ones I have aren't good. I might get lucky, I have some boxes with spare parts, decals and stuff. 🙂
Also, it will be fun working with the landing gear, because I want to try add a shiny metal rod, and I will be using resin wheels, where you don't have to freaking mask the wheel at the center. 🙂
Wow, you are really meaning bussiness with this one! it is a joy to follow you on this journey.
some great improvements, the lights look great now 👍
just a note: you are planning a metal rod between the stabs? dont forget about the cans in between😉
Man this one is going to be fantastic, great attention to detail.
I love Aires cockpit details.... but I wonder why they have to be always a pain to fit..... keep at it Treehuger, the result will be worth it
Agree with Spanjaard, they are very well detailed, but a pain to fit.
It is worth pointing out that the Aires resin kit is probably for an open canopy configuration, so I have to cut off the resin hooks and two beams that lifts the canopy open. I also won't be using the resin part that is at the vey end, because it won't be visible with the canopy closed, so the far end wall of the canopy (seen on the fuselage, here roughtly cut off) can be plain or just a hole like in my case. The two sidewalls require some additional sanding/cutting to fit snugly onto the big resin cockpit base part. As for the nose landing gear bay I think a sound idea is to use this one separate fuselage part, as a guide, by simply creating the gear bay separately and glued onto that piece, but only so tall that it matches the separate fuselage piece, that way I can know that the gear bay won't be too tall and bump into the resin canopy just above. Because of this the gear bay probably have to end up being ca 1 mm +- too shallow I guess.
Nice work! The correct nose is really a tricky thing to fix...during my build I struggled a lot with this. Elongating, shortening again...Direct comparison showed the length in front of the cockpit to be ok for my kit- What makes it looks off in my opinion is that the whole nose part underside is slightly drooping, a bit flanker-esque. As it is too beefy in the front. So my fix was heavy sanding of the underside, (most critical where the nose joins) to correct the droop, make the complete nose part pointier in side view and flatter on the bottom at the radome joint. Just my approach to this affair, far from saying mine looks like the original now 🙂
Pic 21...Yes the fourth fin goes inside the pylon...the Sparrow missile first drops from the pylon and then ignites its rocket
Thank you for the encouragement.
This is all delicate and whenever I use sprue goo I have to wait a long time before I can clean it up. The whole canopy area is somethign of a nightmare. I think I can do it, but margins are so small and I can't just glue stuff together because of fit issues.
With the canopy closed, I won't try overdo the insides of the cockpit, but focus most on the outside because that is what will be most noticeable.
I will probably use Pledge floor polish on the two canopy parts, but I will first test with some scrap parts first. Have to make sure things remain dust free. Probably a good idea to clean the inside of the fuselage parts really good to avoid ending up dust ending up inside the canopy clear parts after gluing things together.
I've also been away camping for a week. 🙂 I also nearly cleaved my finger tip before that chopping onions, the finger nail received most of the force, and that came after I sawed into my other finger tip some days before that again using my The Army Painter saw. 😄
You really are making this one of the most interesting Tomcat GB contribution... I salute your determination - and the results so far too 👍 The muzzle opening looks really good!
Thank you. 🙂 This is taking time, but there is no rush. I am glad I had this opportunity for learning new things. I was also camping recently, so eh this won't be finished quickly.
I want to quickly correct myself, having mentioned Pledge. The product in question is not the polish product, but the 'floor gloss' product which is not milky, but transparent and apparently very fluid like. I had to buy this product a second time, becuause the first one, was a similar, but I think different Pledge product (white bottle).
I hope I can start finishing this. I've been doing lots of various things around the model up to this point. I have to also make the wings snap and fit neatly into the fuselage parts, before I can start gluing things together. 🙂 I tried to drill out the holes for the two flare/chaff dispensers, but it doesn't look good. I might remove it all, and glue in a thin piece of styrene, as an alternative to photo etch. With a little luck I should be able to drill some.. eh.. 30 + 30 holes (seen on the model). :|
Btw, I have this evening now tested the Pledge floor gloss product on this piece of perfect clear part (scrap). It is currently drying, but it looks good. I sanded the perfectly smooth plastic surface with 3000 grit Tamiya sponge, and then I cleaned the part with water, then dunked it into the floor gloss liquid. I can't fully tell how foggy the part is because of the 3000 grit treatment, but it looks fairly good. If I am lucky, then maybe I do not have to use more than 3000 grit on the two canopy parts. Been fiddling so much with up to 1200 grit stuff, but the insides are hard to sand because there isn't much room.
Update: Hrm, the shine isn't the best on the scrap part. So, not good enough with 3000 git I guess. But I will try a second layer of this stuff on the scrap part, just to see what happens.
All those special products...yet i use a 1000 grid, than 2000 and final is 2500, than i use 3M car polishing and most important is the cloth you use...if i use a T-shirt i can polish till the end of days and it wont get that Shine i want...if i use blouse i'm usually done in minutes and no need for "Pledge Floor finish"
@ Mathijs Ah, nice. Very interesting. The microfiber cloth I used previous was very soft. I found some similar cloth for cleaning either windows or kitchen surfaces and this time, lots of tiny scratches have been cleaned out. 🙂 Thanks for the tip!
@Treehugger, you're welcome sir...And may i compliment you on this very nice job you're doing on this "Dog of a Cat"
Still no shortcuts taken! 👍 I really enjoy watching this battle!
Some thoughts:
Pic 61: You could simply sand the rear seat underside? 🙂 Since those are height adjustable in the real jet I think this would be my cheap solution to this
Pic 65: This is a very, very sensible step, wish I had used that on mine...
Pic 67: How do you get around the engine parts in between?
If I can just get the damn canopy pieces on without screwing up, I think it will end up being a nice looking model. 🙂 Except the nose gear bay which will look so basic, it won't be interesting to look at, and I'll be happy I managed to get the nose wheel on in the first place. 🙂 I am currently painting the cockpit. I started with glossy black primer.
@Daniel
I moved the whole canopy down, which made the rear seat fit. I did try to sand the base of the rear seat, but it wasn't enough. Aah, interesting about the engine parts. I checked just now and it looks like my rod will go clear, just barely, so it looks it will fit.
I am just amazed at what you are doing with this kit. I was looking last night and figured out why I had so much trouble with my kit. The 2 prior ones I built were newer boxings, the last one I built was one of the first boxings. It had been in my stash for a long time.
Ooh, the figures are tricky stuff. I tried to make the look as good as I could as mere plastic figures, but masking the tiny edges is tricky. I airbrushed the black primer, green and white, but it seems it is now back and forth fixing things here and there with a tiny brush. The hands and the few details I will have to paint with a small brush. I used multiple layers of Vallejo Green Flourescent over glossy black primer, with a brush and I think it worked nicely, or ok. Still more painting to be done with the cockpit/seats/figure. I will have to add a gloss coat to the figures and seats, and add a pin wash.
WOW... You've put a mountain of work into this project so far, well done.👍👍👍
Album info
Content will be added later. I just quickly made a project and an album as soon as I learned about this group build. I like being motivated like this, so I am in!
Checking with other people's old builds of this Academy kit, one seem to make the point that this is a copy of a 1:50 Fujimi kit, I wonder if that is so with my kit as well.
I do NOT recommend buying this kit. 🙂 Also, btw, the decals is also very much so so.
I might try use self adhesive shiny chrome metal foil for the slats. 🙂 Or, maybe I also have some polished steel foil as well, I don't remember.
Colors? Unsure.
1) Vallejo 70.820 "Off White" (model color, must be thinned and such)
2) Vallejo 71.121 "USAF Light Grey" aka "Light Gull Gray"
3) Vallejo 71.074 "Beige" aka "Radome tan"


Group Build

1. May until 31. December 2020