

Vought XF4U-1 - completed

Which engine I had to use?

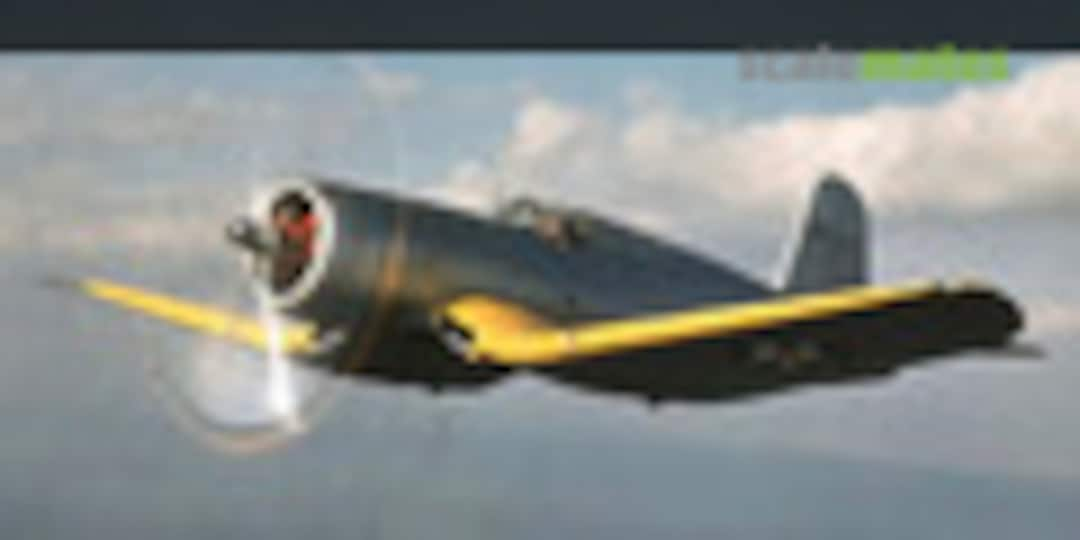
By the way: this picture shows the prototype before the crash (prop with pointed blades).

Cowling thinned on the inside, cylinder heads shortened a bit: Metalic Details’ R-2800 fits 🙂

Correct position inside the cowling: reduction gear about 2 mm outside.


Gun tubes added.


Outer flaps lengthened. Ready for creating rib & fabric structure via Mr Color 1000 primer.


Shortened ailerons with the two steps. Three hinges. In the middle on the upper side is a large u-shaped notch for the link rod. Smaller trim tab, slightly out of the centerline. New research results: the trim tab is here not 100% correct so I reworded them.

Note that the aileron don’t have a straight leading edge. They are two steps.


Fabric & visible rib structure of the prototype restored after scribing new panels. The sprayed structure have the same “character” as kits surface. 🙂🙂🙂


From left to right; floating bag housing, ammo compartment, gun compartment.


Reworked wing root inlets


0,2 mm thick PVC ready for thermoforming over a toaster.

Teardrop shaped window in the more forward position than with the production machines.

Basis material ready for shaping and installing.

The clear part for the new window is glued in. It looks still bad… However, it is not yet finished. 🙂

Clear part sanded, polished and windows masked.

Clear cover and green bulb installed on the inner side.

Approach light on left side only.

Red bulb

New research results (thx Hanno🙂): the ailerons were covered with fabric. 11 ribs, 10 “fields”.

Repositioned trim tab: corrected 2. Time.

DIY stitching roller.


No step cutout in the left inner flap.

New research results: gun opening in the wing leading edge is not in the center of the leading edge but in the center of the chord.

Outer flap (lengthened) temporarily installed for determining the correct size and position of the support arms. The large rectangular “block” (installed only on production machines) will be removed.


Enough room between upper edge of the wing and the flap for additional “narrow flap” (left on production machines).

Moveable panels on the underside completed. In the middle a small cutout for the actuator rod for the narrow upper “flap” is well visible.


Wing and inner & middle flaps prepared for correct installation.


Flaps in position (1st step). Few additional details coming at next.

For better strength & cleanliness I glued together the middle and inner flap after positioning.


Screws on the hinges added.

Actuator rods for the flaps added.

New research results: arms for the actuator rods are installed on top of the flaps (not on the side).


The prototype had different reinforcement structure on the door inside compared with the production machines.


“Additional” flaps in place.

0,4 mm thick plastic (bended in hot water) ready for dividing into 4 mm wide stripes.

The visible edge will be thinned BEFORE separating from the rest.


Each part is reinforced with 2 or 3 stripes.

Wheel dish thinned down for opening the areas between the 8 spokes. Formerly thickness 2,6 mm. New thickness 1,6 mm. 4 pieces of 1,5x1 mm rod added.


Two additional inspections panels/ gearbox housings on the XR-2800


…very unusual colors for a R-2800…🙂

The prototype had very thin ignition cables in comparison with the production engines.

XR-2800 completed.


After applying 1500 Mr Color‘s filler I airbrushed the color & gloss - optimated basic coat (50 % chrome yellow and 50 % gull grey).


Prop with wide blades („after the crash“) ready minus HamStan logos.


Main coat finished. As usual in the last years I don’t use pure chrome yellow but mix them with light grey. 80% H188, 20% H129 and a little bit Revell’s Mattplus produced exactly the color and shine that I wished.


Prop completed. Tips painted additional with Future to level out the different shininess of the three stripes.

I left the rest of the DYI made antiskid matte (MH-53). Fortunately it was enough for all 4 parts.

Excellent roundels from generic sheet (Aeromaster) in 4 positions.


The windscreen section moved about 11 mm forward.


Cut out is too deep. Additional small plastic stripe for the correct level.

Upper edge of the windshield = upper edge of the hood. 🙂

Gaps between stripes and fuselage filled with more plastic and CA (my favorite filler).

Prototypes canopy was longer (about 3 mm in 1:48) and has straight edge. Because of that I sanded the kit part on the rear side and glued 2 pieces 1,5 mm thick plastic.


Deeper hood in comparison with the production machines.

Second stripe on the inside (upper stringer)

The prototype had a different instrument panel layout. 0,35 mm holes for knobs an switches (Anyz models) are well visible.


Because of the different position and angle of the cockpit opening (trapezoid and not rectangular) there was a unique sliding rails configuration.


Both sides before modification.

Modified Aires’ cockpit for the F4U-1.

Two additional black boxes very forward. Aft part of the console closed.

Map case changed from right to left side. Other levers on the side except trim wheel removed.

Scratch build new “narrow” instrument panel. Knobs by Anyz Models are well visible (Thanks Tom!!!!!!). 🙂

The complete interior area in aluminum dope or aluminum in the typical USN pre war manner.

Cockpit completed include lower instrument panel and harness.


Very unusual for such type of airplane (prototype): no shoulder harness.

Fuselage behind the cockpit: I had the most respect for this task. Surprisingly, it worked very well without problems.

New engraved recessed rail for the aft canopy “roller”.


Elongated base for the deeper elevator.


Smaller opening for the tail wheel

Small ones: automatically operated trimm tabs (aerodynamic balance). Large ones: manually operated trimm tabs.

Enlarged elevators (white plastic stripes).

Different tail wheel opening. The arresting hook was deployed separately through the opening at the end of the fuselage and was a separate part (like F4F, F6F or TBF).

Reworked aero balance area of the rudder (larger).

A piece of isolation from brown electric cable = leather upholstery.

One of the last hurdles is taken: canopy glued with CA in place without mess. 🙂


Ready for paint.

The prototype had an another tail wheel configuration.

The wheel is a dish of 3,2 mm round rod.


Seam between fuselage and wings cleaned without serious damage of the finished areas.


The last hurdle is taken: connection of the fuselage and wing is done without mess. 🙂

Cowling in place glued with classic plastic glue. For better adjustment I added to the resin engine a 13 mm dish of 0,4 mm plastic.

Reworked exhaust tubes of 2,4 mm plastic tube because the kit parts are to small and not deep enough.

Any details here and there.


Landing gear completed.


Landing gear in place without mess. “Solide Arbeitsvorbereitung” was worth. 🙂

4 Actuators made of 0,4 mm wire in place.

2 springs for each leg made of 0,2 mm wire.

Flaps in place.


„Tiefzieh-Tatort“ 🙂


Installation of the sliding hood. The most important maxime is “take you time”.

In comparison with the original: Roger!

Masking and airbrushing at next. Inner structure brushed already with metallic grey.


Courtesy Vought.


Sliding hood painted and in place: completed minus pitot & antenna wire.


I’m not really satisfied with the together puzzled numbers especially XF4U-1…🙁. Bacause of that I printed the decals new.


Comments
95 11 November 2022, 18:10
It's stunning: Tamiya released their Corsair more than 25 years ago. About 1997 I build a model and remember that I asked myself the same question about the engine. I think last time I also kind of cheated.
11 November 2022, 18:11
Might have to do some cutting and gluing. The 2800 on the far left (Engines & Things?) is a later model with a bolted gear case as found on later P-47s, among others. If the diameter is right, you might take the gear case from the MD and graft it onto the (E&T?) one.
11 November 2022, 19:01
I was gonna say, look for an earlier model 2800. Look in the Quickboost line for something that would work.
11 November 2022, 19:41
Oh yeah, it does look like a Quickboost piece. I was just rummaging through an old kit and found a bolted case R2800 like the one above and it was an E&T, which I think is long defunct.
11 November 2022, 19:45
Wow, that's what I call a substantiated research on the aileron/ flap alteration !
Let there be light ! 😄
13 November 2022, 13:46
Oh. Mr. Schrock is going again the extra mile for this project. I am keen to follow.
13 November 2022, 18:40
What a conversion! Amazing level of detail and research as usual. Taking a seat, of course.
2 December 2022, 14:12
Moin Bernhard. Das sieht schon wieder ganz hervorragend aus, was Du wieder machst! Freue mich auf weitere Bilder!
13 December 2022, 20:20
I'm glad that you like my conversion. Thx for your nice comments. 🙂. Michael: in my spare box I have "tons" of old and new decal sheets. See picture 87.
22 December 2022, 12:18
Because of the different position and angle of the cockpit opening (trapezoid and not rectangular) there was a unique sliding rails configuration.
20 January 2023, 18:26
One of the last hurdles is taken: canopy glued with CA in place without mess. 🙂
11 February 2023, 11:17
Wooa, beautiful already ! Rivetrows polished with a cottonswab ?
18 February 2023, 18:15
I wholly agree with Hanno: looks beautiful already at this stage... You could display your model now under the label "prototype under construction".... 🙂
18 February 2023, 20:04
Thank you Hanno and Rober:
Yep: "cottonswabbing" 🙂. My new paint formula was a full success!
Indeed I displayed half finished projects so far because many modelers would like to see WIP.
19 February 2023, 06:22
bughunter: herzlichen Dank fürs Lob insbesondere von dir🙂
Es ist sehr wahrscheinlich (endlich) das Ende einer über 25 Jahre alten Odyssey auf der Suche nach dem ultimativen Mix für Natur Metall oder Alu Dope (Navy prewar) inklusive der Möglichkeit stressed skin zu imitieren (durch Nachwischen mit Qtipps).
4/13 Alu Testors Metalizer, 2/13 MrColor Alminute, 2/13 MrColor Chrome Silver, 4/13 Testors Sealer und zu aller letzt 1/13 1000er Leveler von MrColor. Der letztere bricht zwar etwas den Glanz m, verleiht den Mix allerdings sehr gute Füller Eigenschaften.
Der einzige Haken an dieser Geschichte ist allerdings die Tatsache, dass die Metalizer nach der EU Lösungsmittelreform nicht mehr in Europa zu kriegen ist. Zum Glück habe ich vor einem Jahr auf einer Modellbau Tauschbörse durch Zufall die letzten Restbestände aufgekauft 🙂
Übrigens: der prop ist mit der Basismischung ohne 1/13 Leveler geairbrusht und ließ sich zum polished Alu aufpolieren.
20 February 2023, 20:02
Uih, das ist ja eine Hexenküchenmischung, kurz vor Alchemie Statt Gold ist es dann docjh Alu geworden 😉
Gut daß Du schon weißt, das die Farben verschwinden, als ich den ersten Teil gelesen habe, kam mir schon in den Sinn Dir das zu schreiben. Ich habe noch ein Gläschen MC213 ergattern können, da ich damit meine Gummi-Spannseile metallisiere.
Zum Glück sind meine geliebten Alclads noch nicht verboten, aber der Brexit scheint auch die Lieferfähigkeit zu beeinflussen.
20 February 2023, 20:33
Vielen Dank! Die Hälfte vom Lob leite ich an den Toaster weiter!🙂
22 February 2023, 17:42
Always amazing. Amongst all the craftsmanship and skill on display, the one thing that grabbed me totally was the application of the brown isolation as the leather on the instrument panel edge. Inspired. A simple but elegant solution. 😄
23 February 2023, 18:31
I am absolutely amazed by the level of detail and a build so clean that it is absolutely makro-proof.
This is high end modelling.
Please allow me one suggestion and one idea nevertheless. I think that sanding the wheels of the main gear a bit more would give it a slightly more solid stand and look. Maybe some light color variation of the panels would be feasible despite the fact that this is a prototype. But your whitch brew for the main color really nails it.
25 February 2023, 13:31
Der absolute Wahnsinn! Modellbau der Spitzenklasse und die ausgeklügelte Farbmischung für Naturmetall ist perfekt!
25 February 2023, 13:45
I'm glad to see and hear that you like my prototype: thank you.
Micheal: I noticed that the tires were too flat when I took the pictures and fixed this at once. In the typical prewar manner all Navy planes were painted light gray and later with a mix of aluminum powder and clear varnish (Alu dope). Because of that it would be wrong to paint some panels in another color. 🙂 respective it's no a NMF finish.
25 February 2023, 18:03
Was für ein schönes Ergebnis ! In Schwarzweiss und vor dem Hintergrund vom Original nicht zu unterscheiden ! Du hast mich um Längen geschlagen….. 😄 👍
25 February 2023, 19:01
Thank you Hanno, Spanjaard and Jürgen. 🙂
In addition to the pictures from yesterday I shot today morning three more pictures.
It took me 21 years (!!!) to take these pictures. According to my notes, I built the AU-1 in 2002....
26 February 2023, 09:03
Was lange währt wird endlich gut, Bernhard. Top build in top presentation!
26 February 2023, 10:03
Beautiful! Congrats! 👍
I noticed, that there is an oversprayed yellow color on the fuselage and cowling ( pictures 180 and 181) Easy to fix....
26 February 2023, 10:16
Overspray? On Bernhards models? Don't believe that. Looks for me like a mirror effect on the mentioned pictures.
26 February 2023, 11:07
"Overspray be or not to be?" This is here the Question! The answer can be found in picture 86...🙂
26 February 2023, 11:35
Amazing result! I appreciate the amount of effort needed to implement all the small details that made the prototype unique. Just fabulous 👍
26 February 2023, 12:25
Project info


Group Build
Vought XF4U-1 Groupbuild
11. November 2022 until 30. March 2023
11. November 2022 until 30. March 2023