

The Black Island (DH 82 Tiger Moth)


Comments
59 2 January 2022, 04:58
Happy New Year. I know I've got plenty of kits on the workbench waiting to be finished, but I felt like the first kit of a new year should be started fresh. This one has been in my stash almost as long as I've had a stash, so I think it's time has come.
2 January 2022, 05:01
Following, wanting to build mine, but afraid of rigging (again!), will watch and learn
2 January 2022, 21:14
I'm told both the wing struts and the cabane struts have a tendency to break when rigging. The cabane struts on mine aralready broken and haven't started building it.
2 January 2022, 22:13
Looking forward to the rigging, I could learn something new (and I have the same elastic rigging material).
Nice built so far. Keep up the good work.
8 January 2022, 09:14
Thanks Bas! I drilled tiny holes and added some very small wire loops to string the rigging through. Lot's of frustration in threading every eye, but I think better than the alternative. All done now, except I nearly forgot the windscreens!
9 January 2022, 06:58
Now... that's an interesting approach to rigging... the small wire loops, I mean... (with a fine result indeed!). My question is - isn't this more complicated than directly using tiny holes in the plastic (wings, fuselage etc) itself? In any case, congrats are in order, of course! 👍 👍
9 January 2022, 18:34
My experience with trying to attach rigging directly into plastic is basically a recipe for disaster. The glue never holds properly quickly enough, then I end up smearing it around a bit while trying to hold one end in place. With the tiny wire loops, the drilling and glueing are done under more controlled environments. Then you just need to feed the elastic thread through and glue it to itself - and usually only at one end!
10 January 2022, 02:29
Great stuff as usual Greg 👍. Always wondered how you do the lettering on your bases. It's alway so consistent. Is it a stencil or a transfer?
10 January 2022, 06:35
Great rigging method. Adds a bit to it, I think. Did you make the loops yourself?
And, as Gary, I have always wondered about your bases and the lettering too. Do you make the bases yourself?
10 January 2022, 12:44
If you use some elastic rigging thread, you can simply have a tiny bit of cyano at the end of it, stick it carefully in the right place and the do the same (while stretching the tread) at the other side. Good idea is to use a newly open cyano, since sometimes the lost power the longer they have been opened. You want it to dry in a couple of seconds. I did that in my last rigging and it did look ok (not as clean as bughunter but good enough for me). My previous experience in rigging was much worse, using ultra thin steel wire.....
10 January 2022, 12:52
Greg, your little looping dio makes me smile - great idea! 👍
Spanjaard, thx for mention me 😉 Often I hate CA too, but have no other option. I prefer a form-fit connection (going with the thread two times in a loop through a brass pipe) where the CA only need to secure it.
10 January 2022, 17:31
Great Tiger Moth! I built this kit as well, and it was my first rigging experience. I drilled holes and glued the line in place, and then dabbed a bit of paint over the result, and it came out pretty well also. I liked the little built in fixture in the kit to align the wing struts.
10 January 2022, 17:33
Thanks guys. Some final pics up to show the end result.
- As for the lettering on the bases, I create my own decals/transfers and then put them on the wooden bases using a bit of Future underneath to secure them solidly (and then another coat of Future afterwards, just to be sure). I'm quite happy with the results.
- As for the rigging. Yes, I made the loops myself. I just took a bit of very thin wire, loop it around the end of a fine tweezer, and then pull the two ends tighter to get a small enough hole. Then I trim the loop to make a "P", drill a small hole (careful not to go through the thin wings!) and dip the end in CA glue and set it in place. After that it's just a matter of stringing the stretchy nylon thread through as many holes as you can and then glue it to itself.
I came up with that plan after causing myself some mental anguish while trying to glue the rigging in place directly. Although I have to admit, most of that was before I got the stretchy nylon. Using the loops I could pull the tension a bit tighter using a non stretchy thread too.
10 January 2022, 17:46
that is a really impreesive little dio, Greg. amazing idea to present it like that!
10 January 2022, 18:37
wow, that looks amazing, you really outdid yourself on the rigging 👍
10 January 2022, 20:31
Great idea to present your plane!
Also a good build and clean paint job!
Really like the stories behind your models and like the style how you present them on an interestig way on a small base!
10 January 2022, 20:48
I see why there are no pilots on the plane. They forgot their seat belts XD Great presentation!
10 January 2022, 21:33
Thanks guys! I usually post the 'story' behind my builds (both what the project means to me and how the build process went) on my strobez.ca blog. If you want to check out the Tintin album page that inspired this project, you can see it here - strobez.ca/wp/index...th-the-black-island/
10 January 2022, 21:56
I'm actually surprised at how well I was able to rescue this build. After the shelf disaster, the propellor and one of the wing struts were broken off. By adding a small DC motor, the propellor wasn't such a big deal, but I managed to lose the wing strut. I dare anyone to figure out which of the four is the scratchbuilt stand-in~! 😉
3 March, 20:56
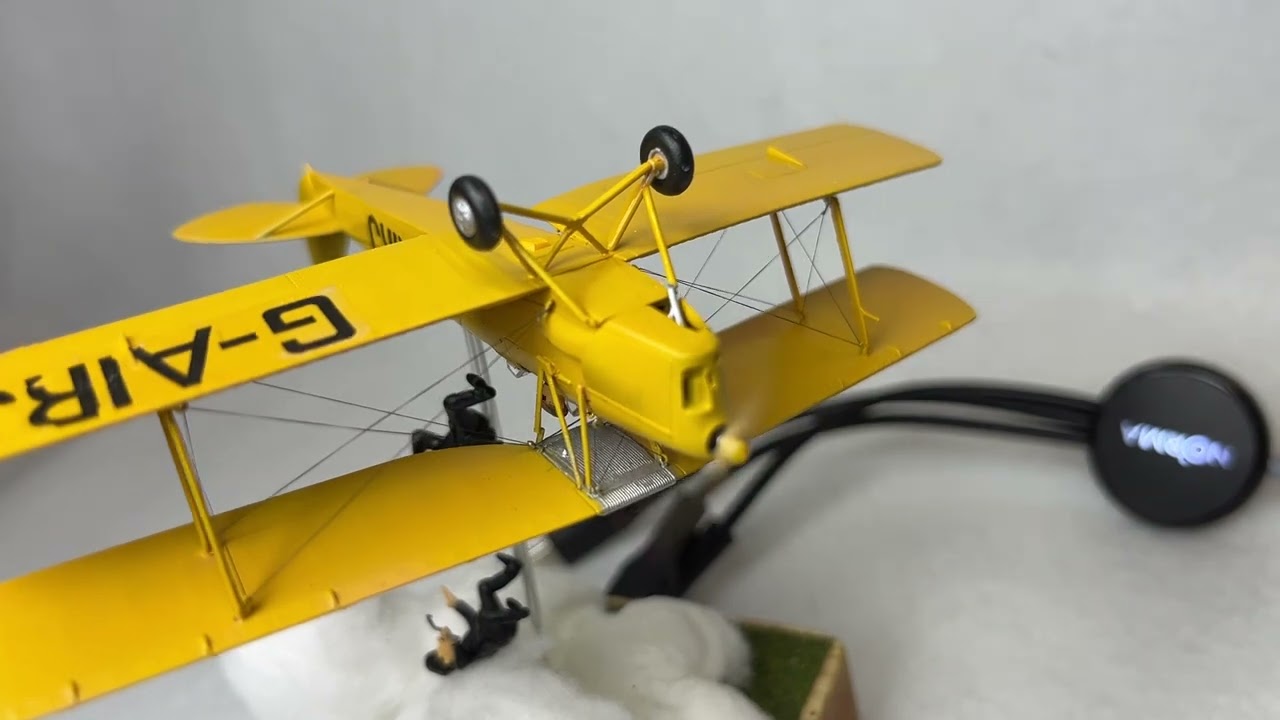
Thanks guys! It's much appreciated. This is one of my favourites, partially because of what a dream the new Airfix kit is to build, partially because I knew going in it was going to be upside down, so I spent more time on the underside than I normally would, partially because I was able to recover it back to a point where even I can't tell what broke (although my damn thumb print on the engine cowling will haunt me forever!), and partially because the two little Thom(p)sons falling out makes me laugh every time I look at it. 🙂
4 March, 15:03


