
Thread started by Fighting 84
added a new photoalbum.


5 February 2017, 01:39
So I got this one going last night. This is my first time using a resin cockpit (Aires). So far everything is just painted the base colors, but I did manage to get everything to fit. Had to cut out the rear portion of the cockpit, and sand off the side details on inside. These pics just show the cockpit dry fit to the kit.
Will paint the details tonight.
5 February 2017, 01:44
Man, you don't take a breath between drinks do you mate.😢 I like what I see so far.👍
5 February 2017, 04:12
Good luck with Aires. Don't be discouraged to resin cockpits because this one isn't top fit.
5 February 2017, 08:30
One of my favorite subjects. Which scheme? I like the Alska scheme and even more the WA brown-tan-green one.
5 February 2017, 09:45
Welcome aboard Michael, Gary, Adam, Maciej, and Ed!
Michael, yeah, I don't mess around! I have just so many subjects I want to do! But, I did wait one day to start this project while I re-set my work area. 🙂
Adam, there was a good amount of sanding to get the fit right, but it wasn't so bad. All the talk about bad fitment of Aires cockpits had me more scared that the reality turned out to be.
Maciej, I am doing the wild "Blizzard" scheme. I have hte Steel Beach mask set for it. I don't think I would attempt it without it!!! LOL
5 February 2017, 15:57
Got the resin cockpit in the upper fuselage and painted (mostly). Gonna have to go back in and touch up a little bit. Also going to have to keep trying to remove all the resin dust that is all over the cockpit, my work area, my hair, my ears, and all over God's creation. This is my first resin cockpit, so this is a new experience for me. Yay fun!
6 February 2017, 05:05
Michael, when I'm cleaning up resin parts I usually use my Dremel and put it my Dremel Vice. That way I have two hands free, one to hold the part and the other to hold my vacuum cleaner hose end to suck up the resin dust. Makes a huge difference.
6 February 2017, 05:09
Oooh, that is brilliant Michael! I gotta give that a try.
Now I just need to get a vice...
6 February 2017, 05:15
I don't have a lot of experience with resin parts, but I have read that the dust from working the resin is quite damaging to one's lungs. Can anyone confirm that it's a good practice to prevent inhaling that stuff? Damage to our lungs is nothing to wheeze at, right?😉
6 February 2017, 13:57
Yes, have read the same. So I bought a 3M mask that I wore for the first time last night that seemed to work very well, since resin dust was flying all over the place.
walmart.com/ip/3M-Pa..e-Respirator/1604729
Also, I was using my new toy, a Harbor Freight Mini Bench Grinder with flex tool (kinda like a rotary tool attached to the Bench Grinder) to grind away. If anyone is looking for a great tool to make your modelling easier, you gotta check this out! It has selectable RPM range of 0-10000. It is perfect for modelling, allowing for lower RPMs so you dont melt plastic. AND IT WAS ONLY $30 AFTER 20%OFF COUPON!!!
Check it out:
harborfreight.com/be..lex-shaft-43533.html
6 February 2017, 14:12
Great tip Michael, thanks! As soon as I get another 20% off coupon in my email, I'm getting one of those. I have two 1/24 FPP Models resin car kits in my stash. I expect a lot of dust will fly when I get around to those! 🙂
btw, I just noticed the CD in your pic. I also use one for a PE cutting surface; you too?
6 February 2017, 15:26
Great start Michael, that aires pit looks very good also. Will start a D model F-16 soon with a Aires pit, a firsttimer for me. The scheme you have chosen is very cool, no doubt you will make another great model 👍
6 February 2017, 16:39
Yep, I use a CD for my PE cutting surface too. Great minds think alike! Works great...
Thanks Erik! I am really looking forward to seeing what you come up with on your Delta Viper! I am sure it will be awesome!
7 February 2017, 05:00
Worked on the intakes tonight. I poured Rustoleum Semi-Gloss White Oil based Enamel Protectant into the intakes, then poured it out. This covers the seams on the intake making them look seamless. Worked like a charm! Left them standing over night to allow the residual wet paint to roll out hopefully leaving everything nice and level.
7 February 2017, 05:04
Looking Good Michael I have two of the Tamiya F-16 to build will follow with interest.
7 February 2017, 10:47
No dust is healthy if inhaled and certainly not this resin one. good idea to have the vacuum cleaner close by... just make sure it does not eat small parts😉
I have the same 3M mask for years, it works like a charm. With the right filters, you can use Alclad or other aggressive products without concerns. Just make sure the filter is the one for chemical stuff. you have to also buy new filters now and then (depending on how much you use them I guess).
7 February 2017, 10:54
Congrats on the perfect intake Michael. Did you use blue tack to block the intake's end?
7 February 2017, 11:55
Michael, looking good so far. That is a genius way to do intakes. I am going to invest is some of that stuff. would like to know the outcome after it has had time to sit over night.
Another tip for resin part sanding is have a wet paper towel under what you are working on. Keep your sanding stick or paper wet. Helps a little. I've seen guys submerge the part in a vat of water.
7 February 2017, 12:43
Thanks Marko, Tim, Ed, Murad, Dale, Michael, Ali, and Bryn!
Spanjaard, I am using an Oil Based Enamel protectant by Rustoleum. It is very thick and hides seams easily. I did not even sand the seams on this, but then again it is Tamiya so the seams were very small anyway.
Ali, yes, I did put blue tac on one end so that the intakes would fill up. I tired to use a pipette, but the paint was too think for that to work. So I took an old spoon, and used that to pour the paint into the intakes. I did it rather methodically, so the mess was actually not that bad. I let the paint sit in the intakes for about 5 minutes, then poured it back into the paint can. I then took the blue tac off the one end, and alternated pouring the residual out of each end, to try to keep it somewhat even. We will see how things look when I get back home from work tonight.
Bryn, I am really pleased how this worked for me, assuming all is well with them today LOL. I bought this at Lowe's for under $10. This will last me pretty much forever, assuming I don't accidentally let it dry up. LOL
Also, thanks for the tips for dealing with resin dust guys!
7 February 2017, 13:58
Thanks Ed, Norbert, and Harry!
Well, got 'er primed tonight. I won't be pre-shading this one because the paint on this Aggressor aircraft is always immaculate. My MRP order should arrive tomorrow, just in time! Now I get to have fun with the SB mask set. This will be the first time I have ever used a camo mask set, so this should be interesting! Wish me luck!!!
13 February 2017, 05:13
Looking fantastic Michael. What kind of primer do you always use? That black has a nice finish.
13 February 2017, 09:20
Thanks Erik and Ed!
I use Gunze MrSurfacer Black for priming. I really love the stuff, it really does give a nice finish, and if I have some sanding marks I did not remove well enough, all I have to do is puddle up a little extra of this stuff and it levels out and takes the sanding marks right away.
[img1]
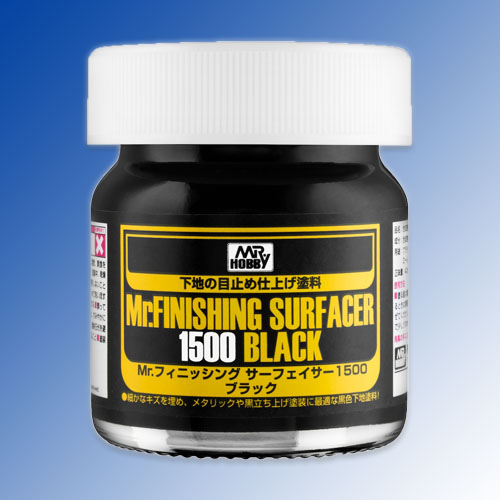
The only downside is it is a little hard to get a hold of sometimes.
13 February 2017, 21:02
How do you use it? i have one bottle (was very hard to get), and i have only used it once. it was a disaster. basically it did not stick to the plastic.... probably i did something wrong, or temp/humidity were against me.... at the same time, Vallejo black primer worked like a charm, and for some people it does not at all.... it must be type of airbrush, needle/nozzle size, distance and ambient factors what makes one work and the other not....
13 February 2017, 21:21
Looking good Mike, can't wait to see it paints up with your shipment of Mrp coming
13 February 2017, 21:52
That is really odd Spanjaard, I have had great success with the stuff, never any issues with adhesion for sure. Environmental factors could be in play, but I would think airbrush nozzle and type should not be a factor ( I use an Iwata Eclipse HP-CS, standard needle out of the box which I think is .35).
What did you thin it with? I use MrLevelling thinner to about 50/50 and it works great. The stuff is pretty thick so you need to thin it quite a bit.
13 February 2017, 21:52
good question.... i wish i could remember, either was not thinned, or it was with Mr Color thinner 50... no idea of the proportion... i will need to do some testing again
13 February 2017, 22:10
First base color down, White Gray. Tomorrow I will apply the first masks to where the white stays and will spray the gray. Hopefully Wednesday will be International Blue, the final camo color.
14 February 2017, 04:56
White Gray masked and Medium Gray applied. Next up masking of the Gray and painting of the final color, International Blue. I have both MRP and Model Master of this color. The Model Master appears to be more "blue" than the MRP. Not sure which one I will use yet...
15 February 2017, 05:22
Looking good Michael. How do you find the MRP paints? Are they any good?.
15 February 2017, 11:03
They are actually quite good, the hype is real. I will say this, I really had to dial back the air pressure for these compared to what I usually use. Keep that in mind if you ever try these out, I had paint drying midair at 20psi. I settled in at about 10-12psi and got very nice results. I have yet to do any close up detail painting, I will report back when I get some experience with that.
15 February 2017, 13:56
Looking good Mike, your camo scheme is looking real nice !! I'm glad u finally gave mrp a chance. Once u get the hang of spraying it, its very hard to go back to other paints
Keep up the good work
15 February 2017, 20:16
Thanks Jeff!
Well, got the blue laid down and the masks off... Looks pretty good on the topside, but the bottom side and nooks and crannies around the the intake will need some touching up.
I ended up going with the Model Master for the blue because I sprayed the MRP first and it was alot duller and more grayish than the MM was. I just liked the look of the MM better.
16 February 2017, 05:18
Michael it turned out great. The masks were surely worth it.
The camo looks a bit strange (nothing to do with you), but hey that's my personal taste. The colours are great, the pattern looks strange.
Looking forward for the decaling.
Maciej
16 February 2017, 08:48
Thanks Harry, Dale, Maciej, and Michael!
Maciej, yeah, this is a very odd and unique camo pattern. I am sure it is quite divisive whether people love it or hate it. I personally think it is really cool! I have wanted to do this scheme from the moment I saw it...
Tonight I will be spending most of my bench time doing touch ups. Hopefully tomorrow will be gloss coat added in preparation for decals and a restrained panel wash.
16 February 2017, 14:21
The camo is rather peculiar. I don't hate it, it just looks strange. Me for example, I always wanted to do the so called "Flogger" scheme, the colours look so warm so to speak. I think it is included in the the options of the kit. By the way you are going this will be done during the weekend. 🙂
16 February 2017, 20:20
Thanks Maciej and Tim!
I will have to keep that in mind, thanks Tim! I just bought two more bottles recently and should be good for the at least a few months.
Maciej, that scheme is indeed on the OOB sheet. I'm not using the kit decals (other than weapons markings), so I can send it with the other parts. 🙂
17 February 2017, 03:00
Fantastic Michael! That is one remarkable scheme. Really loooking great 👍
17 February 2017, 06:35
Thanks Erik, Ed, and Christian!
Got the main decals and the walkway lines done tonight. Really makes it start to come alive!
Tomorrow it will be stencil time. Yay. 🙂
20 February 2017, 05:05
Thanks Dale! The masks are from Steel Beach. They worked quite well in some places, but the complex curves and nooks and crannies (around the intakes in particular) were hard to mask properly. So I had a lot of touching up to do after I removed the masks.
20 February 2017, 14:33
Thanks James and Gerald!
Got the topside wash done tonight. Pretty happy with the results, although I may go back in and try to remove a bit more tomorrow.
23 February 2017, 05:44
Thanks David, Ed, Murad, and Erik! I hope to get the bottom side washed tonight, along with the dangly bits. Tomorrow I hope to finish up the landing gear and do some final touch ups before flat coat. I anticipate finishing sometime this weekend. 🙂
23 February 2017, 13:22