

Revell Mini Cooper - WIP


Comments
19 November 2018, 08:03
Btw, if you get a photo etched saw (thin little saw blade) you can more safely cut parts off the sprue that way.
24 November 2018, 09:36
That's a great idea. I also hear that a heated blade is good. Really like the pe saw idea. I find my sprue cutter is not always the best even for non-clear plastic.
24 November 2018, 20:27
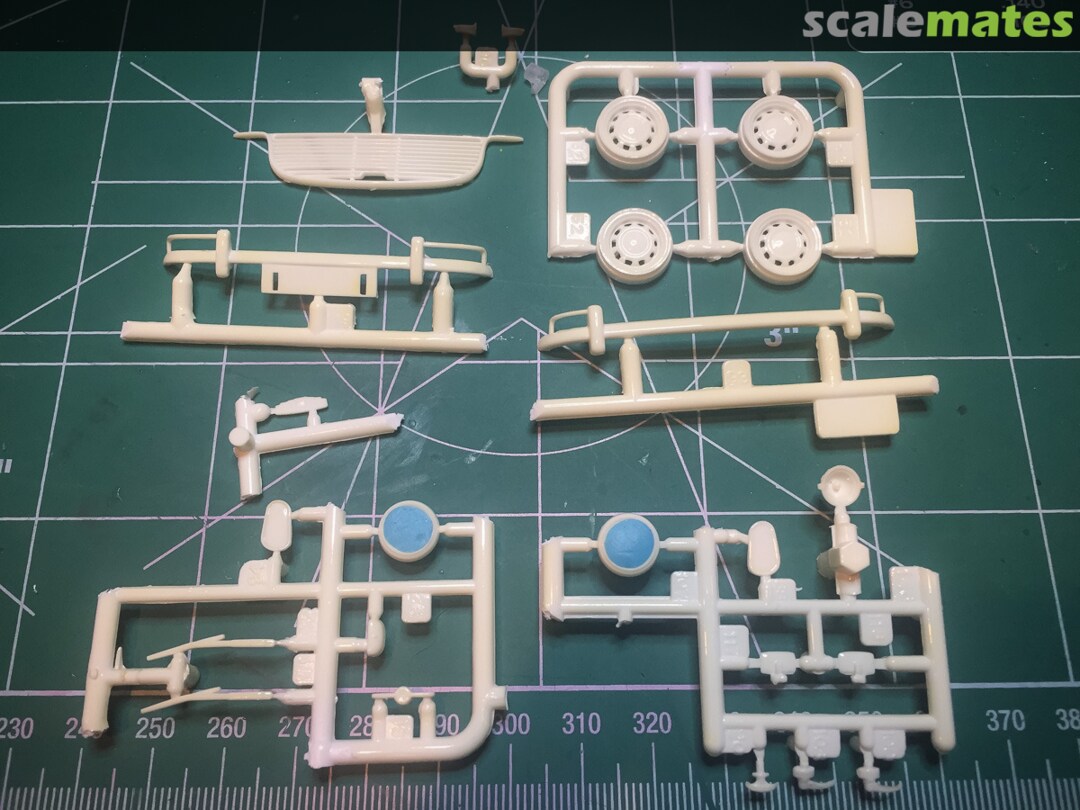
First time using alligator-clips-on-a-stick and the foam block that everyone seems to have. Liking them a lot.
Had some time to prep pieces for priming... the quality of the sprues are pretty good but there seems to be a lot of pin marks. Not sure how noticeable they'll be until it's finished. Fingers crossed.
29 November 2018, 08:51
How did you decide how much batch of blue to make? I'm terrified of batches... What if I make a ton too much... all that waste... make too little, and you have to hope to can make the same. Speaking of, how do you decide how much to make for "x" number of pieces, is it something that you just get used to by eye? I'm always making too much 🙁 btw... Your cooper looks awesome so far!
4 December 2018, 23:32
Ah, thanks for the compliment. Hopefully this weekend I can get a good chunk more done. I'm excited to try out flocking for the carpeting... but also dreading it.
With regard to paint, in this case I didn't really choose. I kept mixing until I was happy and that's how much I ended up with, with was way too much. For the Citroen 2CV I had the opposite problem, I didn't make enough. That sucked so this time around I was happy to over do it.
My feeling with paint at this point is that it's best not to worry too much about wastage. No point putting in all that work and not be happy with the finish. Maybe later I'll change my mind.
5 December 2018, 01:20
at $3-$5 for 17ml of paint, sucks... gauging ratio's is an art over time I guess... Thanks!
5 December 2018, 01:45
yeah, the prices definitely suck but I will say that the Tamiya acrylics are working out really well for me so I'm happy to be issue free with regards to the paints themselves.
5 December 2018, 06:07
Yeah I have their X-1 and X-18 because Vallejo doesn't have gloss/semi-gloss black... I like it... kind of smelly though but you get 23ml for the sameish price... I wish it were eyedropper but then again this: Ebay.com Item - 100 Disposable Plastic PIPETTE EYE DROPPERS Transfer Liquids Mix Airbrush Paint 😄 very cheap
5 December 2018, 07:36
I think it's just showing piece 72 needs a decal before flipping onto the notch and where 73 goes for right-hand/left-hand sometimes looks at a rear can be more helpful
6 December 2018, 04:19
Tom, thanks for the ideas about dechroming parts. The windows look very good. Will follow.
9 December 2018, 15:03
Got some more work done. A bit frustrated. Tried a "Wash" on one of the seats to give it more definition but it made a mess. I used Tamiya panel accent wash over a "Future" coating but it didn't go well. Maybe I have to let the clear coat cure more....
10 December 2018, 08:42
When I use the wash... I draw in the panel lines, wait about 5 mins... then take a q-tip with Mr. Hobby paint remover and gently go over any opps/bleed out from the panel lines, leaving the dried wash in the cracks... your Cooper looks amazing!
10 December 2018, 11:46
The interior is looking good. You may want to experiment with your own wash. Try the gray of the seats with a little black to darken it and thin it way down. That way the any bleed on the seats will also just look like a darker shade of the seats. A slightly darkened shade of the blue, around the edges of the gray could also highlight that transition in a natural way. The detail you are adding in is fantastic and well done. Looks great.
10 December 2018, 13:30
BTW - I'm partial to the mini coopers. While I don't have an original, i do have a 2008 Mini Cooper S and love it. So I am really enjoying watching you bring this one to life. Also the wash you did do really brings out the seat details, makes them pop and look realistic.
10 December 2018, 13:35
Thanks guys for the feedback. I have two more mini's in my stash so I get a few do-overs 🙂
Definitely will look into making my own washes. I'm keen to add some texture to the otherwise unnaturally flat finishes. Next up is the engine and undercarriage so we'll see how that goes...
10 December 2018, 22:31
Finished. Learnt a lot with this build. Disappointed with the Future clear coat. it had a long time to cure fully but still my finger prints showed up! Bah humbug....
17 December 2018, 09:14
Thanks, Daniel. Shame the interior is not so visible in the final build. Might take a leaf from Greg's book and add some LED's to light it up 🙂
17 December 2018, 09:28
I'm still blown away that this is only your 3rd car..... super professional level skillz
17 December 2018, 16:16
nice job. i am surprise with the problem about the finger marks in the future. how did you applied it?
17 December 2018, 20:56
Fantastic classical cars finely done Tom .. except of the green thing left hand side....😢
17 December 2018, 21:01
I like the bright colours of the Citroën and the Mini. Just wonderful. You can be proud Tom 👍
17 December 2018, 21:31
Thanks, guys. Much appreciated.
@Spanjaard - I applied it straight. It had been curing for 3 weeks in a dry environment. I've also noticed that it can get dinged very easily, like with my fingernail. Maybe the batch of Future I have is not the best or has a change of formula? It's funny, people talk about not letting Future dry in the airbrush or the airbrush will be ruined. Don't think my Future has that problem. Hmmm.... is it important to "shake well" before use?
@Daniel - Ha, the green thing was a "let's try this hobby out on something that I won't care if I ruin it" purchase, so definitely the odd man out.
17 December 2018, 22:05
hi Tom, strange... well, one thing i can say for sure, is that i do not shake it, so that should not be a problem. applying over tamiya acrylics should be also fine. how thick is the coat? i do apply multiple layers, but each as thin as possible. much better than thicker layers. i wonder if your trouble is also related to the orange peal that you are getting with it
18 December 2018, 23:33
I'm going to do some experiments with Future to see if I can't figure this out. I think part of the problem (with peeling) might be due to my cheapo airbrush. I have a better brush now so I'll compare their ability to lay down thin coats and avoid peeling (and pooling). Basically I'll test on a bunch of plastic spoons and compare and contrast.
19 December 2018, 00:48
Album info
Build photos for Revell Original Mini Cooper.

