SE.5a B139 - Work In Progress


Comments
81 22 November 2022, 21:21
Welcome to the show my friends! 👍
I added a description about the background of this project to the project page, and the album.
22 November 2022, 21:57
The first pictures shows the seat belts.
BTW, if someone like to follow closely: Eduard has re-released the Hispano-Suiza Profipack this month 😉
23 November 2022, 16:54
Welcome to all of you! There is still some space in the first row 😉
After the wing pictures today, the cockpit will follow tomorrow.
24 November 2022, 17:38
Taking notes on your technique to depict the lights going through the formers for later. That's looking perfect.
24 November 2022, 18:21
Dietmar, nice to see you here!
David, not only the SE.5a, I think all the late types using the powerful V8-engines, like Dolphin, SPAD and so on. That was making a difference. There was also a single Albatros with an experimental V8.
Mathieu, I have not taken so much pictures this time. May be my other projects are also helpful in this regard, e.g. this one Airco DH-2 | Project by bughunter (1:48)
The shadows on the lower surface depends on the upper surface. If it was painted dark (no light going through) you see bright rib tapes, and dark in between. If the wing was linen only, you will see dark ribs and light between. The upper surface is a different story.
It is always helpful to browse some original pictures.
24 November 2022, 19:09
The cockpit is finished. It needs some time with drying of the oil paints.
According to a review this kit contains 124 plastic and 67 PE parts. And I added some additional sets with a lot more parts. This review says it is a complex kit and if I remember correctly I had to take a break on my first build. But this time it went well!
25 November 2022, 09:34
Thank you mates! But we can also thank Eduard for these fantastic details!
I added new pics of the weapons. The order is not completely correct, as I needed the drums for the cockpit, this was done in parallel.
25 November 2022, 18:16
The resin set of the radiator was worth it! It makes painting the individual parts much easier compared to the all-in-one injection moulded part. The details are much better too.
And I found an additional one for a future project at MBK for 3€ 😉
26 November 2022, 11:10
Fuselage is closed and all parts are prepared for the PC12 paint job. Keep your fingers crossed for me!
26 November 2022, 17:47
The more you show us, the more I feel like buying the kit - particularly as I messed up an SA.5 build in small scale some 20 years ago.
26 November 2022, 18:19
Feel free 👍
As I said there is a re-release of the Profipack, and Eduard has a Black Friday, or better weekend:
eduard.com/eduard/se..mp;searchparam=se.5a
26 November 2022, 18:23
Thank you David! My way is may be not perfect (I still try to improve my painting and learn from others like BAT21), but it is one way.
27 November 2022, 12:16
The main PC 12 paint is applied. Little scratches after the pictures as the MRP paints are not very robust and can be scratched easily.
27 November 2022, 18:51
Markings are one. Painted them all after trouble with decals - not perfect, but ok.
The decals of the Royal kit are printed by Cartograf and I have use them 5 years ago on the first model. But this time they cracked along the wing structures like rip tapes. I was no able to conform them to the surface. Can they become brittle if stored too dry? Never had trouble with Cartograf decals before.
29 November 2022, 18:36
I'd have to imagine issues with cartograf decals are rare indeed. Always had good luck with mine. Still looking good.
29 November 2022, 18:42
Time for fixes! Many things reworked.
The next batch of pictures added.
1 December 2022, 18:22
Thank you Guy! It is always fun to have all the prepared subassemblies form a little original.
2 December 2022, 12:31
Just been admiring your lovely prop.
(Which isn't a sentence I expected to use today). 😉
2 December 2022, 13:45
Thank you gorby! It was worth remove the paint completely and start from fresh. Now I like it.
You may know, that every user has a Wishlist attached to his account. But there is also another wishlist for this X-mas event in some weeks. So I put proxxon.com/en/micromot/28536.php to this list. With a bit of luck and I can then sand the airscrews into shape much faster, at least raw 😉
2 December 2022, 16:11
Oooooh nice! Tool p o r n. 🙂
Some of that Proxxon stuff is very appealing.
3 December 2022, 06:33
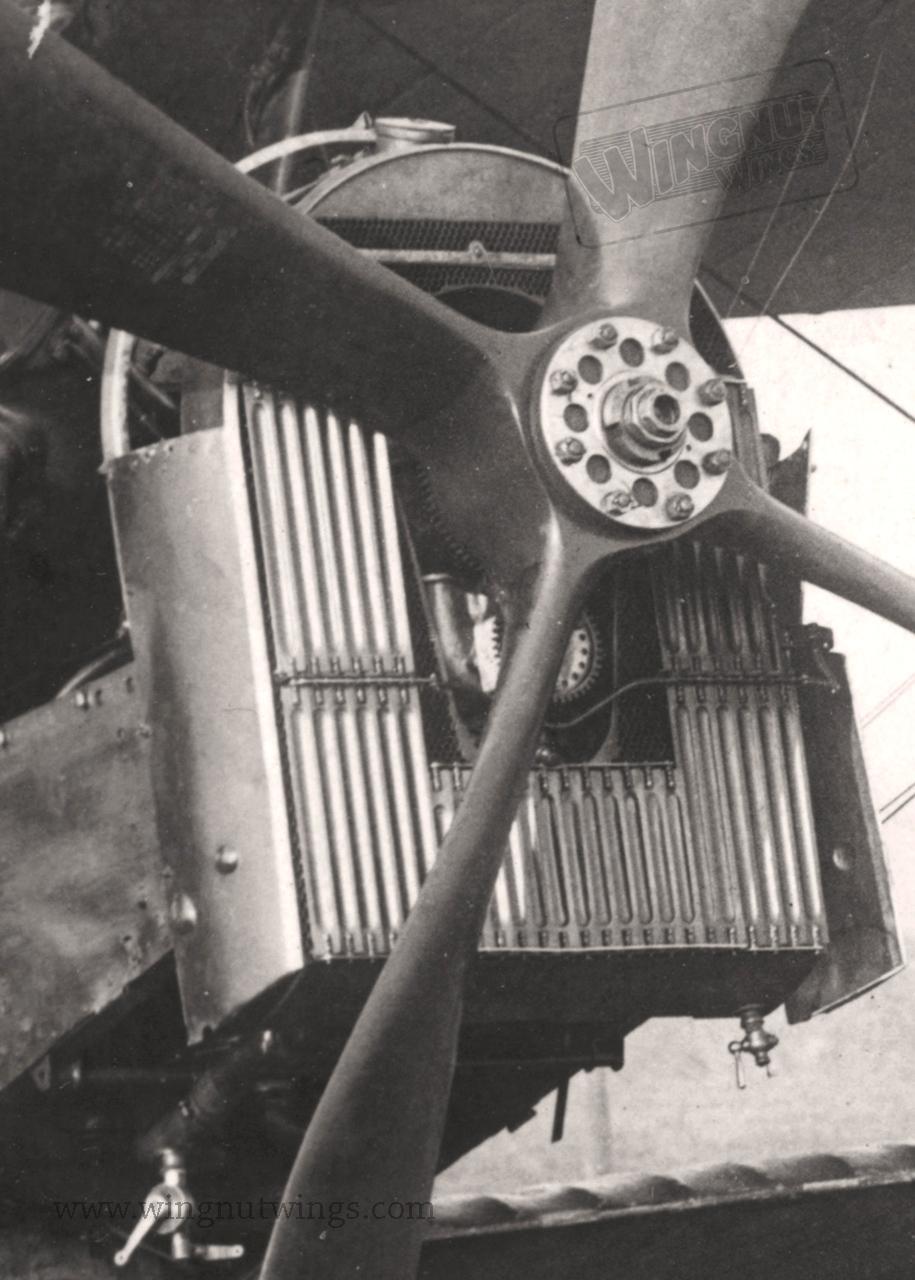
Today only a little bit of work on the front.
For comparison of pic 90 here is the original shutter in front of the radiator.
[img1]
3 December 2022, 20:06
Unbelievable as always and even the macros show no weaknesses in detail.....👍
4 December 2022, 11:12
It's a biplane now and 22 (in words twenty-two!) rigging lines of RAF wires are already added 😉
6 December 2022, 10:36
Wings and undercarriage are rigged now. 34 lines with 66 RAF wire terminals are added.
But far form finished: tail rigging, all control wires, windshield, Lewis MG with mount, ....
6 December 2022, 21:12
Please post a closeup of the rigging detail, especially the double lines...such a good look..thank you!
7 December 2022, 00:30
Yesterday it was a bit dark. I will try with daylight.
Until then, you may have a look here (and the following pics). The same method on my recent DH-2.
Airco DH2 | Album by bughunter (1:48)
7 December 2022, 06:19
I am trying to see your whole process. The little slide down pieces from Gaspatch are hiding what the actual connection is. The look is awesome and clean but what are you actually connecting the EZLine too?
7 December 2022, 08:04
See the manual of the terminals here: Resin Turnbuckles RAF (GasPatch Models 48235, 1:48)
I drilled blind 0.3mm holes before the assembly. Then glue the EZ-line (used because of the flat apperance) into the first hole with CA. Make sure there are two terminals on the line in right direction!
Then cut the EZ-line a bit shorter then needed. Then put the other end with tweezers into the second hole and glue with CA - hold it for some seconds. Now you have a straight RAF wire line. After drying slide the terminals to the end points and secure with CA. The terminal "legs" hide the holes and will be painted black.
")
The RAF wire terminals are also available in 1:32. On a 1:32 model I would used them for main rigging, and the 1:48 for smaller rigging points like the tail. On my 1:48 I have to use the same size for all.
7 December 2022, 08:25
Hmm, I don't think it is helpful to have additional parts between the terminals and the wing, as seen on this original picture (a Camel in this example):
[img1]
The RAF wires are flat steel bars with threads at the ends, so no turnbuckles but just those mounts at the end. And the "fingers" of the Gaspatch terminals are in real a flat peace of steel bracket, coming out of the wing, where the terminal is bolted on.

And I must admit that it is very difficult to get this EZ-Line threaded through the terminals in both directions. It is very handy to have thousands of curses ready for this task!
7 December 2022, 09:40
The hole is too small to use such tools. In 1:48 the terminals are very, very small! The outer diameter is around 0.38mm.
In the middle of the manual is "thread or EZ line", in the red box on the right it specifies 0.1mm.
7 December 2022, 11:45
Looking amazing and am in awe of how good the wire bracing looks and especially in such a small scale. 👍
7 December 2022, 18:01
Lochsa, I just used tweezers and a lot of patience. I think everyone will have its own way to handle this.
As you requested I added some more pictures.
Thank you James! I used this solution already on my DH-2 (not the stripdown, the normal one), Dolphin and Camel and I was convinced by the look.
7 December 2022, 20:45
Your rigging is utterly convincing. I can see why you'd need to have your bagful of curse words at the ready while you're doing it. Amazing work.
7 December 2022, 21:03
Thank you Kyle, your nice words are highly appreciated!
@Lochsa
There is also the option to use the Eduard solution called "stretchers" for this kit, if you can live with the look.
SE.5a stretchers (Eduard 48915, 1:48)
I have used them on the first SE.5a of this kit, as the Gaspatch parts was not yet available at that time.
")
8 December 2022, 17:48
Lost this damn little windshield! I know Eduard would provide a spare part, but need this TODAY! So I fixed it myself.
And I found a good use of the mentioned stretchers 😉
8 December 2022, 20:28
Wow Frank, you've done a lot of top quality work on this since last I looked. The neatness of your rigging always amazes me.
4 January 2023, 15:51
Thank you, friends! Due to a trip over Christmas and other things, nothing happened for a while.
Now I have resumed work on this bird with the exhausts. Because of my original plans to build another machine, I had cut the Eduard pipes according to the instructions. Now I need the long ones again after all.
I also noticed that the exhaust pipes on the B139 were a bit different and a bit thicker after all, just like those of a machine still flying today, of which I have great photos.
You guessed it - now some scratch work comes into play. That was tricky, more with pictures soon.
4 January 2023, 18:16
The new exhausts are painted and mounted now. Assembly was a complicated task because of the smallness of the parts. But the really difficult thing was to make the pattern of the holes 48 times smaller than the original.
But it looks really great now and was worth the curses 😉
5 January 2023, 17:28
When I saw pic 120 I thought "he can't do this"...
I was wrong.
Amazing detail.
5 January 2023, 17:59
Danke Christoph!
My pipes are in pic 120 too 😉 I used a tablet PC with the original exhaust on display and put my scratched pipes on the tablet. But it was hard to take a picture without light reflection and a lot of moire effects.
5 January 2023, 18:15
I thought, sooner or later I will get tired of Bughunters superdetailations. Well, at least not so far. Impressive again.
5 January 2023, 18:27
Your commitment to detail is always astonishing. Really great stuff as always.
5 January 2023, 19:14
This build was close to oob 😉
By the way, picture 27 confirms this shape of the exhaust pipes. As so often, there were many variants. With my other SE.5a I had it easier: the night fighter had a large flame damper, for which Eduard even includes two perfect pairs in resin in the Royal kit. Only one variant needs them.
6 January 2023, 11:32
Ah yes. I see that in picture 27. Didn't notice the many holes in the exhaust the first time I scrolled through the album.
6 January 2023, 12:06
Mee too. The quality of pic27 was not enough to determine the layout, but good enough to confirm that is the same layout as in pic120.
6 January 2023, 12:18
Remarkable neatness! When I try and do something similar it just looks like the part has been machine gunned.
6 January 2023, 12:24
Yep, OOB is dead. Just say'n…
Amazing superdetailations ( I love that term) as always 👍
6 January 2023, 13:24
Over the last few days I have only been able to do a little for health reasons (I had pain in my finger joints). I hope that this does not mean the end of model building!
Now there are no more parts left, everything is mounted on the model. Only some paint on some details and weathering is missing.
At the moment there is no weather for the final photos anyway.
10 January 2023, 19:03
Truly astonishing. I hope your fingers continue to cooperate with you.
10 January 2023, 19:17
Thank you very much mates!
Believe me Kyle, I really hope so! Aging is not for cowards!
10 January 2023, 22:14
Don't miss the new album with the final photos here: SE.5a B139 | Album by bughunter (1:48)
11 January 2023, 17:20
Album info
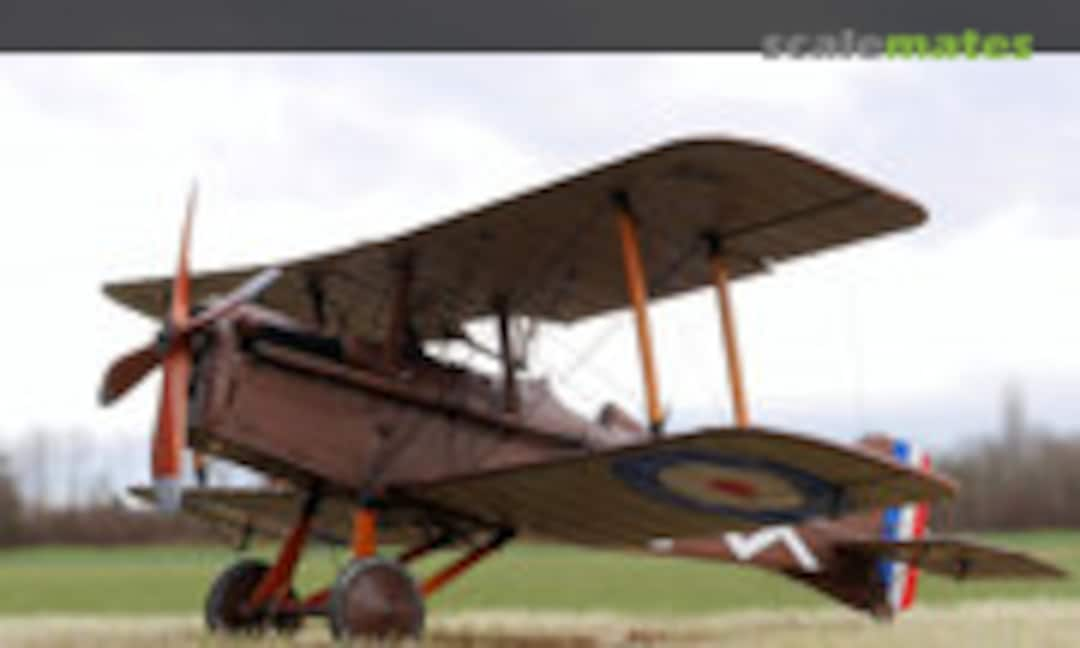
The B139 is a beautiful fighter, but it is not a option of the kit.
It is also shown the Windsock Datafile Special.
I will use the beautiful PC12 color shade of Mr Paint (MRP-254).
The markings are easy enough to be painted. For the serial number I will use a generic decal set.