

WIP

The Pavla pit fits very well, only a few parts of the fuselage need to be removed.


Marked some details that need to be reworked or removed.

Started to rework some areas.


The pit is nearly ready painted.


The Pavla cockpit fits very well, it's only necessary to remove the socket at the front end to give place to the wheel well.

For support a piece of plastic sheet was glued in place.


The pit was fixed useing UHU Plus 2 component glue.

Another reworked detail.

The main gear bays lacks of any sidewalls, so I decided to close at least the biggest gaps.


Main components ready for assembling.


The main wheel wells got a wash with black oil colors.

After joining the wing parts and the splitter plate a step on the upper side appeared.

After sanding and filling and sanding everything turns out okay.


The kit parts for the Air-2 Genie looks okay but need a little improvement.

Finished the "Nukes" for the Voodoo, painted after a photo from Canadian museum.


Fuselage and wings are finally joined.

The gap on the upper side was easily closed under some pressure using Tamiya Extra Thin Cement and Mr.Surfacer 1000.

The air scoops needed some rework, no great deal but good effect.

The fitting to the fuselage was not the best, so some filling and sanding was required.

The engine nozzles lacking any further details and there are no replacements on the aftermarket. I rebuilt the iner section from wire end ferrule and copper rod, the outer part was only sanded a bit thinner.

Painted the parts with different shades of Alclad II.


Comments
7 28 August 2020, 14:20
Nice to see you all following👍. Got a little further with cockpit installation and closing the fuselage.
7 September 2020, 12:16
Thanks guys.
Little update today, finished the wings and also nearly done with the fuselage. Next to this i tried to improve the Air-2 Genies from the kit.
18 September 2020, 14:31
Right, these were nuclear Air-to-Air-Missiles, they should destroy a whole bombe group at once. I´m glad this never happened.
18 September 2020, 16:12
maybe useful picture of a genie missile: ipernity.com/gp/bro/14188/aabbabd7
19 September 2020, 21:00
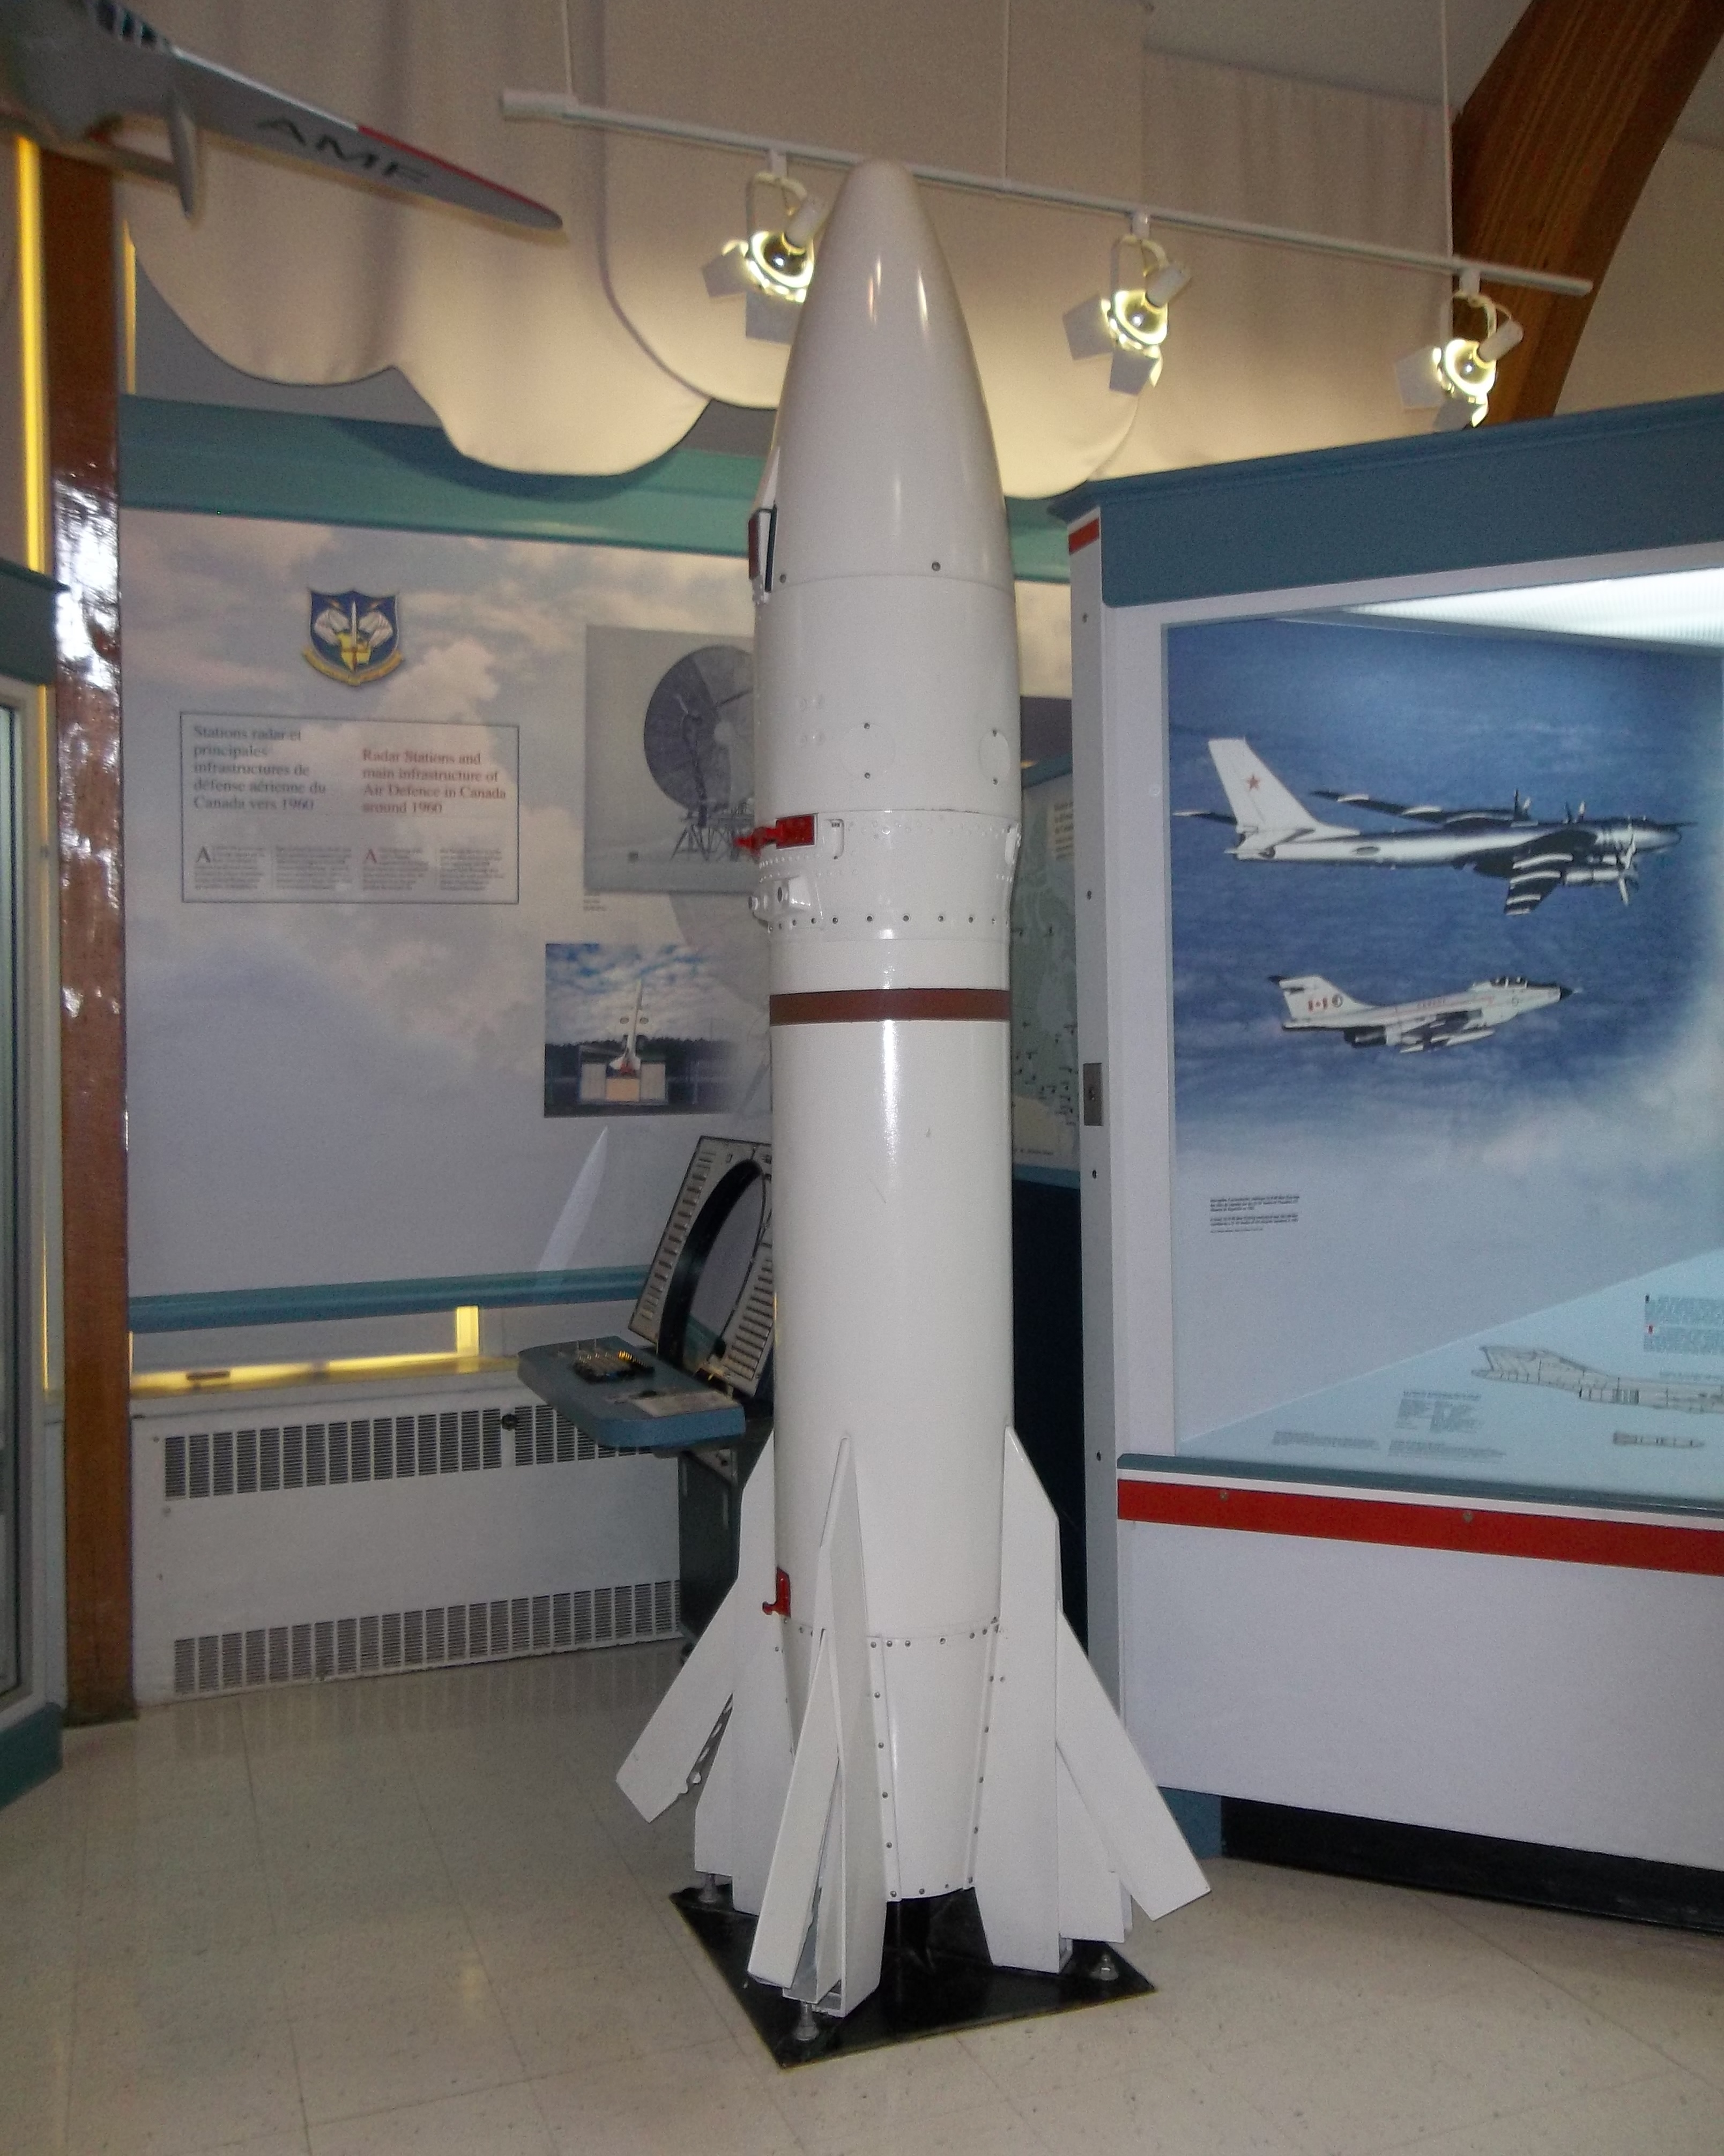
Thanks for the pic, shape looks a bit different to most other Genie pictures. I went mostley after this phot from Air Defence Museum in Bagotville. [img1]
19 September 2020, 21:07
I guess the fin extensions were only deployed after launch. I have never seen these on any Genie model missiles.
19 September 2020, 21:12

Hi Daniel: In previous life I was a Weapons Technician in the CAF. I was with 409 SQN in the 1980s.
I had hands experience with both the AIM-4D and the AIR-2A. I was "C" man which means I "drove" the AIR-2A on its trailer. Combined rocket and trailer weight was a 1,000 LBs. With the B man we loaded the AIM-4D by hand.
Note this kit has the AIM-4G missile. We used AIM-4Ds. Hannants has two nice after market two AIM-4D options.
Mike Belcher has a nice CF-101 decal sheet. Feel free to finish your kit as a 409 SQN aircraft. 🙂
belcherbits.com/lines/decals/bd10.htm
Thanks for building a Canadian Voodoo.
20 September 2020, 10:23
Hi Carl.
Nice to get input from the first hand. I will not pay any attention on the Falcon, I´ll only use the Genies and clue the movable parts from the weapon bay in place.
I allready have the sheet from Belcher Bits here, ordered directly from him, great service and very fast shipping to Austria.
Greetings to Canada, I hope you stay tuned.
20 September 2020, 11:20
Hi Daniel:
Mike is awesome. I have lots of his sheets. I will be watching your build.
Here is a photo of an AIR-2A on the trailer. I'm not in the photo but some of armorers I worked with are.
flic.kr/p/2jJsaPQ
Carl
20 September 2020, 13:35
One other item detail. There are two wires which hold the fins in. The rocket will quickly burn through them and the fins extend.
This the best photo I can find showing the wires. Can be made from heated sprue.
[img1]&name=medium

20 September 2020, 15:56
Carl, in that photo the armourers are getting pretty close to the undercarraige door. "Dink!" Typical flippin' Plumbers, making more work for the Riggers! 🙂
4 September 2021, 22:07
Thanks guys, nearly a year, I think I should keep on working on the Voodoo...
6 September 2021, 18:01


