Tamiya F-4EJ Kai Conversion

The cockpit that caused the change of plan

You can see the straps from the cigarette box foil on the rear seats. I like this because it gives a texture to the straps, albeit not really to scale

I must say, I was pleasantly suprised at how well the dry-brushing worked


The kit soft-fitted just before the decision to do the Kai conversion

Three of the principal modifications. Strengthening strips on the radome. RWR fairings on the tail tip and a modified top for the front instrument panel

The burner cans put together with a little pastel grime added

Unfortunatly the lighting killed the green hue in the cans, which is quite visible in all my reference photos.

I decided to paint the metal section of the rear fuselage before fitting it. Hope I don't regret this. It's also given me the chance to play with raw pastels and various washes. Actually looks a lot dirtier in real life than it does in the photos 🙂

Another of my early mods was to remove the molded first stage turbine blades and replace them with strips of thick foil. The odd shape was to ensure that you can't see through the gaps 🙂

And this is the final effect. I also corrected the strakes coming off of the gearbox cover (?) although you can't see it once fitted

Where we stand today

Time to start work on the combing. First, cut off the section to the rear of where the panel meats the combing

Sand off all kit detail and the kit HUD and then add some styrene strips to change the profile

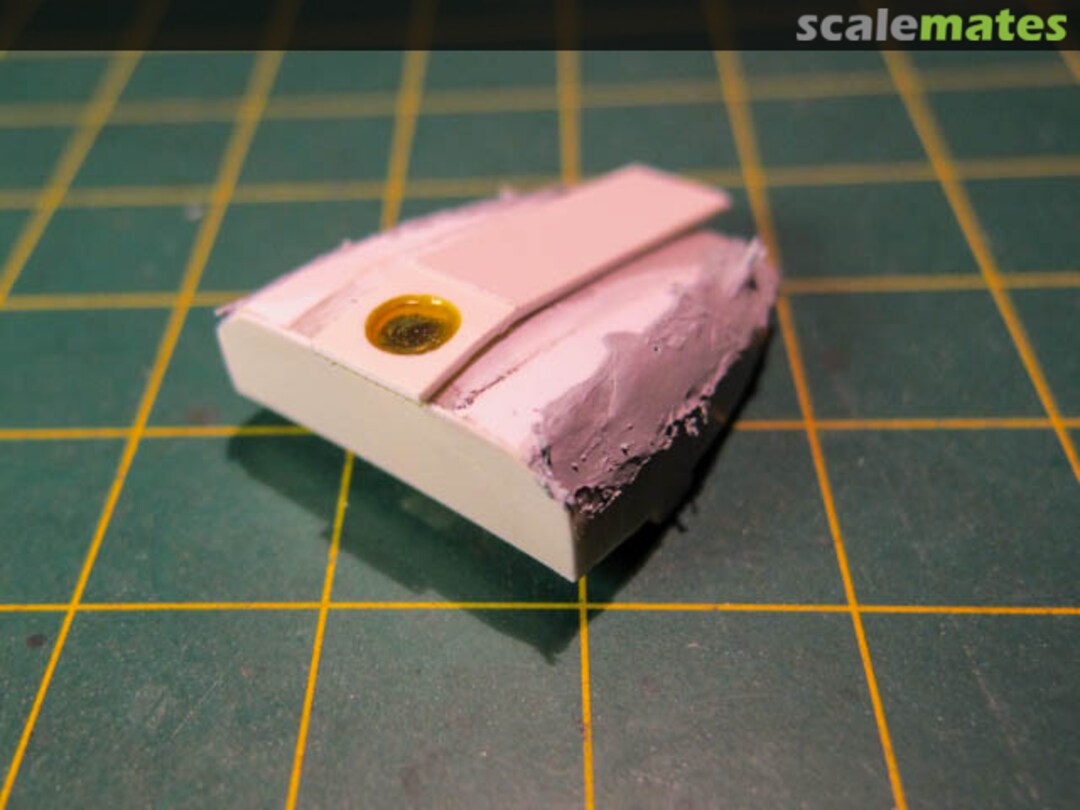
Add filler to complete the new profile (Oh and an HUD lense made of Kristal Klear and yellow ink)

Sand down

Now, for the part covering the gauges, some thick foil bent into steps

A frame of styrene strips and 'glass' made from an overhead transparency

And we have a Kai panel 🙂

The wingtips - Before and After

The cut marked out and the shaped part to be added

The cut is made!!

The various parts glued in - Compared to how I hope they will look

A little sanding and shaping ...

A spot filler and a coat of of primer ... and voila!

Soft fitted to the wing

An overhead view

And where we are at. Most of the major sub-assemblies are glued so almost time for primer and paint

Replacement RWR farings using styrene tubing and rounded bits of sprue

A replacement antenna on the spine made from styrene card

Masked off clears in preparation for paint

The rear is masked off

The clears are pained with the interior color before priming starts

Where we are at

First coat of primer down

Pre-Shading on the upper surfaces

Pre-Shading on the underside

Base coat for the underside (XF-19)

White tack worms masking the split

My 'Spray Booth'

Base coat on the upper surfaces (XF-54)

First coat of gloss applied

Radome painted and brights unmasked
Comments
9 March 2014, 05:44
Thanks guys.
@Michael, it was actually the Wolfpack conversion that lead me to this site. I was researching conversions out there and this was one of the hits.
In the end, I prefer to do the conversion myself. This is mainly due to the fact that the cost of the conversion, including shipping to ZA would be almost as much as I paid for the kit in the first place 🙂
9 March 2014, 18:25
Looking good. I'll follow next steps and am looking forward for the result.
10 April 2014, 07:53
Thanks for the kind words guys. 🙂 The encouragement certainly helps
@Murad - I used Valejo Surface Primer. Covers damned nicely. I've still got to find the best thinning ratio but I thinned it with about 30% Valejo airbrush cleaner and it covered quite nicely.
10 April 2014, 15:13
I really like your scratch-work to convert it to a KAI. Its pure fun to watch your steps and see it grow!👍
6 May 2014, 11:21
Thanks Holger. It was a lot of fun doing the work. It's the finishing that has me frustrated now 🙁
6 May 2014, 12:25
Oh! What exactly is frustrating you? Dont you like the upcoming decaling?😢😢
6 May 2014, 13:04
LOL Thanks guys. The frustration is actually my clumsiness. I managed to make a mess of one of the wings so set it aside for a bit. Will probably return to it soon though
6 May 2014, 20:44


