

Jeep Wrangler Rubicon (Job Log)

Water washed.

The gate was removed and sorted by color to be painted.

The body was painted black on the inner surface of the body to prevent light from penetrating after scratching the panel line deeply and cleaning the surface. (Vallejo Mecha Primer)

I didn't intend to remove the protrusion, but I removed it because I thought it would bother me.

The antenna support on the side was also removed.

I measured the size beforehand in case I lost it.

Then I drilled a hole and inserted an insect pin.

Body part: White surfacer
Wheel: Silver
Engine parts: Flat aluminum
Wheel: Silver
Engine parts: Flat aluminum

Body part: Gloss white
Wheel: Tamiya enamel X-18 (not XF-1)
Wheel: Tamiya enamel X-18 (not XF-1)

And wiped with the 'Finish Master'.

Done.
The rim edge of the actual car is also silver, but I only wiped the inner star(?).
The rim edge of the actual car is also silver, but I only wiped the inner star(?).

I planned to paint the body in 4 different colors, so I did the first masking.

1st. Done.

I masked once more and painted the next color.

Finally, mask once more and paint in black and It's done.

Need to fix.

Need to fix.

If the parts are painted separately, there may be a difference in color, so because the door was temporarily fixed on the body and painted, the paint penetrated through the gaps and the marked part was messy.
There is a possibility that the car will be completed with the door removed, so it is better to fix it neatly.
There is a possibility that the car will be completed with the door removed, so it is better to fix it neatly.

Masking again to cover it with white...
Since this next process will be coated with clear, decals were also applied in advance.
Since this next process will be coated with clear, decals were also applied in advance.

Done.
The marked hinge can be solved by lightly painting it with a brush.
The marked hinge can be solved by lightly painting it with a brush.

Clear coated. (twice)

I need to fix it...

Cleanup.

Final clear coated.

The calipers were painted with gold markers.

After the sheets are painted 'Chrome Orange'...

Masking...

Both sides of the headrest were painted with Tamiya markers(XF-1).

I applied 'GSI Smooth Clear' to adjust the overall gloss.

Painted with colorful clear.

Painted with 'Black Surfacer'(Flat Black).

No holes in the muffler end, so I have to drill them.

Left: Black
Left Middle : Metallic gray
Right : Silver
and I used 'Tamiya Weathering Master'
Left Middle : Metallic gray
Right : Silver
and I used 'Tamiya Weathering Master'

I painted Musou Black(this is like Vantablack) in hole of muffler end.

Sandpapering and Rough compounded.

Polishing done. (Tamiya fine compound)
I usually like polishing, but this time, for some reason, polishing was not enjoyable.
So I just polished it up and finished it.
I usually like polishing, but this time, for some reason, polishing was not enjoyable.
So I just polished it up and finished it.

Painted with hand brush.
Vallejo mecha black primer, silver(063)
Vallejo mecha black primer, silver(063)

Easy detail-up for dashboard with PET package.

Pour woodworking glue diluted with water between the gaps.

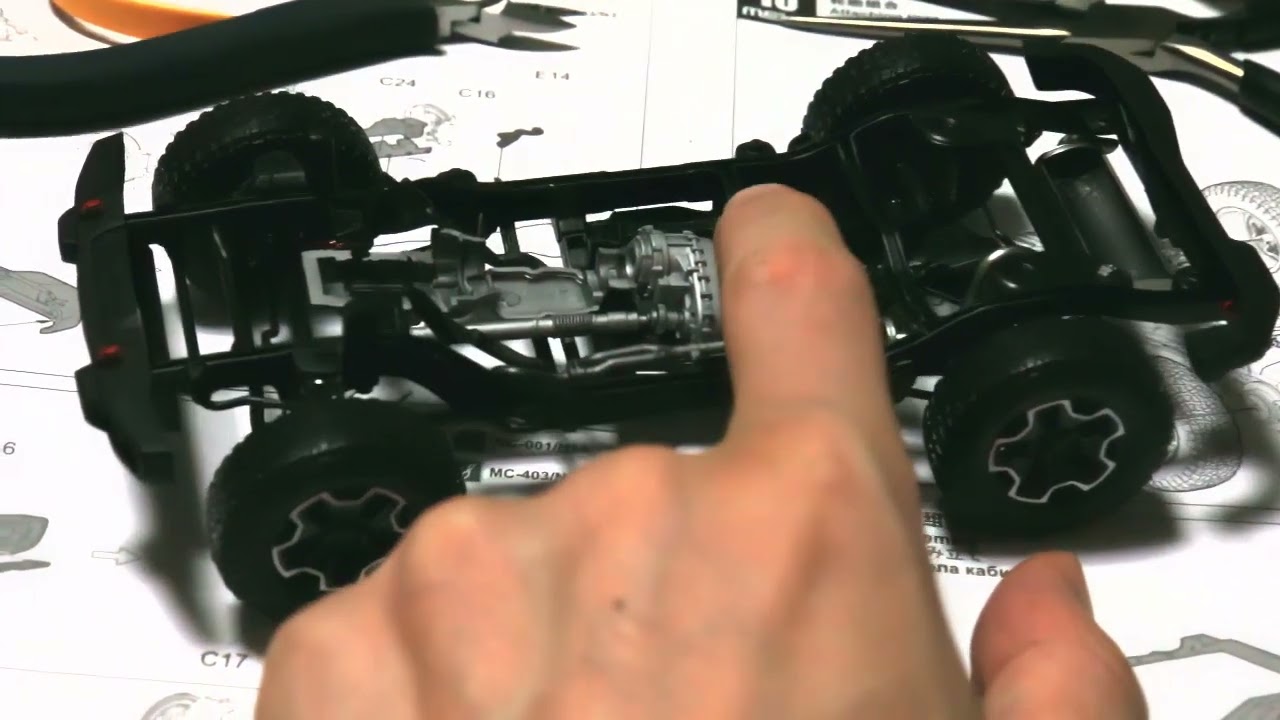
Now I started assembling it according to the instructions.

But assembly was not easy.


Interior done.

Interior done.

Each fender consists of two pieces, so it is better to assemble it firmly in advance.

Attach the fender to the side plate, and stick the silver foil sticker to the marked.

Hi BMO~

The side plates were attached to the interior.
For future assembly convenience, it is necessary to secure it very firmly with time to spare.
For future assembly convenience, it is necessary to secure it very firmly with time to spare.

In the process of attaching the roll cage and windshield, parts such as fenders eventually fell off.

Rear done.

It was stand up to adhesive the wiper. surprisingly It very well stay in this state.

Headlight : Liquid chrome marker.
Winker : Silver foil sticker.
Winker : Silver foil sticker.

Attached.

After stretching the black runner, cut it at an angle to make a windshield washer fluid nozzle and attach it.

Finally, After combining with the lower body, put on the antenna and various covers to complete the work.
After combining with the lower body, put on the antenna and various covers to complete the work.
After combining with the lower body, put on the antenna and various covers to complete the work.

But, it was impossible to assemble it densely by attaching it like a temporary assembly. Even the front passenger door interfered with the B-pillar, so the door could not be attached.

Removed all.

Good~

Finished.

Finished.
Comments
18 5 July 2022, 07:26
Cool! Gotta follow the rest of this one, excited to see how it will turn out!
5 July 2022, 21:14
Glad to hear, hopefully I'll have more to share on that very soon. I'll actually be starting one of these Meng Jeeps as soon as that's done, so I'm curious to see how this kit comes together. And of course, seeing your expert skills on display is always a treat! 🙂
6 July 2022, 17:41
Very nice progress, the seats look really great. 👍
Did you fix the problem with the clear coat on pic.22 by carefully sanding it and then applying a new clear coats?
If yes it seems pretty simple as long as one does not sand the colours.
I had something similar in the past on a kit mine as well and was not sure what to do.
20 July 2022, 06:46
Thanks Tom ...
@István Szücs - Yes, I used my finger with microfiber cloth.
@Robin (WhiteGlint) - Yes, after pic.22, I did clear coating again and sanding + compounding.
20 July 2022, 13:27
Thank you for answering. The result is awesome, I like these happy colors, looking real good!
20 July 2022, 13:41
Thanks Brandon, Dominik
@Brandon - It looks like you are almost at the finish it too. Good luck to the end.
21 July 2022, 17:26
Thanks haha, lord knows I'll need it! But yeah, great result on that Jeep, I'm excited to start mine soon!
22 July 2022, 18:16

