

Piper L-4H


Comments
40 15 January 2021, 23:14
Welcome Alex. I decided to start this while I wait for the paint to cure on my other projects. The Lima Hotel is a beautiful plane.
15 January 2021, 23:47
Alex how did your Piper PA-18 Super Cub come out? I'd love to see some pictures.
15 January 2021, 23:51
Oh my -blush-... The (half-started by someone else) Airmodel vacform Super Cub in question was built by a young me circa 1990-1991... I was at the time very proud just to be able to finish it... but, frankly, nothing much to show... It survives at my parents' house, which I do not currently visit due to Covid... but since you are the second person to ask (Ben has also asked) I might take some pictures some day... (so that everyone can have a laugh or at least a smile!)... Being a big Cub/Super Cub fan, I have several examples of both the land and float versions of the old KP Cub tool you just started... and so I will closely follow your efforts here... Cheers!
16 January 2021, 00:59
Hi Alex, I'd be very happy to just complete a vacform kit, the one time I tried the seams kept popping apart on me and I eventually put it back in the box.
Agree the piper cub is just one of those classic, well proportioned aircraft, looking forward to seeing how this one goes.
16 January 2021, 02:25
Ben to keep the seams of a vacuform from popping apart it is a good idea to add a strip of styrene on the inside to attach to.
16 January 2021, 15:16
It's a long and complex story, but as this was a flying model, the weight of such strips would be prohibitive, the seam areas are backed by balsa. The model is a IM-99 Bomarc, large model rocket.
16 January 2021, 17:04
Great work on the interior detailing! Hope you will be able to see all that work when it is finished!
18 January 2021, 18:12
I'm debating whether to leave the door open, but that would mean cutting the clear window which I may not want to risk.
18 January 2021, 18:16
I fool myself every now and then I'm gonna start my KP Pipers. Following
19 January 2021, 14:13
Welcome Łukasz Gliński, this kit is challenging to say the least. There is so much clear plastic that doesn't have any support.
19 January 2021, 14:19
Whoever designed this kit forgot to put the 12 tiny elves in the box who were supposed to hold everything while I glue it together.
19 January 2021, 19:54
I don't think you want to rebuild the floor😉 It looks ok, not much will be visible anyway. In case you can't live with it (I know that feeling) I propose brush-painting it with a very very thinned dark brown, like I did on my trawlers deck to get a woodish result.
21 January 2021, 08:29
The parts look familiar to me! Some year ago I soldered the Eduard Piper Stripdown. Of course most of the parts was PE, but there was a complete plastic kit included to get wheels, cowling, engine ... An in comparison to yours it looks like KP.
Looks nice, only the internal struts on top of the cockpit should be replaced by thinner wire or so. See my bird here
modellversium.de/gal..iper-j-3-eduard.html
21 January 2021, 21:54
Thanks bughunter, your strip down might be a useful reference. Unfortunately I don't have a soldering gun yet, otherwise I would have used brass tubing more to scale. I did try using super glue on the tubing but that doesn't work very well. Anyway the bars I made from styrene sheet are thinner than what was in the kit.
21 January 2021, 22:22
There's something that's kind of fun about making at least a halfway decent model out of one of these ridiculous masses of malformed plastic.
22 January 2021, 03:07
I think I will replace the internal struts in the cockpit because they do need to be thinner and every reference photo that I could find shows that the top strut is not hourglass shaped but V shaped. Does anyone know why the kit has an hourglass strut on top? Maybe something I don't know?
22 January 2021, 04:50
I spent two hours this morning stretching sprue. It took me a while to figure out how to control the thickness but I figured it out. So hopefully I can now replace the struts.
22 January 2021, 09:27
There was one strut PE on my kit, so it looks like two V: [img1]
More pics in the build report: modellboard.net/index.php?topic=51213.0

22 January 2021, 15:32
So the KP kit did get it wrong. That is what I was thinking after doing further research. Thank you bughunter.
22 January 2021, 19:27
The new struts are on. In the end I the only part I used from the kit in the cockpit was the seat.
25 January 2021, 20:45
Yes, a dramatic difference. These struts are much better than the last ones base off of the kit.
25 January 2021, 21:44
Looks top! 👍
I recommend that you don't glue the plumbs with cyanoacrylate (if they are glued with this).
It can cause problems in the future due to the vapors.
2 February 2021, 20:01
The floats provided are shorter than normal which makes the plane a tail sitter. Since there is a rudder on the tail I am assuming that this is the correct position. I have never seen a Piper with a tail rudder. Does anyone know if this is correct or should I lift the tail?
3 February 2021, 19:54
The SP-AFY had the small float rudder only (it's still flying today, but on wheels and in US Army disguise):
[img1]
Never seen a Piper Cub with such biggie rudder and definitely it wasn't a tailsitter:
muzeumlotnictwa.pl/i..lizacja/katalog/2532 (Polish Aviation Museum pics)

3 February 2021, 20:18
I've found Pipers with large tail rudders while doing research but none seem to be tail sitters. I'm going to assume that this is just another error from KP. I will try to correct the position by adding skegs and float rudders to the floats, since the lead weights I put in the nose and floats didn't seem to help with the position.
4 February 2021, 15:29
As per Lucasz' picture, I think the float bracings need to be more vertical. They look overly angled forward. Also, look where the floats mount - rear brace attachment should be near the step and forward attachment farther forward.
4 February 2021, 18:09
The good news is I greatly enjoy this project / thread and appreciate immensely Skywalker's efforts... and all the mates' input (the bad news is I'm now afraid of starting the KP Cub kits in my stash... as I was planning...). But great tutorial, in any case...
4 February 2021, 18:30
Alex, if you will be doing this kit you'll need "Glue n Glaze" or something similar to mount the windows.
Glue n Glaze 50ml (Deluxe Materials AD55, No)
")
4 February 2021, 18:35
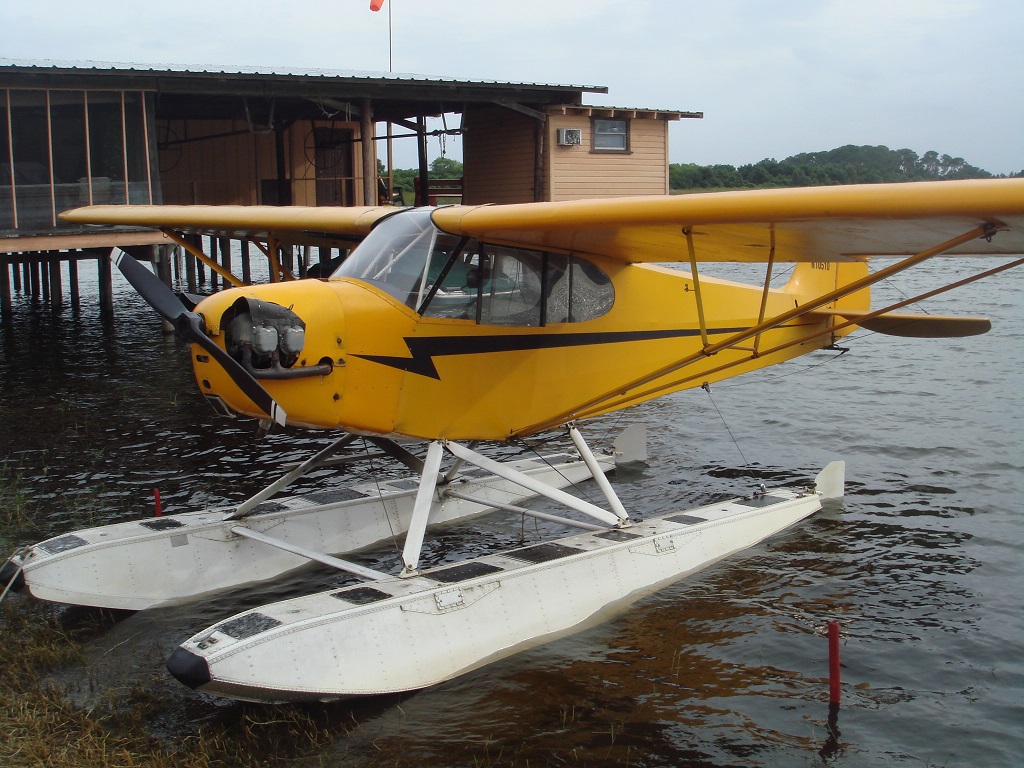
I am doing the 9206 version. But if you notice the SP-AFY has W shaped float bracings where as the kit has provided N shaped float bracings. I don't know which would be correct for the 9206, but N shaped by bracings do exist on Piper's as can be seen here [img1]
4 February 2021, 18:47
I would say the kit-supplied rear brace is too short. The floats should be somewhat parallel to the wing...
4 February 2021, 19:31
Well the skegs didn't straighten the plane so it looks like I will have to replace the float bracings with the original W shape. Thank you KP!
4 February 2021, 19:38
And move the floats a bit back. Compare your pic 48 with the others, also on your yellow one is the rear brace vertical.
4 February 2021, 20:14
Just a note, the yellow Cub is a modern one, the KP propopsals are not. That may explain the differences 🙂
4 February 2021, 20:45
[img1]
Bit better side-view of the 'N' strut arrangement. I would say KP has mounted the floats incorrectly parallel to the rear fuselage and made the struts too short to fit the profile.

4 February 2021, 21:00
I've replaced the float bracings, with stretched sprue, using the original W shape. It seems to be working. I just have to wait for the glue to dry to make sure.
4 February 2021, 21:03
May be it is a bit late, but do you know this wonderful video from 1943? It shows a huge amount of details and show the filigree construction of the Piper.
Youtube Video
If I see such video, I want to build my own plane immediately!

28 February 2021, 20:56
Wow great video. I've been a bit delayed on the modeling from real life. Looking forward to finishing up as soon as I get some time.
1 March 2021, 21:29
Finally, I got some time to model again. Preshading completed. On to the real painting!
5 April 2021, 17:47
Thank you Alex. I hope I can encourage you to jump in with both hands and start your Piper kits. I've had to rework this one several times just to figure out where the problems with the kit are but I think now that you know what they are you should be able to finish it without difficulty.
7 April 2021, 14:13
Well I managed to drop a tool right on top of the model today. Busted the landing gear up pretty bad. I was able to fix it, but now its a little bit off center. Its not worth redoing the entire landing gear all over again from scratch. I'm just going to keep going and call it good enough.
9 April 2021, 20:44
It makes things look so much more realistic when you do things like pose the ailerons like you did, Skywalker. Someday I should learn how to do it!
13 April 2021, 00:12
My decals look suspicious too. Thx for the tip, will consider getting replacement ones from Czechia 👍
4 May 2021, 19:09
They look great. I'd avoid sanding (too risky IMHO), but would add generous layer of flat varnish on top at the very end.
6 June 2021, 18:46
I need some help with the float rigging. Since I couldn't find any photo of 9206 I am using SP-AFY as a reference. aerialvisuals.ca/Air..er.php?Serial=141866
It looks to me like the rudder controls go into the float half way up. I don't see any other support rigging for the floats. Any ideas guys?
13 August 2021, 14:04
I'm not sure if the following could help a bit or it would make things worse, but here it is, just in case grelickscollection.t..m/image/143992463702 - (I could send you a better scan by e.mail)
13 August 2021, 14:20
Ooops... I've completely forgotten the entire W vs N float struts discussion earlier on this thread - apologies...
13 August 2021, 14:48
Thanks guys for the links. Unfortunately the photos are so blurry it's very hard to see what's what. I'll assume the W shaped struts give enough support and just run the rudder controls half way up and into the float. At 1:72 the rigging is so fine you can barely see it anyway. Lukasz you my be right about the USAF livery being fictional. There are a lot of models out there with this livery but no documentation that I could find. It's a shame... I would have preferred the real deal.
13 August 2021, 15:15
Well, nothing new with the original KP kits. Their camos are often fictional (MiG-15UTI and Piper for example) or have wrong colouring (e.g. Mi-8)
14 August 2021, 18:28
I'm calling this one done. It was a long hard labor due the the restrictions of the kit. But I think I managed to make it work. I learned a lot and enjoyed the challenge.
14 August 2021, 22:20
You did more than enough with this kit, Skywalker - respects! 👍 (errr... I do have a question though, regarding the ailerons...)
15 August 2021, 14:06
Aren't they supposed to move to different direction? One upwards and one downwards? I should have spotted this months ago - and I'm a bit puzzled nobody else noticed - so maybe I got something wrong - so just asking... BTW - was this thread suddenly turned to "private" on purpose? (although this way I felt more comfortable about asking the aileron question...)
15 August 2021, 16:40
I'm not sure. I thought they could be controlled separately, but I've never flown a plane. Anyone else want to jump in on this? I'd love to know the answer. BTW - Thanks for letting me know the thread got turned to private. I must have accidentally hit it while scrolling the screen on my phone.
15 August 2021, 17:03
Alex after watching some YouTube videos I think you are right. I believe, but I'm not positive that ailerons can only move in opposite directions. Elevons on the other hand can move together or opposite each other and flaperons can move in opposite directions or down. Is this correct?
15 August 2021, 17:22
I've fixed the aileron issue and I'm waiting for the glue to dry. Thank you Alex. I'll try to make some photos with a white background before I frame the model.
15 August 2021, 17:49
Well, yes. Elevons and flaperons are particular cases, but I think in the case of the little Cub we just have simple ailerons, that (unless I'm mistaken) should move to opposite directions. Dropping or lifting both ailerons seems to be a common mistake made by aircraft modelers - for instance, this L-4 arcair.com/Gal9/8401..9-Piper-Eren/00.shtm has also both ailerons dropped, which, again, I THINK is wrong. I seem to remember (I say this with a grain of salt) that in more modern planes ailerons can simultaneously drop when the plane is on the ground with no hydraulic pressure - but I don't think that's the Cub's case. However, as you suggested, I would very much like someone more knowledgeable / technically competent than me to jump in on this and either confirm or not... And apologies for this little storm in a teacup(b)!
15 August 2021, 17:55
Alex, I very much appreciate your insight and I am 99% certain you are correct. I sent a message to a Airforce pilot who is in Scalemates and I'll let you know what he says about this issue.
15 August 2021, 18:39
Ok here is the answer I got from the pilot... "Yes, that's 100% correct. Many modelers tend to show off their masterpieces with all control surfaces hanging down and in most cases this is plainly wrong. Pilots take their pride to clean up the aircraft before shut down and that means flaps up and speed brakes in. On some aircraft, flying surfaces do droop down but manually operated ailerons will always move in opposite directions."
16 August 2021, 06:16
First time ever I see this kit finished in this livery. And I like it a lot 👍
16 August 2021, 07:54
I'm glad that this point was clarified and that you were able to easily fix this! Once again, congratulations for a great result with this kit and thanks for a valuable tutorial... (from where I seat, out of the corner of my eye, I get glimpses of my old-tool KP L-4 kits in my stash...). Keep up the good work! 👍
16 August 2021, 12:08
Thank you Major and Guy. This kit was a challenge and I learned a lot doing it. I enjoy taking less than ideal kits and improving on them but they eat up a lot of time.
27 September 2021, 07:55

