

Sd.Kfz. 6


Comments
2 15 October 2016, 23:43
Nice profect Steven, but why Kfz.6? Bronco and trumpeter? Because of better shape of structure from Trumpeter kit? I have TMDs correction set
16 October 2016, 08:49
Thanks, Joerg. It all begun with buying the Trumpeter kit unaware of the problems. It contains some parts that will still be used rather than Bronco's. I never saw the correction set over here. Now I have made the tracks, you can compare with a Sd.Kfz.251 track.
22 October 2016, 22:19
Those Rifle Racks drive me crazy, tried today 2 hours to put them together, can you show, how you put them together?
22 October 2016, 22:25
Before I bought these, I scratched some in another project: Sd.Kfz. 251/7 | Album by StevenVD (1:35)
22 October 2016, 22:41
I just adapted the front axle width according to PMMS advice (perthmilitarymodelli..ak/5ton_flak_01.html)
1 November 2016, 23:39
The gas tanks from Bronco and the air pressure tanks from Trumpeter are merged in one model. Also the lubrication points aft had to be added.
4 November 2016, 00:40
I built both of the incorrect engines, Bronco delivering an underweight Sd.Kfz.251 engine and Trumpeter an Sd.Kfz 7 one on steroids. It won't be visible after all with the hood closed. I also intend to use a mix of Bronco and Trumpeter road wheels but there's a slight difference in diameter. I wonder if that would be noticeable on an uneven terrain. The correct Bronco sprockets contain no less than 14 pieces of PE.
5 November 2016, 23:37
The headlights are coated with silver inside, though I'll put the cover on them. Some large parts appear triple in this kit due to revisions. I decided to cram the Trumpeter engine in the model, because you can peer through the engine grille quite well.
12 November 2016, 01:36
Now the outlines of a halftrack finally emerge. I made use of my Aber toolclamp set.
13 November 2016, 19:56
Thank you, Wesley. I just tried out the Voyager rifle racks. They can be compared to the famous Aber tool clamps because they too can be "unbuttoned" afterwards. The wire used is the Friul type, quite sturdy but thin. Will look cleaner than the kit part.
16 November 2016, 23:38
I advanced on the SiG33 build to measure the length of both and find me a 30cm base plate.
8 January 2017, 00:23
Lots of possible wheel options come with the kit. Some care is needed to free them from the sprue. The suspension couldn't have been reproduced more authentic than in this kit. It also means that to get things right, it's a rather complicated business.
14 January 2017, 21:04
Looks very good so far Steven. A very clean build and a well detailed build-log. Count me in
14 January 2017, 22:35
Thanks, Moritz. I just added the equilibrators and the anchor. AFV has done a goodjob for the gun shield but I think I'm going to need the Voyager set for Dragon to approach the right thickness.
21 January 2017, 23:12
The dio base got its side contours made out of plywood. A ditch poses another barrier to cross.
2 February 2017, 22:31
I completed the Miniart railway section as far as possible before the painting phase. Then I plastered the base. Things to notice about the railway kit: awesome details, some cleaning up of the mould lines but no sprue ejection points and one downer: the pattern on the rails for the lining of the sleepers does not continue correctly when you join the rails with the perforated part to another set of rails (i.e. like when you add them to another Miniart kit to lengthen the tracks, or in my case when you join the rails the other way around). Very positive is the variety of sleeper wood patterns and the differences between nut rotations on the bolt plates.
6 February 2017, 00:32
The plaster of last night proved to have become rubbish, so I had to cast it all over again. Now I also threw some ballast stones in. I used the Friuls to make an impression in the mud.
6 February 2017, 22:58
The splintershield took a day of work to not get finished yet. The railroad section is taking on primer.
12 February 2017, 00:19
The Voyager set is now connected to the gun via a dryfit. After that I proceeded with adapting the Bronco roadwheels of the half-track to the narrower, correct friul track width.
19 February 2017, 20:22
Lots of ammo are prepared, I don't know where to stick these Stielgranate.
21 February 2017, 01:16
I'm adding some elements of nature tot the diorama. The goats will be disturbed by the dissonant arrival of the Third Reich.
26 March 2017, 11:41
It appears that the far side of the diorama will be revised. It will contain a second track with the Miniart signal pole near it.
10 June 2017, 23:01
Yes Martin, it fell victim to the Chupacabra or something. Today I trimmed the railroad structure on the dio outlines.
11 June 2017, 22:45
The ballast for the second track is cast and dispensed over the wet plaster.
13 June 2017, 00:11
Some ballast is still added with pva glue and then primed gray. The railroad track is primed black.
14 June 2017, 23:27
The Miniart semaphore is joining the diorama. A difficult but impressive kit.
4 July 2017, 23:49
Thanks. It's a 251/7 with some engineers that will spread out to make the passage easier for other non-tracked vehicles.
5 July 2017, 15:36
After some repair of the fiddly Voyager gun rack PE, the 6/1 could be primered in Motip red. It has that many roadwheels so I needed a second paining stand.
1 August 2017, 20:52
Most parts are primed now. The last few pieces of the gun suffer from orange peel, I'll try to correct that.
3 August 2017, 20:06
And the gun, which was difficult to cover competely with the barrel already mounted.
24 August 2017, 22:13
Wow, it seems you are underemployed with your OOB atomic cannon😉😢
26 August 2017, 06:55
No worries, Alexander. Today I will acquire the lasercut maintenance platforms, that will need to be carefully attached to the cannon and receive some access stairs too. I have not procured fitting holes because I don't know what offset they used. The original thickness made them too weak and they crumbled.
The 251 has got it's wheel rubbers painted on, the wheels could not be masked because of the center hub. The front tyres will be masked and airbrushed.
26 August 2017, 08:43
I was building a plaster base for the sign post that is now assembled properly.
17 December 2017, 01:51
The bike with sidecar has been started. It's easy to put together the wheels in a wrong direction. The second and fourth discs point with the pattern inward. I perceived the error after completion of two wheels, it could be corrected because Tamiya glue was used sparingly.
10 February 2018, 23:26
The engine is painted to be able to fit in the frame. The sidecar gets together very nice. Some detailing remains possible, like the spring cylinder under the back seat and the MG supports; the picture of the boxart showed a flange on it.
17 February 2018, 23:54
This kit is not the easiest to fit together, it seems like the locator pins are all oversized. At the end, you still get a perfectly detailed motorcycle. At one moment I had the front engine cover wrong, that's corrected in the last two pictures. Painting this will not be a walk in the park.
24 February 2018, 23:58
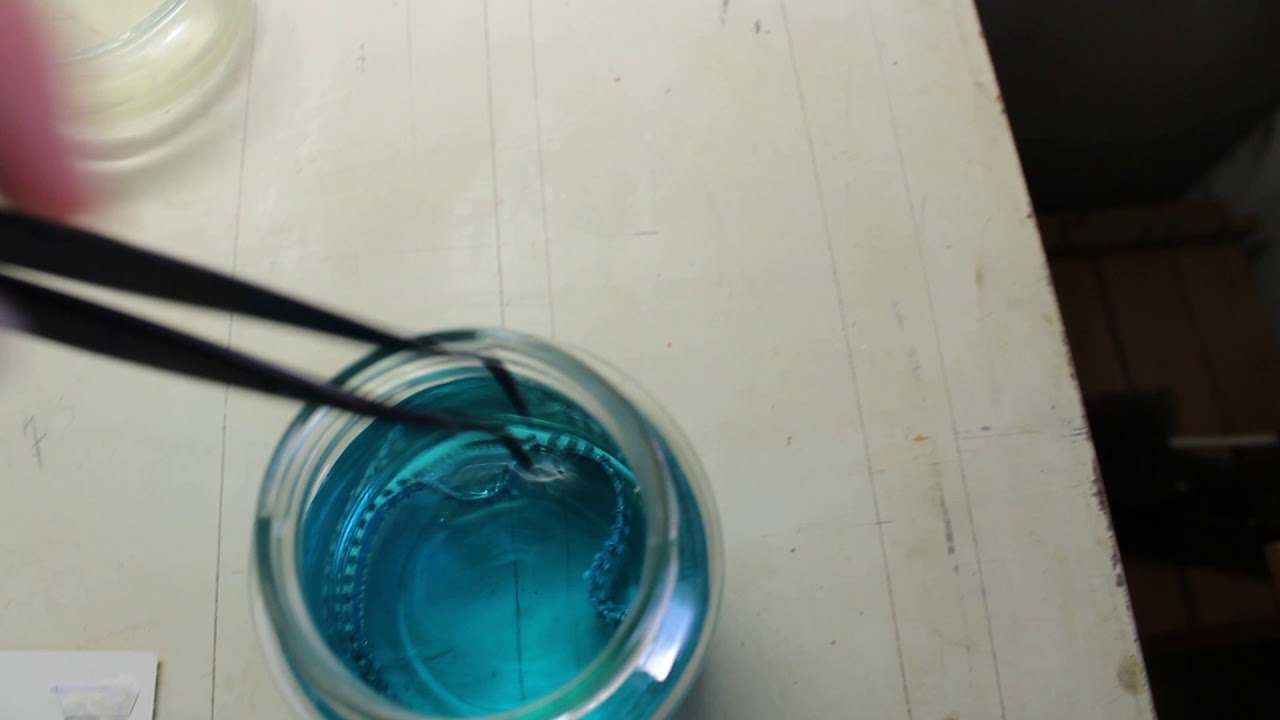
Experimenting with MiG Burnishing Fluid to get the white metal tracks to blacken. You get a rusted look from it. Fun to do, but it should be avoided to use CA glue on beforehand. Here's a link to a movie I made when I tought the track would blacken instantly, a few minutes seemed necessary after all: Youtube Video
11 March 2018, 23:14
Thanks, Zsolt! I forgot to explain, this week I fixed the railroad to the base and covered it in gravel.
30 March 2018, 15:48
I removed some gravel and repainted the grit. To do that, I had to mask the railroad with tape, straws and Micro Mask.
6 April 2018, 23:24
I threw some logs aside the high track and moved the stopper over to the other side after some repainting of the woodwork and rails. This solves a few problems that kept me from fixing the vehicles on the dio.
13 April 2018, 19:54
The Sd.Kfz 6 wheels and tracks are fixed to the chassis. Only now the position resembles the album picture.
17 April 2018, 15:38
I bought an Aber upgrade for the LeFH18 I got from Militracks and I started torturing myself into squeezing all these tiny particles into the AFV kit. Pushing all these rivets in the shield is not so easy, but at least the plate thickness will be corrected.
16 July 2018, 21:58
The LeFh18 has it's gunshield mounted, it was a taxing undertaking because all of the original fixing points are modified to PE non ideally adapted ones. Then the brass cylinder jammed, I had to remove material before it would fit. The cycle had some instruction problems outlined in 3 pictures: a part you should avoid, one that is not named and one that is repeated unnecessary. I already made a passenger for it.
23 July 2018, 22:29
What glue do you use for the PE? It seems to me that you have no problems at all gluing it with plastic?
Well done 👍
28 July 2018, 15:10
It's the standard thick Zap-a-gap in the yellow bottle. This is combined with the pink bottle if there remain seams without glue in them.
28 July 2018, 19:34
The Aber photo etch trail lock replaces an already small plastic piece with more than 10 smaller pieces, making it completely articulated. The shovel blades on the trails have to be meticulously bent to fit the guides. Even the wheels will get some PE.
29 July 2018, 17:42
The shovels are mounted on the arms with a strange concoction of Aber discs. I included their instructions to enable you to follow my photo album. Glad that that worked out fine.
31 July 2018, 21:35
The gun is now ready for painting, after some cleaning and restoring some small pieces.
1 August 2018, 20:29
Really nice progress, Steven. Superb detailing work although it'll hardly beat your Atomic Cannon insanity😉
2 August 2018, 11:07
Thanks, Alexander. It won't surpass it in album space, but I think it will have a lot more interaction in the elements. There must be about 15 figures already. Today I painted the gun and the bike in Gunze Dunkelgelb.
7 August 2018, 21:07
Now I dry-fitted the half-tracks again to the base plate, with the new gun and bike. I also tainted the Sd.Kfz.6 with Flat Earth and Deck Tan. The two last pics show a better position of the bike.
8 August 2018, 23:41
Thanks, Olly. Today, all the vehicles are painted with their shadows and highlights. Some other details are already put on.
13 August 2018, 23:30
Some smaller paint jobs and the jerrycan assembly are done. The bike gets the rubber tyres.
16 August 2018, 00:12
Most of the Hornet heads are placed today. The gun is completed and the half-track got primer red in the lockers.
17 August 2018, 22:41


