Ferrari 250 Testa Rossa - 1958 - WIP

So it begins...

Assembling the body, sanding it smooth and put it in primer.

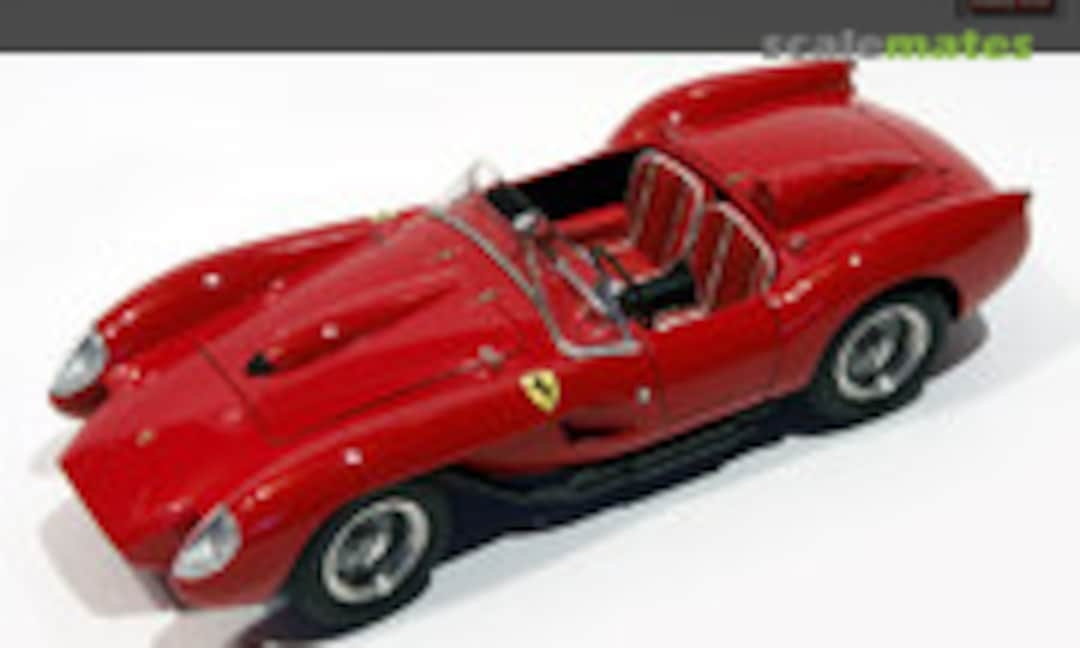
After the primer has dried, I applied a first coat of flat acryl red, then 3 wet coats of TS-08 Italian Red.

Obviously, the body still needs to be polished, but the glossy base is already there.

It's hard to see at the picture, but the bonnet was already polished to try out the procedure.

After the polishing I will have to decide if a gloss clear coat is still nessecairy...

I would like to achieve making a picture of my model looking just the way the reference picture of Ralph Lauren's car looks...

I finally started to build the engine, showing why exactly this car was called 'Testa Rossa' which means 'Red Head'...

I added the wiring and the red guiding tubes through which the wires are running. I also ordered aluminium turned intakes, but they haven't arrived yet...

The big 12-cilinder 3 liter engine takes up quite a bit of space in the chassis.

No brake discs here in 1958, this Ferrari was stopped through drum brakes 😉

I continued the build, assembling the rear suspension and the frame.

Hasegawa did a pretty good job simulating the tubular frame chassis.

The engine compartment is not complete yet; a few hoses and wires still need to be added.

The bottom of the car is complete; I think I will give it a light drybrushing.

I didn't add any details to the underside since it won't be visible anyway...

I replaced the kit wire wheels by aftermarket rims by Hobby Design. Each wheel consists of 11 parts (of which 8 PE parts).

With the wheels in place, the chassis looks a lot more like a car...

The wire wheels really give the model a realistic look; compared to the kit wheels they enhance the model 100%.

The cockpit still needs a lot of details before I can fix the body to the chassis.

Here you can see part of the battery which was located in the cockpit interior.

I added some extra details to the engine bay and I painted the seats.

Seats were given several coats with different shades of red to enhance the depth effect.

Once the red seats were looking good, I sprayed them with a protective flat coat.

Next I could mask the white stitches and spraypaint them as well.

Close-up of the engine bay. Nearly finished now. Intake trumpets still missing though.

In the meantime I managed to repair the damaged paintjob. Next I fixed the decals and I sprayed a gloss coat.

Next I painted the complete body interior semi gloss black.

I also added some of the details like the headlights, the instrument panel and the radiator (not visible here).

Finally I gave the panel lines a black wash and I when this was done I polished the complete body once more.

The body was put aside and the final detail work was done at the chassis.

The last wiring was fixed in place, and the only missing parts under the bonnet are the intake trumpets which are still in backorder...

I fixed the gear lever and the hand brake in place.

The fuse box was installed as well.

Now the chassis and the body are both ready to be joined together.

Here is the last picture before the 'wedding ceremony'...

And here we are, the chassis and body have been joined together.

It was a bit tricky to pull the body over the chassis, since it needed to be widened a little and I was afraid to damage it, but it all went well.

The engine looks great under the open bonnet.

Of course, it will look even greater once the intake trumpets will be installed.

But for now, this will have to do.

Dryfit of the bonnet.

I will probably show the car with open bonnet, but it looks ok with closed bonnet as well.

Another view of the car form the rear.

Now I can start applying the detail trim on the Ferrari.

First thing on the to do list: installing the exhausts...

So that is what I did: fixing the exhausts.

Next I attached the model to a firm acryl base, allowing me to continue the build without having to touch the car very often.

Fixing the external trim is very important and tricky: you can ruin your model in the final phase of the build easily...

The most tricky part will be fixing the windscreen without damaging the paintjob.

But first things first: I assembled the steering wheel, cutting away the plastic centre and replacing it by PE. I also assembled the tiny ignition key (compare to a normal push pin)...

This is the spot where the ignition key will have to be fixed. As it is quite prominent it's important to make an interesting key with keyhanger 😉

Close-up of the dashboard and gear lever.

Close-up of the radiator protection mesh.

Close-up of the engine bay. Still no intake trumpets 🙁
Comments
14 November 2012, 06:37
I applied the Ferrari red paint. First I airbrushed a mist coat of acryl flat red to cover all the panel lines and hard to reach corners. Next I applied wet coats of Tamiya TS-08 Italian Red with the spraycan, just as long as needed to get a glossy finish. It turned out to be 3 wet coats. I still have to polish the body, but the bonnet already received a polishing treatment to try out the procedure.
Building Ferrari's is always a tricky business since no 2 cars are exactly alike. Therefore it is quite dangerous to just surf around the internet and gather some refernce pics of a similar car. I chose to build the Ferrari Testa Rossa with chassis N° 0734 TR 58. This is the Ferrari owned by F. Gibbs since 1958, and he never raced it. After Gibbs' death the car was sold to Francois Sicard who fully restored it in 1978. In 1985 it was sold again to Paul Pappalardo, and since 1993 it became property of Ralph Lauren who still owns the car and who shows it on very rare occasions. Most of the time the Ferrari is showed at the Fine Arts Museum, Boston, MA, USA. So now I have a guideline against which I can check the details that need or needn't be built on my model. I will try to follow the Ralph Lauren example as close as possible.
24 November 2012, 14:13
Wow, looks great! Such painting surely isn't easy. We tank builders can cover a mistake with dust etc., you can't! Looks absolutely perfect to me. I admire your skills! 👍
24 November 2012, 15:08
Hi Guy, My favourite non F1 Ferrari. Nice start, the colour looks spot-on, the finish already looks great. Rattle Can or Airbrush??? Watching!!!👍👍👍
24 November 2012, 17:20
I finally decided to continue this build which has been 'on hold' way to long!
20 November 2013, 16:29
@Steve: rattle can. But I somehow managed to damage the paintjob of the body when dryfitting the chassis, so I had to do some repairs by airbrush. The paint is drying now and will be polished again to make it shine again as before...
20 November 2013, 16:32
4 days under a year😮
Wow!!! where's the time gone???
I'm still watching tough!!!
20 November 2013, 16:35
Sorry to hear that Guy!!!
Dry fitting a painted model is a necessity, but can be dodgy...
It's where ingenuity and experience is vital, you have bags of both Guy 🙂)👍
20 November 2013, 16:43
What a fantastic gloss finish Guy, awesome! I build airliners so I have an idea of the effort you have applied to get this finish. Love the snaps they look great and show the effort applied.
21 November 2013, 08:22
Awesome Guy...
Even in 2013 that's still a gorgeous car.
And that Model is a marriage made in heaven, top job...
15 December 2013, 14:00
Guy...
I really like the ignition key, a particularly nice little addition to a fantastic model.
Excellent8)👍
19 December 2013, 18:56