Tom Cruise WIP
![Album image #1 Album image #1](/albums/img/9/5/8/1526958-77774-29-720.jpg)
![Album image #2 Album image #2](/albums/img/9/5/6/1526956-77774-98-720.jpg)
![Album image #3 Album image #3](/albums/img/9/5/7/1526957-77774-11-720.jpg)
![Album image #4 Album image #4](/albums/img/9/5/9/1526959-77774-91-720.jpg)
![Album image #5 Album image #5](/albums/img/9/6/0/1526960-77774-39-720.jpg)
![Album image #6 Album image #6](/albums/img/9/6/1/1526961-77774-59-720.jpg)
![Album image #7 Album image #7](/albums/img/9/6/2/1526962-77774-10-720.jpg)
Maybe I’m being spoiled by Tamiya kits… but I really wasn’t expecting fits like this
![Album image #8 Album image #8](/albums/img/9/6/3/1526963-77774-62-720.jpg)
Not so good looking intakes
![Album image #9 Album image #9](/albums/img/9/6/4/1526964-77774-19-720.jpg)
Hmmmm
![Album image #10 Album image #10](/albums/img/9/6/5/1526965-77774-36-720.jpg)
![Album image #11 Album image #11](/albums/img/9/6/6/1526966-77774-50-720.jpg)
Lots of gaps to fill
![Album image #12 Album image #12](/albums/img/9/6/7/1526967-77774-78-720.jpg)
![Album image #13 Album image #13](/albums/img/5/4/6/1529546-77774-44-720.jpg)
Sanded down the steps, these are not panel lines
![Album image #14 Album image #14](/albums/img/5/4/7/1529547-77774-99-720.jpg)
More putty after figuring out which seams to keep
![Album image #15 Album image #15](/albums/img/5/4/8/1529548-77774-18-720.jpg)
And even more putty
![Album image #16 Album image #16](/albums/img/3/3/5/1531335-77774-76-720.jpg)
![Album image #17 Album image #17](/albums/img/3/3/3/1531333-77774-52-720.jpg)
Polished and tinted
![Album image #18 Album image #18](/albums/img/3/3/2/1534332-77774-97-720.jpg)
panel lines re-scribed
![Album image #19 Album image #19](/albums/img/3/3/3/1534333-77774-52-720.jpg)
Decided to fill this too
![Album image #20 Album image #20](/albums/img/3/3/5/1534335-77774-46-720.jpg)
The actuators are labeled wrong in the manual, just make sure all the joints are facing inward
![Album image #21 Album image #21](/albums/img/3/3/4/1534334-77774-65-720.jpg)
Ready to paint
![Album image #22 Album image #22](/albums/img/3/3/6/1534336-77774-76-720.jpg)
Primed
![Album image #23 Album image #23](/albums/img/7/2/4/1534724-77774-75-720.jpg)
![Album image #24 Album image #24](/albums/img/7/2/5/1534725-77774-55-720.jpg)
![Album image #25 Album image #25](/albums/img/7/9/3/1535793-77774-83-720.jpg)
Apparently, the whole plane is painted with FS36375, not the usual dark and light ghost greys. I spent $19.99 on Ace Combat 7 Top Gun DLC to confirm it… which means that Meng and Revell both got it wrong. I got suspicious of this because the jet looked unusually bright in the movie and internet photos. HB has the right color scheme but the paints are mislabeled.
![Album image #26 Album image #26](/albums/img/7/9/4/1535794-77774-44-720.jpg)
I will try some in-between shading to add texture before topping it off with light ghost grey again.
![Album image #27 Album image #27](/albums/img/9/0/8/1536908-77774-42-720.jpg)
Blue spots
![Album image #28 Album image #28](/albums/img/9/0/6/1536906-77774-83-720.jpg)
Texture with stencils
![Album image #29 Album image #29](/albums/img/9/0/7/1536907-77774-66-720.jpg)
Idk
![Album image #30 Album image #30](/albums/img/9/0/9/1536909-77774-31-720.jpg)
No idea how this will look
![Album image #31 Album image #31](/albums/img/9/1/0/1536910-77774-30-720.jpg)
Maybe the stencil shading wasn’t the best idea, I had to spray lots of grey to cover them
![Album image #32 Album image #32](/albums/img/9/1/1/1536911-77774-75-720.jpg)
![Album image #33 Album image #33](/albums/img/2/3/5/1539235-77774-86-720.jpg)
I thought long and hard about how long and how wide the stripe goes
![Album image #34 Album image #34](/albums/img/2/3/6/1539236-77774-69-720.jpg)
Not bad
![Album image #35 Album image #35](/albums/img/2/9/4/1541294-77774-90-720.jpg)
Meng’s decals look like they were made in MS paint in comparison…
![Album image #36 Album image #36](/albums/img/2/9/2/1541292-77774-62-720.jpg)
These are the best decals I have ever used! They come off easily, conform to details without softeners, and don’t easily stretch or break!
![Album image #37 Album image #37](/albums/img/2/9/3/1541293-77774-69-720.jpg)
Noice
![Album image #38 Album image #38](/albums/img/2/9/7/1541297-77774-26-720.jpg)
Furball stencils arrived just in time, I will use a combination of all three
![Album image #39 Album image #39](/albums/img/2/9/6/1541296-77774-11-720.jpg)
The insignia is too dark, I will spray highly diluted main color to blend it
![Album image #40 Album image #40](/albums/img/2/9/5/1541295-77774-40-720.jpg)
After
![Album image #41 Album image #41](/albums/img/9/8/9/1543989-77774-52-720.jpg)
Ready for another gloss coat
![Album image #42 Album image #42](/albums/img/9/9/1/1543991-77774-72-720.jpg)
![Album image #43 Album image #43](/albums/img/9/9/0/1543990-77774-24-720.jpg)
This looks kinda bad…
![Album image #44 Album image #44](/albums/img/9/9/2/1543992-77774-20-720.jpg)
Is this normal?
![Album image #45 Album image #45](/albums/img/5/5/0/1545550-77774-65-720.jpg)
Washing with brown… this was a bad idea
![Album image #46 Album image #46](/albums/img/5/4/9/1545549-77774-30-720.jpg)
The wash left an uneven yellow tint to it. Looking at other super hornets on the internet and I realized they’re all on the bluer side.
![Album image #47 Album image #47](/albums/img/1/2/0/1546120-77774-55-720.jpg)
Non-slip pads
![Album image #48 Album image #48](/albums/img/1/2/1/1546121-77774-61-720.jpg)
This Gundam Marker is super helpful in weathering! It can be blended with a dry brush or cotton swab directly on the surface. It sticks to the surface better than oil does so it’s pretty easy to make some good looking stains without worrying about wiping it all off. It’s also finger grease resistant!
![Album image #49 Album image #49](/albums/img/1/2/2/1546122-77774-49-720.jpg)
Painting smoking rivets has never been this easy
![Album image #50 Album image #50](/albums/img/1/2/3/1546123-77774-81-720.jpg)
Flap streaks by Tamiya grey panel line accent
![Album image #51 Album image #51](/albums/img/1/2/4/1546124-77774-79-720.jpg)
Weathering almost done in just one night
![Album image #52 Album image #52](/albums/img/3/2/0/1553320-77774-96-720.jpg)
Adding highlights with white oil paint
![Album image #53 Album image #53](/albums/img/3/2/1/1553321-77774-29-720.jpg)
Polished the spine and verticals
![Album image #54 Album image #54](/albums/img/3/2/2/1553322-77774-85-720.jpg)
Ready for flat coat, I wanted this to have high contrast between the black stripe and flat grey
![Album image #55 Album image #55](/albums/img/3/2/5/1553325-77774-15-720.jpg)
Damn it… I ordered 1/144 decals to patch this up later
![Album image #56 Album image #56](/albums/img/3/2/3/1553323-77774-44-720.jpg)
Stock nozzles in this kit are kind of a joke
![Album image #57 Album image #57](/albums/img/3/2/4/1553324-77774-16-720.jpg)
I used light gull grey as off white, it’s more cohesive this way
![Album image #58 Album image #58](/albums/img/3/2/6/1553326-77774-87-720.jpg)
Nozzles painted with super iron, followed by thin layers of clear brown and clear black
![Album image #59 Album image #59](/albums/img/3/2/7/1553327-77774-62-720.jpg)
Noice
![Album image #60 Album image #60](/albums/img/6/1/2/1625612-77774-52-720.jpg)
![Album image #61 Album image #61](/albums/img/6/1/6/1625616-77774-61-720.jpg)
![Album image #62 Album image #62](/albums/img/6/1/3/1625613-77774-95-720.jpg)
My least favorite part of any build
![Album image #63 Album image #63](/albums/img/6/1/4/1625614-77774-77-720.jpg)
Thankfully I didn’t lose anything
![Album image #64 Album image #64](/albums/img/6/1/7/1625617-77774-66-720.jpg)
Installed gears and doors
![Album image #65 Album image #65](/albums/img/6/1/5/1625615-77774-26-720.jpg)
Mr. Cruise himself
![Album image #66 Album image #66](/albums/img/6/2/1/1625621-77774-20-720.jpg)
![Album image #67 Album image #67](/albums/img/6/1/8/1625618-77774-76-720.jpg)
Only two pylons as in the first training scene
![Album image #68 Album image #68](/albums/img/6/1/9/1625619-77774-94-720.jpg)
The last things I installed
![Album image #69 Album image #69](/albums/img/6/2/0/1625620-77774-44-720.jpg)
Done!
Comments
37 14 August 2023, 01:38
![](/profiles/img/52499-702-s.jpg)
Awesome! Stepping in late, but went through the pics twice, just to be sure I didn't miss any 🙂
1 September 2023, 05:47
![](/profiles/img/71675-536-s.jpg)
Funny enough. I bought the 1/48 Revell Top Gun Kit just to convert it into a regular navy scheme. Having known about your project, we could have exchanged decals.
Revell FA 18E | Album by Guillohm (1:48)
5 September 2023, 11:25
![](/profiles/img/72020-938-s.jpg)
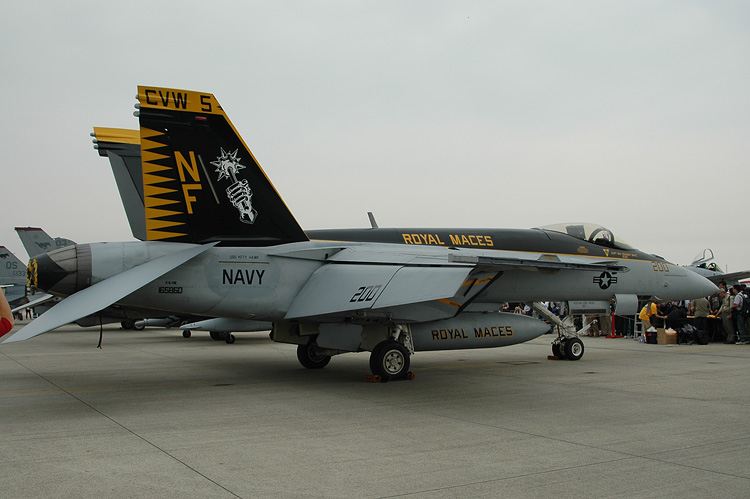
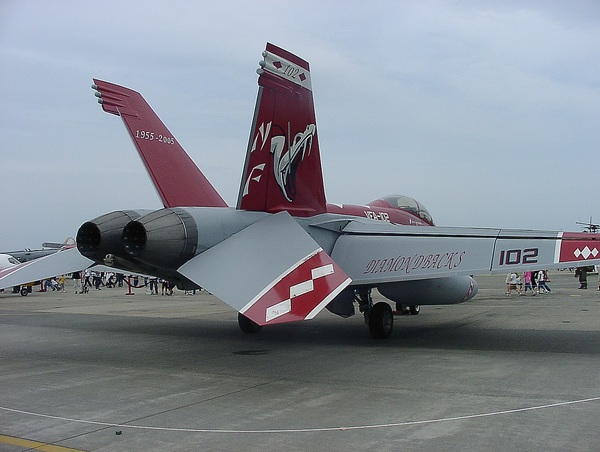
Picture 44: The inner flap sits as far as I can see at photos just a tiny bit higher than the outer one ?
5 September 2023, 18:08
![](/profiles/img/48987-587-s.jpg)
yep, theres a little bit of "misalignment" between inner and outer flap but most importantly the cover panels are parallel to the flaps, this is indeed a bit off on the model.
Great job fading the decals 👍
[img1]
[img2]
5 September 2023, 18:42
![](/profiles/img/77774-824-s.jpg)
Thanks mark and Daniel, bummer that it's the other way around on the model 🙁
Guillaume, the Revell decals are pretty inaccurate to the movie, probably because it came out two years before the movie's release…
5 September 2023, 22:41
![](/profiles/img/77774-824-s.jpg)
The build is finally done after a 3 months gap! More pictures coming soon!
26 December 2023, 00:43
![](/profiles/img/77774-824-s.jpg)
Pictures are in the new album!
Maverick's F/A-18E from Top Gun: Maverick | Album by kengdad (1:48)
26 December 2023, 20:48