

Aktuelles
Wall
hat ein neues Fotoalbum hinzugefügt.
76 Bilder
Caproni 311 / 311M / 313 / 314
1:72
Caproni 311 M / Special Hobby / Masking almost done


Projekt: Caproni 311 / 311M / 313 / 314


 2+
2+All comments (29) » 32 19 November 2023, 22:21
All looking great I have the Italeri kits as well I cannot bring myself to mask those massive canopies
26 May, 01:42
I paint everything by hand, I sometimes use masks if there are ones on the market but generally I find painting canopies isn't that difficult by hand. A thin stiff straight brush, then you can scrape off any slight mistakes with a finger nail.
26 May, 02:01
hat ein neues Fotoalbum hinzugefügt.


All comments (6) » 16 23 April, 21:23
Thank you Alberto and Joseph Russo! That motivates me to continue on the path. You will see the progress at the Caproni-project 😉
26 May, 01:23


May 19, 2024
May 15, 2024
 (Revell 05128)")
May 11, 2024
hat diesen Artikel gestartet
")
Bren Gun Carrier & 6pdr Anti-Tank Gun Vintage Classics
Airfix 1:76
A01309V 2018 Neue Verpackung Mehrfachthemen (2)11 May, 22:29


May 5, 2024
hat ein neues Fotoalbum hinzugefügt.


4 26 October 2023, 23:02
Dornier knew how to make seaplanes and this one is superb in its civil version.
Transparent parts can be improved with polishing pastes
5 May, 11:26
Thank you. I will try this first. In case of failing I will try vac-forming it. If failing again I think I heard of third party canopies and will make a search.
5 May, 21:45
April 27, 2024
April 24, 2024
")
April 23, 2024
")
April 8, 2024
")
besitzt diesen Artikel
")
Junkers Ju-86R German high altitude reconnaissance and bomber A/C
RS Models 1:72
92277 2022 Neue Verpackung 8 April, 19:05
April 5, 2024
")
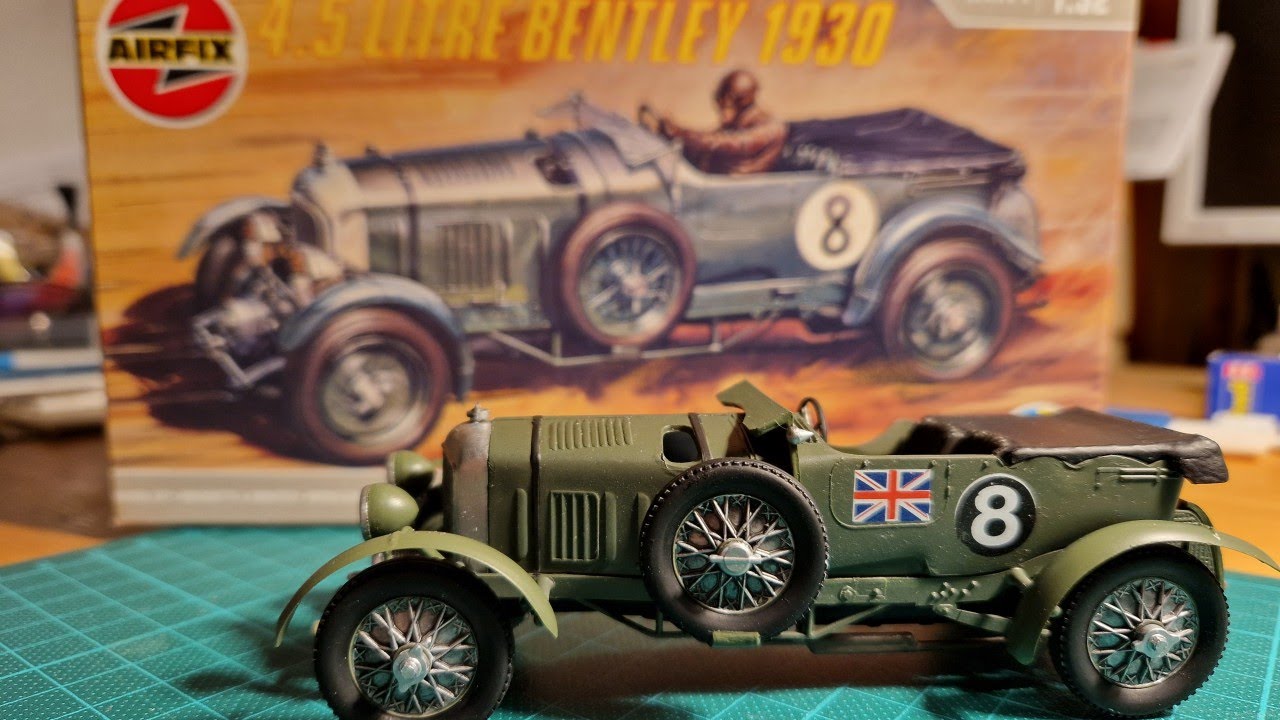
hat ein neues Fotoalbum hinzugefügt.


All comments (10) » 24 26 December 2023, 01:24
Today I finished this car. I am happy how it looks and as I always say: My best model is the one I just finished. I learned a lot and the next one will be better.
hope you enjoyed the build and I want to say thank you for following and watching. 😄
5 April, 21:58
April 3, 2024
")
March 27, 2024
hat diesen Artikel fertiggestellt
")
Apollo-Saturn V 25th Anniversary Of The Moon Landings 1969 - 1994
Airfix 1:144
09170 1994 Neue Verpackung Mehrfachthemen (2)27 March, 00:18
March 26, 2024
hat ein neues Fotoalbum hinzugefügt.


All comments (5) » 14 21 January, 21:47
Looking good so far, Chris.
The black ring you are referring to was painted on the test vehicles, SA-500, which both Revell and Airfix used as reference for their respective kits. If you're not accurately modelling a specific Saturn V, don't worry about it. As to your other curiosity, the real Saturn V was 363 feet (110.6 meters) tall and weighed an average of 6.3 million pounds (2.8 million kilograms) at takeoff, depending on the mission.
24 March, 06:55
Thank you, Mike. That clarified a few things. As I do not want to build a specific Rocket, I agree and don't mind the painting. There are some things I learned during building, so I would have to build a second one, that woukd be more accurate. 😉
24 March, 23:59
March 23, 2024


March 22, 2024


March 21, 2024
March 17, 2024

March 15, 2024
")
")
March 11, 2024
")
will diesen Artikel
")
Double kit
Gotha Go 145C & Focke Wulf Fw 44J Austrian Service Kora Models 1:72
KPK7268 2018 Neue Bauteile Mehrfachthemen (2)11 March, 22:48
will diesen Artikel
")
Fiat CR.32 Chirri over Austria.2 Decal options for Italeri and Supermodel
LF Models 1:72
C72227 2018 Neue Bausatzform 11 March, 22:48
")
")
besitzt diesen Artikel
Bren Gun Carrier & 6pdr Anti-Tank Gun Vintage Classics
Airfix 1:76
A01309V 2018 Neue Verpackung Mehrfachthemen (2)11 March, 22:29
March 6, 2024
March 5, 2024
March 4, 2024
hat diesen Artikel bestellt
Bren Gun Carrier & 6pdr Anti-Tank Gun Vintage Classics
Airfix 1:76
A01309V 2018 Neue Verpackung Mehrfachthemen (2)4 March, 22:54
March 3, 2024
February 27, 2024
February 26, 2024
")
February 23, 2024
")
")
February 21, 2024
")
February 18, 2024
February 16, 2024
February 6, 2024
January 27, 2024
")
January 23, 2024
")
")
")
January 21, 2024
")
January 10, 2024
")
")
")
")
")
")
")
")
January 7, 2024
")
")
")
")
December 30, 2023


December 29, 2023
December 26, 2023
hat ein neues Fotoalbum hinzugefügt.


All comments (6) » 4 22 December 2023, 23:56
Some issues working with PE are more irritating than others: I think photo etch looks the best on vehicles, like tanks, less stress and much easier imo than on ship models.
Problem 1: Tiny parts. Some tweeers are better than others. Though I prefer holding thiny parts with my fingers, to avoid part catapulted into nowhere if it springs off the grip with the tweezer.
Problem 2: Application of cyanoacrylate glue. I mainly use a "glue loop", but one can use the tip of a sharp blade to collect a tiny drop of glue, or something else.
Problem 3: Cyanoacrylate glue drying up. I keep my tubes of superglue in a small sealed glass jar filled with silica bags, the moisture in the air makes the glue go hard.
Problem 4: Precision placement of parts is tricky. So tricky, one is wise to use methods for making this easier, like using a small bit of masking tape to hold things in place at the correct position, or use some other water based glue so that you can at least have ample time gluing the part onto the plastic, even if it won't fully stick, then you can add cyanoacrylate glue around the edges if you have to, once your part is somehow fixed properly at the correct place.
Problem 5: Tools. Tamiya diamond file is nice for sanding off stubs off metal parts like photo etch, I have three, as they wear out over time.
Problem 6: Photo etch can be too hard sometimes, and so one can soften it up by exposing the PE to a lighter flame. Works best with parts that aren't thin. Annhealing thin parts = easily destroyed PE parts. Softening the metal is required some times becuase one often just can't bend the PE good enough without softening the metal with a flame.
Problem 7: Safety. Well, anything sharp and adhesie might be bad, best keep control of your hands (and elbows, for your coffee cup on the table), maybe keep them well away from your face, so don't make a habit of scratching your face while also holding a tool. Also, best not have the habit of rubbing your eyes when working with superglue.
Problem 8: I forgot. Painting photo etch with a brush I can only imagine, is not fun. I have used an airbrush for some time and so I never thought about this kind of issue until now as I sit here and write this text.
Problem 9: PE parts can be removed using a debonder agent (liquid, somewhat toxic probably), but imo this liquid tend to soften the plastic, and so using a debonder is undesirable if one want to maintain a perfectly smooth plastic surface finish. One can instead try pry the PE part off using a sharp blade.
Using the minimal amount of cyanoacrylate glue, might be wise at first, so that you can remove the part if you aren't happy with the placement.
25 December 2023, 08:52


December 25, 2023
December 23, 2023


December 22, 2023

December 21, 2023


December 19, 2023
December 18, 2023
December 17, 2023


December 10, 2023
November 26, 2023
November 25, 2023

wnolder.php?lang=de
2023-11-25 01:15:31
2023-10-26 00:43:22
134336
/ajax/wnolder.php?lang=de&sd=2023-11-25 01:15:31&md=2023-10-26 00:43:22&filter=&w=134336
todo