

Quick build


These are the paints and tools I’m going to use. The red and green are optional for the navigation lights.

And off course the Testors spray can... It’s a one color paint scheme and one would want to add that to any initial shopping basket in that model shop.

Let’s start building that ‘first’ kit!

The wings and fuselage are made of a dense but brittle plastic and I managed to break off this locator pin while dry fitting.

White, yellow, black (mixed with white) and a hint of chrome produced this already.

The interior green with that same dark grey mixture and some chrome drybrushing. The wash is thinned black paint with dishwashing detergent.

Coming together alright.

Only the pitot and antenna mast left on the sprue. Minor sanding and polishing and then I’m hitting it with spray can paint.

I’m quite impressed by this little kit! Parts are simplified but fit together very well!

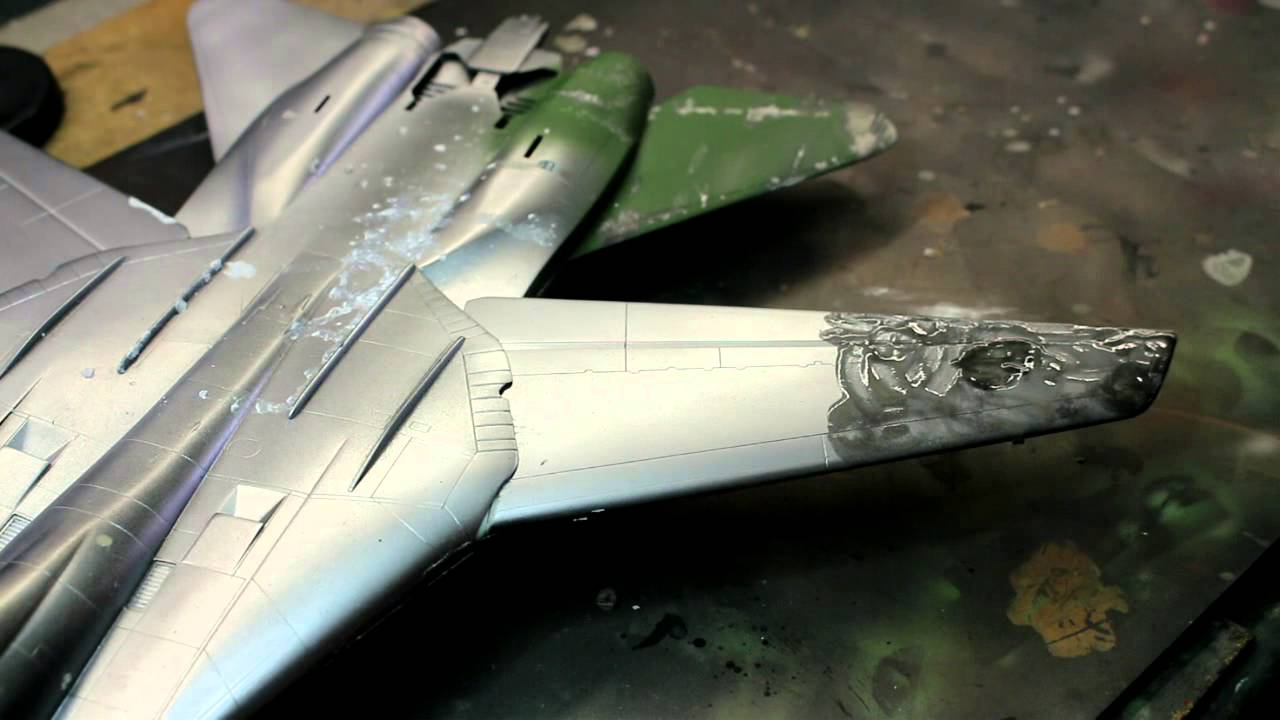
In order to restrain from filler, I went for sprue shavings mixed with glue.

After rescribing with the back of my scalpel I cleaned the panel lines with cement.

No way to check my progress with primer as I can only use my base color spray can.

One gotta love the lack of control a spray can gives....

One color coating: achieved-ish...


And there it is: an uncomfortable drip. Some sanding needs to take care of that.

With ‘Big Hog’ off my desk, I finally can turn my attention to this project. This is where I left it...

I wasn’t happy at all how the paint job turned out! Oven cleaner it is!

I decanted some in a jar and went ahead dabbing it on the plane. I didn’t want to soak it in order to save the painted cockpit.

Slowly but steadily I’m getting the paint off.

Almost there...

Take two! This time I took Tamiya AS-8, a bit lighter but far more pleasant to spray.


Nice even coverage. 🙂


And everything in just one controlled go. 🙂


Let’s get some decals on! The decals are quite stiff, glossy and thick but some Micro Set and Sol will get them down.

On the flat surfaces the decals already start to snuggle down nicely.

In the meantime some canopy masking...

...brush painting and spraying....

...and unmasking. Because I brush painted the Interior Green acrylic before spraying the Tamiya lacquer, the paint chipped away while unmasking. So, some repairs have to be done.

Next up: flat coating! I read somewhere that Future can be dulled with Tamiya X-21, so I gave that a try.

First up, determining the mixing ratio to see what amount of shine to achieve.

The decals on the cowling snuggled down enough to give it a try.

Not that bad...

Different story on the fuselage though...

Somehow the Future/X-21 mixture wouldn't level out and I ended up with weird brush strokes all over the plane.


Maybe this is why. The X-21 separated and settled down in the mixing cup. I guess this is what happened while painting the fuselage. I think the X-21 settled down before the Future leveled out.


So, Windex it is to remove the Future again...

The Windex liquifies the Future again but doesn't take it off. The course of action is to wet the Future and then take it off with a whipe, a very tedious process.


Because of the reliquification the Future/X-21 seeps around and settles back in all kind of nooks and crannies.

Eventually, I called it a day...

And hit it with this!

Looks a lot better!

The finish line is nearing....


Comments
8 July 2019, 17:35 - Private message
Welcome Łukasz! As mentioned this is just to show what can be done with a simple kit and minimal supplies to draw in some hesitant starters in this great hobby. After the club competition the winning model will be put in a display with the comments on how easy (and cheap) it was to come up with a nice model for somebody's desk or bookshelf.
10 July 2019, 14:08
Cool idea, you have my support😉 Those HB and new Airfix kits are great for such quick projects.
10 July 2019, 18:14
Indeed they are! I'm quite pleased by the high quality combined with ease of building.
10 July 2019, 18:21
I got at least 7 of these kits at hobby lobby clearance sale for around 3 dollars each. This is going to be fun to watch.
11 July 2019, 02:52
Cleaning up the seam between the fuselage and wing without using filler (sanding and rescribing with my scalpel) took the better part of this evening...
11 July 2019, 02:56
Sent most of the evening waiting for my GF to get off work. once I get done with my tank, I will start on the F6F
11 July 2019, 03:21
Yep, we've all been there with the spray cans.....great salvage job, (seems there's a few Hellcats on here at 72nd, must be the time of year) !!
13 August 2019, 06:22
😄 I already started an Eduard Hellcat when this club challenge/competition came along to build a model as a youngster would do with his/her first kit to have kids drawn into the hobby. After a quick search and looking at the one color paint scheme, a(another) Hellcat was my build of choice! 🙂
13 August 2019, 12:56
It´s a hell of a cat already, I´m curious where this journey will go 🙂
13 August 2019, 13:05
😉 Not as deep as on the Corsair as I'm limiting myself to the tools and paints I can use on this build. I'll work with what's in the box in that first (second) picture. Only that I swapped out the Testers spray can for a Tamiya one.
13 August 2019, 16:06
What a difference the spray cans made! Does oven cleaner work on anything or just Testors? Looking v smart Patrick.
13 August 2019, 19:45
I remember using it on Tamiya spray paint back home and it worked a charm there too. Back then I sprayed the oven cleaner on the whole model and put it in a container. This time I needed to be a bit more precise, that's why I sprayed it in a little jar and brushed from that.
13 August 2019, 19:53
This project came out nicely!. I'd like to see more detail about your canopy masking method. The photo showing the raw masking tape was impressive.
31 August 2019, 01:13
Hi Brian! Glad you like it! I took it to my modeling club yesterday and put it in the display cabinet over there before I could take some pictures of the finished build. I'll take some more pictures over there next Friday.
31 August 2019, 23:50
With a well defined canopy frame, masking is actually quite easy. Cut a piece of Tamiya tape just a tad bigger than the window pane and line one side up to the edge of the frame. Burnish the rest down and hold the canopy into the light. With a fresh and sharp blade lightly trace the frame and make one clean cut per side. You'll see that the tape pulls off fine and leaves the window pane covered. Just burnish it down to be sure and spray ahead in light coats.
31 August 2019, 23:55
I never trust my blade handling skills (or the sharpness of the edge) to make that single cut on clear plastic. I know I've tried it before. It makes my skin crinkle just thinking of it, now.
8 February 2020, 13:06
Hi Brian, it's all in being light handed. If you use a new blade, you'll see that you don't need to exert a lot of force. The weight of the blade is enough to slice through Tamiya tape. As long as the frame is well defined and as long as you check your cut against a strong light, you'll see that the blade will just line up against the frame without 'hacking' into the clear plastic. Just practice a bit on an old/unused part until you feel comfortable.
8 February 2020, 21:16
How'd you fit the canopy on? I had big gaps on the back with mine. Is there a whole to put the slots of the canopy in? Do you cut them off?
1 March 2020, 03:44
Hi Otto, if memory serves me right (the finished kit sits in a display cabinet in my local hobby shop), I shaved off some of the protrusions at the bottom to make the canopy sit flush on the rails. There are slots, but it is easier to remove the tabs than deepen those slots.
1 March 2020, 15:29
The concept of this build, was to show new modelers and kids what can be achieved with a 'simple' kit and basic tools. The paints and tools I used are pictured in the first picture of the album. Along the way I had to change my Testors Gloss Sea Blue for Tamiya's version, because the Testors spray paint came out in large uncontrollable bursts. Tamiya performed waaaaay better.
9 March 2020, 00:05
In picture 51 you can see the Flat coat I used after decalling. The decals went on fine without the need of a gloss coat.
9 March 2020, 17:18
My decals were extremely thin and the us stars folded over themselves, ruining my build. Did you have this issue? Any suggestions on what to do so this doesn't happen in the future?
17 March 2020, 23:18
Hi Otto! I remember my decals being thin but a bit on the stiff side. It took some persuading to get them to conform to all rivets and panel lines. If a decal folds up on itself, try to take it off the model using tweezers and dip it in the water again. That way you can handle the decal without too much damage. Be sure to not have the decal soak for too long, as the adhesive is water activated, but can also dissolve completely if left in the water for too long. Hope this helps! 👍
18 March 2020, 19:04
Thank you for the answer, I think that's what happened!
A couple of questions: how long did you put the decals in the water? How did you do the chipping effects? How did you do the black gun streaks?
19 March 2020, 21:43
The whole idea of this build is to not use any fancy materials, so all the weathering has to come from the materials in the first picture. The Chromate Yellow and Silver was thinned with water and very carefully applied to parts with heavy wear and crew traffic. No special method, just veeeeery careful painting and avoiding to overdo it. I immersed every separate decal for just a couple of seconds letting it sit on a piece of kitchen towel (a prestige object nowadays...) until the decal could be moved. I then transferred it to the model and rolled a slightly dampened Q-tip over it to remove water and air bubbles.
20 March 2020, 05:07
Oh! The gun streaks were black acrylic paint thinned with water and a drop of Dawn and carefully feathered out in the direction of the air stream.
20 March 2020, 05:09

