

Spitfre Mk.Ia MT-P

Basic paint on the instrument panel. Hataka laquers. Probably should have used less saturated black.


Basic interior paint down.

Gauges decals punched out and applied, plus some scratch-built details.

Adding details where the kit is lacking.

I've decided to go against the manual and glue the cockpit walls to the fuselage. Hope this will help with alignment and allow easier paining.

First dry fit. 3D printed jig.

Wires improve the looks, but brass is hard to band and glue

Minimal weathering with oils.

By far the hardest piece of scratch-built addons. 0.1 wires, 0.2 holes to drill.

2019.07. After one year(sic). I have all the cockpit pieces painted and extra details added. Glacial pace.

I'm glueing this in a funny order, but is seams to work for me.

Pilot's seatbelts were made out of masking tape and brass wire.

Putting the cockpit parts this way made adding those radio wires possible.

I've tried to sand down the gunsight glass to make it look thinner, but it broke eventually. Need to make another one.

Moving on to the lower part of the wing. Jeez, why did Airfix made that central panel depressed? Looks awful. I Also had to delete few inspection hatches that are not present on the Mk.I

Filled it with adhesive aluminium foil. It was a pain because that foil is extremely delicate.
Edit: The foil turned out the be a poor idea. While it's relatively easy to shape and emboss details, it's also easy to damage afterwards and paint does not stick to it very well.
Edit: The foil turned out the be a poor idea. While it's relatively easy to shape and emboss details, it's also easy to damage afterwards and paint does not stick to it very well.

Some extra detail for the radiator.

Had to add alu foil to cover the ugly gap between the fuselage and windscreen. Again easy to shape, but you can see every scratch.

Redid the fasteners of engine covers

Tried to fill the "Airfix trenches"®

OK, this pissed me off. WTF Airfix? Either this or the wing tip would not align.

Tedious filling and sanding.

Fast forward to painting stage. Sorry, for no pictures of the previous stages. Here the tail band is masked of and painted.
I used Hataka's lacquers. Roundels were painted before camo. Highly recommend doing it in this order.
I used Hataka's lacquers. Roundels were painted before camo. Highly recommend doing it in this order.

Oramask 810 left a bloody mess (probably kept it to long), but it was easy to clean with an enamel thinner

All cleaned up.

Classic hair spray paint chipping.
(chipping fluids are robbery 😉
(chipping fluids are robbery 😉

Airfix forgot about blades fairings on the prop hub


Time for some scratch built details


Nice

It's far better to paint markings before camo and mask away. This way if your complex masking goes south, you can wipe it off, sand it down and respray with primer. Painting roundels on camo is far more terrifying. This is my second attempt after rolling back. A light solution of IPA and water was uses to wipe the lacquer paint off, then some sanding and polishing.


Ufff... that was laborious but worthwhile. Got some red paint bleed under the mask, but will be easy to fix.

Now, time to mask squadron codes.

Oh yeah. I'm getting the hang of it. After the paint is dry and hardened I usually go over the markings with fine sandpaper (aprox. 3000). Just a couple of passes can make the edges a lot less visible.

Gun ports on Spitfires were covered with cloth glued to the wing with red dope. Instead of using those awful decals I decided to mask and paint those too.

Exhaust stain airbrushed with black diluted ink and later supplemented with some grey oil paints. Took me 4 attempts before I was satisfied with the shape. Using inks over lacquer paints allows you to just wipe them off with a mild solution of water and IPA if you're not satisfied with the result.
Picked it up after Will Pattison, go check out his video about it Youtube Video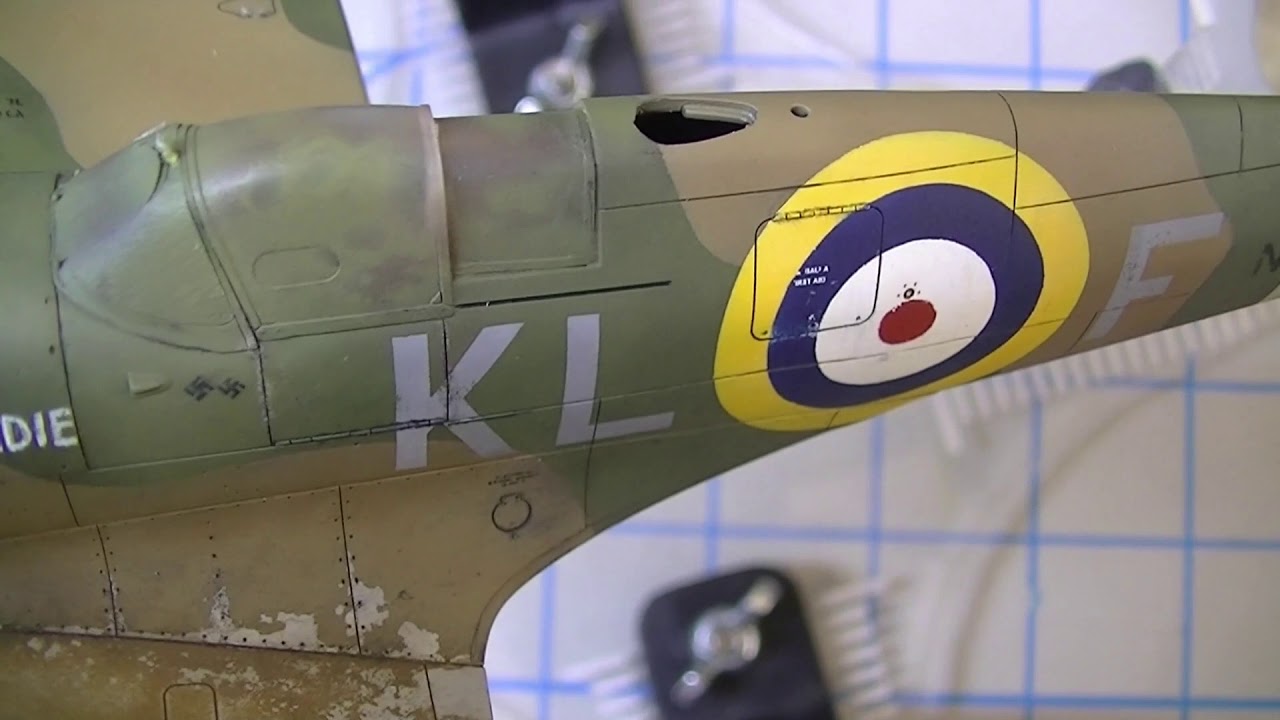
Picked it up after Will Pattison, go check out his video about it Youtube Video

This stain, very characteristic for Spitfires, forms as a result of engine oil gathering at the bottom of the engine compartment cover. Several layers of black oil paint mixed with raw umber were used to replicate it. Unfortunately I've killed the shine while matt coating the bottom.

Final shots.

The stand is 3d printed (my design) and the plane is held in place with a strong magnet


Kommentarer
20 11 February 2020, 20:35
Agree with Bruce, help with technique is very useful for me. I also like your rig, are you able to point to where I could buy the cad files on the net?
11 June 2021, 23:14
Thanks for the kind words! It's almost finished, so final shots will fallow shortly.
Jay, that jig was posted on Thingiverse and I made some minor tweaks. Here's the link thingiverse.com/thing:4632606
I also integrated it with a very useful tripod ball head. A lot of printing, but it's worthwhile
thingiverse.com/thing:4809088
30 June 2021, 12:06

