Austrian Sikorsky S-70 - Bundesheer - DONE
![Album image #1 Album image #1](/albums/img/0/8/7/1101087-10307-19-720.jpg)
![Album image #2 Album image #2](/albums/img/7/6/1/1099761-10307-49-720.jpg)
Let's go....
![Album image #3 Album image #3](/albums/img/0/7/8/1101078-10307-89-720.jpg)
Same story as with the other 2 kits,...cutting off the interior parts from the sprues.
![Album image #4 Album image #4](/albums/img/0/7/9/1101079-10307-70-720.jpg)
The version I will do here, will have all doors open - so I need to redo the seatframes. So the seats left/bottom will get new legs. I decided to build the remaining benches into the Hasegawa kit for the KFOR version.
![Album image #5 Album image #5](/albums/img/5/8/8/1104588-10307-46-720.jpg)
The seats of the 3 kits I am working on are in fact not matching the configuration of the "real thing"....so I am adjusting my original plans to modifiy the Revell kit parts only,...
![Album image #6 Album image #6](/albums/img/5/8/9/1104589-10307-83-720.jpg)
...so I decided - in order to come as close as possible - to cannibalise the kits and mix them together...
![Album image #7 Album image #7](/albums/img/5/9/0/1104590-10307-19-720.jpg)
Frist step: open up the space between the framework of the seats at the headrest.
![Album image #8 Album image #8](/albums/img/5/9/1/1104591-10307-43-720.jpg)
Done.
![Album image #9 Album image #9](/albums/img/5/9/2/1104592-10307-42-720.jpg)
Next step was to add seats from the Revell kit and add a brass tube to simulate the fram at this area.
![Album image #10 Album image #10](/albums/img/5/9/3/1104593-10307-94-720.jpg)
Dry-fit after adding the support frame/seat legs.
![Album image #11 Album image #11](/albums/img/8/7/8/1108878-10307-74-720.jpg)
(one) seat configuration for "gunner" respectively on-board technician.
![Album image #12 Album image #12](/albums/img/8/8/2/1108882-10307-11-720.jpg)
After looting the spare part box and scratching this seat config with a nice mixture of leftovers.
![Album image #13 Album image #13](/albums/img/8/8/1/1108881-10307-28-720.jpg)
...now it looks like this.
![Album image #14 Album image #14](/albums/img/8/7/6/1108876-10307-33-pristine.jpg)
Let's have a look to the 2 rows in the middel of the cabin...
![Album image #15 Album image #15](/albums/img/8/8/0/1108880-10307-32-720.jpg)
...what we have is this:
![Album image #16 Album image #16](/albums/img/8/7/9/1108879-10307-39-720.jpg)
Some scratch work too....and they look a bit different now
![Album image #17 Album image #17](/albums/img/3/5/9/1110359-10307-48-720.jpg)
So the cabin is getting full. Before painting them and adding belts, I will consider other aeras of the interior first.
![Album image #18 Album image #18](/albums/img/5/3/8/1129538-10307-31-720.jpg)
I am not very happy with the kit - gaps everywhere: floor panels
![Album image #19 Album image #19](/albums/img/5/3/9/1129539-10307-81-720.jpg)
on the ceiling panel,
![Album image #20 Album image #20](/albums/img/5/4/0/1129540-10307-93-720.jpg)
and at the rear panel as well.
![Album image #21 Album image #21](/albums/img/5/4/1/1129541-10307-58-720.jpg)
Checking the fit of my "improvements"....
![Album image #22 Album image #22](/albums/img/5/4/2/1129542-10307-44-720.jpg)
Started to work on detailing the pilot seats
![Album image #23 Album image #23](/albums/img/5/4/3/1129543-10307-64-720.jpg)
Sure not 100% correct, but enough to be a "look-alike" of the original picture evidence.
![Album image #24 Album image #24](/albums/img/5/4/4/1129544-10307-61-720.jpg)
Quite small surgery needed here,...
![Album image #25 Album image #25](/albums/img/5/4/5/1129545-10307-31-720.jpg)
Another dry fit,...
![Album image #26 Album image #26](/albums/img/5/5/2/1129552-10307-10-720.jpg)
![Album image #27 Album image #27](/albums/img/5/4/6/1129546-10307-13-720.jpg)
...and the decision to use as is.
![Album image #28 Album image #28](/albums/img/2/2/0/1154220-10307-91-720.jpg)
Further scratch building in the helicopter cabin to make it look "abit" more like the real thing...
![Album image #29 Album image #29](/albums/img/2/2/1/1154221-10307-22-720.jpg)
Frames at the entrance and panels at the gunners area done.
![Album image #30 Album image #30](/albums/img/2/2/2/1154222-10307-58-720.jpg)
View from the outside...
![Album image #31 Album image #31](/albums/img/2/2/3/1154223-10307-41-720.jpg)
Closing the gaps on the ceiling panel and adding some details
![Album image #32 Album image #32](/albums/img/4/5/9/1169459-10307-69-720.jpg)
Some more details on the ceiling panel.
![Album image #33 Album image #33](/albums/img/9/8/4/1524984-10307-16-720.jpg)
Changing to the exterior....
![Album image #34 Album image #34](/albums/img/9/8/5/1524985-10307-50-720.jpg)
![Album image #35 Album image #35](/albums/img/9/8/6/1524986-10307-51-720.jpg)
Same procedure again on number #4....
![Album image #36 Album image #36](/albums/img/9/8/7/1524987-10307-97-720.jpg)
removing the FOD Lids of the resin parts
![Album image #37 Album image #37](/albums/img/9/8/8/1524988-10307-95-720.jpg)
![Album image #38 Album image #38](/albums/img/9/8/9/1524989-10307-10-720.jpg)
Adding dispersers and sensors,.....
![Album image #39 Album image #39](/albums/img/9/9/0/1524990-10307-91-720.jpg)
....shorting of legs from "fully expanded" to "weighted"....
![Album image #40 Album image #40](/albums/img/9/9/1/1524991-10307-45-720.jpg)
..adding landing ski at the back and....
![Album image #41 Album image #41](/albums/img/9/9/2/1524992-10307-89-720.jpg)
...at the front.
![Album image #42 Album image #42](/albums/img/0/0/6/1525006-10307-72-720.jpg)
Group the birds 🙂
![Album image #43 Album image #43](/albums/img/9/9/3/1524993-10307-93-720.jpg)
Continue to set up the interior....
![Album image #44 Album image #44](/albums/img/9/9/4/1524994-10307-56-720.jpg)
![Album image #45 Album image #45](/albums/img/9/9/5/1524995-10307-62-720.jpg)
pilot seats painted
![Album image #46 Album image #46](/albums/img/9/9/6/1524996-10307-85-720.jpg)
![Album image #47 Album image #47](/albums/img/9/9/7/1524997-10307-80-720.jpg)
![Album image #48 Album image #48](/albums/img/9/9/8/1524998-10307-16-720.jpg)
![Album image #49 Album image #49](/albums/img/9/9/9/1524999-10307-92-720.jpg)
![Album image #50 Album image #50](/albums/img/0/0/0/1525000-10307-96-720.jpg)
Interior build in.
![Album image #51 Album image #51](/albums/img/0/0/1/1525001-10307-42-720.jpg)
Ceiling panel ready...
![Album image #52 Album image #52](/albums/img/0/0/2/1525002-10307-27-720.jpg)
..and joint in.
![Album image #53 Album image #53](/albums/img/0/0/3/1525003-10307-73-720.jpg)
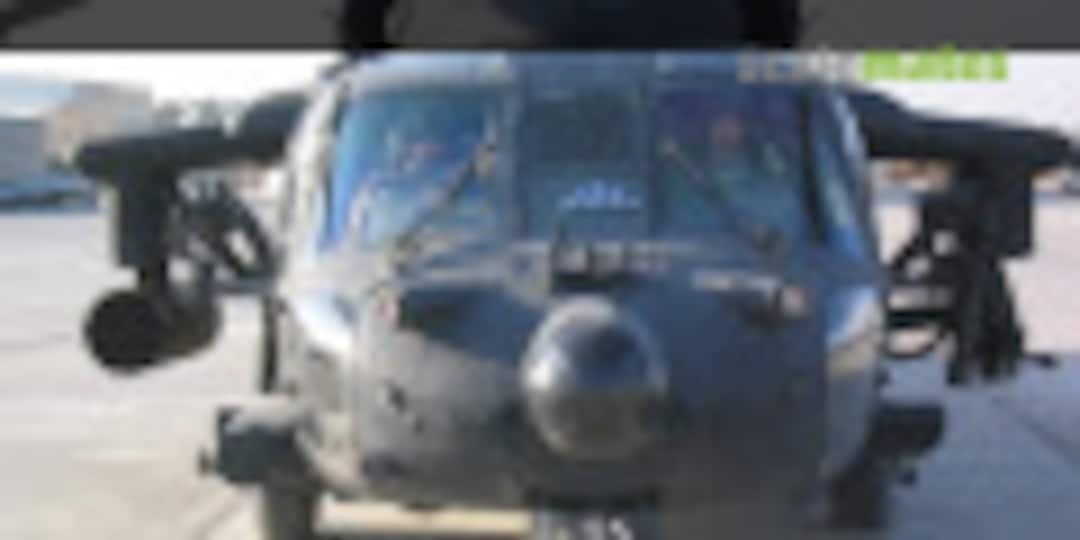
The view from outside.
![Album image #54 Album image #54](/albums/img/0/0/4/1525004-10307-21-720.jpg)
The cockpit window
![Album image #55 Album image #55](/albums/img/0/0/5/1525005-10307-16-720.jpg)
And now - masking and closing all holes for more putty & sanding.
![Album image #56 Album image #56](/albums/img/9/8/5/1545985-10307-19-720.jpg)
All open holes covered now, all windows masked. The new 3d printed radom arrived and was attached straight to the nose. It went on perfect without any additional work neccessary.
![Album image #57 Album image #57](/albums/img/9/8/6/1545986-10307-20-720.jpg)
Time for a little extra work,....
![Album image #58 Album image #58](/albums/img/9/8/7/1545987-10307-51-720.jpg)
LH door will be shown open, that means to.....
![Album image #59 Album image #59](/albums/img/9/8/8/1545988-10307-94-720.jpg)
...scratch work was necessary to pimp the inside appearance. After final painting I have to add the handle & the door pocket.
![Album image #60 Album image #60](/albums/img/9/8/9/1545989-10307-55-720.jpg)
Primer on - some bumpiness of surface got obvious,...smoothing with fine grade sandpaper and repaint in some areas is needed.
![Album image #61 Album image #61](/albums/img/9/9/0/1545990-10307-25-720.jpg)
Marbeled with white. Some nuances with yellow, red and blue I have in mind before the dark green top layer will get applied..... not 100& sure about it - let's see.
![Album image #62 Album image #62](/albums/img/5/1/9/1583519-10307-41-720.jpg)
Preparing some details for the exterior.
![Album image #63 Album image #63](/albums/img/5/2/0/1583520-10307-61-720.jpg)
Scratching the gun from 4 different kits leftovers.......
![Album image #64 Album image #64](/albums/img/5/2/1/1583521-10307-81-720.jpg)
My first time playing with "wear" on the on the rotor blades. Now I have to apply black and metallizers on the FW edges....
![Album image #65 Album image #65](/albums/img/5/2/2/1583522-10307-65-720.jpg)
Skis are attched, allmost all exterior add-ons placed,.....
![Album image #66 Album image #66](/albums/img/5/2/3/1583523-10307-30-720.jpg)
Almost done. Few steps to go.
![Album image #67 Album image #67](/albums/img/5/9/7/1650597-10307-87-720.jpg)
![Album image #68 Album image #68](/albums/img/5/9/6/1650596-10307-87-720.jpg)
![Album image #69 Album image #69](/albums/img/5/9/8/1650598-10307-63-720.jpg)
![Album image #70 Album image #70](/albums/img/5/9/9/1650599-10307-85-720.jpg)
![Album image #71 Album image #71](/albums/img/6/0/0/1650600-10307-10-720.jpg)
![Album image #72 Album image #72](/albums/img/6/0/1/1650601-10307-20-720.jpg)
![Album image #73 Album image #73](/albums/img/6/0/2/1650602-10307-50-720.jpg)
![Album image #74 Album image #74](/albums/img/6/0/4/1650604-10307-74-720.jpg)
![Album image #75 Album image #75](/albums/img/6/0/5/1650605-10307-22-720.jpg)
![Album image #76 Album image #76](/albums/img/6/0/7/1650607-10307-43-720.jpg)
![Album image #77 Album image #77](/albums/img/6/0/8/1650608-10307-43-720.jpg)
![Album image #78 Album image #78](/albums/img/6/0/9/1650609-10307-57-720.jpg)
![Album image #79 Album image #79](/albums/img/6/1/0/1650610-10307-65-720.jpg)
![Album image #80 Album image #80](/albums/img/6/1/1/1650611-10307-62-720.jpg)
![Album image #81 Album image #81](/albums/img/6/1/2/1650612-10307-60-720.jpg)
![Album image #82 Album image #82](/albums/img/6/1/3/1650613-10307-57-720.jpg)
![Album image #83 Album image #83](/albums/img/6/1/4/1650614-10307-79-720.jpg)
![Album image #84 Album image #84](/albums/img/6/1/5/1650615-10307-45-720.jpg)
![Album image #85 Album image #85](/albums/img/6/1/6/1650616-10307-89-720.jpg)
Комментарии
58 5 October 2021, 20:02
![](/profiles/img/10307-421-s.jpg)
Welcome gents!
Started working on the interior/seats this weekend
7 November 2021, 09:22
![](/profiles/img/11266-s.jpg)
Einen Blackhawk vom Bundesheer lasse ich mir natürlich nicht entgehen. Saubere Arbeit bisher!
17 November 2021, 19:16
![](/profiles/img/10307-421-s.jpg)
Hallo Stefan - freu mich über dein Interesse.
Did some good progress on interior over the weekend - but unfortunallty I have an IT issue with the computer. So I'm not able to share some pic's currently.
I will turn in picture update asap.
22 November 2021, 07:26
![](/profiles/img/10307-421-s.jpg)
Added some news - I spend quite some time recently with my 4 little Blackhawks. I use this kit/album as my trailblazer and copy respectively adjust the outcome to the other 3 kits. The Hasagawa one is the tail-light at the moment, but catching up soon.
18 December 2021, 14:45
![](/profiles/img/10307-421-s.jpg)
It's been a while. Busy with work and family. So progress is slow on this one and I am still glueing in a lot of styrene to close gaps and adjust the interior to (nearly) something like a S70.
I don't know your experience with that kit - I'm upset with fit and quality of details. But ok - the kit is not the youngest.
21 January 2022, 18:30
![](/profiles/img/57594-145-s.jpg)
I love to watch your detailed build log! You have some great skills with scratch built parts!
21 January 2022, 20:59
![](/profiles/img/10307-421-s.jpg)
Thank you Cuajete, Thomas & Lukasz for your nice comments. Very motivating!
27 January 2022, 14:46
![](/profiles/img/10307-421-s.jpg)
Gents - after a while I can anounce some progress on this one too.
11 August 2023, 18:14
![](/profiles/img/10307-421-s.jpg)
Finishing line crossed.
In fact it is done since few days but I need to do some final pictures.
29 October 2023, 11:02
![](/profiles/img/10307-421-s.jpg)
Cuajete - here they are.
My Blackhawk #3 album final pitures are now uploaded. Thx all for patience 🙂 and thx for following this project. Happy to anounce a DONE.
28 January, 15:16
![](/profiles/img/10307-421-s.jpg)
Hi mates, I am pleased about your comments - thank you so much.
29 January, 19:07
Album info
Bundesheer
Group Build
![Scalemates Sikorsky S-70 Group Build in](/events/img/11822-70497-82-p.jpg)
Scalemates Sikorsky S-70 Group Build
1. Июль до этих пор 31. Декабрь 2021