

Tamiya Citroën 2CV - WIP


Comments
3 November 2018, 07:36
I just bought this kit, I look forwards to your finished product 😄
7 November 2018, 02:58
I wonder if older cars had a different glossy quality to the paint or not. I guess I would expect more of a more dull metallic satin sheen, instead of some super glossy suface as seen in the Tamiya illustration. I am ofc no expert on cars.
7 November 2018, 09:47
Oh nice. One of my favourite cars... looking forward to seeing this one come to life.
11 November 2018, 14:07
I'm jealous of your quality of work... very well done. I don't see any fuzzies stuck on or bumps/splatters or anything.... are you sure you've never used an airbrush before?????? 🙂 I still have those problems
11 November 2018, 18:07
My solution (I am not an expert) for airbrushing on a gloss coat, is to use 7-8 psi and keep airbrush close to model, and then make sure to airbrush on the gloss coat wet, but not runny, just by moving it sideways and covering one area at a time. I guess one get much less overspray the closer you keep the airbrush. I can also imagine that a high air pressure causes orange peel with air blowing against the drying paint. Having said that, having too low pressure, I've seen others show how paint start splatter around in small puddles as if not atomizing properly.
11 November 2018, 19:43
One trick is getting a bigger needle. Paul Budzik explains here: Youtube Video
11 November 2018, 20:01
I have been surprised that the room I spray in hasn't resulted in dust-bunnies and such. It's an unfinished basement room and I had been planning on putting up plastic sheeting across the floor joists that make up the ceiling but so far it's not been necessary.
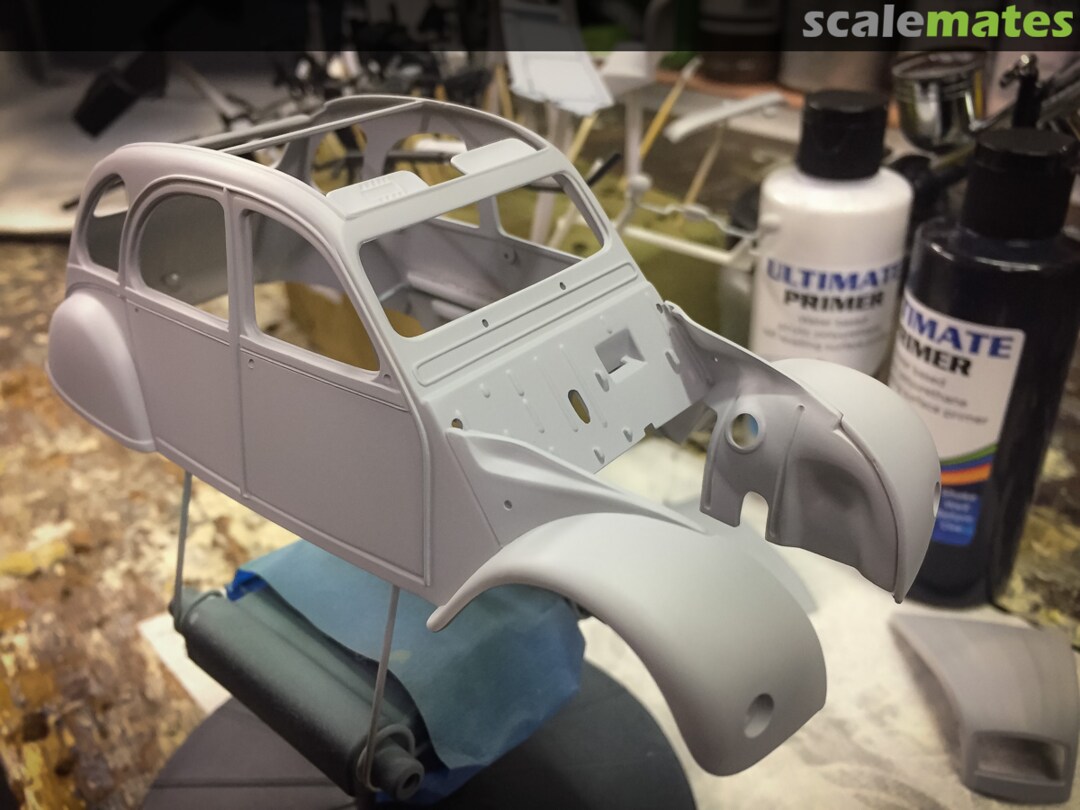
However the airbrushing hasn't been all plain sailing. I do struggle with covering large areas (like the car bodies) without getting orange-peeling or pooling. I added a photo that better shows the state of clear coating on the body. Going to start using a 0.5mm nozzle in future for doing bodies to see if I can get better coverage. Might also put a humidifier in the room and see if that helps...
What paints do you use and how much thinning? For Tamiya acrylics I thin about 50/50. The UMP/Stynylrez primer and Future I use straight. The primer goes on amazingly well. The Future I find very hard to get on evenly without pooling.
I've also just gotten an in-line water trap as water was coming through from the compressor when using it for too long.
11 November 2018, 20:02
Treehugger and Martin: Yes indeed. I have a 0.5mm nozzle now and will try lower pressures.
11 November 2018, 20:09
Just finished watching that video. Very concise and clear. If my 0.5mm nozzle doesn't cut it I might have to invest in a better airbrush for doing large coverage.
11 November 2018, 21:10
I just used a 0.4 on the mini with an okayish result. Used tamiya x-22 with x-20a thinner in 50/50 ratio. More practice might help 😉
11 November 2018, 21:27
As far as airbrush I have a dual-action and use a .3 needle. I keep the air at 25 psi for everything. Then paints, I have almost all Vallejo paints, including their primer and airbrush thinner.... I add color to the cup, then thin down to a milky consistency and mix with one of Tamiya's awesome twisty stick things... I've tried to add thinner first then color, and also mixing outside the cup, but the color then thinner method works for me.
11 November 2018, 21:58
So the weirdest thing happened tonight... I have a new 0.5mm PointZero airbrush that I was using to add another clear coat to the Citroen after applying the body decals. I was thinking that it would have a much higher flow rate than the 0.3mm PointZero airbrush I've been using since I started modeling a month or so ago. However, hardly any clear coat came out and I went back to the 0.3mm version. Conversely, I've noticed over time that the 0.3mm airbrush's output has been increasing with use but tonight using 30 PSI there was a ton of material spraying out. In fact I was able to get the best coverage ever to date.
What gives? Do airbrushes have a "break-in" period? The 0.3mm airbrush was acting as a fire hose tonight but I've not made any adjustments to it. On one hand I'm really happy to get the coverage but I'm confused as to why I'm getting it.
12 November 2018, 08:43
After using an airbrush for the past three years... it seems to depend on the phases of the moon... and if Aquarius in in ascension in the Year of the Monkey...
12 November 2018, 09:43
Probably a good idea to go over the painted surface every time, gently with fine sand paper, to knock down uneven surface. Same with paint and gloss coat. Might as well do it after the paint, otherwise it becomes harder to correct it later on I think. As long as you don't sand through the paint, once you add a gloss coat, it will look ok, and there will be no visible trace of you having sanded the surface previously.
One thing I learned, if you know that your end result is not supposed to be glossy, is that, even though the glossy surface looks obviously uneven, once you dull the glossy surface to satin, it becomes harder to see that the surface was uneven. So, I think the more glossy the surface is, the more toy like, and the easier an uneven surface stands out.
12 November 2018, 09:59
Speaking of airbrushes, my Iwata Eclipse CS, supposedly has an operating range of 25-30 psi as an ideal. Though it would not surprise me if my el cheapo airbrush, was running ok with lower psi. So I used the el cheapo airbrush for airbrushing on the gloss coat.
I do not have enough experience to talk that much about the Iwata Eclipse airbrush, though I sort of have the impression that the airbrush might be better for t-shirts than models. Having said that, I have since bought this aftermarket paint limiter for the Eclipse CS airbrush, which should help a lot. Btw, I have two of the Iwata Eclipse airbrushes, one with smaller standard needle, and the other customized with a larger 0.5mm needle.
The airbrush part of my hobby is currently on hold, so I don't accumulate much experience these days. I've been using an airbrush previously, for about a year, on and off.
Btw, the results from my previous use of gloss coat, can be seen in my project threads for the two submarine kits in 1:350 scale. Basically primer + paint + gloss coat + satin varnish. I think I learned that the layers can start cracking if the paint isn't allowed to dry properly between layers.
12 November 2018, 10:03
@Treehugger - What do you use for satin finish? I really like how easy Future is to use and how well it goes on. I wish there was a flat and satin version of it as I don't care for glossy car finishes, particularly for older cars.
12 November 2018, 19:57
I use Vallejo's satin varnish. I try dilute it. On a large model, I think it can be difficult to get an even effect, but maybe I am doing something wrong. On a side note, I remember airbrushing on too much Vallejo Matte Varnish, and the surface turned white'ish, so that is probably why I like diluting the varnish a little.
For gloss coat I have so far tried mastering Humbrol's Clear, and it works for me on especially submarine kits. I have other gloss coat products as well, though I haven't started experimenting and using them just yet.
I tried using future once, but was unhappy with the result. I guess I forgot to thin it with 50% water. One thing I think I've learned about Future, is that, double dipping canopy parts is bad, as the last dip eats at the already dried first layer afaik. I have no idea how to use Future, but I guess I ought to practice more to try make it work.
12 November 2018, 20:07
I like future, but only a coat or two gives it a scruffy unfinished, finish/feel... I usually hit it with 3-4 coats of future by the end to give a more finished look/feel to it... also, no dilution... it took me 3-4 models to figure out
12 November 2018, 23:34
I agree. Future shouldn't be diluted. It's self-levelling, so I find it only gives me problems when I spray it a bit too lightly for the drops to find each other. I spray it a little bit heavier than I would paint, but usually one coat will do it... for the same reasons double dipping canopies doesn't work.
13 November 2018, 00:50
Question.... my DA brush with .3 needle @ 25psi and 1 coat Vallejo Grey Primer.. would going up to a .5 prevent this bumpage while priming/painting? imgur.com/18bKuDd
13 November 2018, 01:03
Chris - I would experiment with thinning it more for sure. However, the spray pattern looks very uneven. Maybe check the nozzle and needle for built up paint, even take the whole thing apart and cleaning it thoroughly.
I would think the 0.5 tip would certainly give better coverage. Can't give you any real feedback on that aspect as my mine is not working at the moment.
I have the Vallejo primer too but I much prefer Stynylrez. I have white and black and mix it to get the grey I want. In fact all the black and grey colors on the Citroen are just the Stynylrez primer.
13 November 2018, 04:17
About future, I certainly use it straight from the bottle, y would suggest to reduce the amount used if poodling. I use the H&S infinity, and I set the limit to the bare minimum. Better several layers very thin, rather than one too thick layer. Humidity and temperature can make a difference, but if too dry you can always use flow improvers for example.
I do clean my airbrush thoroughly at the end of the session. some paints can be more demanding than others. Alclad need a airbrush clean as a wisthle. Sometimes I do a deep cleaning after a few colours, and always if you change paint type (from acrylic to alclad for example) otherwise they react with each other and clog it
Future can be made matt by using a bit of Tamiya flat base. Start with very little or it will turn whitish
In any case practice is the key 😉
One last thing.... The mantra of "use the thinner of the same brand"....is not true. I had a training a year ago during SMC. The guy was using all kind of combinations with great results. In some case the worst thinner to use with a paint was the one of same brand. That in any case requires a lot of testing. Some mixes are of course a complete mess 😛
13 November 2018, 07:59
Ah, if you want shinny finish, start making sure the plastic is already shinning by polishing it. That is specially true with metal finishes like alclad. If surfaces is not perfect, the result can be really disappointing. "This would be enough" is usually not enough at all when preparing the surface
13 November 2018, 08:02
They say that the 'thinner' make the Vallejo paint dry faster, while the 'flow enhancer' makes the paint dry slower, so maybe good idea to add 'flow enhancer' instead of only thinner.
13 November 2018, 08:44
Thanks, Spanjaard! Very helpful. Definitely gong to try out the flat base suggestion!
And timely advice too. I just spent the evening disassembling my airbrushes, cleaning and figuring out the various problems I was having, and learnt a lot in the process.
Firstly, my issue with the .5 airbrush was simply due to the fact that the nozzle cap was for a 0.3 nozzle. This resulted in very little air coming through the tiny gap in the nozzle cap hole around the nozzle tip. Once I found the correct cap with a larger hole it worked fine.
Secondly, "Clean, clean, clean". I realize now that the .3 airbrush, even though it was new, must have had some residue or build-up on the nozzle or needle. That was my first experience with airbrushing and I couldn't believe how little paint came out. It took forever to do any coverage. It got better over time and I'm sure that's simply because whatever was restricting the flow got worn away with usage.
So now I have three el cheapo airbrushes (0.2, 0.3 and 0.5) that are working perfectly and I couldn't be any happier.
The only downside to the cheap ones is that you have to do your own quality control and the spray pattern is pretty wide, even for the 0.2 nozzle, but for most modelers I would think that's a good thing.
13 November 2018, 09:10
Well, I can say also that if you are a natural born airbrusher you may get good results with any tool, but a good tool can make a great difference. I had a Taiwanese cheap one for a long time and it was hard to get good results, with the infinity, it works a lot better, and it is slot easier to clean (cheap ones look ok outside, but it is the inside what makes the difference). Of course it is a question of budget. Maybe I could get better results with 3 iwatas, each with a needle and nozzle size, but it will be a lot more expensive than changing needles in the infinity 😄
13 November 2018, 10:12
Ah I didn't set out to have three at all. The compressor kit came with two gravity fed ones (.2 and .3) and it ended up more economical to buy an airbrush that included needles and nozzles for .2, .3 and .5 than to just buy .5 nozzle and needle. So for a grand total of $120 I ended up with a compressor and 3 airbrushes and spare needles and nozzles. Crazy.
13 November 2018, 10:52
Spanjaard, when you say to use very little of the Tamiya flat base in Future, roughly what kind of proportions are we talking about? 5:1, 10:1, 20:1?
13 November 2018, 21:01
i can not tell, since i have not tried myself😉 but i have been told is possible. i would suggest to try with very little, and test is in an old model before doing it in the current build😉
start with 20:1 🙂
14 November 2018, 10:13
Michael Philips mentions a 6:1 ratio in this thread Zoukei Mura F-4S Phantom - WIP | Album by Fighting 84 (1:48) AND the addition pf some thinner.
15 November 2018, 18:41
Thanks, Martin. I didn't get to try it last night. I went ahead and used XF-86 Clear Flat for now. Over the weekend I'm going to test it out for sure.
Also last night I started getting my first experience of "splatter"! Ugh. And this after I had thoroughly cleaned the airbrush. It might have been coz I used some black Stynylrez primer to darken a Tamiya color... which I was doing to give some texture to the Citroen's roof canopy which in turn made me, for the first time, use the airbrush for detailing rather than just straight coverage... which is a round about way of me realizing that what Spanjaard said above about cheap airbrushes is spot on. Having a quality airbrush might make life a lot easier, and for detailing it seems like it might be critical.
15 November 2018, 19:44
Tom... your setting the bar kinda high for me and my noobs skills with my Citroen, which I'll prolly build next... and you've only been at it a month... *a gentleman's golf clap* nicely done.
15 November 2018, 20:07
Don't worry, Chris. I'm moving on to do the windows next so this has a high probability to go horribly wrong. 🙂 The Jeep Wrangler was easy. This one looks really tough!
15 November 2018, 20:50
You're welcome 👍
If you have some future left, dip the windows in it. After dipping, carefully wipe away excess at the edges. Let dry for a day and voila! Clear glass!
15 November 2018, 21:35
To wipe away the excess, I usually just touch it down on some paper towel and then move it to another spot on the towel to finish drying. The Future self levels, so you don't need much.
15 November 2018, 22:25
Thanks, guys. I used Future for the Jeep's window and it work perfectly, even though I didn't get ride of the excess very well. What I'm terrified about is painting the edges and glueing. On the Jeep there was no edging and you glue the glass well away from the visible surface... on the Citroen there is nowhere to hide!
People suggest using white glue but with the Future coating I guess I can get away with thin CA?
15 November 2018, 22:55
[img1]
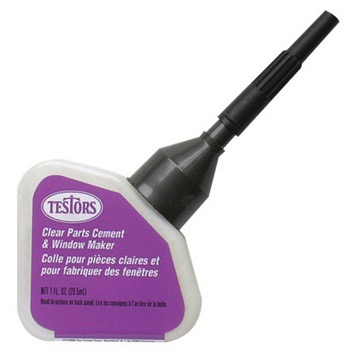
This I what I use, just a dot in the 4 corners,drys crystal clear.
15 November 2018, 23:29
I haven't had much success with white glue on windows. It seems to take forever to cure and in some cases leaves the seal a bit "rubbery" after I run out of patience for waiting. The Future will protect the plastic from a CA bloom but I'm always pretty cautious about how much I use... just in case.
16 November 2018, 01:09
I just use Tamiya Extra Thin with the windows (with and without Future), I don't have any fogging or weird issues and it holds the window in place just fine. I haven't had luck with white glue, and CA just turns into a mess on the window for me. but the capillary action of the Extra Thin around the edges of the widow works wonders for me.
16 November 2018, 15:34
Thanks, Robert.
I just got the windows in. That was NOT fun. Very frustrating. The fit of the windows was not great so it made it really tricky to get them to sit in well. Some of it seems to be the mold and then the layers of paint and clear coat make it worse.
I used Chris's extra thin cement technique. It definitely glues them in well but very risky. I managed to get glue on to the window in places. I think I was also trying to get too much in there. Next time I'm going to try the testor's glue Robert mentioned to see if it's more forgiving but using the extra thin cement I think is fine once I learn to use a lot less glue.
Going to let them fully cure before finishing the rest of the build. Should be easy going now. Just glad the windows are over!
20 November 2018, 02:48
Tom, just so ya know, my Citroen will be nothing near this quality 😛... very good, beautifully done 🙂 and yeah the Extra Thin is great, but it does take a window or 2 of accidental smears and NO shaky hands of get the hang of it. Great Job!
20 November 2018, 07:13
Thanks, Chris. Much appreciated. And no worries. It's all about enjoying the process. On to the next one 🙂
20 November 2018, 08:30
Album info
Some work-in-progress shots for my Tamiya Citroen 2CV build.

