Panther Cuckoo WIP

Next on the bench!

Trying to replicate some of the damage on the Zimmerit based on reference. Not going for a perfect match, because the photos aren't that clear, but I want to show an indication of damage at least.

Trying to replicate some of the damage on the Zimmerit based on reference. Not going for a perfect match, because the photos aren't that clear, but I want to show an indication of damage at least.

First time using metal tracks. These R Model (???) tracks are great, but I still need to drill out the guide horns. I did glue the pins with CA because I couldn't get them to stay put without glue. Also worth noting Panther tracks are handed...

First time doing complex photo etch folding, and first time soldering the joins. Extremely ugly, but it's on the inside, and it works. Just gluing the rear of the stowage bin before I attach it.

Almost done with the build. Photo-etch is all from the box, but I replaced the plastic grab handles with copper wire of various thicknesses just for sturdiness. Aftermarket barrel fits well!

Almost done with the build. Photo-etch is all from the box, but I replaced the plastic grab handles with copper wire of various thicknesses just for sturdiness. Aftermarket barrel fits well!

Very happy to get the "final type" left rear stowage bin attached, one of those distinctive features of Cuckoo I really wanted to replicate. Then discovered the ribs are supposed to be protruding, not recessed, so I'm going to have to redo this one, sadly!

Working from the idea that the SCC 15 Olive Drab was painted over Dunkelgelb, I wanted to see what it'd look like if I did chipping fluid over Dunkelgelb before spraying the green, and chipped some of the paint. Spoons and stowage box on the right are standard Dunkelgelb base under green, spoons on the left are RAL7028 Dunkelgelb III. I'm honestly not thrilled with the look of either, so I might just paint straight SCC 15 over primer.

Re-did the left-hand rear stowage bin, much happier with this one. Finally time to prime the hull!

Primed with Mr Surfacer 1000 mixed 1:1 with Mr Color Levelling Thinner and ready for base coat. I brushed some Mr Metal Primer-R over all the metal surfaces before priming, because last time I used a metal barrel I had all the paint peel off after masking. :/

This is considerably darker than Ammo's SCC 15 out of the bottle, but this is the darker base for the modulation.

This is considerably darker than Ammo's SCC 15 out of the bottle, but this is the darker base for the modulation. This is easily the largest model I've ever sprayed a single colour, and it took *forever* with my 0.03mm airbrush! I desperately need to get a larger nozzle/needle airbrush before I base coat another model this size...

Modulation complete, minus highlights. Layers are: 1) 1:1 SCC 15 & Satin Black, 2) Straight SCC 15, 3) 1:1 SCC 15 & FS33446 US Modern Vehicles. All colours are Ammo, thinned 1:1 with Mr Levelling Thinner.

Modulation complete, minus highlights. Layers are: 1) 1:1 SCC 15 & Satin Black, 2) Straight SCC 15, 3) 1:1 SCC 15 & FS33446 US Modern Vehicles. All colours are Ammo, thinned 1:1 with Mr Levelling Thinner.

Modulation complete, minus highlights. Layers are: 1) 1:1 SCC 15 & Satin Black, 2) Straight SCC 15, 3) 1:1 SCC 15 & FS33446 US Modern Vehicles. All colours are Ammo, thinned 1:1 with Mr Levelling Thinner.

Modulation complete, minus highlights. Layers are: 1) 1:1 SCC 15 & Satin Black, 2) Straight SCC 15, 3) 1:1 SCC 15 & FS33446 US Modern Vehicles. All colours are Ammo, thinned 1:1 with Mr Levelling Thinner.

Highlights done. Sketchy in places, but that'll pretty much disappear after the next few stages.

Highlights done. Sketchy in places, but that'll pretty much disappear after the next few stages.

Cuckoo finally has her name. On to weathering.

First pass of oils on Cuckoo's hull

Wasn't happy with the alignment of the star on this side, so I redid it with a stencil. Looks sketchier now but I like it better.
Comments
25 16 May 2021, 04:30
Cool subject and following 👍
A bit of info on the tank if interested:
Youtube Video

Youtube Video
1 June 2021, 17:43
The Cuckoo video is nice, but it's missing a lot of the detail in other reference sources! Prime example is the left rear stowage bin on that 3D model.
2 June 2021, 06:50
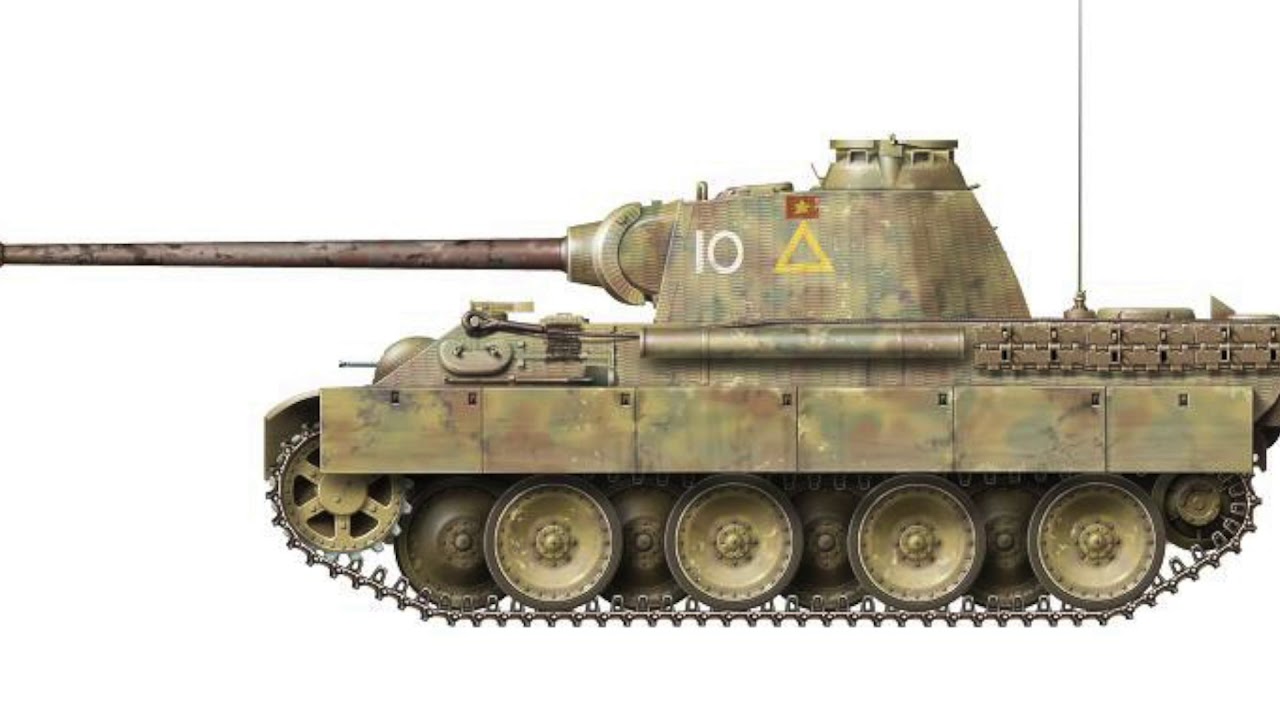
This is a great subject, and gives me a reason to build a more modern Panther kit; lots of diorama possibilities too. Maybe with a Universal Carrier delivering some 75mm ammo for a fun size contrast. I can't wait to see it. Regarding your chipping, maybe you can do just a little Dunkelgelb using a sponge?
2 June 2021, 12:39
I did consider a dio with a Universal Carrier, actually! I'd love to recreate something like the shot of them driving along the wooded path from the reference album I've collected for this project. And as far as modern Panther kits go, this Takom kit is excellent. I'd definitely recommend any of their series of Panthers, based on my experience.
2 June 2021, 13:05
Are you just going to do a little sponge chipping instead of hairspray? I figure that the OD color must have been fairly new so it won't have gotten wrecked too much. Looking good!
8 August 2021, 22:05
Yeah, there's definitely going to be chipping, because Cuckoo was used in action, but like you say, the SCC 15 would be fairly new. It'll probably be some very light sponge and brush chipping. Definitely more dust/dirt than chipping on this one, and most chips will be superficial, exposing the original DG base.
The bigger concern for me right now is just that it's impossible to say how thorough the respray job over the original DG base would have been, that is, how deep would it go, especially on the overlapping/interleaved road wheels. For simplicity's sake I'm just painting everything green and assuming anything too deep to be resprayed will be too hidden to be very visible on the finished model.
9 August 2021, 00:36
Good idea. I'm sure it would have been sprayed quickly in the field, so I doubt it would be perfect.
9 August 2021, 15:10
How were the decals? They look pretty thick, as per Takom's usual style.
1 December 2022, 09:49
I didn't pay a whole lot of attention to the decal thickness, and I didn't notice any particular thickness issue. Regardless, I would definitely recommend masking the geometric shapes and hand-painting the lettering, even over decals, just because it's a better representation of field-applied markings.
2 December 2022, 00:37
I guess the decals being thick would be more visible on flat surfaces. Zimmerit hides it pretty well. Very good job, though. I forgot to add that part!
2 December 2022, 10:07