

Shackleton MR.3 (WIP)


Comments
71 2 January 2021, 22:12
This looks like a great project! I'll follow for sure. Concerning those sprue gates: I switched from using a side cutter to a finde razor saw. Like that there's less danger of damaging the parts around the sprue gates.
3 January 2021, 16:58
Thanks mates. Yes Bernd, sometimes I also use a fine CMK saw for the smaller parts. 🙂
3 January 2021, 17:36
Moving closer to closing the fuselage; getting very, very cramped in the cockpit due to the added PE - the Eduard guys are always optimistic to what they can fit in a small space
9 January 2021, 09:16
Well put about the Eduard guys and their optimism 😄 Your Shakleton is coming along nicely. I've build the Mr2 from Airfix last year. Also a very nice kit but unfortunately with no rivet structure from the box.
9 January 2021, 09:37
I have the old Revell Kit somewhere, but this one looks like a brand new one. Tanks for the picture mate.
9 January 2021, 11:48
Thanks mates; @Bernd, yes, this one has lots of rivets, although they dissapear toward the top curve of the fuselage (really bad) and does not have the interior as Airfix's has; @stefano2904, yes, this is not the older Frog/Revell one; welcome @Jim!
9 January 2021, 18:01
Nice work on that cockpit. I can only imagine how tricky that was in 1/72 scale! 👍
9 January 2021, 18:25
Thanks James, very tricky indeed! 🙂 Anyway, managed to close it, now on to the putty and re-riveting festival!!!
9 January 2021, 19:06
Fuselage close, now on to the (nasty) clear parts and then some putty and scribing of the faded rivets and panel line near the joints
10 January 2021, 18:28
Fit of the inner engine nacelles is a nightmare, still sure how I'm going to overcome this......
13 January 2021, 08:30
I have to watch this 👍
If it's innermost, I'd putty it, nobody will ever notice😉
13 January 2021, 09:21
Yes, Lukasz, I thought of that also. 🙂 However, the gap is huge, so I opted to insert spacers made from sprue from the inside of the wing, and the gap is now much more manageable; I will still have to use putty, probably will use acrylic and clean with water, so that the gap is filled and everything else is clean
13 January 2021, 14:22
Youtube Video
Try airfix clear gloss see video attached works a treat
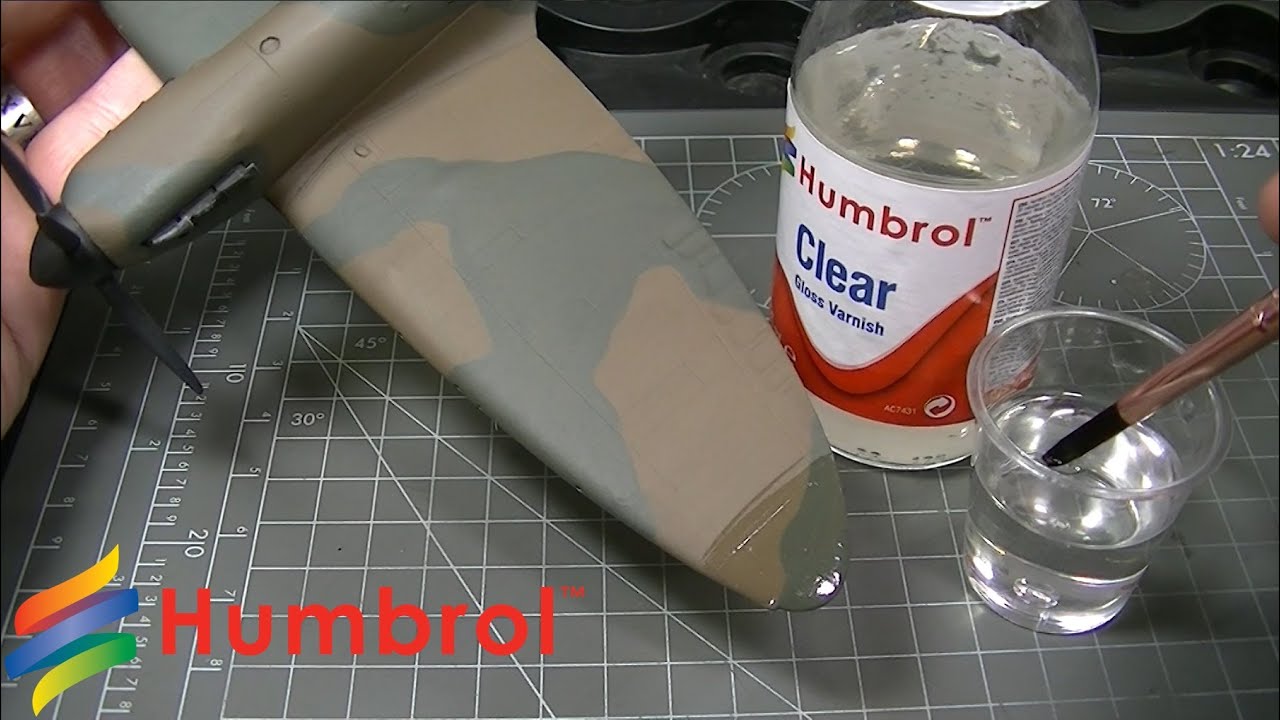
13 January 2021, 18:29
Thank you Simontie - I don't use varninshes on top of clear parts (not even AK Gauzy) if I can avoid it; actually, in this case, I polished the parts using Tamiya polishing products and it worked out OK.
13 January 2021, 19:40
Nice build so far, Ricardo. Like the idea of a spacer in the wing. I have used that idea to widen a fuselage and reduce gaps at the wing-root.
13 January 2021, 20:32
Yes, Gordon, it turned out OK - It's not perfect, but much better now
13 January 2021, 20:51
Hi Ricardo.
Is this a re-box of the old kit or a new release?.Wonder what the Airfix kit stands up.
15 January 2021, 15:30
Nice progress!
@David Taylor: The Airfix kit is very nice but has no rivet detail from the box. I've built the MR2 version last year: Avro Shackleton MR.2 Airfix 1:72 | Album by centuryfan (1:72)
15 January 2021, 15:46
Hello David, it's a new tool. Compared with the Airfix I believe the main differences are more surface details on Revell's and Airfix's has interior, which this one is mostly lacking; Thanks Bernd, love your model, mine still looks years away from completion!!! 🙂
15 January 2021, 19:04
Thanks James, despite some lack of quality, it really is quite an imposing model 🙂
18 January 2021, 22:54
Thanks. And yes, still one pitfall to go - one of the Eduard photoetch cover a window opening in the roof of the canopy; I'll try to replace it without destroying the kit, because Revell kindly sent me a new one.....
24 January 2021, 01:16
This is a very helpful build. Thanks for the tip about the wing spacers. Did you manage to get the scratches out of the glass or did Revell supply new parts? I have similar scratches on the Revell AEW version that I'm building.
27 January 2021, 18:47
Thanks. I polished the scratches with Tamiya polishing compounds and it worked fine. Meanwhile, because I glue a (oversized) PE part on the inside of the canopy and only realised when masking it, I had to remove it. Revell service was impeccable: fast and no charge, they sent me a new canopy! 👍
27 January 2021, 22:39
Looking good Ricardo your drive is unyielding, look forward to you next update
28 January 2021, 19:37
Thank you Clifford, just waiting for the new mask set to arrive and painting will proceed!
1 February 2021, 09:35
Eheheheh! Not dumb at all, when finished, they look impressive on the bench. I didn't glue them to the model yet because 1) I want to make sure I don't need to add more weight to the nacelles to balance it and 2) because I am afraid to break them.
3 February 2021, 11:04
Yes, it's quite a sight on the workbench! 🙂 And the AK RC 296 color is beautiful, with a lovely satin finish!
16 February 2021, 11:27
Thanks Bernd, it's looking real nice; the final proof will be the looks of the transparent parts when the masks are removed...
16 February 2021, 15:15
Beautiful so far Ricardo. I do not usually do 1/72, but just may have to give this one a try.
17 February 2021, 00:26
Thanks Clifford - it is a complex build, much complicated by some difficult fit, by the fact I chose to put in some Eduard PE and, of course, the plane is so large and need so much weight that it is quite difficult to handle; I just hope the landing gear holds its weight...
17 February 2021, 10:30
Moving to decals - these are thick and prone to silvering; furthermore some of them cover bumps and holes, I really can't see how this is going to end well... onwards, the finish line is near!
19 February 2021, 19:59
Thanks mates, it does look good, but only from afar - I hope the decals come out well after several washes of Micro Sol (image #59); also sprayed an additional layer of AK Intermediate Gauzy Agent on the top of the wings to see if the decals behave better there; wish me luck!
20 February 2021, 00:42
Yes, I hope the bottle of Micro Sol doesn't run out!!! 🙂 I've been using litres of Micro Sol, a scalpel blade, a needle and a lot of bad language to smooth out these %#$&!@;=*% decals!
20 February 2021, 16:53
Really looking great. Quite a project. Looking forward to the finish. I'm sure you'll get the decals under control.
20 February 2021, 17:52
After gathering much courage and losing love to the model, I decided to follow a colleagues advice and applied Tamiya Extra Thin glue directly over the decals (!!) - much to my surprise, damage was minimal and the silvering was reduced by, I'd say, 80%!!!
22 February 2021, 13:17
Indeed Alec, although I confess I was quite anxious when I started brushing the decals with the glue; it is quite unforgiving: as soon as the glue touches the paint, it first turns matt, then changes tone and after that it "boils"; all in around 1 second! :-\
22 February 2021, 17:22
Thanks mates - some silvering is still visible, but waaaay less than before; I'll also have to do some touch ups on the painting, and then is forward to the finish line!
23 February 2021, 00:11
Thanks mates, it certainly was a difficult decision to try it on the model! 🙂
23 February 2021, 15:21
Wow Ricardo! I don't know if I would have had the courage to add Tamiya glue to those decals! A very nice recovery indeed. Well done.
23 February 2021, 15:31
Tamiya extra thin over the decals??? Wtf? I confused that green bottle by Tamiya once or twice with the Mark softener by Gunze and the decals nearly disappeared.
Since then, i put the blue cap of the Mark setter on it.
But it paid off well Ricardo...Very well done Sir... 👍
23 February 2021, 16:08
Thanks again mates - I must confess I was more motivated by despair than by courage! 😄
24 February 2021, 00:53
I passed that hint onto a mate with the another Shackleton too but he has currently shelved it cos of the biiiig gaps around the chin.
24 February 2021, 12:58
Are you going to load up or leave the bay clean,figuratively speaking.
25 February 2021, 21:29
Unfortunately, clean, the kit does not bring any torpedo. I do not have info about the torpedoes the plane carried and, to be honest, I really am running out of patiente with this kit. I should even pass some wires (with are visible in the photos of the real plane) but, honestly, I'm lacking the stamina.......... but, yes, I should research and see if there are any torpedoes I could put here........ 🙁
25 February 2021, 22:53
Found a link that might be helpful:
britmodeller.com/for..2-ordnance-question/
Still, empty bay or not, your plane is going to look grand 👍
26 February 2021, 08:21
Thank you Lukasz: after the message from David I went ahead, studied a little, and ordered the Eduard set with two Mk.44 torpedoes... 😛
26 February 2021, 14:57
Thanks David, but I believe the correct loadout should on be torpedoes (Mk30 or Mk44) and depth charges; I'll scratch some simple adapters and will place them as per Airfix's instructions for their MR.2 kit
26 February 2021, 15:31
Nice progress, Ricardo! I have two left overs from my AIrfix Mk.2 kit which I couldn't place in my bomb bay. They are already assembled and painted. I can send them to you if they are what you are looking for. They look like the ones in photo #4 of my Shackleton MR.2 album: Avro Shackleton MR.2 Airfix 1:72 | Album by centuryfan (1:72)
26 February 2021, 17:13
Thanks Bernd, I'll take it. I'll send you a PM; thanks for the reference Ben.
27 February 2021, 01:43
Ricardo if you look at wikipedia the shack is armed with Lulu nuclear depth charges
27 February 2021, 16:57
There has to be some kind of reason to arm your Shackleton with atomic weapons, Ricardo!
27 February 2021, 17:25
@David, yes, I discover that as well! 🙂 @Ben, well, this build has been like an atomic bomb on my workbench! 😄
27 February 2021, 18:05
Thank you Ben; I read first on Britmodeller that they could carry this depth bomb, quite impressive! 👍
3 March 2021, 11:27
Thank you Remco, doing the best I can, but I'm afraid the decals slivering will still show, no matter everything I try...
3 March 2021, 22:34
Ol´Shackles been through some weather & more! 🙂 Looking quite excellent, the final finish will be quite a feast 👍
5 March 2021, 18:57
Thank you Clifford, almost finished, just waiting for the torpedoes to arrive
7 March 2021, 01:12
Awesome detailing Riccardo...👍
Glad you managed the critical part with the decals 👍
17 March 2021, 21:03
Very nice! Makes me want to build another Shackleton! Were those static dischargers part of a Shackleton-specific Eduard-Set or is there a generel PE set for those dischargers?
21 March 2021, 08:37
Thanks mates, but as I approach the end of the build, lots of problems surface like, for example, fogged clear parts from the inside, or a loose part I thought had been lost in a place where I can't retrieve it. Also, the weight of the model is now enormous, for sure the gear will not hold. This makes me feel really bad. @Bernd, the discharges are from the Eduard set for the Shackleton.
21 March 2021, 14:31
Hi Ricardo, any possibility to use brass rod in the landing gear to strengthen it?
21 March 2021, 14:33
@Ben, I think the best part where I SHOULD have done it was to replace the axles on the main gears. I should have removed the existing plastic ones, drill the legs and pass a small brass rod, with some slack to ensure all wheels touch the floor at the same time. If I have to remediate now, it will be much more difficult...
21 March 2021, 15:02
Sad news indeed. Even the Scale Aircraft Conversions don't offer metal gear for that kit 🙁
How about transparent plastic rods somewhere beside the undercarriage? (I had to use similar one for my X-1 tailsitter)
21 March 2021, 16:26
Good news mates, the gear held, at least, the photographic session!!! What a relief!!!! I'll post the final photos today! 👍
21 March 2021, 16:40
You will have to build one of the magic roundabout to keep it company.(no worries about a tail sitter).
21 March 2021, 17:36
In the meantime, this project is concluded. WIP final photos in the same project, in this album: Shackleton MR.3 | Album by RReis (1:72)
21 March 2021, 18:32
Hi Ricardo.Kids programmeThe magic roundabout ,the AEW Shackletons took a characters name and adorned their aircraft after them.
21 March 2021, 20:12
Building this now and I appreciate this excellent build log to help me along the way. I don't think my nacelle fit was quite as atrocious as yours but much filler will definitely need to be employed to smooth mine out.
11 April 2022, 10:40
It really is. Wish I had looked for other builds before I even started mine but what a great WIP thread and a gorgeous finished product.
11 April 2022, 10:45
Thank you mates, I'm glad it helped; @Kyle, two words of advice, at least from my experience: beware of the decals' silvering and try to put as much weight as in can in the nose, not on the engines - if you put much weight on the engines, the main landing gear will have a lot of stress
11 April 2022, 11:47
@Ricardo, thank you for the helpful tips. Not sure how I'm going to attack potential decal silvering yet but I did pack the nose full of weight (well over the kits recommended 30g) before I sealed it up. I'm hoping it's enough
11 April 2022, 21:09
Because I put very little in the nose, mine took over 100g in the end; and the gear did not fail! 😄
11 April 2022, 21:42
nice tips on the nose weight - want to get this done this year, and this came up.
11 April 2022, 23:08
Very impressive build, the detail you have put in is amazing!
I will take some notes from this for future builds - Good job sir 👍
11 April 2022, 23:09
Thank you mates, I appreciate you comments, it was a very difficult build indeed 😅
12 April 2022, 08:17
Hi Ricardo, outstanding job! 🙂 I have this one in stash also, your build album is most helpful. Hope I can manage half as good as yours 👍
12 April 2022, 08:25
Thanks Neil, it's difficult but the plane is so beautiful that I would do it all again! 🙂
12 April 2022, 08:34
Personally, I'm going to be happy if mine is 1/4 as nice as Ricardo's. But it's truly a lovely plane and I kind of want to build another one already. Kit issues aside. Lol
12 April 2022, 09:55
@Kyle, it will nice for sure, because it is a very imposing model; I'm also curious on how the Airfix would come out, I also love the white MR.2; you have the advantages of a better detailed interior, a stair for the door (!), a classic landing gear with tail wheels and torpedoes for the bomb bay, but the disadvantage of no riveting whatsoever
12 April 2022, 11:48
Great job and very nice painting job. This beautiful plane could not deserve less.
Congrats!
You are right Richard. The Airfix kit has the most detailed interiors, but the Revell kit has the most detailed exterior surface.
12 April 2022, 12:07
I am late to the show but I enjoyed it nevertheless. Turned out great.
12 April 2022, 14:28
Ricardo, exactly my thoughts. If I get this one built and looking decent I was considering maybe trying the Airfix one out as a compliment. See how they compare and the differences. I've left my exterior door closed on the Revell as there isn't much to be seen on the interior anyway. Also why I decided to just use the kit decals for the cockpit instead of upgrading.
12 April 2022, 20:23
Yes, the Eduard PE may be an overkill, but can't help myself to improve everything with extras… however I would say that in this case the masks are mandatory! 🙂 As for the open door, I should have gotten a ladder but when I finishing the build my patients was growing thin… 😕
12 April 2022, 23:19
I haven't attempted the photo etch yet as I'm just really getting into attempting airplanes in general. I definitely purchased the masks though. As you say, mandatory for this one. I will attempt some photo etch in a cockpit at some point though.
13 April 2022, 03:17
@Kyle, I use PE or Quinta in all my build, it's much faster than painting and much better than decals; the only disadvantage is that we have to use CA glue; however I'm becoming fan of using Ammo's Ultra Glue, which strong enough and being PVA based it's very permissive to errors and can be cleaned with water if still not dry
@Thomas, thank you
13 April 2022, 12:13
Well it's certainly lovely to look at. I actually bought an Eduard limited edition set recently so I'll be trying out the full experience with that one.
13 April 2022, 19:22
Beware, the Eduard set has a tiny problem... the side consoles do not fit the space in the cockpit! The guys at Eduard are always overly optimistic on what their PE can do!!! 😄
14 April 2022, 11:52
Album info
This is the WIP album; final photos here: Shackleton MR.3 | Album by RReis (1:72)


