

Destination Moon (XFLR-6 Test Rocket)


, and with my resin printer, I've got the ability to make a much more accurate rocket. A quick run to Value Village netted me a cheap clock radio to work with. | View full picture")


 but gained an SD card. I also wired up a simple 2N222 transistor audio amplifier. | View full picture")

, the clock circuit board, the 4Ohm 3Watt speaker, the SD card reader (with a couple of .wav files loaded on it), the Arduino board to run all the functions, a micro USB power input and an on/off switch to cut the power when not in use. Oh, and a whole mess of wires holding it all together. | View full picture")


Comments
61 9 November 2017, 14:28
Took some heavy duty sanding of one side of the epoxy coat to get the rocket as round and true as possible. It's not perfect, but for a paper model created out of plastic... who can complain. Sanding the epoxy coat got me close, but it might take a few sessions of Tamiya grey putty and sanding to fill in the imperfections to the point where they're not really noticeable.
20 November 2017, 02:30
i will certainly not miss this one! you are building it fully from scratch... wow. also the towers?
20 November 2017, 08:11
I'm not entirely sure what planet I am from though...😉
It is 100% scratchbuilt, but I did cheat a bit. This is supposed to be a 1/72 scale XFLR-6, which is the test rocket (not the actual moon rocket). So the size is correct, but the shape is actually the Moon rocket because I was able to find those dimensions more easily. The test rocket is a little thinner, so I would have had to do all the calculations to cut it into 2D segments myself, and that sounded like just a bit too much work. 🙂
Once the straight XFLR fins are on, only the most nit picky fans will know the difference.
I have to admit, after I glued all the segments together... even though I tried to be as precise as possible, the rocket was a bit misshapen and I wasn't sure this was going to work. My wife even asked me why I was building a pickle... 🙂. But after a few rounds of sanding, even if it's not laser perfect, I think it will look good enough,
20 November 2017, 15:32
this is one of those occasions when a lathe would have been really handy.... so many tools so little space/money 😄
20 November 2017, 15:57
Wow Greg - that's a lot of scratch building! Looks good though. I think I'll stick to the Blue Rider book's suggestion and use a V1 model kit as the base, but it will probably be too cylindrical (and need 3 instead of 4 fins). Looking forward to seeing how yours works out 🙂
21 November 2017, 07:48
I thought long and hard about just using a V1 kit as the base, but the shape isn't quite bulbous enough so I figured I might end up doing much the same thing trying to modify the shape to fit. Now that I added the fins and the antenna I think it looks a little better. I was even able to scratch up some sort of 2-part rocket engine which will be painted separately and inserted in the end - both positionally and chronologically.😉
At least my wife stopped calling it the pickle rocket... of course now she's calling it the cow rocket. ;D
21 November 2017, 08:35
Heh, in my latest pic you can see the Ki-10 Perry peeking over the rim in the background. It was sent to its room for bad behaviour and the Tintin rocket got all my attention instead. I was able to scratch up the comm tower. So now the stage is set... and we just need a little masking and red paint...😉
26 November 2017, 15:41
I like your project with the rocket...because i also like the adventures of Tintin (or Tim and Struppi as called in german).
Looking good so far, i will stay tuned!!
26 November 2017, 18:38
Wow love it I am a fan of Tintin also got all the comics and now you did a good work
27 November 2017, 07:35
Thanks guys! Don't worry Thomas, you'll get a personal invitation to the launch party. 🙂
I have to admit, now that I've made it to the masking/red paint stage (which is more or less the final stage), I'm a little nervous. The checker pattern will make or break this project... and the bulging shape means it's not just a straightforward set of boxes in a line. Here's hoping!
@Achim -nice to find more Tintin fans around here. I've got several builds dedicated to our intrepid reporter friend (with more to come!), and there are several other great builds to be found here by others.
27 November 2017, 08:16
Urm... anyone got any good suggestions for masking a checkerboard pattern across a (slightly irregular) curved surface? I'm asking for a friend...😉
27 November 2017, 15:36
Hey Greg! It is not that difficult, but it costs a lot of tape😉. I will try to explain it, but excuse me for my English:
I first sprayed the bottom and top red. Masked it and sprayed the body white. I masked the first lines with small strokes of tamiya tape for curves, ideal! The large parts you can mask with normal tape.
Then I split the rocket in half. I masked the first half and I split the other half again in 2. I mask a quarter in the desired number of squares and spray the red color. With an hairdryer I speed up the drying proces. When it is dry I remove the masking and I apply it again but know the other quarter. Now one half is done!
Up to the other half, mask the side who's allready been done and proceed with the same proces.
It costs a lot of maskingtape and there will be a bit of overspray if you do not mask everything. But it is just paint and you can overpaint it easily by brush.
Did I explained it a bit clearly?
Greetings,
Eelco
28 November 2017, 09:42
Thanks for the detailed instruction, Eelco. I understand completely, however there were a few things that made me stuck. First off, I don't have the Tamiya curved tape... but I was thinking about it for sure. Second, I studied your pictures and I think you just masked 4 quadrants evenly. I was trying to do 5 rows of 6 squares each, so I'm not sure your method would be easy to handle that set.
The other problem is that because my rocket is 100% scratchbuilt, the dimensions are not quite perfect all the way around. So even though I did the math... it didn't quite work. So in the end, I used the match to cut some curved tape and get approximate squares. Then I just used my eyeballs to make it look as balanced as possible (including cheating to hide some of the construction dimension flaws). In the end, it needs to look right, not necessarily BE right... right? 🙂
28 November 2017, 15:04
I won't lie thought... my method cost a lot of tape and several printed pages as I adapted the original cut-out template as a guide... and then I took a DEEP breath before I blasted the whole thing with red....
28 November 2017, 15:06
i bit late for suggestions, and maybe it is bs.... anyway.... but instead of doing all the squares in one go, as you did, why not do just do it in steps. you place some wide tape around (horizontally), then leave one horizontal area unprotected, then wide band again, then empty band again. and then the same process vertically. paint red. leave it rest for a couple of days. remove tapes. do the same process but starting one "line" higher and one "line" more to the left/right..... i think it may be easier. anyway i am sure it will be fine one way or another.
28 November 2017, 17:43
That's a good suggestion.and one that I considered actually. Basically masking horizontal slices and then creating a revolving vertical slice as well. However, the reason I decided to go as-is stems from the fact that I don't trust myself. With that slow and steady process I figured I'd somehow misalign the vertical strips because they'd be partially covered after the second horizontal slice was done. I also figured I'd miscalculate and the last slice would be much thinner than all the rest.😉
As I said, because it's scratchbuilt, I realized the biggest challenge was that it was not the 100% true shape that we are used to when dealing with kits created by machine. I actually don't think I could've done any better, and on-sight i think it looks okay, but the slight variations in shape make the careful calculations methods very frustrating. Once I realized the best way was to go with art and not science, it was a lot less frustrating... but I still had a grip on my ruler, just for comfort. 🙂
28 November 2017, 22:38
Hi, excellent scratchbuilding. I really love your Tintin (Tim und Struppi in Germany) models, a pleasure to lock at them and a journey back to childhood.
29 November 2017, 16:38
"the leaning rocket of Greg" - Bwahahahaha! It does lean ever so slightly because I misaligned one of the legs a bit. I tried to sand down the difference, but didn't want to change the shape, so it was very minimal. Oh, well. I'm happy enough. Thanks guys!
29 November 2017, 22:09
Just added a few final pics against the white backdrop... mainly to see how much she actually leans to one side. It doesn't look that bad (in fact barely noticeable) on the bookshelf... but I had to have photographic evidence to support my claim. 🙂
12 December 2017, 07:53
Idon't usually like going back and reopening a closed case, but I just to good an idea to resist. Besides, I think this one deserves a proud display base... let's just hope I can deliver. My recent foray into electronics has been a steep learning curve.
23 April 2018, 23:55
Hi Greg, that looks great! I have just one question: Where did you get that paper model for the moon rocket from? Because I'm considering of building it myself.
24 April 2018, 09:57
Thanks Siegfried! It wasn't easy, but after a bit of searching I found a template online. Not sure I remember where though...
24 April 2018, 11:35
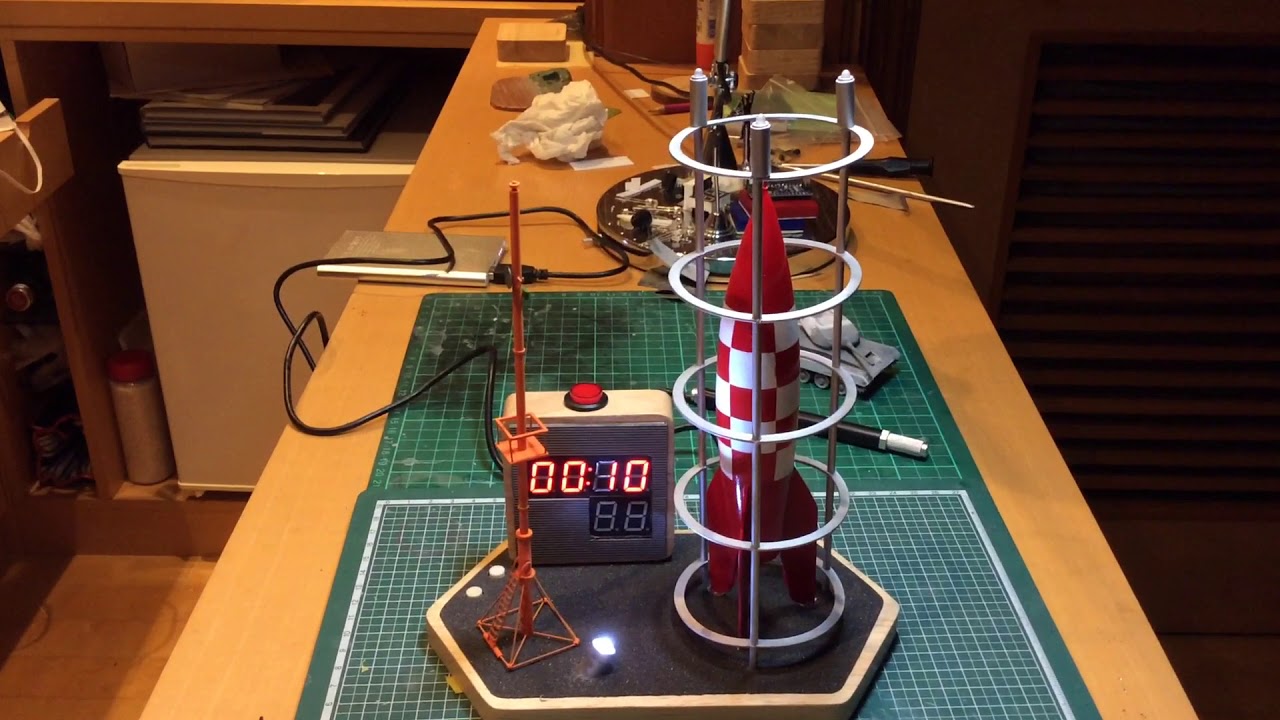
After a few wiring nightmares and breaking the legs of my last two transistors, I finally got everything shoved into the box. Besides the clock, pushing the button once turns on the green blinking lights and the spotlight, pushing it twice arms the countdown, pushing it three times starts the countdown, and pushing it a fourth time resets it back to "off". Whew!
27 April 2018, 15:28
Thanks guys. I'm glad someone's impressed. My eight-year-old son was less so... "But Dad... what does it DO?"😉
27 April 2018, 23:55
That is really great! I like your way of approaching to the final model.
28 April 2018, 07:03
That is literally out of this world. Mind blown. The engine effect is awesome!
29 November 2018, 01:39
Heh. Thanks Tom! This one was quite special... and it's now my "modelling area clock" so I check it regularly... and my wife sometimes uses the countdown timer to gently tell me how much "me time" I have left for the day...😉
29 November 2018, 05:25
Upgrading mainly. The slightly lopsided handmade rocket did bug me a bit, but I used a very simple clock kit the first time around and it's a problem. It uses a capacitor alone to count the seconds, which made it run slow very quickly. By butchering a real used alarm clock for its components, I assume the clock will actually tell time (and I'll add battery back ups to avoid issues when unplugged. Bonus… it's now got a radio too!
16 January 2022, 21:24
A clock radio rocket!! I love the countdown and the engine effect. I have an upcoming project where I will be masking a pattern on a sphere so the approaches to masking a pickle were interesting as well - thank you for sharing what you learned.
My older daughter and I have been looking at plans for various "shark" submarines like professor calculus built as well…
16 January 2022, 22:03
Thanks Ben! I built a Tintin shark submarine as well… out of a Me262! Red Rackham's Treasure (Shark Submarine) | Album by strobez (1:72) - if I ever redo that one, I might take a slightly different approach.
Hopefully this one turns out better than before too. 😉
17 January 2022, 00:54
Heh... technically speaking, it was on the shelf of glory... got dragged off and broken down, but like a phoenix, will emerge from the fire more glorious than before. 😉
18 January 2022, 20:11
Not that much progress on the actual model part yet because I spent a lot of time upgrading and debugging my Arduino code. I ran out of pins to use, so I had to sacrifice the lit up launch button… but I think the upgrades are going to be worth it.
24 January 2022, 07:12
Coming along. Got some paint on the plastic finally. Also, tried something new. Made a blueprint, printed it on photopaper and then used some spray adhesive and some Future to laminate it between a plastic sheet and a clear plastic cover. Seems to have worked. Also start rewiring the connections.
26 January 2022, 07:52
i think i see a revolutionary change in your dios.... you are adding figures! 3D printed captain Haddock in space suit if i am not mistaken and maybe also the professor?
26 January 2022, 08:43
Sharp eyes as always, Spanjaard! Those figures are actually what spurred on the decision to revamp this project. There's more to come on that front. 😉
I'm pretty happy with how the blueprint turned out. There's a lot of dead space below the clock face, so I was scratching my head as to what to include. I also decided to ditch the launch tube/tower. Less "authentic" maybe, but I want to see the rocket better! 😉
26 January 2022, 17:05
I had a bit of a challenge using some of the parts from the clock radio, but luckily a trip to the dollar store got me a $1 clock. I ripped the guts out and rewired it, and now we're back in business.
7 February 2022, 07:15
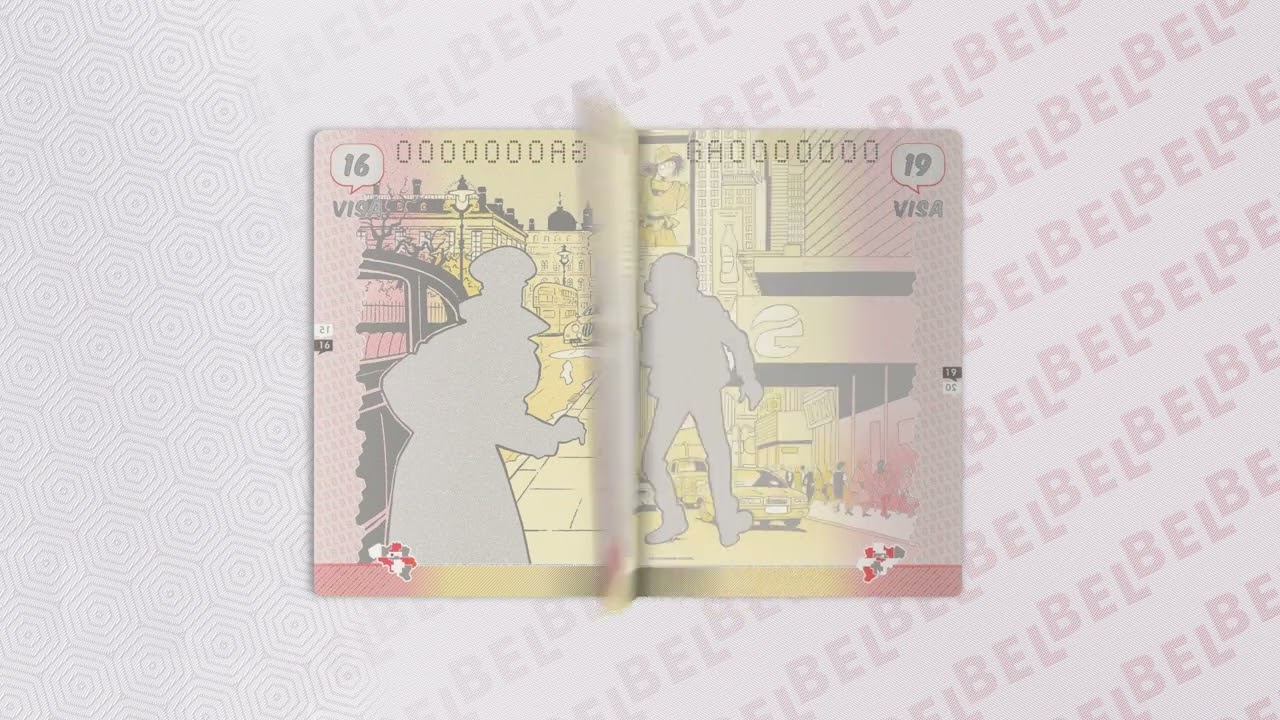
One would apply for a passport just as a memorabilia...
Love the upgrades you are integrating in this one...
7 February 2022, 07:24
I see a lot of stuff hidden in the baseplate: speaker, sd card, ... Are you preparing a whole show ?
7 February 2022, 12:19
Yep. I'm still trying to figure out how to include the fog machine and the confetti canon… 😉
7 February 2022, 14:27
The train guys have a little steam generator for their steam engines… don't think I haven't thought about it. 😉
7 February 2022, 17:32
Wow... Macgyver would enjoy all that mechanism like a kid in a toy store.
7 February 2022, 18:44
looks great to me....almost lifelike...where do you sign up for this feed? Oh that's right...i just did...nice stuff to kick off 2022, Greg...
11 February 2022, 09:43
Getting near the end finally. Just the checkerboard pattern to paint now… just… 😉
15 February 2022, 06:34
Not quite. The middle part of the rocket is a checkerboard pattern. Still need to mask/paint that. Getting close though!
15 February 2022, 18:45
I screwed up the paint job on the rocket, so I had to strip it down to bare plastic and try again. That checkerboard pattern is so tricky to get just right on a curved surface. Oh, well, two rows down, three to go. Almost there!
20 February 2022, 06:25
Not sure how to do that, but decals on a curved surface seem equally challenging to get right.
20 February 2022, 08:55
And… just like that, I got the final masking done and was going to do a few final touch ups… and sure enough I drop the rocket and it smashes all three legs and the tip of the nose cone off… AAARGHH!
Luckily the printer is chugging away again… 19 hours to go… sigh.
23 February 2022, 06:56
Well, that's a bit of a story. So the first one broke. But I decided to make a few changes to the file before reprinting. 1) to add some panel lines so I could actually mask the checkerboard properly, and b) make it hollow. I printed it, but made two mistakes. The first was to make the inner wall of the main fuselage (almost) too thin. The second was to accidentally leave some of the internal mesh on the nose. That ended up confusing my printer into thinking there was an internal structure and it made the walls paper thin - which ultimately caused the print to fail. So, I updated my file, made the inner wall thicker and removed the problem mesh and reprinted. I was able to squeeze in a second nose cone, so now I have... two. 😉
27 February 2022, 04:28
Thanks Erik!
For some reason, Scalemates doesn't want to let me upload any new images at the moment, but I've updated my blog with some pics and more detailed explanations of how this project was upgraded - strobez.ca/wp/index...8/03/22/test-rocket/
If anyone is interested, I've included my Arduino code and the 3D rocket files (in STL format) available for download on the page.
2 April 2022, 17:23
Thanks guys! It was fun. Now if I could only figure out how to make small clear "bubbles" for 1/72 scale space helmets, I could get the Lunar Tank upgrade done too.
2 April 2022, 21:42
Enjoyed the video very much. Very nicely done, Greg! A triumph of a project!!
3 April 2022, 00:34
Brilliant finish 👍 The rocket is awesome.
Regarding the bubbles, I can (again) suggest UV glue 😉
3 April 2022, 08:51
looking excellent.
With regards to the bubbles, what diameter are we talking about?
4 April 2022, 07:16
The diameter of the space helmet bubbles would be 6-8mm. Tintin's helmet is slightly smaller than Captain Haddock's.
4 April 2022, 14:02
Greg, maybe you able to thermoform by applying heat to an acetate sheet and then pressing it against an appropriately sized round object before it cools.
4 April 2022, 19:12
If you know your way with 3D CAD, you could print the helmet bubbles.
They will require some work after printing, though. Sanding, clear coats/UV protection and maybe more...
5 April 2022, 06:47


