

Avia B.534.17, I. series, "stripped": gallery


Comments
5 7 September 2018, 01:11
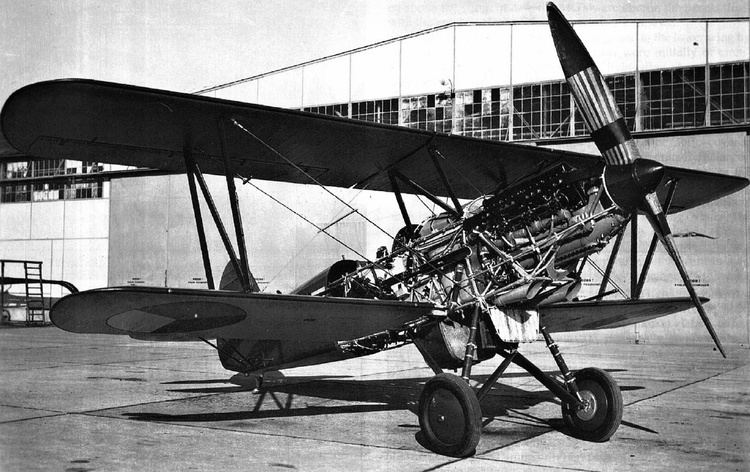
What the hell is this! Alec, this is so great 👍 👍 I thought the last picture is your model in black and white, until I found this one:
[img1]
Me deepest respect for the idea and execution!
7 September 2018, 12:46
That is something very fine! Since I know the model and have already built myself, in the scale, respect! 👍
7 September 2018, 13:08
Thats a great achievement!! Beautifully executed. Did you have to add anything extra for the internal supports ? or is that all from the kit ? 10/10.
Wow, just noticed thats 1/72!! Stunning.
7 September 2018, 13:43
Nice, even very nice in this scale... Did you use the Brengun PE as a template for the tubing? and how did you build the framework?
7 September 2018, 13:49
Mates, thanks you all for your kind words. Much appreciated! This has been a project "in my head" for quite some time, just was not sure if I could pull it off with my skill level. In the end, there were very few "aww sh*@!" moments, and I am pretty happy with the result.
Mike and Bart: the internal structure, as well as the engine and the fuel tank, are 3D-printed parts. I found these on Shapeways. I only used very few pieces from the Brengun PE set. I will get into all of that minutiae in my WIP album, should you be interested (nearing completion).
Cheers!
7 September 2018, 22:05
Why would we be interested in the construction of this gem? Just kidding, think most are very interested. 3D printed in this scale, and it looks good. Definitely interested... Also in the material chosen and such on
8 September 2018, 05:55
The advent of 3D printing opens up all sorts of possibilities for model makers. Was it very expensive ? And what design did you use ?
Is this the right company ?
shapeways.com/marketplace/miniatures/aircraft
8 September 2018, 11:01
In every respect a masterpiece! Absolutely fabulous.....!
8 September 2018, 17:27
Thanks very much mates for looking, and for positive comments.
Regarding 3D printing inquiries Bart and Mike made: Mike, the link you sent is correct. I have included a link (below) to the products designed by CADfish models, three if which I have used in this build:
shapeways.com/market..raft/?tag=avia+b.534
I have chosen the best technology/material option available on Shapeways at the time (early 2018), called "Frosted Extreme Detail". What they offer now (for the items designed by CADfish models) is either "Smooth Fine Detail" or "Smoothest Fine Detail". Not sure how these relate to "Frosted Extreme Detail", but I would go with "Smoothest Fine Detail" option if I were to order again. Here is more info on the current Shapeways' "Fine Detail Plastic" material and printing technology: shapeways.com/materials/fine-detail-plastic
Regarding cost: I spent US$49 for the 3 items from Shapeways. When considered next to the cost of the kit alone, it's expensive. When looked at as part of a typical build these days, involving 3x to 5x in additional cost for aftermarket parts etc, it's not that bad IMHO. On the other hand, when I consider the time it has taken the guy behind CADfish models to research and design those parts, and what Shapeways keeps for the printing of those parts before CADfish gets his share... well, it seems more like a labor of love to me.
Allow me few musings about 3D printing as applied to scale modeling: I would be very surprised if 3D printing replaced traditional injection-moulded kits and resin accessories anytime soon (i.e. 10 year horizon). Although this technology is used already by manufacturers to make their masters (for resin shortruns in particular), the cost of these prints is very high: the resins (raw materials) for these fine-resolution prints are very expensive (hundreds of dollars per kilo), and the printers themselves sell for US$ 10-120K, depending on size and printing capability. Health risks associated with the process (the resins are not mild chemicals) is considerable as well.
For me personally, I think the best bet is to learn to design in 3D and have someone like Shapeways (and I am sure there are other options, or soon will be) print it. Better yet, buy a completed design and print it 3rd party... 😉
Sorry to ramble on, hopefully this is helpful to those thinking about the potential of 3D printing.
8 September 2018, 20:51
To this day I was reluctant about accuracy and thickness of the layers. I have a few resin kits bemased on printing, and cleaning them to get rid of the "Steps" inherent to printing and the layers didn't make it something to try. I have some experience with different kinds of printing at my work. Cleaning till a flat surface is hard, and all fine detail painstakenly added in 3D gets sanded away and still has to be added in scratch...The latest I've seen from Model Monkey, though expensive, will broaden the path for those willing to try, and will even convince me.
8 September 2018, 21:20
Acetone vapour bath left over night will smooth out the layer steps etc. 🙂
8 September 2018, 21:28
I must say that, on this build, I did little to deal with the "steps" left after printing. In many cases, I just don't see how any "smoothing" is possible (take the Avia frame part, for example: VERY fragile). That said, the technology is improving very rapidly, so prints with "steps" invisible to human eye, and affordable to modelers, are likely coming soon.
Bart: quickly looking at the Model Monkey website, it seems that he is a designer that uses Shapeways for printing of his/her products. How recent is the print you have seen, and what was the printer material/resolution (i.e. "Smooth Fine Detail" or "Smoothest Fine Detail", etc.)?
Choppa: can you elaborate on the "acetone vapour bath"? I.e. how does one do that? First thing that popped into my mind was "bye bye fine detail" 😄 Thanks.
8 September 2018, 22:15
Depends on the plastic but I've read (and watched) there's a technique for dealing with this with the more common plastics PLA etc. and what they do is to get a tub with a lid large enough to seal the model in, pour some acetone into the bottom suspend the 3D print on a table or using string so it's not directly touching the acetone, seal it in with the lid and leave for a few hours, over night if the model can take it.
The acetone evaporates bathing the model in the vapour, hence "Vapour Bath" which softens the surface and smooths out the furs and steps etc. but if left too long will soften sharp corners as one might expect 🙂
On something as fragile as the frame work perhaps check it every hour or so
Another idea is to use the side of a scalpel blade to get the worst of it off
I wonder if Mr Surfacer would work here ? 🙂
8 September 2018, 22:49
The print was only a few months ago, it was the size of An old phone horn. Finely printed, but a hell to clean, spray with paint filler, sand, repeat, felt like modelling though but at work. 😉
Material used I'll need to ask. But structure looked like the material used on Lode's turrets. Looks softisch, but very hard to sand.
9 September 2018, 07:26
Thank you very much Alec K. That was a very interesting.
I certainly cannot see any evidence of the 'steps'. You would need a magnifying glass to make them out!! Wow, what a great project and superb result. It looks like 3D printing will certainly be entering the add on market big time soon. Being able to get bespoke unique customised parts is going to be highly attractive to model makers in the future. I imagine most manufacturers are already looking into this. As you say, fairly (but comparably) expensive as yet, but prices will fall with greater demand.
All we need now is someone to create 3D models down to the very last nut and bolt and we are set for some interesting painting. I feel a laser guided brush must be in the offing soon ha, ha. Cant wait for your next build. Inspiring stuff.
9 September 2018, 11:55
Choppa: thanks very much for the info, good to know that acetone reacts with PLA plastic. The 3D prints I used for this project use a resin that has a different chemical composition: I tried to use acetone, lacquer thinner, and Tamyia this cement, but none of these reacted with the print material.
Bart: thanks for the info as well. Sounds like it's the Shapeways' resin-based Acrylic Plastic / photopolymer.
Mike: thanks for the confidence 👍
9 September 2018, 14:18
Awesome. I like your interpretation very much Alec....
Fantastic job Mate....
9 September 2018, 14:38
From what I read from your link it seems it might be an acrylic plastic, I think the PLA and SLA plastics are nylon/delrin based, but I might be misremembering, it's been a while since I've read up on this 🙂
9 September 2018, 14:41
The WIP album is completed and can be seen here, for anyone interested: Avia B.534.17, I. series, "stripped": WIP | Album by Pardubak (1:72)
11 September 2018, 20:46
Album info
WIP album is here: Avia B.534.17, I. series, "stripped": WIP | Album by Pardubak (1:72)


