Academy MH-53E Sea Dragon - WIP


Comments
37 28 April 2020, 03:49
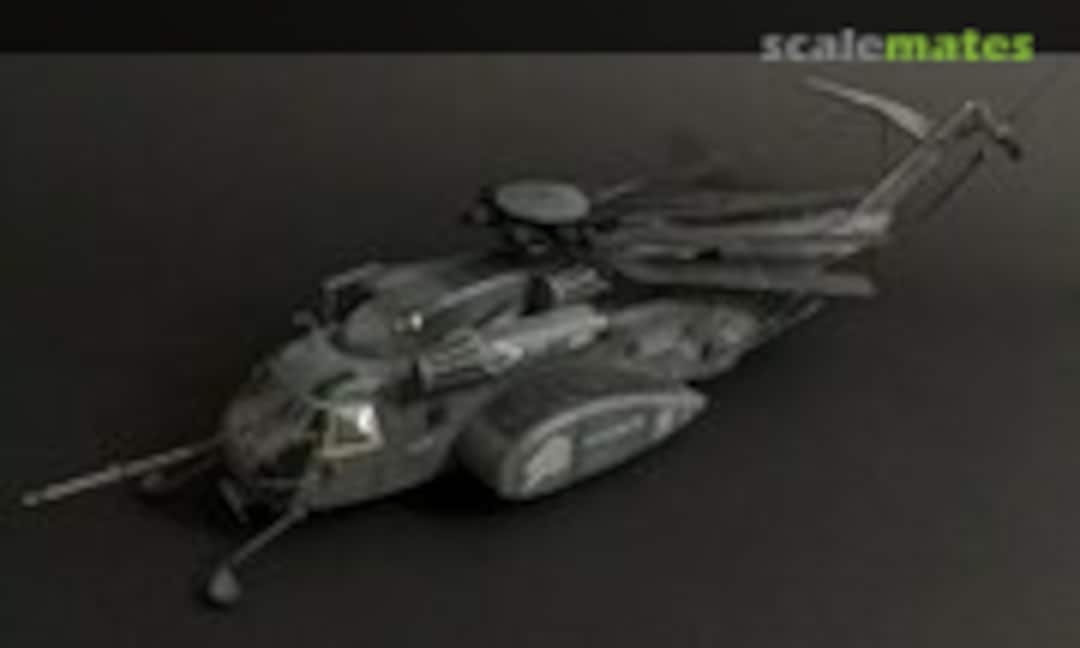
Well, here it is! My next project is a doozy... A big helo! This is going to be a pretty involved build, using some aftermarket and plan to rivet the whole model using the RB riveter. Still waiting on some of the aftermarket to arrive from BNA Models of Australia, hopefully soon though. Been about a month now, but it is what it is in these uncertain times.
Every build I have seen of this bird looks awesome, so I am pumped to see what I can make of it. This will have folded rotors but the rear rotor will not be folded.
28 April 2020, 03:53
I'm in Michael ... I'm going to follow this build with great interest. I have never built helicopters myself ... I grab a front row seat my friend!
28 April 2020, 11:37
Welcome Jos and Florian! I have only built three helos so far, and have found that they are tougher for me than jets. But as I do more of them I am hoping they start coming easier to me.
Anyway, a little sidebar about this aircraft. One of the reasons I moved this up in the queue is because my wife and I got to see one of these in person at the Cleveland Air Show last year, and she really thought it was cool, and had me take pics of her with it. This is a very impressive beast in person!
29 April 2020, 01:47
Mrs Phillips made a good choice indeed!😉 👍 I´ve built a Hind long time ago, messed up the Rotor overhangs, was not really happy... Sure you´ll handle this one with all due expertise!
29 April 2020, 08:51
A big model to get to grips with, and no doubt, a smart result will ensue in your capable hands Michael.
1 May 2020, 21:15
Welcome Ronan, Slavo, Daniel, Nathan, and Kerry! Glad to have you all on board!
Slow start on this, I have been just assembling sub-assemblies so far as I am a bit gunshy to start the riveting. I have everything ready to go for that and have been practicing on scrap plastic, so I think I am finally ready to tackle that task. Wish me luck!!!
4 May 2020, 18:49
I wish you luck and if that doesn't help a bottle of sprue goo! 😉 Seriously, that's my saving grace for riveting and scribing. If I screw up, I apply some sprue goo, let it set up for a day, sand it and start over from a fresh canvas.
4 May 2020, 20:11
Your sense of achievement will be at an all time high tackling this part Michael. But 'good luck' any way bud. 👍 🙂
4 May 2020, 21:25
Following too. I also find choppers to be a bit more challenging, all those antennas popping around... Expecting a top result, which will make the wife happy
5 May 2020, 03:30
Well, finally an update! I have really been laying low lately, had lots going on and less time to model. But, I have been slowly working on this in stealth mode, and here is where I am now! Got most of the fuselage assembly done, and it is really starting to come alive! It's such a cool and mean looking chopper.
I must say, riveting the whole model was a pain, I could only do a little at a time before I needed to take a break for the day. It is just soooooo tedious. Made some mistakes, and some misalignment here and there, but overall the effect is very cool and convincing. Very glad I went ahead and did it.
28 June 2020, 20:48
Hey Michael great progress so far man...I recognize the economical time you have to build sometimes! The more joy you have the time behind the bench 😉 👍
29 June 2020, 08:10
Re. image 42: This remindes me, maybe all scale model kits ought to allow clear parts to be glued on from the OUTSIDE and not the inside like what kits usually require. then one might avoid having to do all the tedious masking work on the clear parts I am thinking (if gluing on clear parts AFTER all the painting).
29 June 2020, 08:38
Cool to see things moving on - and very nicely indeed for that 👍 I was waiting for an update on this for some time!
I am sure on a piece this size & in this camo pattern the rivets will really pay back double all the effort invested. Exhausts look great too. Should really be a big show when this gets done!
29 June 2020, 12:03
Thanks Nathan, Jos, Treehugger, Slavo, and Konrad, I appreciate the kind words.
Treehugger, I totally agree here. Usually, I make my own masks, for some weird reason I don't really like buying Eduard masks. But for this one, I did get the Eduard masks and it was DEFINITELY worth it.
Slavo, yep, totally. I really think this will be the most impressive looking model I have built so far in person once I am done. It already just looks so cool, and it is only like half done!
Anyway, I have some more Eduard PE exterior pieces to add but should soon be ready to prime. I am going to prime this one in gray instead of black because of how dark the base color is. I will also not pre-shade, I will be using the dark gray paint itself to get areas of lighter and darker shades depending on how much paint I put down and how much of the gray primer I let through. This technique worked quite well on the Hasegawa Apache I built a while back with its dark green paint.
30 June 2020, 17:37
Finished priming tonight, was kind of a pain getting in between the engine nacelles and fuselage. If I build any more in the future H-53s I will wait until after painting to attach these. Next up is the dark gray, likely tomorrow. This is where things start to get FUN!
3 July 2020, 05:30
Thanks Patrick and Maciej!
Well, got the dark gray painted tonight. I actually used two different dark grays from Mr Paint on this. Was not a fan of how it looked with the first gray (a bit too light), so I sprayed light layers of the darker gray on top to give the look of fading and to also darken the coat to my desired level. I am pretty happy with how it turned out!
4 July 2020, 05:53
Thanks Konrad! Future coat today, then maybe some decals tomorrow. Happy Birthday America 🙂
4 July 2020, 19:37
Got the main decals on tonight, no issues at all. Partially kit decals, and partially Wolfpack decals for this specific aircraft. Really starts to come alive once some markings are in place. 🙂
6 July 2020, 03:35
Your 552 has the BJ markings aligned vertically, whereas the 543 in the cover picture has those slanted in line with the tail leading edge, is that on purpose? Just checking... Otherwise, as remarkable as every build you do! 👍
6 July 2020, 14:33
Thanks Konrad, Nathan, and Patrick!
Patrick, that is very interesting! So I just quickly did some google-fu searching, and it appears the BJ code can be found in many different variations as far as placement. Some are even side by side. 543, oddly enough, is the only one I could find with the BJ slanted in such a significant way. 552 has the B and J much closer to each other than all the others I have seen as well. It appears most are close to vertical when viewed from the side, as I did by following the color guide that came with the Wolfpack set. Interesting stuff and good eye!
6 July 2020, 15:22
Pfew.... Good news then! 😄 You're welcome and glad I could be of 'help' here. 🙂
6 July 2020, 19:29
Main coat & decals look very good indeed 👍 Now all the real fun with getting all the specific blends, shades & wear begins... big cliffhanger 🙂
6 July 2020, 20:18
Thanks David, Pero, and Slavo!
Yeah, I plan on doing some further fading and other misc. weathering, including toning down the stark decals. Hopefully I won't take it too far, I have a tendency to do so sometimes. LOL
7 July 2020, 18:04
Really impressive work overall! All the effort put into the riveting shows off very well - since most of it looks spot on, some minor mistakes will barely be noticeable.
Hope I can achieve the same quality when I'm going to rivet my Eurofighter.. 🤔
8 July 2020, 19:44
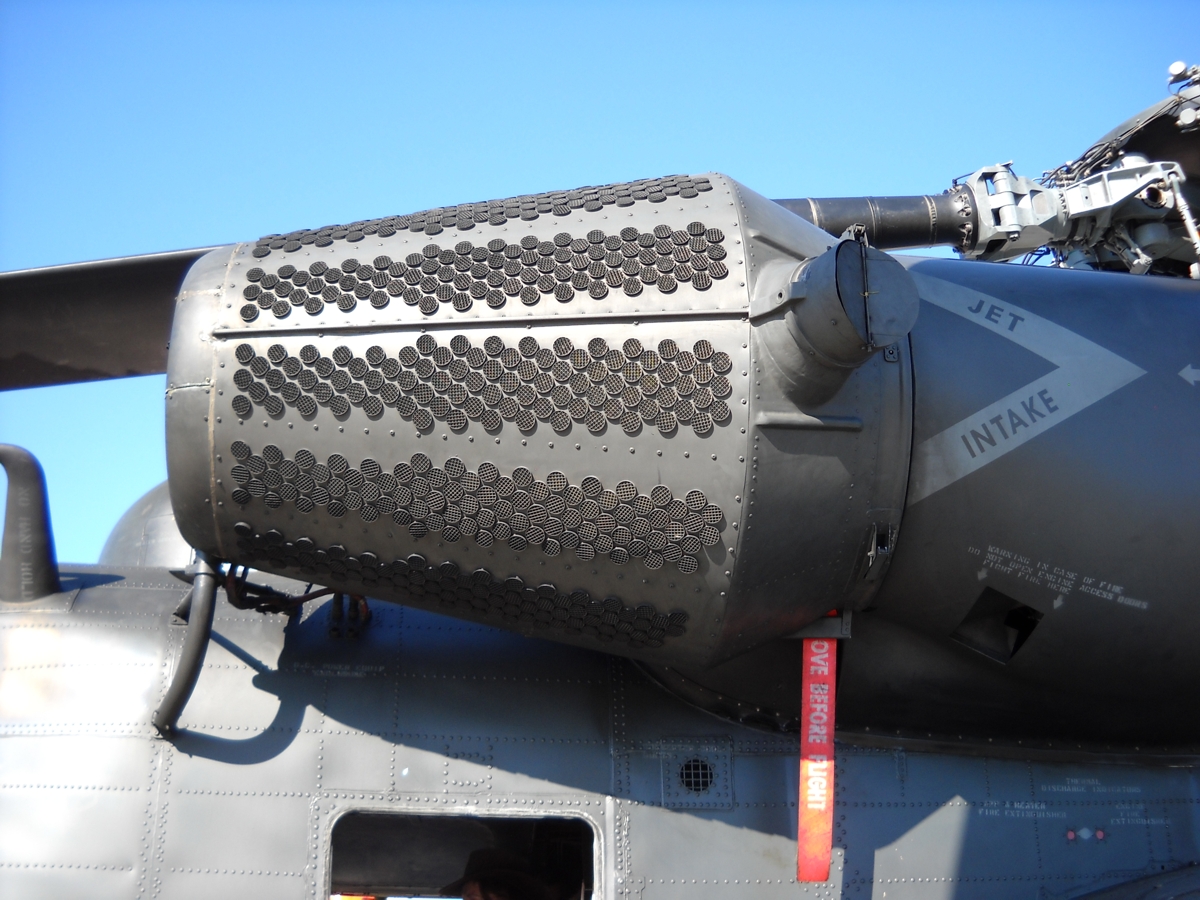
I am looking forward to seeing how well you replicate the intake cowling with all it's black bumps, as that will be the crowning glory and make the model complete. 👍 🙂
[img1]
8 July 2020, 20:59
Thanks Jos, James, Alexander, and Kerry!
Treehugger, I measured it tonight and it is right around 20 inches from tip of the refueling boom to the edge of the tail. Big girl!
I appreciate the kind words Alexander about the rivets, that is why I didn't worry too much about small mistakes. There are so many all over this machine that it is hard to tell where they are. I am sure you will do fine on your Eurofighter. If you want any tips on what I found works for me, just let me know.
Kerry, THANK YOU for the link. Some really good pics there that I will definitely refer to. As far as the black dots, I have been thinking about that recently. My plan is to use a chisel tip permanent black marker for those since they are relatively proudly raised, so I think that will be the quickest an easiest route. I will then be sure to add a future coat to lock the permanent ink in. Sound like a good plan?
9 July 2020, 03:49
So I now have MOST of the decals on. Worked on the stencils yesterday, and started the walkways today. That is fun. Not. I still have the sponson walkways to do tomorrow, but once those are done I think I am done with decals. Then it will be on to fading and weathering then the wash. Coming along!
9 July 2020, 03:51
Michael, The only reason I remarked on the engine intake cowling colours was that I screwed up my Stallion with getting over enthusiastic with the paint pen and hoped you would avoid the same dilema I had.
But the chisel tip marker pen sounds like a great solution. 👍
As for the images, I just asked Google for 'images of the super stallion engine covers' and the link popped up. 🙂
Glad to help mate.
It's looking quite a great effort and well done too. 👍 🙂
9 July 2020, 18:34
Great work so far. I like the paint, nice worn look but not overdone. 👍
9 July 2020, 18:44
The shading & blending work over the decals will be the pivotal point of this match IMHO... And I've placed my bet on the winner😉 Everything is set-up for the showdown, really looking forward to the next steps 👍
9 July 2020, 19:31
Great to watch this beast come to life 👍 really looking forward to the faded and weathered end product
10 July 2020, 18:05
Thanks Dominik, Kerry, Daniel, Thomas, Slavo, and Daniel!
Finally finished all of the decals, and toned down the decals and faded them some. Happy with some areas, think I need a bit more work in others. I will revisit that before I apply the wash.
Also, not happy with the walkways. The kit supplied decals are way to light. Pics I have seen show it to be either black or somewhat similar in color to the dark gray overall color. Also, it has a grit to it, so I was thinking of maybe using some white glue mixed with black paint and dabbing all over the walkways to give it the textured look and to darked it up to nearly black. I think I will try it out sometime tomorrow.
Wish me luck!
14 July 2020, 03:26
Michael, if you look into the Tomcat group build, you'll find pictures of how some of those builders put gritty walkways on the F-14 intakes. Sorry for not remembering who exactly, but you'll find some information in there...
14 July 2020, 17:02
Bullet 106 - WIP | Album by halohead (1:48)
I think I found it!
14 July 2020, 17:05
Thanks Thomas and Nathan! Getting excited to wrap this one up. Lots of things left to do, but I can finally see the light at the end of the tunnel, and it isn't a freight train coming my way! LOL
Patrick, THANK YOU! That is exactly the effect I am looking for. I will send Daniel a message and asked him the particulars. 🙂
14 July 2020, 17:27
So I attempted the walkways tonight using glue, baby powder, and black paint. Figured I would do it freehand since I could just cover the gray decals. It turned out okay, buy I definitely need to go back in and tighten up the edges. Only got the top and one sponson done. Will finish tomorrow.
16 July 2020, 04:32
That is indeed a delicate job Michael. It will be a cool build, awesome...! 👍
16 July 2020, 05:06
Thanks Jos! Spent some time tonight trying to clean up the walkway edges and make the color a bit more consistent using Tamiya Rubber Black. I am pleased with how it turned out, although looking at the pics I see some areas to clean up still.
17 July 2020, 04:27
Just saw the way you made this "carpet" on the stepareas.
another way to get a Steady Surface i take is paint the Areas thick and sprinkle bakingpowder in the Color. it soaks up the paint, after drying i paint the Areas black. perhaps a try on the next build😉
17 July 2020, 05:40
Now the step areas look really nice with very smooth edges - except maybe the smaller ones on the portside "thingie" (wheel well? 🤔 ). Hope you get the same result eventually as well as on the starboard side.
Getting better and better Michael! 👍
17 July 2020, 14:12
Thanks Soeren, Dominik, and Alexander!
I finally finished the walkways. Damn. That was an intersting 3 day adventure. I learned quite a bit a long the way, and improved my technique along the way. I think in the future I will just use thick, unthinned rubber black sprayed at high PSI to get the effect. Easier to control, faster, and more consistent. Also gives a more understated texture.
Next up will be the wash!
18 July 2020, 19:11
Well crap. After looking at the pics I just realized I forgot to paint the walkway on the area that connects the right engine nacelle with the fuselage. I remembered to the other side I see. Weird how often I find issues by looking at pics compared to looking at it in person.
18 July 2020, 19:14
Oh, I think we all know this^^ the mistakes reveal themselves just after uploading, must be a special filter on this site😉
The outcome looks really nice, there are a lot of ways to get to a rough surface 👍
19 July 2020, 19:31
Looks really tidy Michael! 👍 Apart from that missing patch of course.... 😛
19 July 2020, 21:03
Very nice Sea Dragon Michael. I thought it was a nice kit. Enjoyed building mine.
19 July 2020, 22:41
That is such a cool chopper. Always wanted to build one. Will be following.
19 July 2020, 22:47
Looking really good & I agree on the photo-review/reveal... I also use photos to look for finding mistakes - somehow they seem to bring-up things I just cannot see on the model itself...
Haven´t tried a rough surface yet - in Russian aviation, the roughness is apparently provided by the hardy rugged men who fly & maintain the planes... 😄 but it´s a technique I´d like to check on in the future!
20 July 2020, 10:05
Thanks Daniel, Patrick, Clifford, Guillaume, Denis, and Slavo!
Applied the wash over two days using MIG Deep Brown. I think this was a good choice as it is dark enough against the dark gray and also gives it a nice dirty hue. I am pleased with the outcome. Next up will be some final weathering with Tamiya Smoke and some soot from the exhaust and rotor wash along the rear fuselage. Add a little bit of weathering to the exhaust pipes as well. After that the final flat coat and then final assembly. Wont't be too long now!
21 July 2020, 03:54
Wooow Michael...you're definitely building a masterpiece, I love you subtle weathering...be careful with the Tamiya Smoke, I like the model just as it is right now...👍
21 July 2020, 19:05
Thanks David, Jos, Konrad, and James! Your kind words are greatly appreciated.
Jos, I will try to keep it restrained, although I am going for a slightly dirtier and worn look than I already have, but only slightly. I will just randomly spray some Tamiya Smoke for some stain and discoloration enhancement, and will spray some Tamiya Rubber Black to simulate the soot from the exhaust and rotor wash along the mid to rear of the fuselage around the word NAVY. In pics of Sea Dragons this is the area that tends to be the most dirty.
[img1]

22 July 2020, 14:33
Thanks Maciej!
Well, added a few bits and reattached some things I had knocked off during the build, and hit it with some flat coat. Have some other small details to attend to but then it is on to the rotors!
23 July 2020, 04:44
The weathering really makes the icing on the cake and adds to the realism of the build, Michael!
Though is it just the lighting/camera/etc. or does the helicopter look rather flat? But I guess this aspect is probably up to debate among aircraft models in general..
So now it's "just" the rotors as you said and some small parts (and the landing gear), right?
23 July 2020, 17:21
C'mon Clifford, yours is very nice, and was actually one of my inspirations to want to build this kit.
Alexander, thank you! It is actually quite flat, but that is my personal preference. I prefer my models, unless very clean or glossy paint, to be rather flat in finish. I know this is not a universal preference, but as they say, to each his own. 🙂
So I am pretty much done with the airframe now. Only have to add the front cockpit side windows, I think. But I am sure I will notice something else I need to do that I have forgotten in the meantime. Next up will be the tail rotor, followed finally with the main rotor, folded. That is almost like a kit in of itself, and I plan to add some detail wiring and plumbing to that as well.
24 July 2020, 06:04
I like it a lot mate and if you fotograph that bird with a real background I believe you cannot say if it's the real deal or the model!
Cool👍!
24 July 2020, 06:20
I agree with conrad, this is another example of your excellent eye for realistic appearance. I also agree with full flat coat for navy models like this one 👍
24 July 2020, 16:44
Thanks Konrad, Laurent, and Daniel!
I appreciate the kind words. I always strive to achieve realistic weathering without going overboard. Sometimes I get very close to the line, and have gone over the line a couple of times. But it is fun to play with different techniques to get the look I want.
So after thinking about what I need to do still, I realized I did still have a couple things to add to the airframe on top of the front side windows, the entry step on the starboard side door, and the windshield wipers. Hopefully tonight I will get those done and perhaps the tail rotor.
24 July 2020, 16:57
Steady progress & looking better with each step - the entire front section looking really great - with the (IMHO) most difficult part - and the reason I avoid helicopters for an open-ended period 😄 - yet to come... Folded may be slightly more controllable, but still - but then you have showed you can make nice & believable model rotors in the past... 👍
24 July 2020, 19:30
The finish is looking fantastic & I really like the exhaust shooting.
24 July 2020, 20:35
Thanks Slavo, Nathan, and Clifford!
Spent the last few days doing lots of little detail stuff and the rotors. I added some plumbing to the main rotor head using copper wire. It is not super accurate, but it is busy and looks the part. That was quite tedious to do. I am almost done now, so expect the final reveal within a couple of days!
30 July 2020, 04:22
Pipes, Pipes ! Pipes ! and more Pipes. !!!!! How I love this stuff. 👍 🙂
Excellent effort Michael. Great work. 👍 😉
30 July 2020, 05:13
Beautiful job on the rotor head. What did you use for the wires and tubing?
30 July 2020, 21:44
Thanks Kerry, Jos, and Clifford!
Clifford, I bought a set of differing thickness copper wire from eBay awhile back for this kind of thing. Works very well and easy to manipulate. I used two different gauges of wire on this model.
31 July 2020, 00:55
Well, she is done! See the finished pics here:
Academy MH-53E Sea Dragon - Completed! | Album by Fighting 84 (1:48)
31 July 2020, 00:56