

BMP-2D - Afghanistan


Comments
5 April 2017, 19:12
Hey guys! Here is my new project. This time it will be an BMP-2D during the Soviet-Afghan War.
5 April 2017, 19:15
The build is almost finished. I only need to paint the lower part of the turret and glue it to th upper part. Then i can start with the painting of the model. I decided not to add the ATGM on the roof as most of the BMP-2 pictures from Soviet-Afghan War i have seen were without it.
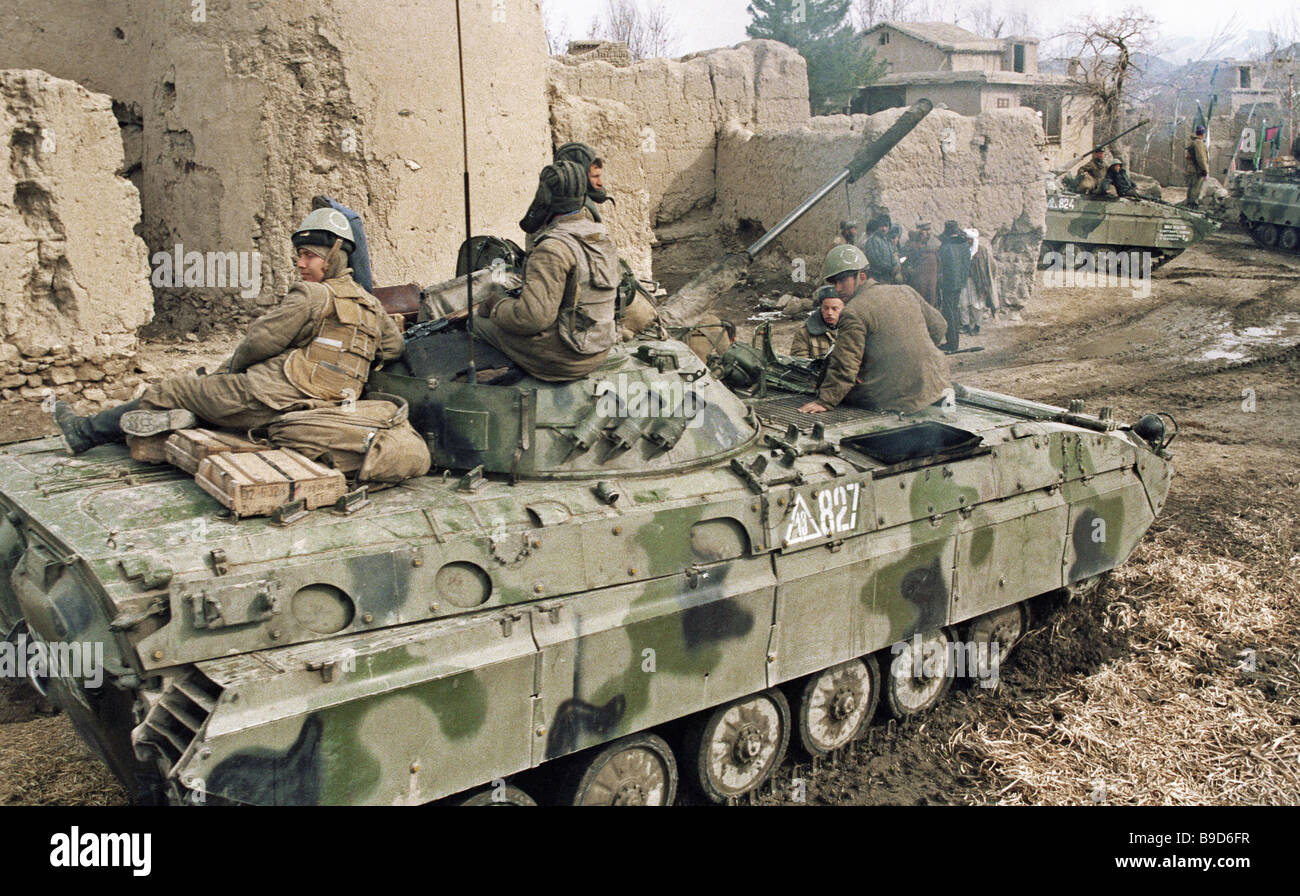
The plan is to add stowage an figures to create something similar as this both pictures.
[img1]
[img2]

11 April 2017, 20:04
Nice progress Ingo! Looking forward to seeing it painted and with the figures on top
11 April 2017, 23:30
Question: Did you end up using the metal barrel ? or stayed with the provided plastic one ?
12 April 2017, 05:25
I used the barrel that was provided in the kit. The metal barrel from RB got a different connection end. Its wider then the barrel itself. I tried to remove some plastic to fit it in but almost messed up the whole turret part.
The same goes with the single link tracks from Trumpeter. Every single link got an ejection point on the inside that is hard to remove. At the end it would be about 150 links that i have to clean up. Right not i am checking if i go with the vinyle tracks from the kit or spend hours/days to clean up the links. :/
12 April 2017, 13:19
will you added the different thicknesses at the armour plate in the turret? Nice and clean build so far...
12 April 2017, 13:28
Thanks for the explanation, I have DML BMP-2 in progress currently and I have the aftermarket barrel and not very sure about using it.
12 April 2017, 14:54
Thank you Bart. No, i wont add the additional armor plates on the turret.
@Cortex: Which BMP-2 from Dragon? 3504 or 3508? If its the 3508 and the gun mount is the same as show on the boxart, then there should be no problems with the metal barrel. If the mount is the same as the Trumpeter one (Picture 19 in my build) then you have to modify the mount or stick with the kit barrel.
12 April 2017, 15:40
Yes, I'm also a bit disappointed to hear about the tracks as I was planning on getting a pair for my BMP. Ingo, would it be possible to post a picture showing the ejection point? Many thanks
12 April 2017, 22:50
Yes James and Dan, i was surprised and disappointed about it myself. I will upload a few pictures of the replacement tracks after i am back from work. Even if i remove the ejection spot, in the end i would have the pleasure to glue all the tracks together.
The problem are the connection pins of this tracks. The technique is the same as the Orochi tracks for Leo but the pins are made from plastic and not from vinyle. Many of the pins wont hold the tracks together in the end. I am afraid they would just fall of.
The camo sheme will be overall sandy color with a few patches of black and green. The same that you can see on the boxart. This time i decided to paint the model the different way. Not the usual basic color and then the camo but the camo first and at the end the basic color. First of all i will paint the model overall black (priming) then use blue tak or uhu patafix to cover the black camo patches. Next step will be green color around the covered black patches and cover them after they dry. In the end i will paint the model in overall sandy color.
13 April 2017, 05:48
Hey Ingo, looking forward to see how this will work. I want to try a MERDC scheme on a M981 and I was thinking of doing the same way, paint the black first, then cover each spot progressively. Little worried about covering black with lighter colors though.
13 April 2017, 09:44
Hey Dan try to use the black & white technique something like this: Sd.Kfz.182 Tiger II - Pz.ABT.505 - HENSCHEL TURRET w/ZIMMERIT | Album by Igi87 (1:35)
Prime the model black and then use lighter color like off white or light grey to paint the prominent spots where the light hit the surface the most.
Better not to use the usual white color because its to bright and hard to cover with lighter paints like yellow, sandy colors or light green.
13 April 2017, 11:54
Hey Ingo, thank you so much! Yes, that's a nasty spot. Can't believe some manufacturers still do this kind of thing. Academy has a similar problem with their individual link tracks for their M113. I ended up using the vinyl one.
13 April 2017, 20:28
I am going with the vinyl tracks from the kit. Will cover them with enough wash and pigments. ^^
13 April 2017, 20:31
hi Ingo F, so answering your question: The kit is DML 3504 and I think I will need to modify it in order to use the metal part, but I noticed it's noticeably thinner than the plastic part so not sure which one looks more realistic.
14 April 2017, 03:22
The model is now finished and ready to paint. The BMP is a little bit overloaded, something that is not typical for russian/soviet IFVs. I want to show an BMP that loaded some goods & ammunition at the main base and is moving to an outpost. Ammo crates for shells are from SKIF and the small wood crates for ammo/grenades are from Eureka.
I scribbled some lines with the hobby knife to simulate wood planks as the Skif crates do not have any textures.
The road wheels are made from resin. It was my first try to cast resin and it was a partial failure 🙂 I forgot to squize the slicon mold to remove the air so i got about 2/3 of the wheel. 😄
But hey i can use them the way it show on the picture. I will cover the missing part with some blankets made from miliput.
The fuel barrel is from the T-64 kit. The holding stripes will be removed and the holes closed.
Both soldiers at the back are from the ICM 35637 - Armoured Carrier Riders.
I am going to scratch build a pack of cigarettes for the left one so it looks like he is showing it to the other guy. Something like " Want some smoke?". 🙂
The soldier on the turret is from ICM 35601 and represend a sovie tanker. Currently i am modifying the figure so it will look like he is wearing an light tanker jacket.
18 April 2017, 15:42
Nah, no Vodka. 🙂 I moved the stowage back and forward and tried out different combinations. In the end i decided not to use this both guys and leave them for my BTR-70 project. The more i looked at the BMP from different sides the more i didnt like how the poses of the figures look like. I only keep the guy on the turret and the stowage.
The modifications on the figure is completed and i will upload the pictures later.
18 April 2017, 22:01
Finished the figure yesterday and i think its look ok for the firsttime frying to modify one. 🙂
Primed it black and everything looks smooth.
19 April 2017, 16:05
Painting is all done. I think the "reverse" camo sheme turned out pretty good. There are some points that i need to correct but overall it good.
23 April 2017, 18:35
Finally started the weathering on this one. First added some chipping at the sides, front and back. The places where the soldiers used to climb and sitting on the BMP. Added some russian green chipping around hatches and turret.
21 May 2017, 18:51
Weathering is almost done only the tracks need some finish. Next one will be the stovage and the figure.
6 June 2017, 16:36
it is boring to say always the same but.... WOW! excellent result Ingo
as usual😉
20 June 2017, 16:12
Hey Bart, i will add only on figure to the model. I have finished the modifications yesterday and going to prime the figure today. I had to modify the left arm as the hatch is small and the arm will not reach it.
Somehow i am little afraid to start the painting as i never painted a figure before. 😄
3 July 2017, 12:27
go Ingo go, and if you do not like it, do not use it.... but something tells me it will be just fine 🙂
3 July 2017, 17:30
Hey Ingo, take a look at games workshops official YouTube channel. They have a lot of figure painting tutorials all of them geared towards the beginner. Take a look at imperial guard (or astra militarum as they are called now) figures as they are closer to 1:35 military figures
3 July 2017, 21:23
Thank you James. No i went with the vinyle tracks from the kit. I think they turned out good.
4 July 2017, 21:28
Very well done Mate.Subtile weathering.Not to less ,not to much.👍
5 July 2017, 04:49


