

Tamiya He 219 plus detail sets


Comments
2 18 September 2015, 17:36
So here we go... As so many times before this build starts with cockpit. Aires was my first choice for this most important area. The detail they provide is amazing!
This is a very nice detail set.
18 September 2015, 17:50
Thank You Christian! So let's see where we end up... So many things to do... But it's fun ! 🙂
18 September 2015, 18:03
Thx Martien! This one will be no quick build. I will have to cut the Tamiya kit into pieces to get all the resin bits in place. And there are plenty of them... I hope not making any mistakes on this one.
Cheers Mate!
20 September 2015, 17:58
Na das ist ja ne Zutatenliste. Bin gespannt was du draus macht. Übrigens, das gun bay set sieht eher nach nem engine set aus.
21 September 2015, 05:13
Thank You!
@ Christian: Da hast Du recht, das ist das falsche Foto.
21 September 2015, 05:54
Some small progress. Prepared the fuselage for the new cockpit. The test fit is good so far.
21 September 2015, 17:25
Some small progress for today... Started to paint the cockpit. There are many sources that tell you that the cockpit of a HE-219 should be RLM 66. But I do not agree according to my reference material. I used Humbrol "Satin Black" as a primer, followed by Humbrol RLM 02 in very thin layers. This is the point where the Aires Cockpit shows it`s quality. All the detail pop`s up and I`m happy.
26 September 2015, 18:09
When I see this ....You have no time to drink coffee in Wilhelmshaven. 🙂 That goes all well 👍
27 September 2015, 08:11
Thank You Christian!
This will be a long term build, but the Aires Detail Sets are worth a proper paint job. Since You are the Guru of small scale details You know what I mean😉
1 October 2015, 18:35
How thoroughly enjoyable to see your work Christian, The cockpit is just crammed with beautiful detail mate and I don't know how I missed this for so long. :-/
Simply stunning. 🙂 👍.
2 October 2015, 03:59
Thank You Mates!
This detail sets from Aires are excellent. It´s much fun to paint them.
2 October 2015, 06:11
You are blessed mate, and your patience is fantastic.
I am always in awe of your abilities Christian.
Not enough words. 🙂 👍 👍 👍
2 October 2015, 18:11
Well Kerry, if You think that I did it right it must be right. It means very much to me when a talented modeler like You is saying this. Thank You very much Sir Kerry Cox! 🙂
2 October 2015, 18:21
Christian, you are way too kind my friend, and I am fortunate to have such big items and parts to work with. :-/but you just do magic at every turn, and that's more than most of us put together. 🙂
2 October 2015, 18:25
The cockpit is nearly finished. Only the radar section in the back needs a little drybrushing. But before that the oil paints have to dry several days.
5 October 2015, 18:10
Christian, your an absolute wizard at what you do mate. 🙂
Just so impressive in every way.👍
The oils you mentioned I am wondering about, but that question will be answered when you post your next set of images. 🙂
Cheers.
5 October 2015, 18:27
That looks really really nice and help me much for my next steps🙂
5 October 2015, 18:34
Many thanks Kerry! I painted all the details with artist oil paints because they are easy to handle for me. As long as they are not totally dry, they will mix with the drybrushing and everything will be spoiled. That´s all I was trying to say.😉 So I will stop here for a while and turn my attention to the wings of this bird.
5 October 2015, 18:41
Thanks for that info Christian. 🙂 👍
I have just started on the wing section too.🙂
Good luck with yours mate, happy days. 🙂
5 October 2015, 18:46
Kerry, I noticed that! You are very fast Mate! May the force be with You! 🙂
5 October 2015, 18:51
Many thx Soeren, but not finished yet. A little drybrushing and a layer of dull cote is still needed.
5 October 2015, 18:58
Now, that is an impressively detailed cockpit ! Well done so far Christian !
5 October 2015, 19:04
That looks extremly good! Nice washimg an drybrushing! A perfect look for real!
5 October 2015, 19:08
Christian, I have forced myself to slow down mate, as I want to thoroughly enjoy every mouthful of this most delicious meal, if you get my drift. hehehe. 🙂
5 October 2015, 19:45
Very nice cockpit you have done ! Could you please tell me the reference of RLM66 you used ? Cheers.
6 October 2015, 05:22
Hi Pierre!
There is no reference for my RLM66 because I didn't use it. 🙂 The first step was to paint all cockpit parts in flat black, followed by some thin layers of RLM02 from Humbrol. Using this method all details can be seen without any washing. When the fuselage will be closed You will still see most of the details and not a dark hole.
But that's only my interpretation of it.
6 October 2015, 07:20
Christian, that's a really interesting way of doing that cockpit paint job. I think you are absolutely right about it.
6 October 2015, 11:24
Thank You Rui!
It depends on the scale of Your model as well. If You are building in small scale You should use a brighter color than in big scale. Another thing is taking pictures. In my case all pictures were taken using the cameras flashlight. This lights up the grey paint as well. By daylight my cockpit looks a little bit darker than on the pictures seen here.
6 October 2015, 12:05
Yes mate, you are right.
And when you close it, the daylight intensity in cockpit will be even less so even darker.
6 October 2015, 12:13
Thanks a lot Christian for your message ! I will try to do something like that😉 Cheers.
6 October 2015, 12:15
The lighting is a problem I have found too, and Choppa pointed out that my Uhu looked a light grey in the posts, but it is RLM66 under a fluro lamp. too bright. 🙁
6 October 2015, 12:37
So what`s the conclusion? So many different eyes, cameras, pc-monitors and model paint manufacturers...
Do it the way it looks the best for You. 🙂
6 October 2015, 13:24
Yes, I totally agree, otherwise, it is a "I'm right---Your wrong" situation, and that's unhealthy. 🙂 )y)
6 October 2015, 18:49
Small progress: I trimmed the cockpit floor and the fuselage halfs a little bit to ensure a good fit of all components. Nothing glued so far, only snapped together.
7 October 2015, 18:34
Ups I noticed I forgot the eyepiece for the two radar sets in my cockpit. That looks nice Christian! No fear to broke off the fragile antennas?
7 October 2015, 18:55
Thx Christian!
Don`t worry about that eyepieces. As far as I know they were not always fitted on the radar device. I`m still wondering why you need a radar eyepiece in a plane which flys in the dark? This is a nightfighter !?!
Perhaps somebody knows why.
No problem with the antennas because the whole radar section is not glued to the nose or fuselage so far. I still have to build the brass antennas from MASTER. If this works well the plastic ones have to go anyway.
7 October 2015, 19:11
Christian M, This is looking wonderful mate. 🙂
I noted your "dry fitting" the components on the nose section. ?
I am having to do the same with my build too, as I am finding I am doing so much 'handling' of the components, I believe it will be wiser to have all the sub assemblies done in preparation to begin the final assembly, as I am sure to snap some vital component or rub paints off areas that are exposed to too much contact all the time.
This really applies to the actual engines, as if I was to have them 'fixed' now, there is every chance I will snap most of the cowel opening rods.
Cheers. 🙂
7 October 2015, 19:14
Ah ok sub assemblies and dry fit. Thx mates for the explanation. I thought they always used it.
Cheers, Christian
7 October 2015, 19:18
THX 🙂
@Kerry: This is what I was trying to say. It`s always good to be sure that all sub assemblies fit well before everything comes together. I learned this the hard way by building lots of short run kits 🙂
7 October 2015, 19:28
Well, the hard way is the informative way because you'll never do the same mistake a second time🙂
7 October 2015, 19:32
Totally agree Christian, and I am really having to 'nut' this one out.
But so far, so good. 🙂 👍
7 October 2015, 19:46
Did I mention that I am so impressed with your build. ???🙂
Inspirational is what it is. 🙂
7 October 2015, 19:49
Yeehaw! Yesterday I got my he 219 engine happy box! This is a long out of production item, so I´m very happy to get mine from a dear friend.
So during next week I will spend my spare time by constructing two engines for my UHU.
10 October 2015, 17:39
A great thing to get something special, and you will no doubt, do yourself proud. 🙂
Looking forward to your efforts mate. 👍
10 October 2015, 20:09
Hi Christian, would be fine if you could post some photos of the engine cowling arrangement. Guess the're shown in the instruction manual. Will help much to represent the open engine well on my Uhu.
Thx, Christian
11 October 2015, 09:24
Well Chrstian, just send me Your email adress in a pm. I have some reference material for this bird. Just tell me what You need and I will make some scanns.
11 October 2015, 09:28
Oh, dass wäre toll!
Übrigens, wenn auch mit viel Verspätung, herzlichen Glückwunsch zum Geburtstag nachträglich mien Jung!!!
11 October 2015, 14:00
Well, today I made some good progress... Just after lunch my dear wife told me that she would like to visit her sister. So another lonely boring Sunday afternoon... hehehe 🙂 I closed the fuselage halves and installed the instrument panel, so the cockpit is almost done. After that I watched "R.E.D. 2" and had a few beer. So I like those lonely boring Sunday afternoons a lot😉
11 October 2015, 18:46
I did see the gun pak in that small opening yes, ?
I am convinced all you guys are watch repairers in your spare time. 🙂
Just amazing what is happening here.🙂\O
I love it. 🙂
11 October 2015, 20:32
Thank You all! 🙂
@ Kerry: Yes, i opened the gun hatches and filled them with parts from Aires. The same will happen to the wing panels. I think that when I `ve finished this one about 50 percent of the Tamiya plastic will be gone.
12 October 2015, 06:53
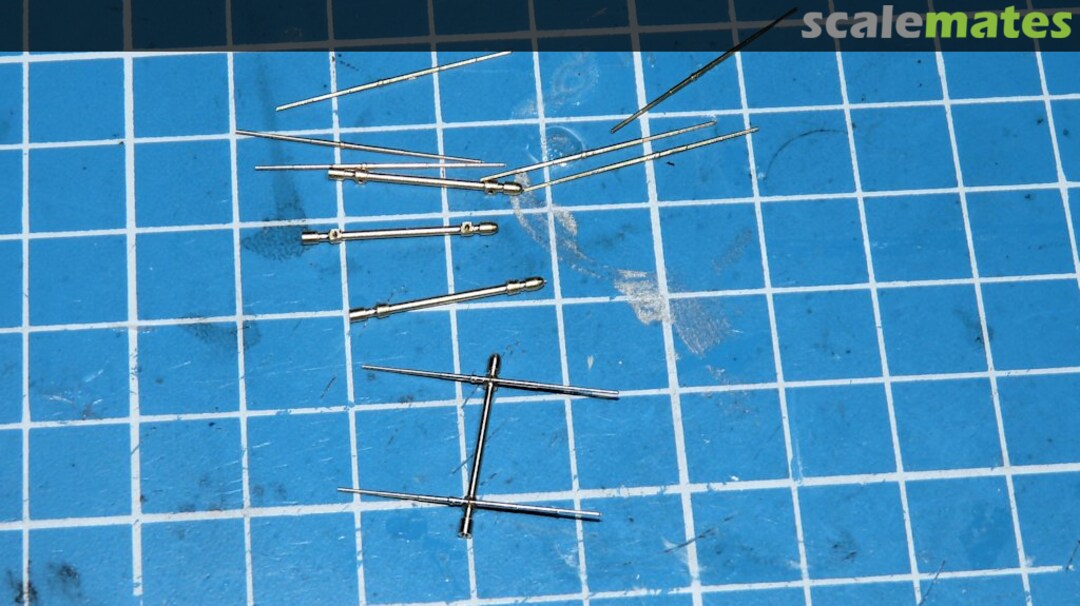
Today I was lucky to get my antenna set from Schatton. This little company produces the finest brass stuff I`ve seen so far and this set was no exception. It took me only ten minutes to put the parts together. You need no cyano glue or anything else due to the precision of the parts. Just stick them togehter and it`s done. In my opinion a big improvement to the kit parts. Well done Schatton! BTW: this set is available in 1:72 as well.
13 October 2015, 17:49
I can fully agree about the quality of the Schatton goodies.I also used them at my Uhu
13 October 2015, 18:19
Well Lemmy, I used many of their products over the years and they were all worth the money.
13 October 2015, 18:57
I will be hoping I can do the same with my set from ZM.!
Great looking Uhu Christian M🙂 👍
13 October 2015, 20:15
Small update: Started to clean up all the resin bits and pieces for the engines, rudders and wheel bays. A lot of work but worth it.
16 October 2015, 17:17
It all looks so delicate Christian, and I wonder will a lot of this detail remain visible mate. ? 🙂 👍
16 October 2015, 19:37
Well Kerry I hope so! I will try to open as many hatches as possible. There is still a lot of work to do.
Cheers!
17 October 2015, 07:48
Today I started building up the engines of my UHU. They needed some trimming and filling but look ok so far. The turbo chargers got a little extra detail made from plastic card and brass mesh. When the filler is dry it has to be sanded down and some more wiring will be applied.
18 October 2015, 18:51
It's delightful to watch your work unfold Christian M.
great attention to all your detailing.🙂
Wonderful stuff. 👍 👍 🙂
18 October 2015, 20:05
Thanks Kerry! This one is more work than I expected, but it`s fun.
Cheers!
19 October 2015, 05:51
With so many mates looking on and slapping you back, you must be having fun. 👍 🙂
19 October 2015, 08:18
Today I finished the wheel wells. These resin parts are very thin and delicate to handle. While removing the cast blocks they broke in some areas and had to be repaired. But in the end everything is fine. 🙂
19 October 2015, 16:43
I much like the big brothers of my tiny DB-603. They're looking good! Photo no. 37 shows a grid in the centre of the supercharger fans. Seems to me it is a PE part?!
19 October 2015, 17:55
Thanks Christian!
Ich mach das jetzt mal auf deutsch... Im original hatten die Lader ein offenes Lüftergitter. Das CMK Set ist von 1998 und damals waren die Lader wohl nicht anders zu machen. Ich habe einfach mit einem 3mm Locheisen dünnes Plastik sowie Messing-Gitter ausgestanzt und auf die Lader geklebt. Ich denke wenn Farbe drauf ist sieht das ganz gut aus. Die Motoren erhalten auch noch zusätzliche Leitungen. Das Set von CMK ist sehr gut für ein fast 20 Jahre altes Produkt, aber Du weißt ja... Besser geht immer 🙂
19 October 2015, 18:12
Hast du dir schon Gedanken darüber gemacht, wo du das Gewicht unterbringst um einen tailsitter zu vermeiden?
25 October 2015, 12:18
Moin Lemmy!
Wahrscheinlich in den Flügeln. Etwas Besseres fällt mir zur Zeit nicht ein.
25 October 2015, 12:23
Flügel bringt nicht viel da die Drehachse das Hauptfahrwerk ist. Je weiter vorne desto besser. Habe die Gewichte in der Nase, anstelle des Radars, in der Waffenwanne und in den Kühlerringen ( entsprechend geformtes Blei) untegebracht. Hat gerade so gereicht.
25 October 2015, 13:31
Danke, guter Tip! Mal schauen wie das wird. Im Notfall wird der Vogel auf einem Holzsockel angedübelt.
25 October 2015, 15:43
What a fantastic display of detailed work Christian M, and the 603's especially mate.👍
The wheel wells too. 👍...................everything. 🙂 👍
25 October 2015, 21:37
Many thanks Kerry! There is some additional wiring to do, but I hope that everything will come out fine in the end. Still a long way to go, but still having fun 🙂
26 October 2015, 08:43
Christian, Is the wiring for the 603's or what. ?
I still have heaps to do with mine too, and the "fun" factor is only increasing. 🙂
But I will not be sorry to see it finally in my display case. :-/
Cheers. 🙂
26 October 2015, 08:47
Yep! All the oil and cooling pipes are still missing. I will use fine copper wire and solder for it.
26 October 2015, 08:50
Now it is getting really interesting here Christian, and this will be the masterpiece we have all been waiting for. 🙂 👍
26 October 2015, 09:09
Small Update: Time for some plastic surgery on the wings. Mr. Tamiya would not be amused, but I had to do it. There is a lot of stuff going in to the wings. Gun bays, wheel wells, rudders, engines and air intakes. A lot of dust is sitting around my bench... but I`m still alive 🙂
26 October 2015, 18:06
Hey Christian, I can smell the resin and plastic dust from cutting off and out wings, nacelles etc. 🙂
Looking very good so far!
26 October 2015, 18:07
Wow Christian, The adventure gets more exciting by the day. 👍
What your doing here is stunning and I am really keen to see the step by step mate. 🙂
And with your skills, the results will of course, be fantastic. 👍 👍.
26 October 2015, 20:31
Many thanks Kerry, but I only try my best to get this beast right. I made a beast out of it by my own... Out of the box this one is a pleasure to build, but may be a little boring...😢
26 October 2015, 20:53
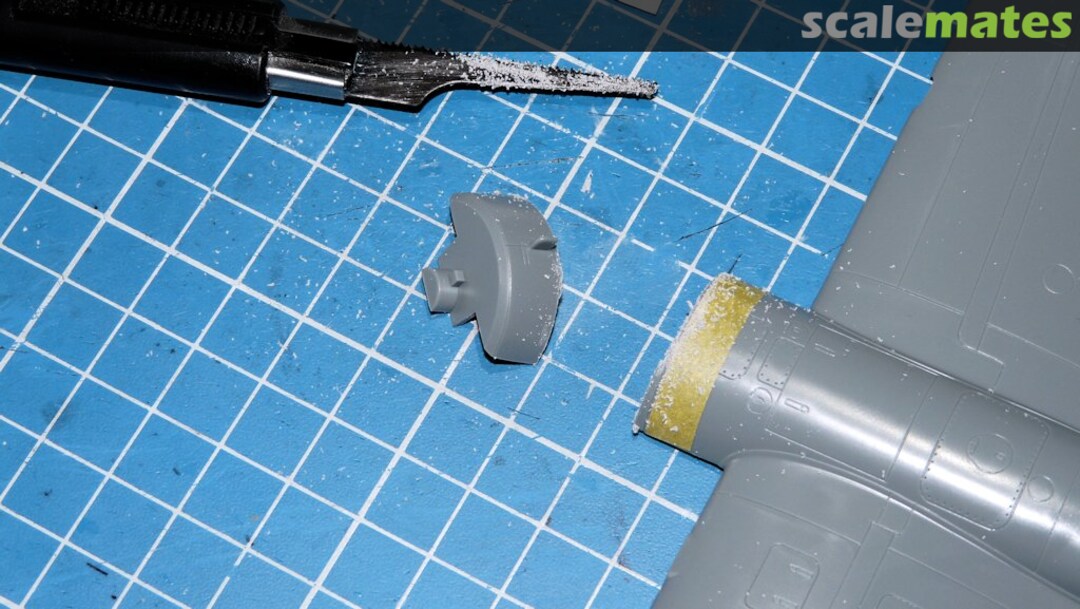
Small progress on the DB 603... Firewalls and engine struts are ready. It`s only dry fit so far, at first they have to be painted. I had to drill out some holes till everything fitted well. Those CMK Sets are a little bit tricky.
27 October 2015, 18:18
The big Daimlers look fab Christian. Seeing all that you've crossed out on the wing/nacelle surface, you ' d like to be a surgeon.....
I' curious on what's next !
27 October 2015, 22:22
Many thanks Mates! I`m still trying to get the most out of this one... Let`see how it ends. Still about one million possibilities to mess it up😉
28 October 2015, 20:15
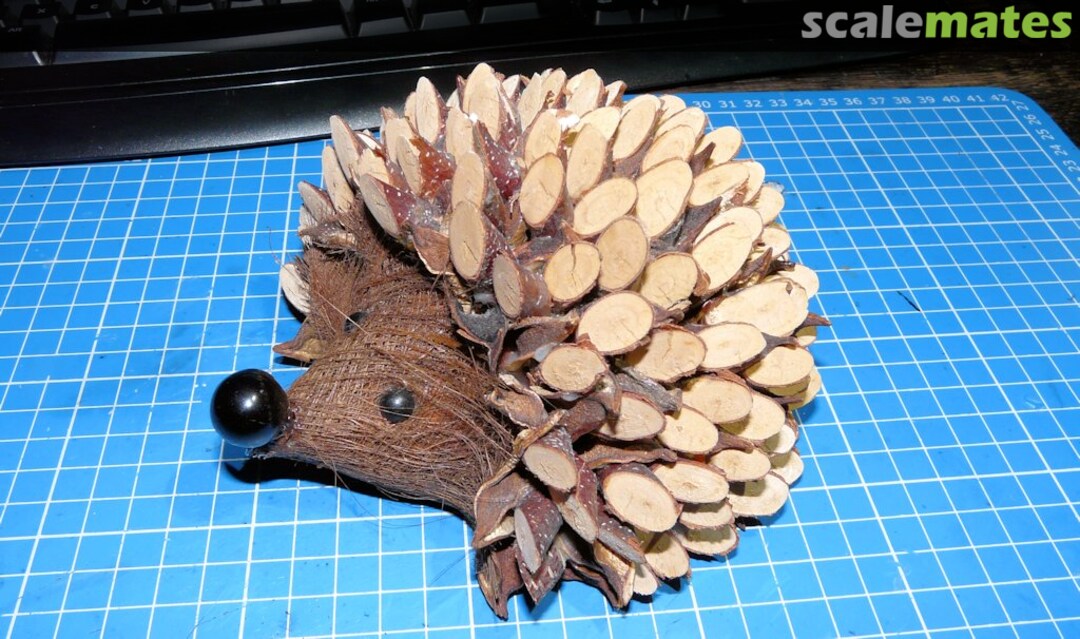
And now for something completely different... This was a case of emergency! My wife's hedgehog lost it's nose during a battle with our neighbors cat. This was rather hard to fix, but both are still alive! 🙂
28 October 2015, 21:12
Small update: I prepared the wings for the correction of the air intakes. Meanwhile there is not much left from the original Tamiya parts.
31 October 2015, 11:00
Removed all the inner details from the wheel wells and made a test fit with the resin parts. No issues so far exept the fact that I cut out one under wing panel too much.... S**t happens. Next step will be cutting out the upper wing engine panels and preparing the wings for painting.
31 October 2015, 14:07
So your patient needs an retransplantation of styrene now......... 🙂 This is a real unique build Christian, hang on in there !
31 October 2015, 15:57
I am building Tamiyas He-219 currently as well.... but there is hardly left any similarity to what I am doing now. 🙂
Great undertaking and very awesome outcome, Christian. This will be a precious masterpeace when finished!
31 October 2015, 18:28
Many thanks... but still the chance of one million mistakes to be made by me.😉
@Roland: Why don`t participate in this Group Build? It would be fun to see another talented modeller`s work here. 🙂
@Hanno: Wer keine Arbeit hat der macht sich welche. Das war so nicht geplant 🙂 Gott sei Dank das ich die ganzen Schnippsel aufgehoben habe. Wird morgen wieder eingebaut.
31 October 2015, 18:56
Hallo Christian.....äh, ich dachte ich täte.....? 🙂
....egen des Namens, den ich meinen beiden He-219 Projekten gegeben habe. Hmmmm. Werde mich da noch einmal schlau machen 🙂
Großartige Arbeit Christian!
31 October 2015, 19:06
Oh Mann... Und wenn Du jetzt weißt warum ich da noch nichts gepostet habe liegt das daran das ich das wieder mal völlig übersehen habe. Ich bitte um Endschuldigung! Mein Avatar sagt wahrscheinlich Alles!
31 October 2015, 19:20
This is what I call, "Leaps and bounds".
Just beautiful what your doing Christian, and the resin kits are such a huge improvement.
Your progress is stunning.
Top effort mate.
👍 🙂
31 October 2015, 22:45
Christian M, It is all of us who thank you for your inspiration and for showing us your skills.
Many thanks to you Mr Meyerhoff. 👍 🙂
1 November 2015, 09:37
Small update: Got the Schatton antennas in place and have a big smile on my face 🙂
2 November 2015, 20:03
Jep! As with all Schatton products I`ve used so far this was no exception. Perfect as always. I´m a big fan of this company!
2 November 2015, 20:09
Christian M, Wow, I am so impressed with the delicate work you have done mate.🙂
They look so much better than the ZM ones, and less drama.👍
Beautifully executed mate. 🙂 👍
2 November 2015, 20:55
Inch by inch, step by step.................a masterpiece is happening. !!!🙂 👍
4 November 2015, 08:44
I do like slow progress Christian, as it lets us keep pace with all your mastery. 🙂
5 November 2015, 00:37
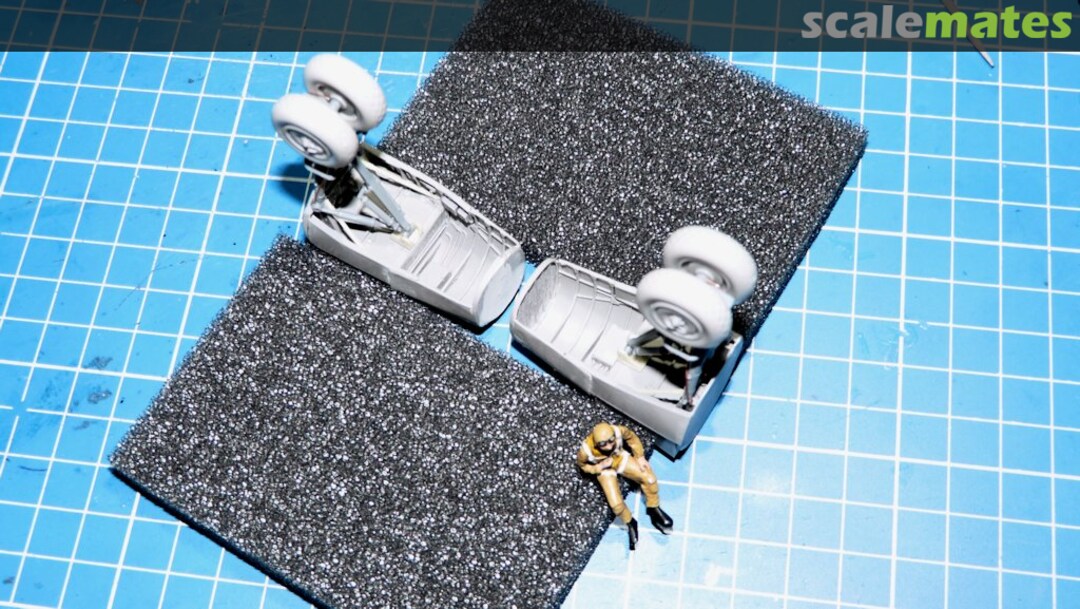
Small update. Finished the main undercarriage, added the break lines and made a test fit with the resin wheels and wheel wells. No Problems so far.
6 November 2015, 11:49
Looks great and a nice Pilot!!! Which Radar System do you have there? Ist the Naxos, isnt it?
6 November 2015, 13:52
The scale is really obvious with the figure there Christian.
The mains look impressive.🙂
6 November 2015, 15:08
Very impressive. The radar antenna from brass looks very good. I hope that nothing breaks of until construction🙂
7 November 2015, 18:38
Well Bernhard... I try to do my best ! 🙂 It`s good to know that You like it!
7 November 2015, 19:04
Yes Mr Meyerhoff, it certainly seems that your enjoying yourself mate. lol 🙂 👍
7 November 2015, 21:28
The day the fun stops, so will I, literally. 🙂 👍
Cheers my friend. hahahaha
8 November 2015, 11:29
Many thanks Christian. Meanwhile I started cutting the tail rudders, which is not that easy. After that I can start putting all the bits and pieces together and make a model out of this ragged UHU 🙂
8 November 2015, 18:09
Album info
My contribution for the Group Build.


