

Finished - HMS Belfast


Comments
93 24 August 2013, 17:43
I got the book "Anatomy Of The Ship HMS Belfast" today. Ups, there is some work to do do build a more or less correct catapult and catapult support.
3 September 2013, 18:29
Nearly one month back from modelmaking, I start again working on HMS Belfast. I have got the Shapeways correction set for the 6" gun mounts via my friend Frank Spahr – thx for that Frank!
shapeways.com/model/..fast-gun-mounts.html
The set is quite easy to use even it still miss any manual. It contains four base plates for the mounts and sixteen round retainer as support for the brass barrels (not included) I use the ones coming along with the Flyhawk set. Because the Flyhawk set contains eight long and four short barrels I asked to get four replacement parts for the long barrels. They're on the way and hopefully Mr. Peng will release a separate set with twelve long brass barrels.
But back to work, the supports at the base plate and the housing of each turret has to be removed. The correction base plate has to be fixed afterwards. I places the part 4.2mm aft of the kits base plate along the centerline. To glue the parts I used superglue with a good result. Then I put the retainer in place and add a 1.3mm diameter plastic rod axis to each retainer. A 0.4mm whole has to be drilled to fix the gun barrels in place. All the parts has to be carefully aligned to get a proper fit!
Once finished I add the new PE roof top to the turrets and filled the gaps along the seam line.
After a long and hard time in the office this was a good restart for me in modeling business.
Cheers, Christian
25 May 2014, 11:34
The Shapeways correction set is a great improvement.
The barrels are truly crisp now!!!
26 May 2014, 20:21
Yep absolutely Dirk! First I thought I'd made a mistake with the retainers longitudinal position. But I checked it again, and following the scale drawings in Anatonmy of the ship it is quite correct.
27 May 2014, 17:05
Thx Mathias. Turrets are filled and sanded. Some photos soon. Cheers, Christian
28 May 2014, 16:57
Aft turrets are filled and sanded, PE roof is added to the fwd turrets. Once the glue is dry I fill the too.
About the stacks coming with the kit there was an extensive discussion in the net. The fwd stack is obviously to small in diameter and I thought the stacks coming with the Flyhawk set will fix this problem, but it did! They are nicely done but copies of the kit parts. There is a White Ensign Models correction set, the stacks coming with this set are ok in their dimension but did not look well at all. So what to do? I thought to scratch build some new ones, but that need some extra time and attention. Yesterday, while looking at the kit parts and detail sets I saw bright daylight! Why not to use the large kit and Flyhawk stacks!? They're not 100% ok from the main dimensions but it look ok to my eyes!
Next I start building the QF 4" twin mount. There are some nice brass barrels with the Flyhawk set and I add some extra details made from styrene.
Cheers, Christian
31 May 2014, 16:11
ohhhhhhhhh man , Christian was soll man da vor lauter Bewunderung noch schreiben , Deine Miniatur(Meister)werke machen mich einfach immer wieder Sprachlos 👍 👍 👍 👍
31 May 2014, 16:24
Hi, Jens and Barry, thank you for your very kind comments. Cheers, Christian
31 May 2014, 18:00
To sculpt the fuse setter in each side of the gun mount I had only add a rod. Looking to it, it looks quite simply. Well I spent some time and made it more detailed. It is not 100% but it looks ok now, because you will not see smaller details when the gun is fixed on its final position. Hope you like it!
Cheers, Christian
5 June 2014, 11:07
Great work on the armarment, Christian!
And what a difference to the kitparts!👍
5 June 2014, 12:15
Thx Dave and Christian for your kind comment. I just glued the gun supports to the mount. Hope to make some more progress tomorrow. Cheers, Christian
5 June 2014, 18:55
Thx Clifford, I try to do my very best🙂
Small update, all six 4" QF guns are finished except some PE parts to add on the gun shields. Cheers, Christian
6 June 2014, 11:07
Thx, Clifford and Christian. Yep I'll do Clifford! I finished the quadrupel 2 pdr. PomPom. There are two to build, each consist of 15 PE parts, 8 brass rods and one resin part. It took some time, but the PE is quite easy to bend and all fit well together except the resin mount for the gun tubs. The part was 0,6mm to wide and has to be cut off to fit well to the PE mount.
9 June 2014, 13:35
I'm speechless! So I have to use David's words:
"Mother of PE parts! Great job mate, I really enjoy your pictures!"
8) 👍
9 June 2014, 13:50
Thx mates for your very kind comments! Mr. Peng from Flyhawk made a good design on the parts, so it isn't as complex as it look first. But I'm quite satisfied with the result🙂
9 June 2014, 15:52
Wow, great detail! All hail, magnifying glass! I think you are being overly humble by saying it is not as complex as it looks. You have a great deal of patience and skill to work PE like that in 1/350 scale. Looking forward to more.
10 June 2014, 03:45
Alan and Michael, I'm glad you like it and thx for your very kind comment.
@Alan, well you need patience handling tiny and fiddly parts. But the way Flyhawk designed the parts made it easier to work with them . They have thinned engraved lines along the line you have to bend the parts as well as a material thickness that is still ok for details but did not make the parts to fragile to handle. Sure the set is complex but I never worked with better PE parts.
Cheers, Christian
10 June 2014, 07:40
Leugnen zwecklos: Du bist in Wirklichkeit Uhrmacher von Beruf!! Und das da neben dem Centstück sind zwei neue Uhren mit neuartiger Zeitanzeige....🙂
10 June 2014, 07:56
Ich frage mich nicht nur wie Du das gemacht hast, sondern auch, wie man so sch**ß kleine Rohre drehen kann! Dafür muß man wirklich eine feinst CNC Maschine haben!
10 June 2014, 08:00
Sehr sehr schöne Detailarbeiten.
Die Flak aus Ätzteilen ist umwerfend schön. Ein Modell im Modell.
Sehr schöne filigrane Arbeit und sauber verarbeitet.
👍 👍 👍 👍 👍 👍
10 June 2014, 13:52
Holy moly, an overhelming feedback. Thx for your interest and your very kind commemts.
@Bernhard, darüber reden wir bei Gelegenheit😢
@Holger, stimmt die Teile sind klasse. Die Rohrmuendungen sind innen und aussen sogar konisch gedreht!
Cheers, Christian
10 June 2014, 16:50
No I know - my models are nothing small, compared to yours.. AWESOME WORK!
10 June 2014, 18:36
Many many thanks to all of you for your overhelming feedback and comments.
11 June 2014, 08:51
A while back from this build I now made some progress with all the PE decks on the superstructure and catapult and cranes.
I thought for a while how to fit the larger PE deck sections exactly in place. I than start drilling holes along the surface to fill in CVA glue from the back side. That's the way it work fine! Once fixed and glued I closed the holes from the back side using round styrene stripes.
The one piece catapult out of the Flyhawk set was a nightmare to bend. Once finished it looks quite nice but incorrect?! What happened? Taking a look to my references I noticed, that the catapult has starboard and port retractable sleds to extend the catapult when in use. The Flyhawk part show this situation but without showing a gap between the main catapult and the retractable sleds. I too have the WEM PE set and checked the WEM catapult. This one looks more or less correct but much better than the Flyhawk one. Well now this one is in place!
Contrary to my plan to use only the Flyhawk PE set I now use some parts out of the WEM set too, because of accuracy. I use the WEM cranes too, because they need the it basic part which give a more 3D look to the parts instead of the Flyhawk PE parts.
All in all a time consumption build and I have to take care not to over detail the parts what means to extend the building time!
Cheers, Christian
23 August 2014, 15:06
Christian Bruer, making PE look easy !!
the clever git 😄
...
He's a PE wizard !
There has to be a twist,
He's a PE wizard !
He's got such a supple wrist...
How do you think he does it ?
I don't know..
What makes him so good ?
😄 😄 😄
Youtube Video

23 August 2014, 15:16
Great work on the cranes. I have trouble making a square box look right with PE! 🙂 Keep at it and the final product will be amazing.
23 August 2014, 15:16
Thx mates!
PE is easy due to good tools, a lot of patience and the experience of many many mishaps😉
23 August 2014, 15:22
That would be my problem then - not enough experience, just the mishaps!
23 August 2014, 15:35
Keeping an eye on this one Christian. The detail is superb. I never have great fun with PE,tend to stick more to myself than anything else 🙂
23 August 2014, 15:36
ah so thats how he does it !
highly developed skills due to a wealth of experience and patience, and good eyesight...
easy peezy 😄
23 August 2014, 15:44
Hi Christian, what a great PE-work. These Flyhawk-sets are fantastic, but i often feel, that the parts are too small for european fingers. I just got the SMS Derfflinger upgradeset in 1:700 and this is unbelievable. Anyway, you're doing a fantastic job on the HMS Belfast and i will have an eye on it....
23 August 2014, 16:14
Thx mates! @Jens, that was one reason why I switched to scale 1/350. Some of the tiny 1/700 PE parts are not workable!
23 August 2014, 16:26
what kind of glue do you use in order to get the PE one the actual model?
23 August 2014, 18:32
I normally use MXBON MX401, but following a good advice I changed to Tamyia superglue. The glue works perfect with its applicator. I can highly recommend it, the best superglue I hitherto used!
23 August 2014, 18:54
Superb as always. I still haven't started my Belfast kit but this is giving me inspiration to have a go!
24 August 2014, 06:11
Thank you all mates for your interest and all your overwhelming feedback!
Today's progress, rigging the crane. I used the WEM parts for the rig, but had to scratch their support in form of a hoisting drum. It took some time to find the best way to let all the parts fit as good as possible in that scale.
Cheers, Christian
24 August 2014, 20:01
one assumes that the model is still dismantle-able so that you can paint it at this stage ?
24 August 2014, 20:04
Not like the former 1:1 ship, these are all subassemblies. I will replace them for painting. Otherwise I need some ants or spiders to paint the ship😉
24 August 2014, 20:08
I guess you know, that you´re a little bit mad?😉 😄
Looks realy good 👍
24 August 2014, 20:12
yeah some ants and really tiny brushes ! 😄
will you be using a black primer to help with the shadows ?
24 August 2014, 20:34
@Mathias, yes I know! Thats why I'doing that muhahaha🙂
@Choppa, not for ship models in that scale. Take a look to my HMS Montgomery and HMS Polyanthus, there you can see how I do the paint and weathering.
24 August 2014, 20:49
Hi Christian,
is`s a wonderful crisp work you did.
A pleasure to watch your WIP thread!
👍 👍 👍 👍 👍 👍
25 August 2014, 12:37
You're all bedazzled by all the brass😉
Thx mates, all your very kind comments means a lot to me!
25 August 2014, 16:41
look at the shiny shiny !! 😄
It is just so neat and crisp, especially for such a small scale and I think I am not the only who has struggled with PE that we appreciate you mastery of it.
Mind you the did occur to me "does he cheat by using a micro surgery robot with a VR headset ?" 😄
25 August 2014, 17:04
Haha, never change a winning team – ants and spiders instead of robots. You don't have to control them only to give them an assignment what to do – and they did.
May for me it is quite normal and easy to work with PE cause I always use it with my ship models. For scale 1/700 ship modelers scale 1/350 PE is huge. But I couldn't handle most of the really tiny scale 1/700 PE, one more reason to switch to 1/350. May when my eyes getting older and older I will switch to 1/200 or 1/100 – who knows?!
25 August 2014, 17:27
1:48th and up !! 😄
Though I must say the Eduard 1:72 Dr1 Stripdown kit is enormously appealing !!
It just looks so cute !! 😄
25 August 2014, 18:45
@Choppa, may I will do one of these strip down planes one day, but than in scale 1/144😉
brengun.cz/e-shop/1-..-dh-2-stripdown-925#!prettyPhoto
@Bernhard, thx for your very kind compliment! I've had good teachers😉
Now some more progress with the crane. I decide not to use the Flyhawk PE because it looks to two-dimensional even it has to be bend. The Trumpi kit parts looks much better, but need a bit attention for some detail. Because of building time I decide not to overdo it, so I left the hoist and luff motors and their gear boxes. I only add some supports, hoist contactors and resistance and bearings. The driver platform as well as the gear wheel came out of the Flyhaw set.
I'm not really sure if both driver platforms should be to the inboard side as I made it following some photos of a Southampton class cruiser.
That means different parts and arrangement for port and starboard crane. In reality I would never do this because of cost and time savings in design and building process.
Last I went back to the 4" HA gun shields. While researching I found out, that the shields are completely closed left and right and not open as the kit parts. I start closing the area with 0,3mm flat styrene and add a guide for a canvas cover to close the mount from the back side.
Cheers, Christian
26 August 2014, 13:38
oh my word, that DH2 is small good grief, no way for me, my ants just aren't skilled enough ! 😄
I have looked at the Eduard 1:48th which is much more appealing for me, I was bidding on the 1:72nd Dr1 but I have chickened out, maybe next year when I've done a few more 1:48 seat belts and cockpits 🙂
26 August 2014, 14:26
It is just a good basic with the kit and detail sets, but thank you very much for your very kind comment Clifford.
26 August 2014, 18:54
Great work Christian, wish I had waited until the Belfast sets were coming available before doing my Sheffield!
I also have that DH2 by the way, was thinking of covering the wings
27 August 2014, 08:40
Thx Clifford, Mike and Edgars for your interest and kind comments!
@Mike, I just mix WEM and Flyhawk because some of the WEM parts are easier to bend and in some ways a better replica of the original parts. But all in all there are a lot of parts left in the Flyhawk set to place on the model.
Getting deeper and deeper into my build is quite astonishing there are less photos of HMS Belfast in her 1943 fit. To make it more difficult, the references are different in their statements. For example the sheet anchor - AOTS statement, platted over in October 1942. Warship in Profile Volume 3 statement, anchor landed and hawsepipe platted over in June 1943. Just a bit confusing building her as correct as possible?!
Cheers, Christian
27 August 2014, 18:21
You are lucky to have the choice, I had the old WEM sheet that came with the kit and whatever I could put together from other sets. Wish I had waited!
28 August 2014, 08:35
@Mike don't worry! I assume your HMS Sheffield looks nice although you use the WEM PE set😉
Today I start with the Mainmast. I replaced the kit parts with 0,9mm brass rod for the tripod. All the PE is a mix of WEM and Flyhawk and some styrene. Building a tripod mast is always a challenge due to different angles and line of direction of all parts. In this case the main support has an angle of 80° and the mast top with its Typ 281 radar 90°.
All this has to fit well when assembled without any retainer or hold. First I made a mistake and the mast top fit not well with a slight angle of approx. 85°, so I removed the mast top and radar carefully and put in place again, this time on a correct angle. I spent some hours on this but I think this was it worth.
Cheers, Christian
29 August 2014, 16:56
Do you use soldering for some bigger PE parts? Or you only glue them?
30 August 2014, 07:24
Hi Mates, thx for your comments!
@Aghis, yep the Flyhawk Typ281 aerial is a touch to big as well as the WEM part. I removed the IFF responder on front of the main mast post. First it looks to clumsy and second Belfast did not use this in 1943.
@Edgars, I only glue them. I'm not to be at home with soldering, and in my opinion to glue the parts is much easier to handle because you can hold the parts in your hand to fit and glue them and can correct the position if necessary. When you use soldering you have to align the parts absolute correctly and this all will take time. I do not have any problems so far using superglue on PE and brass parts.
@Christian, Danke für dein Feedback. Staunen tue ich auch bei der F-100😉
30 August 2014, 08:19
I have had to leave all the shine brass parts for a while and have to go back to some basic work. There are some gaps between the parts. First a gap between the die cast Flyhawk signal bridge and the kit part. The contour is different and so I have to adjust the plastic parts using flat styrene and filler. Second, there is a gap between the kit part of the aft superstructure and the main deck section. You will find the gap on port and starboard. First I thought to extend the deck section, but this was not a good idea because of the PE deck. So I add flat styrene and filler as well. The rest of the story sanding! Next I will check the result by adding a ground coat. If the fit and look is ok I can go on with the bridge and foremast section. If not, filling an sanding again😉
4 September 2014, 16:14
The close ups are evidence of careful and patient work. Well done.
4 September 2014, 17:50
Hi Aghis, glad you noticed it. You are absolutely right, patience and careful work is always necessary to get a good result. I'm just curious how it looks after the ground coat. Cheers, Christian
5 September 2014, 19:20
I hope so Christian😉 There is one more topic with the bridge section - I have to rework the square windows two each on port and stb.
6 September 2014, 14:21
I love your photoetch work on the pompoms. It must have been difficult.
6 September 2014, 16:24
Thx Patrik! No not difficult, because the PE was well designed and easy to bend just patience!
Note my previous post about the PomPoms:
I finished the quadrupel 2 pdr. PomPom. There are two to build, each consist of 15 PE parts, 8 brass rods and one resin part. It took some time, but the PE is quite easy to bend and all fit well together except the resin mount for the gun tubs. The part was 0,6mm to wide and has to be cut off to fit well to the PE mount.
Cheers, Christian
7 September 2014, 08:43
Very nice! I like the styrene work, I suggest you to try two component filler, it works good for sculpting something where you need more of it 🙂
7 September 2014, 14:51
Thanks Edgars. I use one component and two component filler (Albrecht plastic filler from a DIY store and Milliput). In case of geometrical structures I normally use styrene compared with filler. It is better to fill the main thickness with styrene. I use the filler only for the last layer. Once dry the one component filler has nearly the same stiffness as styrene. That makes sanding even more smooth on the surface. Milliput is more stiff than styrene, therefore you have to take care when you compare both materials when sanding to avoid an irregular surface.
What matters is what you will do! For sculpting a two component filler like Milliput is the better one. For filling as described above the one component is better. But everybody has his own way and favorite materials.
7 September 2014, 20:18
Yep, agreed with all above. And we still will discuss about what is better 😄
7 September 2014, 20:43
There was some progress on Belfast's turrets. I was not very confident with the look inside the turrets. The kit parts are any side walls and armor missing. I add left and right of each mount a splinter wall and below an armor plate. I filed the armor plate in shape to fit to the cut out below the gun. This is not 100% at the moment and I plan to add some filler and sand it to a correct shape. Last I have to add a splinter shield on each gun tube. At the moment I'm not sure how to do but time will tell. Just interesting, the different boreholes – see photo 49😉
Cheers, Christian
17 October 2014, 17:44
.....and it is just half time😉 Thx Alan and Wim!
Cheers, Christian
18 October 2014, 19:58
Christian... admit it! You have tiny guys doing this stuff!!!
Its not the size its the perfection of the work!! i could't see no glue anywhere!!!! I think that when i finish one session i would have all the parts glued to the fingers! Amazing work!!! Im a fan of your work!
18 October 2014, 20:48
Christian just looks up to details and they freeze in place from his look! 😄
18 October 2014, 21:29
Thx mates for your kind interest and for your very kind comments, that means a lot to me!
Hehe no brownies doing that stuff and no parts freeze in place while looking at them. May I will try this once, but until then I still use Tamiya Extra Thin and their CA cement. Both works very well without blotches of glue all along the mends.
Cheers, Christian
19 October 2014, 09:06
At the end each of the mounts need a splinter shield which covers the opening. I used 0,25mm flat styrene, rolled it with a 3,0mm diameter steel pin and drilled a hole in the center. Finally the hole was carefully widened with a round file and set in place in the gun house. It was a little bit tricky to fit each part exactly but my little helpers tweezers and needles did it quite well😉
Cheers, Christian
20 October 2014, 17:19
We need to send you to some special laboratories for checking your brain, Christian. We need your brain for future.
20 October 2014, 19:53
Hallo Christian, was für eine Arbeit! Wann denkst du kommt kannst du mit dem Lackieren beginnen? LG Christian
21 October 2014, 16:38
Hi Christian, danke für die Blumen. Mhhhh, lackieren, sicher nicht mehr in diesem Jahr. Da warten noch einige hundert Plastik- und Fotoaetzteile auf ihren Verbau. LG zurück
21 October 2014, 16:52
Mann Christian, das ist wirklich unglaublich makellose Arbeit auf kleinstem Raum, das schraubt meine Ansprüche echt ins Astronomische hoch !
19 November 2014, 21:07
Fantastic work Christian, thanks for the work in progress photos, they are great.
20 November 2014, 07:03
Hanno and Bill, thank you very much for your interest and your very kind comments. I'm glad you like it! Some more progress soon with the foremast!
Cheers, Christian
20 November 2014, 16:25
Flyhawk's upper bridge is fixed to the main kit bridge section. This is necessary to add the foremast correct to the forward structure. The foremast struts are made of brass rod similar to the main mast. All the PE again is a mix of White Ensign and Flyhawk. The lookout is scratch build because of a more or less incorrect kit part. The whole lookout was made of flat styrene. Some more progress soon.
Cheers, Christian
22 November 2014, 15:45
Last month I have got my last order from WEM, 4" QF guns. CAD mastered and nice and clean casted these parts are the most fiddly resin parts I have ever worked on. They need a careful handling because they are nearly thin as paper! But the end result is it worth! I will replace the modified kit parts with these ones! Sadly WEM is down since Friday this week, they cease their business very sudden this week!
Some more progress with the Typ276 radar platform. I use the Flahawk PE parts as well as some scratch build styrene parts.
Cheers, Christian
29 November 2014, 14:55
Hi Christian, great job. I like your attention for all those little details!
29 November 2014, 14:58
I looked at the first photo and drank gallon of glue. My dog is writing this.
THAT IS AWESOOOOOOOOME CHRIS!!!
29 November 2014, 16:09
Hey mates, thx for you overwhelming and very kind comments! Mhh, I only need a lot of passion to bend and glue the PE. That is the reason why it took so long to make progress with my builds. As replied earlier, the Flyhawk and WEM PE is well designed and easy to work with if you know and use a bending tool etc.
Thx again and take care! Cheers, Christian
29 November 2014, 18:05
Great work on the radar tower, wish some of these parts were available when I was doing Sheffield!
29 November 2014, 20:40
Thx Mates for your very kind comments!
@Mike, however, your Sheffield looks amazing!
30 November 2014, 09:33
Christian the Magician!!!! That is something amazing my friend... picture 19 and 26... wow!!!! And most impressive when i do not see any trace of glue!!!
How i would like to see it live!!! Congratulations Christian! 😄
30 November 2014, 15:03
Gerald and Vitor, thx for looking at it and for your kind comments. @Vitor, may we will have a chance to get together in Telford or another international show one day?!
30 November 2014, 16:32
Hi Christian. I have been following and am amazed at your work. Your skill with photo etch boggles my mind. The finished product will be a masterpiece. 👍 🙂
1 December 2014, 01:02
Christian, it would be a pleasure, maybe in Telford... who know's? What about Portugal? We have a couple of good shows too... 😉
1 December 2014, 09:37
@Clifford and Alan, thax for you interest and kind comments - I'll do my best😉
@Vitor, would be a pleasure. Portugal, mmhh sounds interesting and it seems to be warmer than here!
Cheers, Christian
1 December 2014, 18:14
hehe, but no bird inside! I'm planning to add a small Typ276 inside the housing. I left this with my Flower, but this housing is a bit wider and higher and allows to look inside.
2 December 2014, 18:19
The radar outfit and the director and control towers for the main artillery and anti-aircraft guns need a lot of attention not only because of all the small PE parts. All the parts should look well in any detail it is possible to show and see in scale 1/350, but without over detailing them.
The Typ276 radar tower is finished and now I take my attention to the 6in and 4in direction towers. There are two 6in DCT's one fore and one aft and three 4in HA DT's two fore and one aft. I start with the DCT and even there are not so many parts it took me more time than I expected. One of the most challenging parts, the Typ 284 gunnery radar. I choose the one part Flyhawk's PE instead of the two part WEM, but I cut the one piece in two because it was impossible to bend while one part. Gluing both parts in a right fit took some patience and a great strain on until it was correct in place.
Anyhow, the final result was it worth and luckily there is only one Ty284, but that reminds me, there are three Typ285 to do😉 The fore DCT is finished now and the aft is prepared to final fitting. Next I will go on with the 4in DT's.
Cheers, Christian
7 December 2014, 10:41
Microkleine Teile, alles symmetrisch ohne jede Kleberspur, wie machst Du das ? Lupenbrille ?
7 December 2014, 18:40
Hey Hanno, danke für die Blumen. Ja ich benutze eine Lupenbrille. Ohne geht das leider nicht mehr🙁
Keine Klebespuren, mmhh, schaun wir mal bis Farbe drauf ist😉
7 December 2014, 18:56
Ich glaube so'n Ding brauch ich auch bald. Die Leuchtlupe reicht manchmal nicht mehr aus, und stört auch beim Hantieren mit den Teilen mitunter.
7 December 2014, 19:11
Ich bin immer fasziniert, wie Du diese kleinen Schiffe zusammenbekommst. Ich brauche schon die Lupenbrille bei manchen Modell im Maßstab 1:35. Großer Daumen hoch.
8 December 2014, 08:22
Thx Tim!
Danke Thomas! Die Lupenbrille ist tatsächlich nicht mehr wegzudenken. Habe seit einem Jahr ein recht komfortables leichtes Modell mit wechse[img1] Gläsern.

8 December 2014, 17:53
Hi Chris, immer wieder faszinierend hier zuzuschauen. KannstDu die Lupenbrillen mal zum nächsten Treffen mitbringen.
9 December 2014, 08:40
Danke Stefan! Na klar, mache ich. Lassen die Augen auch bei Dir nach🙂
VG, Chris
9 December 2014, 17:57
@Stefan, ein Grund warum ich keine 1:700er mehr baue
The DCT's need some more attention. I add rails, a third door and a periscope, the styrene rod in front of the radar (image 70), to the fore DCT and finished the aft DCT.
I use the HA towers out of the kit, but the parts need some filling and sanding before they fit and look well. Next I will add the tiny PE base for the Typ285 radar.
More soon, cheers Christian
14 December 2014, 10:41
Thx Clifford!
Today I correct the angle of the rangefinder periscope of the HA towers. I repositioned them with a slight angle, because they are linked with the Yagi antennas I still have to add.
By the way, brand new, MASTER makes a conversion set for the main gun turrets:
britmodeller.com/for..cement-barrels-1350/
To know that would have saved a lot of extra time while closing my gun turrets - grmbl 🙁
15 December 2014, 18:13
The HA towers now have some insides like binoculars, sets etc.! Support frames and the Typ285 holder is in place. Only the Yagi antenna is still missing. Up to two more HA towers, cheers Christian
20 December 2014, 13:31
Oh Mann, es geht immer noch ein bisschen kleiner...... perfekt !!
20 December 2014, 13:32
Ich sehe Du hast Urlaub, Christian. Wahnsinn was Du aus dem Bausatz alles herausholst!
21 December 2014, 08:07
Thx mates!
@Lionel this is top secret😉
@Sven, nope just weekend progress so far.
Cheers, Christian
21 December 2014, 11:15
The HA towers got their Typ285 antennas. They are two parts each. You have to curve the base slightly before you fit the Yagi arms in place. Carefully done you have to bend each antenna frame down to the Yagi arms. Some patience and a steady hand is necessary.
Some more small parts finish I go back to some basic work. The platform atop the aft deck house hast to be enlarged. The Flyhawk PE part does not represent the 1943 fit of the platform deck. I extended the deck using flat styrene 0,35mm thick. While working on the parts I decide to replace the PomPom director housing. The kit part is much to thick and lack any detail. I scratch build new housing from 0,35mm flat styrene.
Cheers, Christian
22 December 2014, 18:29
Edgars, don't call it crazy, call it AMS🙂
Otherwise, many thx mates for your kind comments!
23 December 2014, 08:03
Ha, got you, Christian! You missed the wiring of the antennae. And the hinge of the far right lower bulls-eye is loose...😉😉😉
Hey, this is far beyond every perfection! I love to see your projects growing! Amazing can't describe it... 👍
23 December 2014, 08:10
Hehe yep good one 🙂
Many thx Frank, your kind comment is much appreciated!
23 December 2014, 08:16
Don't know what to say. Between all this good a very good models on SCM is this and Bernhards Seaking a league of it's own at this time.
24 December 2014, 13:49
Acki and Mark, thank you very much for your very kind compliment – you make me blush!
There is a little brake on my modeling yard because all the dock yard brownies celebrate Xmas🙂
Merry Christmas and a Happy New Year to you all!
25 December 2014, 08:42
The aft deckhouse is finished. All gaps and seams are filled, sanded and cleaned. Rain gutters, made of 0,1mm copper wire replace the molded kit parts. Next to the director towers (still finished) some small parts, like cable reels, boxes, lockers etc. are finished as well and put in place only for a first setting. I will paint them separately and add them later. I only have to add some final details to the PomPom director (two tubs atop the deck house) and the 6in barrage director (the with tubs stb. and port.).
The kit part for the stb. and port boat boom is only minor. So I replaced it by a scratch build part made of brass rod and styrene rod and flat. Now the part looks more convincing to me.
28 December 2014, 08:48
The Master of the almost invisible...... How did you manage to bend all these 0,1 mm wire dustparticles equally into shape? I'm envious!!!😉
28 December 2014, 09:28
Thx mates!
@Matthias, I do my very best🙂
@Hanno, quite easy, bend the copper wire on a round pin - I use a 1.9mm drill - than cut the copper wire roll once in length. Now you have a lot of separate rings in a more or less same diameter. To get the rain gutters you have to cut each ring in three quarter pieces.
28 December 2014, 16:54
Thanks for telling me Christian,I'll keep that one in mind ! 🙂
28 December 2014, 18:04
You're welcome Hanno.
Thx Aghis for your kind commemt, and glad to see you back🙂
28 December 2014, 20:04
The detail here is amazing Christian.I sometimes struggle with really small parts and photo etch doesn't seem to like me very much 🙂
28 December 2014, 23:33
Thx Martyn. The Flyhawk PE is good to handle and my THE BUG PE bending tool helps a lot. The rest is patience, patience and patience🙂
29 December 2014, 07:12
Moin Christian , ich finde es echt schade , das diese perfekte Bauausführung irgendwann unter Farbe versteckt wird , einfach nur genial was Du uns da zeigst 👍 👍 👍 guten Rutsch 🙂
29 December 2014, 10:47
Thx Arsam and Jens for your interest and your kind comments.
@Jens, ich habe mal darüber nachgedacht. Aber es dann immer wieder verworfen. Mit Farbe und im Wasser gefällt es mir dann aber doch besser🙂
Barrage directors and PomPom directors are finish now. I use the Flyhawk PE for the barrage directors one set stb. and port on the bridge deck – the ones with the new round tubs – and one set for the aft directors – new tubs too. I use the WEM Yagi aerials for the PomPom directors – the round tubs high atop the aft superstructure. The main structure for the PomPom directors is scratch build. It is a little bit guess work because of only limited photos but the kit parts and WEM and Flyhawk PE only lacks a lot of detail – see photo no. 88 left kit part + Flyhawk PE according to instructions (only aerial is missing), right scratch build part + Flyhawk PE.
29 December 2014, 19:03
unglaublich klein... ein Lob auf eine gute Lupe!* 🙂
*ich könnte das nicht mal mit Lupe sehen😉
29 December 2014, 20:41
Happy New Year, all the best for 2015, thx for looking around and all your very kind comments. Cheers Christian
1 January 2015, 08:32
Hope you all had a good start into 2015!
During the last days I fill, clean and sand the bridge structure. There are a lot of small scratches, openings, etc. to fill. All portholes in front of the bridge are molded in longitude slider direction. Because of the angled surface the portholes are not normal to the surface and need to be correct. I close all openings and drilled new portholes. Two small platforms for the 24" searchlight and the submarine lookout port and starboard of the bridge need some attention too.
The rest, before I can go to all the brass details, the bridge windows! I modified the basic shape of the bridge structure to fit close to Flyhawks open upper bridge. The side windows are closed due to the modification. Now I have to make them new. To make it as easy as possible and to correct the wrong window alignment I cut out the window section, sand and clean it, add a new 1,5x1,0mm flat styrene with a round shaped to the cutout and add new window frames. That all went out pretty well and the only I have to do once the glue is dry – shaping and sanding .
More progress soon. Cheers, Christian
2 January 2015, 14:25
Love it! You are my inspiration for scratchbuilding, Christian! 🙂
Maybe don't paint it? 😄 it will look better, we will be able to see all work you have done..
2 January 2015, 15:50

Thx Babak. I just add the sub lookouts and wind deflectors stb. and port. It is a fiddly work, I will post some photos tomorrow.
2 January 2015, 18:10
Well basic work at the bridge section is nearly done! The assembly of the PE wind deflector in comparison with the sub lookouts as well as the upper bridge was really challenging. I now have to wait till the filler is dry before I can sand it in shape. Hope it will be sharp and clean when finish!
3 January 2015, 11:35
I don`t think that anyone of us has only the slightest doubt about it being anything less than perfect.
Are the front windows only temporarely closed with sheet, or will they remain like that ?
By the way, what`s that filler that you use ?
Happy new year, Christian,
Hanno
3 January 2015, 13:01
Burkhard and Hanno thx for looking at my WIP and your kind comments.
@Hanno, Happy New Year to you too! The windows will be close at the end. I will fill them with black gray and seal them with crystal clear. I use Albrecht Kunststoff Spachtel. One component filler 125 gr. from DIY store.
3 January 2015, 14:09
Until the filler dries at the bridge section I go on with the next part – the PomPom platform. Some PE supports, railings, lockers and some of the boats has to be build and assembled. The small boats are a mix of the kit parts and PE from Flyhawk and White Ensign and some scratch made extra details like a gunwale at the motorboat and gunnels at the ruder boats. Al in al fit well together with the already finished mast and PomPom's. Only the stack isn't finished yet!
3 January 2015, 19:35
"Thx Thomas, good to see you're also start building ship models😉"
Christian, build some time ship models, but in 1:35 scale. There are quite a LCM and LCVP.
3 January 2015, 22:51
Well.... this is just amazing. Either you have exceptionally good eyes or you´re using a telescope for magnifying... 🙂
4 January 2015, 02:03
Wirklich eine Freude das anzusehen, Christian, das Ensemble um den Schornstein besonders. Waren das Fla-Achtlinge ? Hat sich das bewährt , damals ? Dake für den Spachtel - tipp, mal sehen ob sowas hier auch kriegen kann.
4 January 2015, 09:34
Ah ok Thomas!
@Matthias and Hanno thx for looking around and Matthias, bad eyes but good glasses and a good magnifier😉
And about the 8 barelld PomPom. You find some technique and history on this side:
navweaps.com/Weapons/WNBR_2pounder_m8.htm
4 January 2015, 11:30
That is a lot of PE...excellent assembly, requires much patience Christian.
4 January 2015, 13:26
Thx. Indeed Aghis a lot of PE in the Flyhawk Set and lot of patience is required to bend and fit in place correctly.
4 January 2015, 16:04
Incredibly impressive Christian! 👍 The penny used for scale shows the incredibly small and detailed scale in which you are working. Far beyond my ability and a pleasure to watch as you build.
5 January 2015, 01:15
@Edgars, look out, there will be some more boats soon🙂
@Alan, glad to read your very kind feedback. It took al long time to come so far but most of it os patience🙂
5 January 2015, 17:25
@Aghis, just wondering about the link to your empty Album🙂
@Holger, thx, V live long and prosper🙂
6 January 2015, 20:54
Hey Choppa, long time no read. Thx for looking around and your kind comment! Hope you're doing well!
I modified the arrangement of the boats at the aft superstructure. The Dinghi's must be next to each other and in front are a few Carley raft's.
Then I go forward with the rest of the boats. A 32" cutter, 16" fast motor boat, three 32" fast motor boats and at least two 27" whaler's. There all finished now except the whaler's. I used the kit parts and PE from the available WEM and Flyhawk sets Some scratch build modifications are necessary, scuffs are missing and some seats. Most challenging to fit the 32" motor boats to the three cradles each. I took some time to get the parts in a correct fit. Some more photos soon.
9 January 2015, 18:01
Exceptional work Christian, shown well in photo 106. Gee, the boats must be fiddly to build.
9 January 2015, 20:58
Thank you very much Bill and Michael for your encouraging and very kind comments. That is much helpful after dealing with the really fiddly boats🙂
9 January 2015, 21:44
Luckyly there were obviously no boats shorter than 16 feet , otherwise you would have had to use a microscope......😉
Unspeakable ! Admiration !
10 January 2015, 08:55
Yep you're right Hanno, I'm lucky about it too. Even it is common to me to handle these tiny parts it was a real challenge and I was desperate because the boats and tiny parts flip away from the tweezers. Nothing to put your fingers on, all round curves and to get the three cradles for the 35" boats in the correct position cost some nerves and beside this the Flyhawk cradles did not fit well. Luckily I have both sets, Flyhawk and WEM, so I can use the best parts of each set.
Thank you Hanno, Bill, Michael and all the other mates for looking at my WIP and for all your very kind and approval!
10 January 2015, 10:24
The good thing about parts THIS small is, that you don`t even have to try to go and find them , once flipped away. There is NO way you`ll ever find them again. Just take the next one !😉
10 January 2015, 11:52
Mhh Hanno, if you only have this piece it is not a gem! I have banned the carpet monster out of my modeling cabinet. I have a lamination floor, but if the parts fly off the tweezers they can be anywhere🙂
Ok back to the work. The boat workshop is finished. I highly modified the kit part because together with the on top stored boats it was impossible to fit the boats stored below. I increased the height and add some additional parts. The final fit shows the cramped space. But now it comes together quite well.
The bridge section is ready for further detailing. I sand the wind deflectors finally and now this too looks quite ok to me.
10 January 2015, 15:37
Thx mates I much appreciate your interest and very kind comments.
Cheers, Christian
11 January 2015, 10:55
You know Christian, just now I thought you could actually stop building in 1/350 scale and switch to 1/700, that might challenge you at least for a couple of hours.... 🙂
Oustanding work you show here, wish I had your patience!
11 January 2015, 11:21
Thx Matthias. Hehe, I did it reverse. I switch from 1/700 to 1/350 to get deeper in small details they are not visible or possible to do in smaller scales🙂
11 January 2015, 12:06
Thx Alan and Aghis, it makes a lot of fun to build the kit and share the progress with you. Cheers, Christian
12 January 2015, 19:18
Btw, you are making this ship before or after the incident with mine?
12 January 2015, 19:22
Die Detailvielfalt der Beiboote ist absolut unglaublich, Christian!
13 January 2015, 09:03
hmm, findest du Holger? Das die Positionslampen nicht funktionsfähig sind finde ich schwach! ..... 😄 😄 😄 😉
Tolle Faltkunst, bei der Größe!
13 January 2015, 09:05
@Edgars, yep I build her in the 1943 configuration. She was mined in 1939 and her back was broken. Admiralty decide not to scrap her and rebuild the ship with a new underwater protection, new radar set etc. The rebuild was finished at the end of 1942 and she joined the fleet again in 1943.
Hehe, da fällt mir glatt ein Wortspiel ein Holger – Detail Vielfalt, im wahrsten Worte des Sinnes habe ich bisher Viel Falt beim Bau der Belfast🙂
@Jonns, ich arbeite daran Licht ins Dunkel zu bringen🙂
By the way, some more crazy PE bending progress. I start building the 20mm power driven Oerlikon in Mk. V twin mounts. The excellent housing comes with the Flyhawk set, but I'm not confident with their parts for the 20mm guns. A box to be fold from PE and two flat guns – mmmhhh?! These parts could be easily replaced by 20mm guns and supports from a MASTER set. It took me nearly 30min for the first one, but the result was it worth. Four more to come!
13 January 2015, 17:14
I'm impressed you can hold something that small still enough to take a decent photo 😄
13 January 2015, 19:52
Hey mates, I'm really glad you like it. It was a pleasure to share it with you, thank you so much for your kind comments!
@Lionel, hehe, no ants, spiders, bugs etc, just craziness🙂
14 January 2015, 18:34
A hard day's work. I nearly finished the bridge structure. Again some filling and sanding was necessary to embed wind deflectors straight and clean into the bridge structure. Although the PE parts are made for Trumpeter's Belfast there is some extra work to do to let all parts fit well. Not a problem of the Flyhawk set, but of the kit I modified in some areas.
Tomorrow I will add some more small details and make a test fit of all the lookers, radars, searchlights etc.
Next to this I cut out a base from Styrofoam and fit the hull inside. Some photos soon.
17 January 2015, 19:34
I have to admit that i see your topic almost daily at the newsfeed but never really looked at it,until i just saw that 1 euro cent coin.
Because of the level of detail you putt in it i thought your model would be 1/144 scale or something.I just had 1 of that jaw dropping moments 😄 👍 Damn you got some skills Christian Bruer ! Following!
17 January 2015, 19:54
Unbelievable and beautiful! I am watching with greatest respect!
18 January 2015, 09:34
Pretty impressive how accurately you have bended these PEs. No waves, no dents, no nothing. Just nice and clean!
👍
18 January 2015, 13:25
Holy Moly, thank you all for your very kind comments. I'm really glad you like the work and not to be blinded by all the shiny brass🙂
Well, I have finished the main work on the bridge section now. I add the galley funnel and the aerial trunk and finally pre fit all the parts to be sure all will fit well after painting. A few parts are missing, 22" signal lamps and some railing, but these parts will not held in a pre fit without glue.
Next the main deck section.
18 January 2015, 13:51
Next time just don't tell us you're going to build a plastic model, Christian. You anyway leave 95% of all plastic parts in the sprues... 😛
18 January 2015, 14:12
Yep Burkhard, I will use an Airbrush. I use a Gabbert Triplex and Vallejo Model Color and Model Air.
Most of the small parts are only pre assembled and now back in their store box still ready and waiting to be painted.
You can take a look to my WIP HMS Polyanthus to see how I usually paint my models:
HMS Polyanthus | Album by Christian Bruer (1:350)
@Matthias, looks nice but no way
18 January 2015, 15:05
That's what I wagered. I see you go forward on painting with no less precision. (Awe-)inspiring! 🙂
18 January 2015, 17:25
Thank you Burkhard and Michael, and yes I am pleased with it so far. I build scale model kits since - I forgot to long ago – and try to improve my skills with each build. Some skills are necessary or has to be learned, but the most important is patience and happiness of your work. If something is wrong, don't worry be happy and try to make it better the next time – happy modeling mates!
Cheers, Christian
19 January 2015, 17:56
Alter Schwede 😮
Der pure Ätzteil "Overkill"
Sieht wirklich gut aus. 👍
Ich bin schon auf die ersten Fotos mit Farbe gespannt 🙂
19 January 2015, 18:09
Bei dem bisschen Plastik, dass Du brauchst, könntest Du das doch eigentlich auch scratchen, oder? LOL 😄
20 January 2015, 08:43
I'd be hitting myself in the head with all that PE. Looks great BTW
20 January 2015, 10:11
Thx mates! Hehe, Holger, there is still so much to do that I'm really happy to have a good basis with the kit🙂
mmhhh, Matthias, you're the first one waiting for a coat of paint on Belfast. Some of the mates meant to leave here brass shine😉
20 January 2015, 17:48
This citadel looks really frightful ! I' d like to see it painted too ! We can always go back to the w i p fotos to see the brass ! Painstakingly accurate
Christian. Thats what I love to see .
20 January 2015, 18:17
Thank you very much Hanno. This evening I start adding details on the open bridge. Some electric boxes, compass, direction finders etc. I will add some photos tomorrow.
20 January 2015, 19:31
ok Hanno🙂
Here we go, some small but crazy progress. I start adding the details along the bulwark. Some more will come soon.
Cheers, Christian
22 January 2015, 19:18
.
great scott !!
.
Now this is getting of hand now Christian !
what detailed work, you are making the rest of us look silly !!
Now where is my plasticine ???😉
22 January 2015, 20:00
Crazy indeed ! You keep me on the run Christian, as you show us that there is ALWAYS space for a lot more detail than one thought would be possible. Choppa is absolutely right 🙂
22 January 2015, 21:13
Thx mates for all your very kind words. I'm really glad you like these tiny work.
Only a literally small progress today, the captains chair. It took me some nerves and time before it fit well to my eyes. Now I thing that all will come together very nice.
23 January 2015, 18:36
What a great work! Tiny isnt even near the word I would use for that.....
23 January 2015, 18:38
😎 I'm pretty sure, you will also add the captain's tea-cup...😉
Insanely good, Christian! 👍
23 January 2015, 18:41
yeah spiked with rum, cause Belfast served in 1943 in northern waters🙂 Thx Frank and by the way, mmhh good idea😉
23 January 2015, 18:50
Take some stretched sprue, cut off a piece and add little handle from electrowire (suuuuuuuper this wire, I have one about 0.05mm thin)
23 January 2015, 19:13
Amazing detail! Careful painting will be required so that the details are not 'hidden' afterwards.
24 January 2015, 11:11
Well I think I there is my limit to build a mug of tea or a mug of cocoa in scale 1/350. As Edgars replied It is not impossible to do, but I'm afraid of all the mugs to build for the whole watch keeping bridge crew. If they all have one the rest of the crew will ask for it too as well as for some other more tiny things of life🙂
Thank you all for your very kind words and your interest in this project. I'm glad to share it with you!
24 January 2015, 13:06
you could use a 0.5mm length of spider web silk as a cigar for the captain 😄 😄 😄
24 January 2015, 14:08
A hair might do. I once met a guy who made spoked wheels for his WW I aircraft from nylon strands he recycled from his wife's pantyhose 😄😎
24 January 2015, 18:26
Hehe, Burkhard, a part from a pantyhose aboard - that will bring some trouble to the crew🙂
Only small progress the last days. I add some position lights port and starboard and add some more details to the open bridge. The hangar walls are less detailed and some scratch build parts bring some life in it. Just guess work but it looks ok to my eyes. The bridge is more or less ready to paint as some of the other upper works. But before I put out the airgun I go on with the large middle deck section.
Cheers, Christian
26 January 2015, 19:13
The hangar walls look totally authentic. But this captains chair is just unbelievable !
26 January 2015, 19:59
By now it's probably more PE than plastic on this magnificient build! Cheers mate!
26 January 2015, 20:22
Thank you mates. Not more PE than plastic, but not far from it🙂
It is for sure the most PE work I have done so far on a single kit. But a big compliment to Mr. Peng from Flyhawk and Peter Hall for their excellent and easy to handle PE parts.
27 January 2015, 20:27
with so much metal on this thing it seems a shame to paint it (almost)
similar deal with an RC model made from balsa wood ribs and struts etc. always seems a shame to have to cover it up in order for it to fly as they looks beautiful in their bare bones 🙂
27 January 2015, 21:33
Thx, Clifford and Coppa. Well, I think about it on every model I build, but I like it looks like the real thing – more or less.
28 January 2015, 20:27
Slow progress the last days. I add the life raft racks to the bridge section and aft superstructure, build the paravenes and start the last and final work on the 6" turrets. I start with turret B, the one on bridge deck level. There is one power driven Oerlikon atop of the turret. A pivot and some lockers and a power unit need to be done. I use parts out of the PE set an scratch build parts. The assembly of the scratch build splinter shield inside the turret was a little bit tricky, but finally it worked quite well and I'm happy with the final result.
1 February 2015, 15:02
Sorry Bernd I missed your kind comment. If you need a tip or information about ship modelmaking for sure I try to help😉
1 February 2015, 16:27
A great pleasure to follow your build! Where are these splinter shields inside the turret that you are talking about?
1 February 2015, 16:38
Thank you Ingmar, I'm glad you like it!
Because the turrets out of the kit does not have an enclosed crenel, what has brought a look inside of the turrets, I decide to close them with side walls left and right of each gun and a splinter shield for the barrel. You can follow this from photo 45 onwards. Meanwhile MASTER released a full set with brass barrels and resin mountings and splinter shields – that's life, isn't it🙂
1 February 2015, 16:46
Now you must build another one with as much PE on it so you can paint one and have one unpainted beside it!
2 February 2015, 08:08
Thx for your kind words!
@Bernd, I just noticed you have some Albums here on Scalemates, wingy things and a sub. The're all looking very nice!
@Matthias, hehe *bling bling* sounds good🙂
@Urban, no way, I still have the photos😉
2 February 2015, 19:01
The turrets look great with their AA guns added, Christian ! It´s all coming in the vicinity of completion now, right ?
Still a lot of pe work to do ? Does the ship still look like that today, or is it a picture of a certain moment in her long life ?
I´ll be visiting her next time in London.
3 February 2015, 09:41
Thx Michael and Hanno for your kind words.
@Hanno, yep some modules, bridge section, aft upper works, etc. are done and ready for a first coat of paint, but there is a lot of work to do before I start the paint work. The mid deck section need some attention as well as the hull and deck.
This is the fit in 1943 after her main repair after she was hit by a magnetic mine in 1939. She was in this fit more or less until 1945. Before she was send to the Pacific she was modified the second time. Some AA guns were replaced and the catapult and boat arrangement changed (no plane since late 1943 aboard). She was again in this condition until 1956, than here major refit start and when she left the yard she looked completely different, new bridge and superstructure, new AA arrangement etc. She is today still in the condition of her last modernization. They only paint her more or less in her camouflage scheme she had in WWII.
She is a great warship and in one line and tradition with HMS Victory. She is the last big warship in a once world biggest Navy. I never visit her, this was one topic on my agenda🙂
3 February 2015, 17:02
It as an awesome work. Looks really great. Congratulation Christian. I'm looking forward for the next pictures 🙂
4 February 2015, 16:40
Christian, And which country are you going to intimidate when you sail the finished model into their harbour mate ??? I agree with your lament about having to see all the finest work go unseen, as that's where all models shine at their best. But at least WE know what is in them hey. ! Your work on these models you have in your albums has my mouth stuck in the open position mate. You really do have a beautiful touch. Salute! 🙂
4 February 2015, 16:48
Tamas and Kerry, thank you so much for your very kind words.
@Kerry, hehe, hope I must no intimidate someone, but hopefully impress a modeling competition jury – never mind in which county's harbour🙂
Cheers, Christian
4 February 2015, 18:58
The journey you have taken us all on is just amazing and each photo is not enough to describe the effort and research you have done to get the results you have shown us.
I was told by many judges, that you MUST write a description of all the work you have done on your entry, and never leave it up to them to look for it, as that wins competitions. Attention to detail, both in your work and what you want to bring to the judges attention. We are all great modellers, and here on Scale Mates, I have seen the very best modellers the world has to offer.
4 February 2015, 22:29
Hi Christian. This is absolutely stunning and a wonderful example of the art! Your work is inspirational and should be seen as widely as possible.
Dave
5 February 2015, 09:55
Hello Mates, I'm really glad you follow this one. It is a pleasure to share it with you and discuss all the detail and PE work I have done so far. And last but not least, I'm happy to see some more mates building ship models now here on Scalemates🙂
There is a lot of 1:1 work to do at the moment so I have to go down with the work on Belfast. I hope to get back in the saddle soon.
@Kerry, I'm working on an article, but not so deep in detail. But I will have a thought on it, maybe a photo documentation?!
And yep I agree, this is a good community of excellent and helpful modelers. A big thx to Tim for running this platform!
Happy modeling mates!
8 February 2015, 10:10
Hehe, glad I'm infected you with the ship modeling virus🙂
Looking forward to your SMS König!
8 February 2015, 18:30
Christian has made us to build ships indeed, even I think of getting some 😄
8 February 2015, 22:48
Looking around on Scalemates there are more and more ship building WIP's - Nice🙂
9 February 2015, 17:18
That's mostly your "fault", Christian.
If I'd have smaller fingers and better eyes, I might considered following your steps...
Please continue providing us with your marvelous "in progress" pics. Can't stop watching!
9 February 2015, 17:20
Yep guilty😉
Hehehe, small(er) fingers better eyes, just an alibi Frank😉 What do ya think why Trumpi start a ship kit collection in scale 1:200😉
I will go on and post any progress as soon as possible, and thx for your kind words Frank!
9 February 2015, 17:56
Yeah, my Yamoto is making noises in my store room, so I think I had better take a look !!!! LOL 🙂 I don't have any PE for it, but I am sure someone here could point me in the right direction. :-OO Because after looking at the amazing work done by Christian here, I need to fall in with the crowd. ha ha. !
10 February 2015, 22:56
Yep please, but first please finish your Sandy🙂
Kerry, there are some nice detail sets:
modellversium.de/kit/artikel.php?id=1776
shipmodels.info/mws_..hp?f=16&t=100415
But be aware, there is a new tooled Yamato and I'm not sure if the set will fit for both the old and new one!
11 February 2015, 19:25
Marevalouis work Christian. Where do you find all of these goodies for your ships. I have some ships and think I would like to try the PE on them.
13 February 2015, 16:35
Thank you Clifford. The main stuff for Belfast is out of Flyhawks and WEM's PE set. Next to this I have a collection of aftermarket PE and accessories, mainly WEM and L'Arsenal, like doors&hatches, railings, fittings, cable reels, bridge equipment, paravanes, etc. which I use for my builds. Next to this different diameters of brass rod (0,2mm – 2,0mm) and a good collection of flat, square and round styrene profiles up to 0,25mm are most helpful.
You can see some of this in my latest photos no. 154 – no.156. I use 0,5mm brass rod and thin flat styrene to build derricks. The cradles are made of styrene too. The paravanes are L'Arsenal.
13 February 2015, 17:06
Again, fab work on these minesweeping devices, ( Paravanes = British Navy terminology for Ottern ?)
13 February 2015, 17:46
We are all just waiting for the photograph of all the excess PE bits superglued to your finger tips mate LOL. 🙂
14 February 2015, 07:16
What amazes me guys is how all this detail is produced in brass. Yeah, I know the process, but it must still be amazing to see all the materials used in research, printing and the etching. Industrial scale you think. ??? 🙂
14 February 2015, 07:19
I agree, must be an awful lot of work going into it, until you can see the finished fret .
14 February 2015, 07:46
As I design resin models together with the PEs I can tell you: it is a lot of work. But when you once know how to incorporate width for relief etching for example or which brass thicknesses you can use it is possible.
E.g.: facebook.com/4087688../?type=1&theater
the design of these took me about 3 hours including research and CAD.
14 February 2015, 08:12
Sven, I really envie you guys who can do all the etching. I have a kit, but I now have to source the chemicals and get a workshop happening with a couple of mates so that I can develop (No Pun intended) some skills in the process. 🙂 Thanks for the link Sven and well done on your gangways mate. 🙂
14 February 2015, 09:31
Hey Mates, thx a lot for your kind words. I tried it once with one of my shipmates. I did the CAD work and he the etching. It was really challenging and we quit because our main focus is building ships. Therefore I'm happy about all the aftermarket companies and their owners for all the nice equipment.
@Sven, that gangway looks nice and I think I need some🙂
Do you have the stowage equipment and derricks/cranes to handle the gangway too?
14 February 2015, 12:02
Magic! 😄 😄
Christian the Magician 😄 😄 😄 😄
Still here seeing it and waiting for more...
14 February 2015, 16:18
@Christian - about "dat preis tho" - in that website that PE set preis (price i suppose) in 78 euros, so, thgats the meaning of dat (that) preis tho (tought)
14 February 2015, 18:49
@Edgars, ok now I know🙂 And yes Preis means price.
@Vito, nice to see your still there and thx for your very kind words!
There was a long story about the funnels and I decided to use both large ones I still have with the kit part and Flyhawk resin part. Sadly there is only one large PE funnel cap in the Flyhawk set as well as in the Trumpeter kit, but they did not match to each other. So I have no other choice as to scratch build two identical funnel caps from 0,3mm brass rod. First I make a sketch using the Flyhawk PE. Then I drilled holes along the boundary and add 1,0mm plastic rod. More a gauge than a bending tool I start bending the brass rod carefully using a small round pliers. I takes some time and patience, but the main frame as well as the centerline is finished for one funnel. Some more progress soon.
Well, and the second 6" turret is finished🙂
14 February 2015, 19:11
Hi Christian, impressive progress. Concerning the gangways I do not have any stowage equipment cause this gangway is on used from the land side. So they are only put aside on the pier. I made some thoughts of a modern shipborne accomodation ladder but my drawing is not complete so far and on hold.
15 February 2015, 09:17
Just a small update, second funnel cap is done. Still the vertical struts are missing. Some monotonous work for the next week, next to 30 life rafts I have to build and detail. But this has to be done too before I can go on with some more interesting work on the middle deck section.
@Sven, thx and ah ok, these are land side gangways, I should note that😉
Doesn't matter, would be fine to get some.
15 February 2015, 14:53
AS I have said before you sir are the ship master. I love your work.
15 February 2015, 19:06
You have all of Scale Mates watching here Christian. Can you feel the 'pressure' ? LOL 🙂 We are all enthralled in your work mate. 😉
16 February 2015, 20:58
Hey Mates, thx for all your kind words and interest and patience to follow this long story. It is not finished but on a good way – I hope.
Yep Kerry, I can feel the pressure, but the force is with me to withstand🙂
Hehe, a good motto for this - enjoy the slowness.
17 February 2015, 18:47
Yes mate, I most certainly will enjoy this "Slow boat to China" Ha ha. 🙂
17 February 2015, 19:56
Here, Here!Urban. Modelling is for our enjoyment, not a task forced upon us. When that happens you can see the difference in the finished model.
18 February 2015, 06:22
Agree, fun comes first it is a hobby and were not on the run😉
Thx, Kamal Sabokbar for your kind comment🙂
18 February 2015, 18:29
Really enjoying your build Christian. Still amazed at the small scale detail of which you are capable. I agree with the others about enjoying it with no pressure for time. I pressure myself too often and often spoil any of the fun that goes with it.
20 February 2015, 01:06
Thank you mates for your very kind words. I've got Atlanticmodels HMS Cleopatra today. Impressive and well detailed resin kit in scale 1/350. I will post some photos the next day's. Cheers, Christian
20 February 2015, 20:11
Oh YUMMY !!, more wonderful visual delights are headed our way !!!! 🙂
20 February 2015, 20:33
The funnels are finished. It was tricky to add the vertical frame bars to the funnel grill. It took some time and need a lot of patience to get it in the correct position. Each bar was of an individual length and has to be prefixed before glued.
Both aft turrets are nearly finished too. I only have to add some PE.
@Kerry, by the way, the Cleopatra is very well done. Clean and sharp casting, seems to be a relaxing build once I start it
21 February 2015, 18:04
Thx Kerry and Ingmar. There is only less progress at the moment because of a lot of real work to do. But I go on, even though slow.
A lot of work was required to fit the middle deck section to the hull. I noticed that before but thought to solve it by screwing the section with two M3 screws along the centerline. Therefore I set holes to both parts and add screws, nuts and ring washers. It worked well to fix the part but not to get it straight and seamless along the parts borderline. After some thoughts about pros and cons I decide not to screw the parts but to glued them when the paintwork was finished. Therefore I had to make sure the borderline will sit well on top of the main deck. So I add 0,3x0,8mm flat Styrene under the edges of the middle section and shaped until it fit well and smooth.
Next to this I finished not the 6" turrets with all the PE parts and scratch build splinter shields. Now it looks quite nice and more or less realistic. Work on the middles sections goes ahead by adding some doors and hinges and the tracks for the aircrafts sled. Next I will go on detailing the middle deck section.
Cheers, Christian
1 March 2015, 12:26
In my view this adorable etched-parts goddess needs a new name: I suggest "HMS Incredible"...
My favorite picture is No. 126, by the way... 🙂
1 March 2015, 16:43
Thx Bernd and Roland. Hehe, would be the first RN ship called Incredible🙂
1 March 2015, 18:29
Some small and time consumption progress. The second haws pipe on starboard was platted over in 1943 so now with my model. Trumpeter missed this at the hull side although they did it right on deck.
Triple torpedo tubes need some extra detail made of styrene, brass and PE. When finished they will be placed amidships on port and starboard behind sliding doors.
Really boring and time consumption – clean 30 resin life rafts and add PE rigging, but this is finished now.
I more and more come to an end with all the PE and can start thinking how to paint her🙂
8 March 2015, 17:09
Kerry, keel was laid down in August 2013. After a nearly 9 month break I start again in June 2014 with some minor work and again a short break till August. Since then I work continuously in HMS Belfast.
9 March 2015, 19:04
A true labour of love here mate.
I admire your attention to detail Christian.
I got to know the Australian ship building champion, Dave Dalton and I was talking to him about your work and he said he would take a look at your posts.
I can post some images of his work that he entered in the last QMHE if you like.
9 March 2015, 22:55
A great undertaking love the ships hopefully will be watching this one develop over time. A fine start keep up the good work.
9 March 2015, 23:18
Hi Kerry and Michael, your kind comments are much appreciated. Yep Kerry it would be fine to have a look of Dave's work, so please post some photos of his models.
Cheers, Christian
10 March 2015, 17:48
I missed some details fore and aft. The derricks need a support and cradle to be movable. I add some round and flat styrene to portrait the support port and starboard in front of the bridge and aft next to Y and X turret.
Before I go on and paint and add the catapult and middle deck section to the main deck, both parts need some more details. The catapult is quite easy, only some cylinders and a hydraulic pump is missing or portrait in flat PE. Next I will go on detailing the middle deck section.
22 March 2015, 16:55
The PE parts must be in the order of many hundreds ?! The assembled ship will be quite impressive!
22 March 2015, 19:43
Hi Aghis, long time no hear, hope you're doing well mate!
Yep, there are a few hundred PE parts, and yes I hope so🙂
24 March 2015, 17:15
Hi Bernd, vielen Dank für die Blumen🙂
Seit August 2013 mit einer 9 monatigen Unterbrechung. Im Juni 2014 habe ich dann wieder los gelegt und baue seit dem an der HMS Belfast.
Die ersten Kleinteile sind lackiert und gaaaanz langsam ist das Ende der Fahnenstange zu sehen. Bin jetzt an dem mittleren Aufbau, das wird recht fummelig und ich muss den Aufbau lackieren bevor ich ihn mit dem Rumpf verbinde. Mag ich gar nicht so gern, erst lackieren und dann kleben. Aber wird schon werden.
29 March 2015, 18:32
First coat of paint on 4" guns and shields as well as on the torpedo tubes and 4" gun crew shelter (inner side). The shelters has to be pre painted before assembly on the main deck to get a result as good as possible. The inner side isn't easy to paint once fixed to the superstructure. Same with the 4" guns before the shields will be fitted.
Before the middle deck section can be fixed to the hull some work on the 32ft Cutter stowage and davit arrangement is needed.
Photo 184, slightly modified cutters, stanchions with transversing winch and the gantry's.
Photo 185 the arrangement attached to the middle deck section. The gantry's will be fixed in the carriage.
Photo 186, cutter fixed in boat crunch gantry slightly pulled out.
I'm not sure to fit the cutters in this position or stowed outside. Both is possible, but time will tell.
@Bernd, dann mal wieder ran an die Hood🙂
31 March 2015, 17:01
I'm still following this build. A pleasure to watch and I'd really love to see her in real live someday!
31 March 2015, 20:50
Ah, here comes the first paint ! The catapult and the cutters look great ! Is the slightly off scale nut for the ships stand ?
1 April 2015, 06:56
Really great Job, I am vey satisfied how it will look when its finished!
1 April 2015, 08:02
Thx for your endurance to follow this long build and for your very kind comments and interest mates!
Well Hanno, the middle deck section is not fixed yet to the main hull. So the mid deck section and main deck will be painted separately before I fix it finally.
The idea was to fix the parts only by screwing, using two M3 nuts and bolts, when all the rest is finished. But it will not work proper because there is a main fault with the vertical stringers coming with the kit to prevent the hull from bending and warping. The stringers in the middle of the hull are placed as shown by the arrows. One is just in the center of the mid deck section and one more in front an abaft. But the front an aft stringers are to far away from the mid deck sections end and so the deck will bend while pressing the parts down – see photo 187. I thought to avoid this by using screws but it work not proper. It help much but not enough as I want. I add flat styrene to the underside of the mid deck section and sand it carefully to align the parts as good as possible, but there are still small gaps to see when fixed – see photo 188. So now I decide to add the mid deck section, when painted, to the hull by screwing and gluing (glue as carefully as possible) to get the best fit. Once done I have to handle the hull with more care during the further building and painting process.
Some progress in painting small parts for further assembly and painting process.
Cheers, Christian
2 April 2015, 12:08
Thanks for your meticulous explanation Christian , I see this project of yours is far more complex than anything I have ever done before.
Although the idea of screwing the parts together might not work in this particular case, it still has a lot to it, and might be considered in a future build. I´ll keep it in mind ! I hope your alternate way of dealing with this problem works as desired . 🙂
2 April 2015, 12:39
Well Hanno I'm of good cheer about it cause you cross your fingers
I use screws very often to fix the upper works on resin ships. It is a common practice in ship modeling if you build and complete modules first and add them to the finished ship like module design in real ship building.
2 April 2015, 17:35
Yes but slow Edgars, first I have to paint and assemble a lot of parts before the main painting will start. I will post some photos later.
4 April 2015, 08:02
Catapult, 4" HA and 6" main guns are painted. There is some more paintwork to do on the 6" guns soon. In spite of filling and sanding there are only minor scratches at the 6" guns only visible with Mr. Magoo's big optivisor
All bulwarks are now attached to the mid deck section. The fit was quite good but it need some filling and later sanding to get the best result. Some areas are difficult to reach for painting, so I pre paint some parts and areas before I now add the bulwarks.
Happy Easter
Christian
4 April 2015, 15:36
Well everything suddenly fell into place. Now the main work on all the subassemblies is done. Last was the mid deck section which is now finished and ready to paint and assemble to the hull. I add some lookers, stanchions and winch to operate the boat gantry below the deck. The bulwarks are completed with a frame work grid made of 0,3mm styrene. Sadly there are no detailed photos and it is in some way only guesswork. Once painted it will look ok to my eyes.
Next there is some small work to do on the hull before I start painting all decks. According to Warship Perspectives Vol. two stated wooden decks painted 507A. It seems to me much to dark and I think the 507A has to be brightened with some white or light grey. But before I paint it in a grey brown mix as a basic wooden coat.
More progress hopefully soon!
6 April 2015, 16:05
I have said this before and I must say it again.
You have the patience of a saint Christian.
Each step you have posted is just stunning to see.
Congrats my friend. SALUTE. ! 🙂
6 April 2015, 18:27
Hier kann ich nur noch zuschauen und genießen von jeder fortschritt, Christian.
6 April 2015, 19:07
Same for me...That's why I don't write how I'm still baffled by you build.
And even more now I own a 1:350 destroyer: I can see with my own eyes how tiny what you show us must be...
7 April 2015, 16:45
I would have spared myself the filling of the ejection marks on the underside of the decks. Great progress an good luck with the paint.
7 April 2015, 17:54
Hello mates, thank you so much. Such very kind comments from you excellent modelmakers inspired me much!
@Lionel, let me guess you own Dragons Z-31. Seems to be a very nice kit. Do you plan to start it soon?
Cheers, Christian
7 April 2015, 19:34
Betrayed by my stash, I suppose 😉
When I bought the kit in a fire sale, and inspired by your work I was thinking of starting it without waiting. But then I opened the box and saw how foolish it would be for a first kit!
It will be more reasonable to start with a simpler kit, one I might finish...
8 April 2015, 07:29
Yep🙂
Lionel, don't worry about complexity or small and much parts. It is the same in ship modeling as with other aspects of our hobby – practice makes the master.
When I start building ship models again in 2006 I try new things and techniques in every new build. I learn from my ship mates as they learn from me. And believe me, with every new build there is a new and different challenge even if you build the twentieth ship or tank or airplane.
If you really plan to start with a ship and you don't want to start with Dragons Z-31 I can highly recommend the following kits. I don't know which time period or Navy you prefer but Trumpeters Typ23 is a good choice for a start – in my point of view.
scalemates.com/kits/218745-t..23-frigate-westminster-f-237
But these are nice as well
scalemates.com/kits/100770-dragon-1027-uss-livermore-dd-429
scalemates.com/kits/218753-t..-04550-hms-type-45-destroyer
8 April 2015, 19:08
How simple you make such a complicated process Christian. Your mastery of the PE medium is just fantastic, and your so humble about it too.
Deepest respect from me mate. 🙂
8 April 2015, 21:29
Mathias, just for our English speaking Gentleman.
Mathias mentioned.
You know you are a little bit crazy aren't you.
My answer (hehehe), yes indeed, I'am. Why els should I put so much work in it and cover it all with grey paint🙂
9 April 2015, 14:57
Der Weg ist das Ziel! - The fourney is the reward!
Actually we don´t want to finish a model as it is more fun building and trying to detail as much as possible (may I create the abbreviation AMAP???).
9 April 2015, 17:46
ALL scale modellers are a little crazy. Just have a look at this.
visualnews.com/2014/12/04/in ... eISW827.99
9 April 2015, 18:44
Yeah, it's funny to be crazy🙂
Kerry, thx for sharing the most amazing and much crazy🙂 link. The triple seven looks fantastic and it is nearly unbelievable the modeler build it functional. I only miss it's air worthiness.
9 April 2015, 19:15
Ich möchte mich übrigens, im positiven, ganz der Äußerung von Mathias anschließen.😄
10 April 2015, 06:11
We play County and Western – in modelmaking language, I use WEM and Flyhawk PE. So I have a choice for a lot of parts to use the best or best and easiest part(s). For the cranes I decide last August to use the WEM jib and kit part base, because I thought to get the best and easiest result. Hoist motor etc. was all molded to the platform, the pulleys and rig were on PE part etc. . When finished I was quite confident with the result although the port and starboard crane were in the same position.
When I dry fit the middle deck section last week I noticed the crane platform will get in collision with the Simplex Chain Conveyor for the 4" batteries ammunition. So I thought a while what to do and decide to try the Flyhawk cranes. The jib was folded fast as well as the platform. Using some additional WEM pulleys I will rig the crane later using fishing line. Therefore I can display them in different positions. Some sratch build parts for hoist and luff motor, brake and platform and for some electrical boxes are needed as well as the parts for the drivers platform still added to the old cranes.
I think the new cranes are a big improvement. I like them much more than the old ones – and they're more crazy I think
13 April 2015, 18:07
More crazy and better looking ! You can hardly want more, can you ? Briliant, right on the spot, as usual .
13 April 2015, 19:05
Looking at all the metal on your Belfast, we could call you "Iron Man".😉
Wonderful job, Christian! 👍 I enjoy every picture!
13 April 2015, 19:35
Glad you like it mates and support my build with all your very kind comments and interest. It is a pleasure to share it with you!
Well Hanno, take a look to all the other excellent work here and in other online platforms like Modelwrships.com, I'm not at the end of the ladder but I'm happy with the current result😉
Hehe, Iron Man - Tinman isn't bad too isn't it😉
14 April 2015, 19:20
Thx mates
Brass and resin vents now found it's place on deck as well as the PE breakwater. I now come closer and closer to the paintwork. Only some minor work on the hull, derricks port and starboard and some small parts and then I can start painting the deck etc.
15 April 2015, 18:55
I enjoy every step and each new picture of that precious beauty...
16 April 2015, 17:48
Thx mates for your very kind comments!
@Chris, I think there is a laser cut deck, but it makes no sense in my case because the deck was painted dark grey in 1943 – 1944.
by the way, heheh, wisecrackers 🙂 What do ya think the Admiral told me? The boat will sink like a duck, because you used to much brass! Reduce weight as much as possible. So I start at the bow and use plastic 🙂
16 April 2015, 18:01
I was gonna say, there seems to be far too much plastic in the bow by your standards!!! 🙂
Thanks for clearing that for me Christian 🙂
18 April 2015, 06:59
What else should I say to the Admiral's word🙂
Thx Aghis and Marko!
18 April 2015, 11:32
Scratch build lower and quarter boom's – photos show lower boom on port and starboard – are fit in place.
Working parallel on the display, the base got its first coats of wall paint in a stippling motion. The hull fit quite well at the bow but there is a gap aft that need to be closed. I'm not sure but I try to add a piece of Styrofoam and fix it with acrylic gel. Than the gap along the hull line will be filled with acrylic gel too. Some photos soon.
18 April 2015, 19:46
First time HMS Belfast partly assembled in her later water display. Looks quite nice so far and the waterline level seems to be ok to my eyes (no marking on the kit parts).
Cheers, Christian
20 April 2015, 18:08
Oho, jetzt bekommt die Sache ein "Gesicht " !😉 Klasse mal das Ganze zu sehen. A gigantic project is enetring the vicinity of completion !
I am looking forward to the paintjob !
20 April 2015, 19:00
Just amazing Christian, and I thought it was actually bigger, so now I am even more impressed with you skills and talent.
Salute 🙂
20 April 2015, 19:14
I have all these details and the scenery in my head for a long time and I'm really happy too to see that all come together now and fit nearly perfect. It is not the end of this project but a good milestone! Thx all for supporting me with all your kind comments – I much appreciate it!
20 April 2015, 20:11
„Gottes sind Wogen und Wind,
Segel aber und Steuer,
dass Ihr den Hafen gewinnt,
sind Euer."
Amazing work, Christian... Gorch Fock would say the same...😢
21 April 2015, 06:26
I look at your work and I almost get sea sick it looks so real !!, and that is a compliment mate 🙂 🙂 🙂.
21 April 2015, 07:54
I just found some interesting trivia about the Belfast:
The Belfast served in 1984 as the location for the video of the single "People Are People" by the British band Depeche Mode.
1985 took place the release concert for the album "Rum, Sodomy & the Lash" by the band The Pogues on the Belfast.
The guns of the turrets are aimed at some 20 kilometers away motorway service station in North West London.
On New Year's Day in 2008 played the British band Simply Red their hit single "Something got me started" on the deck of Belfast.
The Thames Festival commissioned by composer Orlando Gough continued in 2011 and 2012 the hull as a sounding body for a drummer.
21 April 2015, 08:21
Thank you Holger for the aphorism. Well said by an old salt.
That's why I really like the Brits. They do so much useful things with their legacy of the past to integrate it in today's life stream and culture. That help much to save not only HMS Belfast.
Yep I know all these and I can remember the Depeche Mode video very well. Reminds me to think about the eighties – Punk and New Wave – my generation🙂
Kerry come on – no seasickness - it is just a calm sea😉
Thx to all for your continuing encouragement. I'm well pleased about it mates!
Cheers, Christian
21 April 2015, 17:46
First time I see it whole - it looks smaller than I thought, but such great build!
22 April 2015, 17:31
Thx Aghis. The length of the model is approx. 540mm, the length of the base 650mm, width 250mm. For me it is big, before I only build Destroyer size and smalle in scale 1/350.
22 April 2015, 17:49
The 'Wallrus' sets it off perfectly Christian. ! Now the 'scale' is noticeable more than ever and it really puts in perspective, just how much effort you have gone too to create this beauty. 🙂 🙂
22 April 2015, 21:18
Thx mates for your kind comments.
Kerry, I think about a scenery like this:
[img1]

23 April 2015, 20:26
Christian, now I see the photo, it begs the question. "Would Eduard have PE people in this scale that you could add as crew to the float plane mate. ?" as that would be wonderful. !!!
23 April 2015, 20:43
I use NortStar Models and L'Arsenal sailors. Please take a look to my HMS Montgomery. The figures are 3D instead of 2D Eduard PE sailors.
HMS Montgomery | Album by Christian Bruer (1:350)
I will try to section some of them to get a walrus crew close to the crew seen on the photo🙂
23 April 2015, 20:52
Just so cool. !! I saw that Tamiya have 1.350 injection moulded figures too while I was looking for some images of 1.350 figures.
Mmmmmmmm ???? says Christian LOL.
🙂
23 April 2015, 20:59
The injection moulded figures are to static. Nort Star is the best at the moment:
northstarmodels.com/..egory/figures/1-350/
May you note there are no RN figures so I maned my RN vessel with Kriegsmarine figures - LOL
23 April 2015, 21:04
I got some 2D Eduard figures for the "Collins class submarine" by "Showcase models". they look ok I guess but more like cardboard cutouts 🙁
BUT, now that I have just had a look at the link, I now know I can do the 'crew on deck' much better. Thanks Christian. 🙂
23 April 2015, 21:09
This is really progressing now Christian. Your work with the PE amazes me,I really don't know how you manage with all them minute parts.🙂
24 April 2015, 06:52
This morning I got the new home for my HMS Belfast. A wooden frame made of walnut. The cover made of acrylic glass and the Styrofoam display base fit well. I'm quite happy with the result. More progress soon, but first I go out and enjoy the warm spring weather in the garden
Cheers, Christian
2 May 2015, 12:34
This will be one well protected work of art mate.
DUST is something that has really held me back from building more models than I do.
My next investment is a good display cabinet.
Looking forward to what you have in mind here Christian. "😉
2 May 2015, 13:56
Sehr schön Deine neue Schatzkiste Christian ! Gut geschützt und schön in Szene gesetzt !
2 May 2015, 16:01
Yep you're right Kerry. Since six years I have a 2,6 meter class cabinet for my models. I can recommend a glass cabinet and I did not regret to invest some money to get one.
But space is always limited. Some of my older models are in acrylic display cases on my attic. For all my ship models displayed I have an cover made of acrylic glass. There is a company in Germany where you can order individual sized covers for a reasonable price.
Thx Kerry and Hanno🙂
2 May 2015, 18:39
Danke Mathias!
Very unique with HMS Belfast was the Simplex Chain Conveyor. A system to provide the 4" QF HA guns with ammunition. Aft of the catapult on each side were two elevators which brought up the ammo from the magazine. The chain system, three chain lines high until the second 4" gun went through the whole length until the last 4" gun now one chain line high.
The kit part was molded flat on top of the middle deck and has been removed while using the PE deck. The Flyhawk set contain a replacement part but flat too. I thought a long time how to manage it to make it more realistic. I used the Flyhawk PE and three 0,5mm square styrene for the chain system. Both upper lines are shorter than the lower line. I add a 0,3 x 0,5mm flat styrene between each line. The main parts were slightly curved to fit well to the PE part. Once finished I add some supports in each side. Now it looks much better than a flat part. A first dry fit on the cramped middle deck shows it is all ok. The starboard chain conveyor is finished and now I go on with the port one.
3 May 2015, 16:03
Das ist echt Modellbau vom Feinsten, unglaublich wie detailliert du arbeitest, das wird ein echtes Meisterwerk!
3 May 2015, 16:04
Da kann ich mich nur anschließen ! Wie um alle sin der Welt willst Du da denn noch kontrolliert Farbe drauf bringen ? Nicht das ich Zweifel hätte, das Du das hinbekommst !
3 May 2015, 16:18
@Hanno: Das ist auch die Frage, die ich mir andauernd stelle... Selbst mit dem feinsten Pinsel und Beruhigungsmitteln würde ich scheitern...
4 May 2015, 07:10
Alles halb so wild, viele Teile sind vorerst nur zusammen gesteckt und lackiert wird mit der Airbrush. Das passt schon😉
Und danke für die Blumen🙂
4 May 2015, 17:44
Port chain conveyor is finished too. It fit also well on the port side. Assembling the boats will be a bit tricky once painted. I add the breakwater and Oerlikon gun tubes aft of the catapult.
16 May 2015, 15:15
I removed all the molded rain gutters and made them new out of 0,1mm copper wire bended on a 1,5mm diameter steel rod. I cut the rings in half and glued each part using matt varnish in place. That works quite easy and fit well. The small an tiny parts can be handled with the brush I use to apply the varnish.
I use the same method to apply the rungs close to each derrick. I'm not so confident with the rungs but it was a challenge to get them all in a more or less same length and correct in plase. I stop counting all the ones flying away from my tweezers🙂
17 May 2015, 17:55
Das ist schon unglaublich was Du da zeigst. Willst Du das Modell wirklich lackieren ? Eine so saubere Arbeit unter Farbe zu verstecken ist eigendlich schon fast zu schade.
17 May 2015, 18:13
Danke Christians! Na klar doch kommt da Farbe drauf, nächste Woche geht es los🙂
17 May 2015, 18:22
Na dann hau rein! Bei so einem filigranen Modell sind die Möglichkeiten der Fehlerkorrektur doch sehr begrenzt. Ich wünsche Dir viel Erfolg bei der Lackierung. Bin auf das Ergebnis wirklich gespannt!
17 May 2015, 18:33
Hehe, da sind wir schon zwei🙂 Das ist das erste große Modell in 1:350 bei dem ich lackieren, zusammen bauen und dann weiter lackieren muss. Bei meinen bisherigen Modellen konnte ich alles modular bauen, lackieren und nachher nur noch montieren. Das geht bei dem Zossen leider nicht.
17 May 2015, 18:38
Wenn ich mir aber Deine bereits gebauten Modelle so anschaue habe ich doch vollstes Vertrauen in Deine Arbeit. Das kriegst Du mit Sicherheit hin😉
17 May 2015, 19:15
Was meinst du Christian: aus wie vielen Teilen besteht denn schon die Belfast? Es ist ja echt Wahnsinn was du da an Geduld investierst!!!
17 May 2015, 20:41
Danke für das Vertrauen Christian und ich hoffe das mal, dass es klappt🙂
Danke Bernhard. Ich habe es nicht gezählt, denke aber es sind um die 1.500 Einzelteile, Plastik, PE und scratch Styrene.
18 May 2015, 08:04
Before I start the paint job I made a small 3cmx5cm test sheet to take a look how the colors will look. Belfast's Admiralty Disruptive scheme based on four colors, 507A, 507C, B5 and B6. 507A is the dark grey on top, 507C is the light grey on the left, B5 is the intermediate blue on the right and B6 is the pale blue in the middle. I use Vallejo Model Air 71056 Black Grey (507A), 71050 + Off White – ratio 3:9 (507C) and 71006 Pale Blue (B6). For B5 I use Model Color 70903 Intermediate Blue.
The test sheet is painted using my Gabbert Triplex in just a couple of minutes. Each paint was masked immediately to start with the next color. The joints where polished using a 3600 polishing cloth. The dark grey wasn't completely try, some abrasion can be seen on the brighter colors.
Because I did not use exact color matches the four colors look quite nice and comes close to the exact Colorcoat scheme.
20 May 2015, 19:38
I like the britisch navy colors. I have once made the Airfix Suffolk and Rodney. With approximately the same colors.
I'm curious how it will look. Until now you have made a incredible piece of craftmanship.
21 May 2015, 10:54
Christian what can I say but marevalious, you are the master of ships.
22 May 2015, 18:28
Christian, you can't wait any longer – me too But know the paintwork starts. The middle deck section underside is already painted, but I made a mistake yesterday because I used black grey instead of blue gray for 507A therefore I have to repaint the middle deck section🙁 Even you have a plan there will be something going wrong – Murphy's law🙂
Never mind, it was fixed and today I start painting the main deck. The wooden decks were painted 507A. First I plan to paint the whole wooden deck in a mix of grey and brown before I apply the blue grey. The idea was to sand the blue grey in some areas to get a worn out effect, but I dismissed this idea and paint it only blue grey. The worn out effects can be added by drybrushingtoo the planks in different shades of blue grey and here and there in a grey brown.
PomPom platform, fwd and aft stack are already painted. I first paint all parts in the basic color. Later I will add some highlights with brightened basic color.
Next the wooden deck and middle deck section because I want to fix the middle deck section first before I go on with the paint work.
That all will take a while because of a lot of masking and painting the four different colors. I hope that all comes out quite nice when finished?!
Cheers, Christian
22 May 2015, 18:30
Superclean paintwork Christian ! I really admire the high level of discipline and motivation you show over such a long period of time.
22 May 2015, 19:41
Thx Mates, glad you like it. Mmhh, Hanno, discipline ok, but there is some other work left and right - scale 144 aero planes🙂
I just found out that my B6 color match does not fit well. I plan to use Model Air Pale Blue but it looks to greenish. I think I have to mix it with some pale or pastel blue and white to tone it down?! I'll give it a try tomorrow and luckily I did not paint any part in B6 - phew.
22 May 2015, 19:54
I tried a lot to get the best shade for B6 and it seems to me a mix of Pale Blue (MA71008), White, Pastel Blue (MC70901) and Light Grey (MA71050) in a ratio 5:4:1:1 comes close to White Ensigns Colorcoats and now it looks more bluish then greenish - see photo 241.
I go on with the four main turrets. All four colors for the ships Admiralty Disruptive scheme are used to paint the four individual turrets. A lot of masking was required to. A big advantage of Acrylic colors, you can mask nearly immediately to paint the next color.
Cheers, Christian
23 May 2015, 14:37
Hey Aghis, long time no hear! Tthx for looking at it and for your kind comment.
26 May 2015, 17:43
I am really looking forward to the "Air Wing" being added Christian, and 'Murphy' moved in here a day or two ago. Grrrr. 🙂
26 May 2015, 20:11
Hehe, Murphy the gatecrasher comes to often🙂
I tried a little bit weathering last Monday and hope to come back to the bench after a long week in the office to makes some progress.
Cheers, Christian
29 May 2015, 17:40
Excellent Work, Congratulations. Can´t wait to see the finished model.
29 May 2015, 21:51
Hey Kerry, it is just a try for a subtle wash as a filter. It turns out quite nice. The weathering on deck is nearly finished preparation to glue and fix the middle deck section. The underside of the middle deck section is weathered too. I will post some photos tomorrow – no more time today.
@Thank you very much Pablo. Your kind comment is much appreciated.
Cheers, Christian
30 May 2015, 15:54
Very nice and subtle weathering Christian, I especially like the "first blossom of rust growing out of a crack in the paint " in frame 248 . Superauthentic in my opinion ! This is going to be a real masterpiece.
31 May 2015, 17:37
Thx Michael and Hanno. Hanno you're faster to answer than me to write my text my latest step🙂 And by the way, good observer!
First some shots of my test wash with a grey filter. It was just slightly because Belfast seems to have been a clean ship. So I will not overdo it.
The deck is finished now. I add a dark blue grey filter and start highlighting the deck with light blue grey oil paint. It should look faded but from walking on the painted deck and not from sunlight (Belfast served in 1943 in the Norwegian Sea). In some areas I carefully paint the deck in a grey brown to simulate abraded areas where the wood comes through the paint.
All this has to be done before catapult and middle deck section comes into place. The catapult got a subtle weathering as well as the underside of the middle deck section before I can add both parts to the main deck.
That all worked quite well and the middle deck section is now in place. I used styrene glue and the screws visible in the photos to fix the part. Because the color and glue interact and the glue unsolders the paint I add stringers inside the middle deck section where I applied the glue.
This was more or less the final step before I can go on to paint the hull and the rest of the upper works and small parts.
Cheers, Christian
31 May 2015, 17:46
A little something I fell over while looking for info on the B-17 engines. 🙂
Youtube Video

2 June 2015, 13:12
Hey Kerry, thx for sharing this very interesting video. There is a little confusion about the footage because a lot of sequences does not show HMS Belfast but KGV class Battleships or other cruisers, but is doesn't matter because of the most interesting interviews with the old hands. I much like this living history information.
One topic about the Battle of the North Cape and the sinking of Scharnhorst. My granduncle served aboard Scharnhorst but luckily he left the ship at the end of 1942. Most of his old shipmates perished on Boxing Day 1943.
After his victory Admiral Fraser briefed his officers aboard DoY,
Gentlemen, the battle against Scharnhorst has ended in victory for us. I hope that if any of you are ever called upon to lead a ship into action against an opponent many times superior, you will command your ship as gallantly as Scharnhorst was commanded today.
Out of the crew of 1.968 men only 36 survived in the cold Northern waters.
2 June 2015, 18:22
The kit and PE parts for the sliding doors (to cover the torpedo tubes) does not fit because I sand and correct the middle deck section. But that doesn't matter because it is quite easy to build some replacements from 0,3mm and 0,5mm flat styrene. The parts will be added when painted from the rear. Some progress soon.
Cheers, Christian
6 June 2015, 17:52
We are not going anywhere Christian. We are all here glued to our monitors and watching with fascination as your Belfast comes alive. 🙂
Take your time, no rush, but I will have an other beer. 🙂
6 June 2015, 20:16
What I am struggling to get past is how you've made such a neat job of such a tiny scale, unreal !! 🙂
6 June 2015, 20:41
I figured I would ask the boat expert just in case 😄
I have the Italeri USS Constellation CV-64 in 1/720, would this PE set be compatible do you think ?
Cheers 🙂
scalemates.com/kits/103279-g..tz-f-r-us-navy-super-carrier
scalemates.com/kits/176724-italeri-526-uss-constellation-cv-64
6 June 2015, 20:48
Thank you very much mates for your very kind comments. That means a lot to me!
@Choppa, according to my research the GMM set should work well for your Connie as well as for other supper carriers in scale 1/720. Take a look to the review on Modelwarships:
modelwarships.com/re..20/supercarrier.html
Cheers, Christian
7 June 2015, 07:49
ah cheers Christian,
that review is so much better than the one in the database, I get it now, it covers several models in one go, I was trying to look at the PE fret picture to make sense of it. Now I know what I need to get when I am feeling brave !! 😄
7 June 2015, 08:18
🙂 IM glad to help. Don't know why the Modelwarship review is not linked on Scalemates. May Tim knows?!
7 June 2015, 08:22
Not sure how to add it, and I don't understand how to make galleries either ....
7 June 2015, 08:33
just had a quick go and it didn't like it because it's already attached to this or something, not sure what's the problem as they look identical products so surely that review applies to both ??
scalemates.com/kits/650960-g..els-720-11-usn-supercarriers
7 June 2015, 08:36
Mhh, the link you have posted first with the only one review seems to me nok, because the product no. 700-11 is wrong, it should be 720-11! There is only one PE set for super carriers available in scale 1/720, and so the last link you have posted is correct.
This one can be deleted:
scalemates.com/kits/103279-g..tz-f-r-us-navy-super-carrier
7 June 2015, 08:59
Painting the middle deck section required a lot of masking although there are only two colors to paint, 507A and 507C, because the main deck, catapult, and middle deck section underside was already painted and weathered.
While damasking the masks on the PE bulwarks I got some trouble with ripped of paint. I guess the paint hold fast on the mask and has not dried completely and partially ripped off the color. Normally Vallejo worked well on PE and a coat of primer is not necessary. It took me some time to repair it.
I made a test afterwards and let it dry overnight. The color hold fast on the PE even if you start masking it and pull the mask away fast. The paint even resist sanding paper. Maybe the PE bulwark was not clean enough because I forgot to clean it with lighter fluid before I start painting it. Never mind, some trouble is not wanted but I managed it, but still I let the color dry completely before I start and washing and fading and there is some more work to do before I start painting the hull.
Cheers, Christian
14 June 2015, 13:31
Nice and clean! I'm still following, even if I did not comment lately. Every post here makes me want to get back on my Prinz Eugen. If I only had the time.... keep up the excellent work!
14 June 2015, 21:47
I will Ingmar believe me🙂 and thx mates for your encouraging comments!
15 June 2015, 17:14
Second Walrus is finished and ready to paint. One will be in front of the ship as I mentioned before and the one with folded wings will be close to the hangar. The size of the Walrus seems to be a bit over scaled because the bird does not fit to the cage. So I will place the bird in front of the hangar and show a small scenery aboard with the crew start folding the port wing. More progress soon.
Cheers, Christian
19 June 2015, 17:22
Here comes the Walrus, coocoocachoo... Amazing tiny birds Christian, will they be rigged with human hair ? 🙂
19 June 2015, 17:32
No, human hair is to thick🙂 🙂 I'll use very thin stretched sprue.
19 June 2015, 17:34
amazing these small aircraft, Christian. And also with rigging 👍👍👍
19 June 2015, 17:36
Absolutely stunning and amazing Christian. No, I am really lost for words. 🙂 👍 👍 👍.
19 June 2015, 22:42
very sweet and delicate, decalling is going to be fun ! 🙂
How big are the squares on the cutting mat, 10mm ?
19 June 2015, 23:14
Hey ya, thx for your very kind and comments and so many thumbs up🙂
Yep, the size of the squares on the cutting mat is 10mm. I'll now start with the catapult trolley and loading bogie, they're made of PE. Stay tuned.
Cheers, Christian
20 June 2015, 09:58
Thx mates As advertised here is the final work. Both Walrus are finished and ready to paint. I add some more small details and the extended wheels on the Walrus sitting on the bogie aboard the ship. Well, I'm much confident with the result even the Walrus is a little bit to large. That will make a nice scenery once finished.
Cheers, Christian
20 June 2015, 14:49
Your level of build quality and precision is fascinating, truly outstanding! 👍👍👍👍👍
20 June 2015, 15:38
Christian , ich hatte schon mal geschrieben , das alles unter Farbe zu verstecken ist doch fast eine Sünde,
faszinierend wenn man eine Vorstellung von der Grösse hat 👍 👍 👍
24 June 2015, 05:02
Thank you all looking at it and for your kind comments. @Jens, it is to late now paintwork has already started🙂
Cheers, Christian
25 June 2015, 19:20
I'm enjoying your build Christian, will definitely be referring to your guidance when I begin my Belfast. Here's a photo of a Walrus on the Belfast in case that is useful: HMS Belfast | Album by Baz (1:350)
26 June 2015, 06:03
Fascinating Barry, to see pics from way back then, especially of the beautiful little seaplanes Christian has built. 🙂 👍
26 June 2015, 07:02
Hi Barry, thank you very much to share the formidable photo of the launching of Belfast's Walrus. The photo helped much because I was not sure about the paintwork on the Walrus with the code S. I guess there is some interpretation if she was painted dark sea grey and slate grey, but it is visible, that the fuselage was painted down without a demarcation line to the underside sky.
Would be fine you'll start your Belfast soon. I'm glad to help as you did!
Attached some photos of the now painted Walrus. The Walrus was airbrushed with Vallejos Dug Egg Green (RAF Sky) and hand painted for the camouflage pattern in dark sea grey and slate grey.
I asked a modeling friend to print some new decals, because the decals included in the kit are printed bad and they are to thick too.
Cheers, Christian
27 June 2015, 19:24
Ah !! The pencil.!!! That really brings home the scale to me Christian, and just how magnificent your achievements are. 👍 👍. 🙂
I/we all salute you my friend.🙂 🙂
Congrats X 10. 🙂
27 June 2015, 19:34
Hehe, I thought about one of your comments, you know now the real size of the model. A Euro Cent is not so common out of Europe and I guess a pencil is better to compare the size😉
Thanks my friend, I'm glad you like it!
Cheers, Christian
27 June 2015, 19:39
Christian. just caught up with all your current photos. Your results so far continue to be just inspiring 👍👍👍
just a small question..... are you sure the ignition harness in Walrus #2 is correct?.......Oh well I leave it to you to decide 😛 😄 😄
27 June 2015, 20:38
Damn macro photos I hoped no one will realize the mistake with the ignition harness 😉
Thanks mates for all your kind and encouraging comments.
Paint can dry now and I hope to start painting the camouflage pattern to the hull and the rest of the upper works. Guess I will spent most of the time to mask the model instead of using the airbrush🙂
Cheers, Christian
28 June 2015, 08:06
Thank you Bernhard, I much appreciate your 1A fivefold plus!
Yes indeed I will add a rig, but first I have to add a subtle weathering and to apply the decals. I guess it will be a bit more tricky than to rig a scale 144 biplane🙂
Cheers, Christian
28 June 2015, 08:24
Above: two micromasters in dialog 🙂
Christian, I am deeply impressed by your outstanding work.
It´s incomparable to anything I have ever seen- and a pure and inspiring joy to look at!
28 June 2015, 08:46
I was going to ask about the Walrus rigging but Bernhard posted before me!
28 June 2015, 09:52
Thx mates, I was overwhelmed by all your very kind comments about these tiny little bird although there are some small inaccuracies here and there (painting and some scratches on the surfaces).
Choppa, nope but a greenhouse is coming along with the Flyhawk PE set, but I did not use it because I was in fear than to scratch build the whole interior😉
28 June 2015, 18:39
You a crazy! I was actually just kidding about the Vesrspannung (wiring) and you are really going to do this!!!! I'm looking forward to the result.
28 June 2015, 19:39
Like I have said before you Sir are the Master of ships. Outstanding work!
30 June 2015, 00:18
@Bernhard, well you know I'm crazy😉 I have had a good Jedi Master when I start building aero planes in scale 1/48 for nearly 15 years ago🙂 🙂
And, yep, me too, but I have to wait for new decals.
Thx Clifford for your very kind and encouraging comment🙂
Cheers, Christian
30 June 2015, 18:06
It seems we all agree that you certainly are the master of all you do with ships and anything that floats on water, and that includes iddy biddy teeny weeney aeroplanes. 🙂 👍.
30 June 2015, 18:35
Thx mates, I'm glad you like it🙂
It is much to warm at the moment for modelmaking. We have temperatures up to 36° and high humidity so no progress on Belfast for the next time.
Be patient I'll be back as soon as possible.
Cheers, Christian
3 July 2015, 16:52
Just a small update following a longer absence working on HMS Belfast. There is too much work to do at the moment to concentrate to the complex paint work I would like to start. But there is some small work to do! The PomPom ammunition boxes look so empty and I decide to fill them with small cartridges made of 0,3mm styrene rod and a flat piece of styrene as a support. That went quite easier as I thought before and now the boxes look much more lifelike and ready to use.
Cheers, Christian
19 July 2015, 15:40
Christian, Your a freak, and said in the nicest possible way mate.
Your work and attention to detail and accuracy is second to none. Clap Clap Clap Clap.You are a watchmaker in disguise here. :-/
Every superlative I know is applicable here.👍 👍 🙂
19 July 2015, 15:46
I have used the same method to do 1/72 scale .50 cal belts 🙂 awesome work mate!
19 July 2015, 17:04
Christian, you're so right, the guns look a lot better with the ammo boxes filled. But Halleluja, what is the diameter of these rods you are using ?
0.15 mm ? Words fail.......... 😮
19 July 2015, 18:52
Insane attention to details so this is all I've to say about it other than it's a marvelous work!
Youtube Video

19 July 2015, 20:05
Hehe, the Black Knight never surrender - All right, we'll call it a draw🙂
You're all to kind, thx mates🙂
@Hanno, I'm sorry not to be accurate in scale, it is not a 0,15mm rod but a 0,3mm rod – the big one you know🙂 They have more punch on attacking aero planes - hehehe
20 July 2015, 18:14
I can see your point Christian, more punch is the only acceptable excuse .
(((((( 😄 ))))))
20 July 2015, 20:41
Christian, Super job on the guns and ammo. 👍 Too bad you went so "off scale" on the shells. 🙂 But, I guess, one must occasionally adapt the materials at hand to portray ones art......cough, cough, choke, sputter ---sorry,😛 all better for now 😉
21 July 2015, 03:36
Christian, you may already know this, but the World of Warships online game is in Open Beta now. The ability to examine bits of ships in a 3d environment is really cool. You should check it out if you have not already...maybe give them some tips on accuracy.
Anyways, awesome work, as usual!
21 July 2015, 03:49
Hey Mates, thx again for your kind and entertaining comments🙂
@Kerry, I much like Monty Phyton and the Holy Grail. It is so British in humor and I mean this in the most positive way! The scene ends - Come back here and take what's coming to ya! I'll bite your legs off!"
@Steve, hehe yah you have to use what is available whether you're gonna be the incorrect Scalemate
@Leif, interesting information I'll try to have a look.
@Kerry (again 🙂 ) You can't see any rivets on my boat cause Rosie is working on Bernhard's aero planes – hahaha
[img1]

21 July 2015, 19:12
Very "tongue in cheek" there guys, and I love a good laff (laugh).
No matter what, rivet counting CAN be fun. LOL 🙂 👍
21 July 2015, 19:32
Well Kerry, some jokes and a good laugh is a fine end for a long and hard day🙂 🙂
21 July 2015, 19:37
@Kerry, yep you all made my day🙂
Thx Marko and Michael for your very kind comments🙂
22 July 2015, 18:00
Unfortunately not Edgars, but I will go on as soon as possible. Last work I already did was to but the hull right into its base, filled the seam line along the waterline with acrylic gel.
13 September 2015, 17:06
You have us all looking over your shoulder again Christian. 🙂 All wondering what special little Gem you are going to post next. !! 🙂 👍
13 September 2015, 22:00
Hi Christian, always a pleasure to watch your builds! And i´m impressed that i never spot a drop of glue... Compared with my builds, it seems as i glue in a "Vietnam-like-manner"! Spray and pray!😉
16 September 2015, 07:54
Thx for your compliment Es-haq and Holger. Believe me Holger, even I take care and sand seamlines etc. there are splotches of glue here and there. They will be visible after a first coat of paint😉
16 September 2015, 16:05
Hi Bernd, in this case the barrels came with Flyhawk's HMS Belfast Upgrade Set. But they have separate PomPoms too:
flyhawkmodel.com/htm..sets/14/12/1081.html
If you'd like to update the kit parts with brass barrels this should be a good choice:
master-model.pl/inde..uemart&Itemid=56
Cheers, Christian
16 September 2015, 19:42
Hi Bernd, you're welcome. Would be fine to see your Hood here in Scalemates🙂
18 September 2015, 17:42
Grand job on the pom-poms Christian. Will wait for your next update with baited breath 👍
19 September 2015, 00:36
Oh, thought it was a Redwood tree he just painted up and posed with the guns 😛
19 September 2015, 04:12
...
Well I thought he was complaining he couldn't get it behind his ear!!! (((🙂 )))
19 September 2015, 12:05
Thx mates🙂
@Kerry, Steve, you should note the chief engineers comment😉
19 September 2015, 12:07
@Steve, better to hook in on the shoulder🙂
@Bernd, practice makes perfect😉
19 September 2015, 17:32
Well Christian., You certainly know how to take a joke and throw it right back. 🙂
Very clever of you to have a Navy Chief standing around just to show off your Redwood -ahem-ah-"pencil". It is masterfully crafted to look just like a pencil; Must be that French "trump dee- oil", I have heard about. Sure fools my eye 😉
p.s. All kidding aside your model is a grand thing
20 September 2015, 00:15
You're welcome Steve🙂 Kidding belongs to life and that is what it makes it worth! I like such sense of humor🙂
Well it is just all illusion to bring life to our model kits. It starts with highlighting and weathering effects etc. You need this to get a depth effect to your paint work and this is much more important the smaller the scale you are working on. To compare it with Trompe-l'œil isn't to be wide of the mark. I like to paint figures as well and a lot of techniques the most experienced figure painters use are applicable for planes, vehicles, ships etc. too.
en.wikipedia.org/wiki/Trompe-l%27%C5%93il
And by the way, this is the best I have ever seen with illusionary painting in modelmaking planes, tanks, etc. - see photo no. 7.
PBY Catalina Airfix | Album by Choppa Nutta (1:72)
Cheers, Christian
20 September 2015, 10:12
Thank you Christian for the two links. You are correct Choppa Nutta's technique is inspiring. The Trompe-l'œil link was a good reminder of the power of this technique, in the hands of a true artist.
As I reviewed your work, the quality of your "Metallurgy" is most impressive. 👍 👍 👍
The wire around the stack is a great scratch build. But the fold of the wings on the planes is inspired and shows the strengths of the use of PE, and your talent in using it.
😉 p.s. the starboard fuel tank pet cock looks to be loose; though, before refueling, I'm sure you'll have it set to rights. 😄
3 October 2015, 22:38
Thank you for your interest and your very kind words Steve.
P.S. I will tell the chief and arrest him for two days🙂
Cheers, Christian
4 October 2015, 15:42
Well mates, following a very long absence from my HMS Belfast I'm back at the bench and finished the hull paint work so far. It is just the first coat without any filter or highlights, this will be done later with upper works first.
It took me some time to align the pattern because of innacuracies in plans I use. Photos do not show both sides in the timeframe mid 1943 and so on. I scalled down a plan and start to outline the pattern, following this I cut out small maskes using Tamiya tape in different sizes.
Painting started with light gray 507C, than B6 pale blue, B5 blue gray and dark gray 507A last. All colors are self mixed Vallejo colors following my own mixture to represent the color as good as possible.
Good to be back with this one here on Scalemates🙂
Hope you like it, Cheers Christian
18 March 2016, 19:13
Exceptional work, particularly the photo etch. I usual build AFVs but took a stab at a ship some time back. I built the USS Kearsarge for my wife. She served on that ship during her Navy career. The photo etch was extensive, delicate and at time maddening. My hat is off to you for such excellent work.
19 March 2016, 13:05
Today I glued the SIMPLEX chain conveyor system on the main AA gun deck. The chain conveyor system supply the three 4" guns per side with ammunition. I scratch build the system except a flat PE part, see photo 223. I don't know why I missed to fix the part before I paint the deck, so I have to make sure it fit well without any warping to avoid the paint comming of. I used acrylic gel and matt acrylic varnish to glue the parts in place. Upper works and cranes pre fit to makes sure all went well later. I fit one of the 4" guns too, to make sure all work proper at the later end.
Cheers, Christian
20 March 2016, 17:50
Christian? Christian?....OH Yes I remember you now. LOL ; Good to see you are back and continuing this fine build.
p.s. I too have been AWOL these last few months. Good to catch up with your progress
20 March 2016, 21:19
I have to ask what your going to use for the lifting cables on the deck cranes Christian B. ?
It's just my inquisitive mind asking that, as I am wondering how thin/thick it will look, that's all. 🙂 👍
My beer went flat and my popcorn went all soggy, but is it time to get a new batch and open an other 'coldie'. ? 😉
21 March 2016, 00:04
Good to see you back too Steve🙂 and thank you for your kind comment.
Well Guido my last ship modell took me three years to finish so I'm in a good timeline🙂 About the varnish, yep you're right I use it just for tiny parts, like all the rain guttest made of copper wire. In this case I used it too to fix the chain conveyor system, the two long curved parts you can see in photo no. 287 running from right, just behind the bulwark, to the left. I'm a little bit concerned that the acrylic paint will crack later because of the different materials there, plastic main parts, PE deck, acrylic paint, styrene and again PE. I hope to avoid any damage later one using the same medium between the contact surface. Time will tell.
Kerry, I'm nut sure yet but I will use my regular mediums for rigging. Rigg that thing - a fine monofilament thread, and streched sprue. I'm not sure at the moment what will work best with the cranes lifting cable?! Both is very fine, approximately 0, 01mm.
Cheers Christian
21 March 2016, 06:09
Looking very good so far. I'not that cautious with gluing part over painted surfaces. Mostly it works fine. But you are right to be careful to glue parts under tension on painted surfaces as this might rip the paint of the plastic - as happened to me on my Prinz Eugen. But I doubt, that the type of glue matters here. As long as the glue sticks better to the paint layer than the paint to the plastic the paint will come of - no matter what glue you use.
21 March 2016, 06:21
Thank you Ingmar🙂 I used it just to allow the parts to extend without cracking because of similar materials in the contact area. CA glue will hold fast and than a crack and warping could happen. Hope to avoid it with my way, but maybe it is just to still my fears of ripping paint.
This is my third ship model I paint with acrylics and where I use large PE for deck sections etc. That all work well so far, but not everytime. In some cases paint came off demasking the camouflage pattern and so on. I never had that problem with Colorcoats, but enamels have other disadvantages.
Cheers Christian
21 March 2016, 06:39
Every big boat need some small boats. Same with Belfast, she carried some 32ft and 45ft motor boats and some 26ft wahlers, 32ft and 45ft cutters. All the shiny brass is covered with paint now. I choose a color similar to the pattern where the boat cradle will be placed later. Inside the cutters and wahlers I paint a wooden color, same with the deck of the motor boats.
Some repaint is requiered and the 45ft boats lack their wooden paint – some work for tomorrow.
Well all comes together, not fast but it works.
Cheers, Christian
21 March 2016, 19:15
I am the Devils advocate here Christian. (heheheheh).
With the completion of your ships Whale boat, are you going to coil up a painter fore and aft. ? (The rope attached to the bow and stern of a boat to attach it to a ship or a post)
As that would be something your nimble fingers would make a perfect job of. 🙂
21 March 2016, 23:02
Hey Kerry, guess you mention the rope running from a bollard along the ship's sheer to the boat, to hold it once swung out?! Clearly seen in the following photo:
[img1]
Cheers, Christian
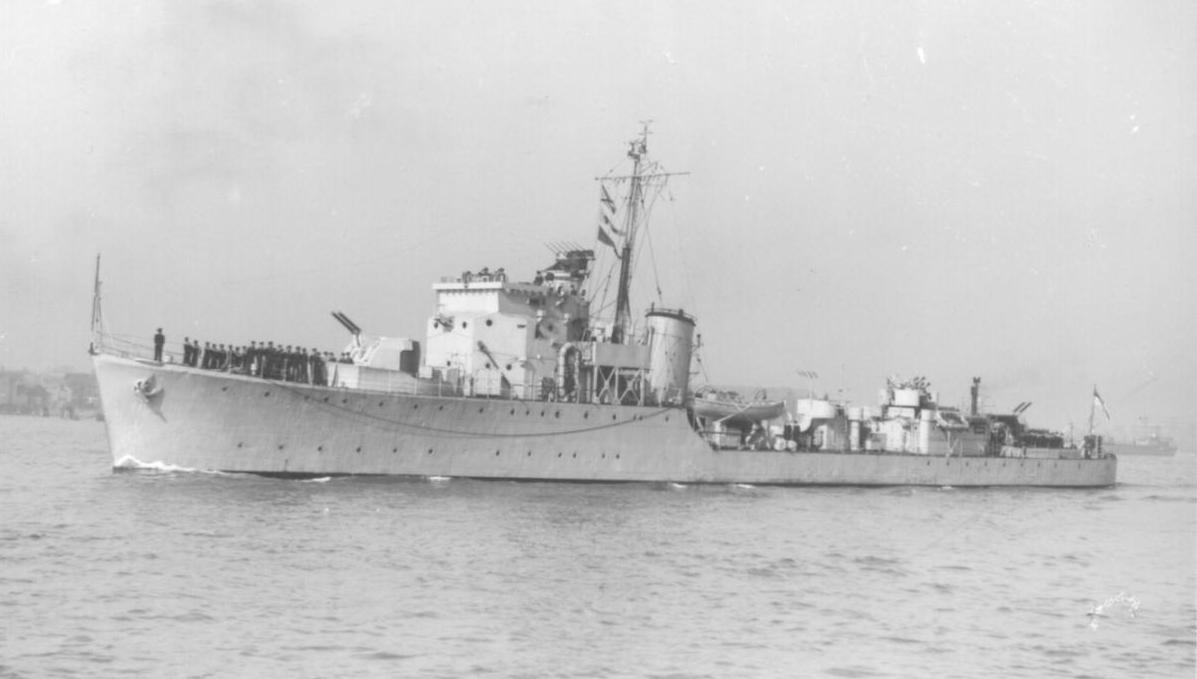
22 March 2016, 07:33
Christian, I am meaning the 'painter' that is usually coiled up in a circle that is left on the forward bow plate where the mast with the nav lights are mounted, and one is also usually coiled up on the stern plate behind the tiller when not in use. 🙂
google.com.au/url?sa..ust=1458726902112717
22 March 2016, 09:43
Ah ok now I know. Yep I will add the 'painter' - I know it as mooring line - later. Thank you for the link - nice and interesting photos. 👍
22 March 2016, 11:16
Christian, I do hope you didn't mind my asking the question, but I just know how very traditional the Royal Navy was and to know that my son who is in the Aussie Navy is still being encouraged to keep these traditions alive. All neat and tidy, nothing out of place thinking. 🙂
22 March 2016, 11:23
Everything is fine Kerry, thank you very much for your kind tip about adding the ropes 👍
Such small details are so important, but to often forgotten while building all that other stuff to finish the model.
To add these details is one of the last tasks to do on my models. Feel free toch take a look to my HMS Montgomery, there you can see some small but important details all along.
modellversium.de/gal..e-ensign-models.html
Cheers, Christian
22 March 2016, 12:05
Christian, I am thankful that you are so diplomatic mate, and I do appreciate your tolerance with me, your a good man, AND, I just had a look at the Montgomery and I will never tire of your work mate, and I have the greatest of respect for your abilities and skills.
Cheers mate. 🙂 👍
22 March 2016, 22:01
You are sure a master ship builder, of that there is no question sir.
22 March 2016, 22:11
@Kerry, I'm much pleased by your view and your always kind feedbacks🙂 I much appreciate it!
@Kerry, Clifford, Steve, thank you very much for taking a look at it and for all your very kind comments!
Cheers, Christian
23 March 2016, 17:56
No silly question! I use washing and highligting techniques on all parts on my ship models. On the one hand to get a deepth effect and a more life like painting (see photo no. 296) and on the other hand to simulate the weathering effects raised by weather, waves and salt water. Hard driven ships look extremly weather. For example HMS Hermes on return form Falkland in 1982:
britishskytours.com/..MES%20PORTSMOUTH.bmp
The challenge is not to overdo it.
Hope that answered you question right🙂
Cheers, Christian
25 March 2016, 09:18
I do my very best Thomas🙂 Thank you very much for looking at it and for your very kind comment.
25 March 2016, 15:32
All done with the aide of an electron microscope and Nano machines guys. 🙂 👍
25 March 2016, 20:27
Ah yes, The skilled workers. How could I forget. 🙂
You are, a most gifted artists Christian, and it is always a pleasant experience going through you albums mate. 👍
Salute. 🙂
26 March 2016, 09:16
I thought the termites were natures architects ?😉 😄
Termite Naval architects in this case 😄
26 March 2016, 15:21
too late, the cats out of the bag !
or should I say, the termites are out of the mound😉
26 March 2016, 16:48
...
There's Ticks in them there hills, not seen any errrr!... Ter... mites yer say!!! He said sitting back in his rocking chair, sucking on his pipe, in a thoughtful mode. 🤔
26 March 2016, 19:13
This is one of the most amazing build i ever see!!! You are doing an terrific work here Christian, thank you for sharing, otherwise i would not ever suspect the amount of work you put there!!! WOW!
28 March 2016, 00:05
With Christian's guidance, and my new pair of spectacles, I am getting nearer to making a start on my HMS Belfast!
28 March 2016, 06:01
Thank you very much mates, your kind comments are much appreciate🙂
@Barry, would be fine you make a start, looking forward to it!
Cheers, Christian
28 March 2016, 09:06
After nearly two years of absence from this built I start making progress painting the upperworks and details. The aft superstructure is done in basic painting. The self mixed colours still work, look nice and still match the colour I paint for nearly two years ago on the hull.
Next is the bridge structure and more small details. The plan is to finish her this year, next to some of my other ships in progress.
Cheers, Christian
14 February 2018, 17:58
holly molly... this thing has more PE than plastic.... this is a true masterpiece, even without paint!
14 February 2018, 18:13
Thank you mates. I'm happy you like it and I'm happy to come back to this built!
14 February 2018, 19:24
I can imagine that's a very tricky masking operation to paint around all that delicate PE work ! 🙂
14 February 2018, 21:04
Great to see you back on this project! I also have a Graf Spee on hold for over a year now...
15 February 2018, 11:18
Choppa, nice to see you looking around. Well the masking wasn't that difficult and extensive than I have thought first. I went out quite easy and need just some patience to place them along the needed contour. I only had to retouch small areas with little overspray.
Thank you Ingmar, ha, it isn't a problem to leave them for a while. They can not hide away or run away and they do not need food and drink. They only need a warm and dry place to stay. But you should look at them from time to time😄
Would be fine to see you back on your Graf Spee!
Cheers, Christian
15 February 2018, 19:45
I cannot stop marveling at the level of detail and precision you consistently demonstrate, which is rarely seen, let alone in this small scale. 👍👍👍
16 February 2018, 16:16
It certainly is wonderful what is available to us now that makes our hobby so much more challenging. 👍
phenomenal work and skill as always Christian. 🙂 SALUTE. 😉
16 February 2018, 22:03
Thank you Lode and Kerry for your very kind comment and your interest in this loooong WIP.
Well this weekend I finished the bridge section. This time it was a little more challenge with masking and painting but at the end it comes out nicely I think. Once the colour dried completely I can start hand painting the decks.
Cheers, Christian
17 February 2018, 16:34
I airbrushed now the last of the 260 sub assemblies and single parts to be add later on the model. So I can already start the detail painting and weathering progress.
Cheers, Christian
15 April 2018, 12:57
Hi Chris, it is always nice to watch the project process. Cheers Stefan
15 April 2018, 13:02
the more i look at your details, Christian, more incredible they look to me. this one is looking amazing.... and it is far from finished!. i hope to see it in Veldhoven 🙂
15 April 2018, 17:52
Thank you very much Spanjaard. I'm working on it to finish it until September this year!
15 April 2018, 18:25
Nice how you added some plastic to the PE 😉
Agree with Spanjaard, so mucht detail and scratch building everywhere.
15 April 2018, 18:35
A project that has kept me enthralled since 2013. ! :-O
September is something to really look forward too Christian. Wonderful stuff my friend. 🙂 🙂 🙂 👍 👍
15 April 2018, 20:14
Thank you very much Kerry. I'm pleased by your patience my friend🙂
16 April 2018, 18:09
Mmhhh I forgot I started this for five years ago. They were faster to finish the real thing😄
16 April 2018, 18:12
LOL. Yes, I can well imagine that is quite true. 🙂
It's still going to be the best you have done...........until the next five year labour of love is finished. 👍
Well done mate. 👍
16 April 2018, 18:19
The favorite of this build for me were the Supermarine Walrus amphibious aircraft.
Images 268/276. That said to me that we have a genius with PE here. Phenominal in every way. 👍
16 April 2018, 21:23

Christian fantastic work, the level of detail is just amazing, particularly in that scale!
17 April 2018, 04:36
Fantastic work so far Christian.
Even if I like to see those kind of builds, I would never do one myself 😛
17 April 2018, 09:55
Thank you all for your interest and very kind comments. She is still my favourite RN cruiser and the painting comes out nice so far. As mentioned before still a way to go, but the plan ist to finish her until a forthcoming new modeling event in September in Hamburg!
International Shipmodelling Days in Hamburg (14-16 September, Hamburg DE)
@Kerry, thx for adding the intersting video🙂
Cheers, Christian
17 April 2018, 19:37
Taking part is everything, but thank you for your encouraging feedback Kerry. Maybe the jury will read you post 😄
Thank you Bob for your kind comment.
Cheers, Christian
18 April 2018, 19:41
"Gold" shall be yours! That makes me wish being able to attend the "International Ship Modelling Days" in Hambur. Quite unlikely, but I would enjoy to see your masterpieces in reality!
18 April 2018, 19:50
LOL. I can imagine being there and hearing the prize awards............"Make a path there everyone for Heer Bruer. Grand Champion. Ja ! !! 🙂
18 April 2018, 21:27
Totally mind blowing as always Christian. Your talents amaze me.
19 April 2018, 21:11
Pre assembly to check the alignments and the setting in the display. There is still plenty of work to do, but there is a light at the end of the tunnel.
Cheers, Christian
2 September 2018, 09:13
Thank you Lode and Spanjaard. I hope to finish her untill next years Euro Model Expo.
2 September 2018, 09:38
Would be fine to see you there too Spanjaard 🙂
Thank you Burkhard.
3 September 2018, 16:19
Thank you James 🙂
Spanjaard, there is still some time till next year. Looking forward to meet you in Veldhoven at SMC!
4 September 2018, 18:57
i have booked some training in SMC, so there is no scape now 🙂 looking forward seeing you!
4 September 2018, 20:20
Well, the sea question🙂 I have a method close to Frank Spahr's easy and simple method of making a display and water. I use a Styrofoam board, the one you use for insulation of buildings. The surface contours can be made using a rotating brass brush and a sharp modelling knife. Frank Spahr use lately a method by heating the Styrofoam board slightly from below. I didn't so far.
Once the surface is in shape I sand the surface, just to prevent irregular pieces of material. Then I add wall paint in a stippling motion in several layers. Not to thick to avoid any cracking. When the surface dried completely I paint it in the colours of my choice. Last is to add several thin layers of high gloss varnish. I use one from the DIY store in a rattle can.
I hope that helps.
Cheers, Christian
1 January 2019, 17:19
After a long absence from modelmaking I am back at the bench. I thought it is a good idea to start finish my longest project - HMS Belfast. The parts are painted for a long time and it is now to add the weathering effects. As usual I am working with oils in different sahdes. The midhsip section is nearly done, now up to the hull, bridge and aft upperworks.
Happy Modelling, Christian
11 November 2022, 22:13
Chrisitan, I look forward to new marvels from you! Nice to read and see from you again.
12 November 2022, 06:15
Thx Christian and Spanjaard 🙂
@Christian, by the way I did not attend to Ship Modelling Days in HH, so no photos and information about your late request
12 November 2022, 10:28
I realized this. No problem maybe next time. There are a lot of other kits in my stash.
12 November 2022, 17:04
Good to know Christian 🙂
Well this was a productive weekend. I managed to paint all the weathering effects on hull and upperworks and start painting the small parts. Now the midship and aft deck sections are nearly finished. Next up to the bridge and equipment.
Happy Modelling, Christian
13 November 2022, 20:45
I made good progress during the last weekend and week. All upperworks are in place and a lot of small parts are added. There are just some parts left over to put in place, railing, mast, rigging and crew.
So far I am really happy with the result.
Happy Modelling, Christian
18 November 2022, 19:59
Ha ha, looks like I am not the only one with multi-year-builds. So I follow you on the final strech. Very nice detailling and expert PE handling.
19 November 2022, 08:09
Thank you all for your kind comments 🙂
@Michael, I only have multi-year WIPs. One year I only build and finish none, the next year I have a run 😄
19 November 2022, 21:22
Good to see you back at the bench Christian, looking forward to seeing this amazing project nearing
Its completion !
20 November 2022, 10:41
24 August 2013, Wow, and still no sight of any rust. !!!
This must be one of the longest running posts in Scalemate history. !
Well done Christian. 🙂 👍
20 November 2022, 20:35
Thank you David, Jörg, Hanno, Sascha and Kerry 🙂
@Kerry, luckily it is all made of plastic and brass, so no rust at all 😄
Hahaha, that's a good one 🙂 May I ask Tim for an award for the longest running post😉
Thx again to you all and happy modelling
Christian
22 November 2022, 21:05
I think we all can honestly say that your the winner of the longest running/current posts.
And thoroughly deserved my friend. 🙂 🙂 👍
23 November 2022, 05:29
@Kerry, that sounds promissing. So I do not need to stop for another year and can go on and finish this build 😄
@Kyle, thx so much for keeping it going and for another Wow 🙂
@Rui, sad to say, I plan to finish it in 2022 😉 And, thaaaankkk you 🙂
😄
24 November 2022, 20:54
You should delay the finish until August 21 next year 😉 Who can say he worked 10 years on a model?
And now a post more.
24 November 2022, 21:47
Definitely not Frank. I want you to have a look on the finished on at EME 2023 😉
25 November 2022, 19:56
@Frank, if the plan works, for sure, if not - so what 😄
Next step before the final, railings and more small parts. I scratch built the Type 279 radar to not have the radar lantern empty.
Adding railings on a painted hull needs patience, not to ruin the paintwork with plothces of superglue. It works quite well so far and with a cover of Winsor&Newton matt varnish the shiny superglue was completely sealed.
Happy Modelling, Christian
3 December 2022, 20:15
Nearly there, rigging and crew is missing.
Happ Modelling, a Merry Christmas and a Happy New Year to all Scalemates
Christian
20 December 2022, 19:09
Thank you Christoph and Hans-Jürgen 🙂
Whishing you all a Merry Christmas and a Happy New Year
Christian
24 December 2022, 11:04
The Christian Bruer maritime museum will be opening next year for all to visit and marvel at his talent and skills.
Be sure to get early tickets so you don't miss out. 🙂 🙂 👍
Happy new year big fella. 🙂 👍
29 December 2022, 22:37
Happy New Year to you and yours too Kerry and thx for the very kind words 🙂
But sorry no CB museum at all. But feel free to visit Euro Model Expo in March in Lingen and Scale Model Challenge in October in Veldhoven to have a chat and to take a look to my scale models 😉
Happy Modelling
Christian
1 January 2023, 10:11
Christian. If I ever get the money together to visit Europe. Be assured I will be buying you a beer or two mate. And may you have a wonderful 2023.
Cheers one and all. 👍 🙂
2 January 2023, 04:11
Kerry so far I will have a toast to you in Lingen and Veldhoven 🙂
2 January 2023, 16:59
Christian, Happy New Year to you.🙂 I have not gotten any notices from scalemates in nearly forever (Well, a long time anyway) So today here you and your magnificent HMS Belfast are. What a treat to catch up on this project, it is a beauty, well worth the wait and the time spent on the construction.
3 January 2023, 06:26
A Happy New Year to you too Steve and thx for your kind words about my work on HSM Belfast 🙂
4 January 2023, 18:11
Christian sir, if only my models looked half as good as yours, then you'd still be twice as good 🙂
Beautiful work sir, beautiful!
5 January 2023, 06:24
Belfast ship planes and a 45ft fast motor boat are ready for a wash and highlights. I need to find some time to rest to be in a good mood for doing the rigging. There is to much real work to do at the moment which engages me really much.
Happy Modelling, Christian
19 January 2023, 20:02
That is truly amazing! Excellent work! Allmost a shame to cover all that gorgeous PE with paint. 😁
19 January 2023, 20:12
I just got here and saw picture 353. Wow that's a lot of detail for that size. Great work!
30 January 2023, 19:20
Well, back to Belfast for the final touches. The Walrus got it's stringers, accessories and crew were painted and placed on board and yesterday I start rigging the masts. A work I do not much desire, but it is an important part for a ship model, so patince and a steady hand is required. I hope to manage it all during the next week, because I want to present HMS Belfast at Euro Model Expo in Lingen for the first time.
Happy Modelling, Christian
12 March 2023, 08:36
Hallo!,
Ihre gesamte Arbeit an diesem Kreuzer ist einfach unglaublich in ihrer Finesse.
Das Ergebnis ist großartig.
12 March 2023, 09:02
Wow Christian - this is out of this world, superdetailed modeling !
12 March 2023, 16:55
Amazing detai! I like the sceen with the sailors taken a group picture 👍
12 March 2023, 18:29
Thank you all for leaving such kind comments 🙂
@Spanjaard, Martin, looking forward to see you in Lingen 🙂
@Hanno, do you plan a visit in Lingen this year?
13 March 2023, 17:33
And some more in progress photos of the delicate rigging work. Some more signal halyards are attached on the main and foremast, and some lifting blocks for cranes and davits.
Some more to do, but it works quite well so far.
Happy Modelling, Christian
13 March 2023, 17:38
@Bughunter, indeed it comes. It was in 2013 when I cut out the first parts from the sprues. I had times of 1 to 2 years in between without any progress on this project. But now I am happy that I am definetley on the finish line and that I can prsent it for the first time on a scale modelling show in Lingen at the end of the month.
13 March 2023, 18:01
Well, nearly 10 years, 390 photos and 807 comments later my HMS Belfast is finished 🙂
I did not spent the whole decade working on the model, but had a lot of time-out in between from this built.
But now she is done and she looks exaclty how I planned.
Thank you to all Scalemates for your patience and hundreds of kind comments.
Now, looking forward to present the model at Euro Model Expo next weekend in Lingen.
Happy Modelling, Christian
18 March 2023, 17:48
Absolut fantastich in jeder Beziehung, Christian, Bau mit PE`s Lackierung und Wasserdio 👍
18 March 2023, 18:21
Excellent build, congratulations for turning your hard work into a masterpiece. 👍
18 March 2023, 18:52
Simply amazing 👍 tons of details to discover. Pity I will not be in Lingen
18 March 2023, 19:17
Thank you Dietmar, Guy and Thomas 🙂
Thomas, I guess I will present here also on others shows and also next year in Lingen. This year I will put here into the competition, so I can present the model next year at our Club Stand.
18 March 2023, 19:48
i'm just going to stumble in there and say: potzblitz! It's simply overwhelming and utterly beautiful! I would also like to congratulate you!
18 March 2023, 19:53
Hi Roland, thank you for your kind words and the "Potzblitz" A word I haven't heard / read for a long time. I much like the old phrases 🙂
18 March 2023, 20:06
Christian, I too add my appreciation, to you, for your major work and best wishes at your Euro Model Expo adventure.
18 March 2023, 21:01
I would like to add my congratulations as well. Incredible stuff and a joy to follow along with.
18 March 2023, 23:42
Christian. I have not been as active in keeping up with all my mates and their work, and I have not said much on what you have produced here. BUT. Knowing how well you research and translate that research into what we all see here. I would still love to see a 'painter' coiled up on the bow of the launch alongside at the stern.
19 March 2023, 06:00
This deserves some attention next week. Admission is a cup of coffee, if I read that right?
19 March 2023, 07:24
I can only second the high praises of my mates. I wish you a lot of satisfying moments when you look at it again and again and realize your achievement, as much as when others marvel this gem.
19 March 2023, 15:18
Thank you to all my Scalemates for leaving all your most kind comments. I much appreciate it 🙂
@Martin, I guess the entrance fee for EME 2023 is a bit higher than a cup of coffee, but I much apreciate your cofee offer - with milk and sugar please 😄
19 March 2023, 17:07
Congratulation on getting this beauty finished even after so many years.
20 March 2023, 19:32
I am happy about an article of my HMS Belfast in Starling Models online ship modelling magazine Scale Ship Modelling issue #2. The magazine is for free download on Starling Models Shop:
starling-models.co.u..ip-modelling-issue-2
Thx to Mike McCabe and Straling Models 🙂
Happy Modelling, Christian
20 April 2023, 16:36
An amazing build. I think I'm more amazed by the water... LOL. Very nice.
20 April 2023, 16:37
Thx a lot Michael . 🙂
If the still water amaze you, may you will have a look on more dynamic water displays 😄
CVE-10 USS Card | Album by Christian Bruer
20 April 2023, 16:47
Award winning masterpiece from your workbench! Scale seems not a limit for your craftman skills, congrats!
21 April 2023, 17:06
Album info
The lower bridge deck and aft deck house come nicely molded in one piece each. The middle section has to be build from straight side panels and the upper deck. Each edge has a skew which allows an exact angle and a clean corner. The parts fit well together and there is only one problem while fitting the part to the upper deck because of one of the hull stringers seems to bend the deck slightly upwards so there is a bump to cover. I sand the walls a little bit down and so it shouldn't be a problem when fixing the parts together. The catapult is a bit crude and something to modify by some scratch work or maybe the new PE set from White Ensign Models which should be available soon.


