

Album E13A/ Nichimo


Comments
1 22 October 2013, 05:32
Hello, I guess it could be of interest to show you the content of Nichimos boxing, since this kit is not seen all to often.
Distributed over all the surfaces are really tiny rivets; in my eyes that looks rather good and makes possible interesting weathering and painting effects.
The cockpit area is funny, isn´t it?
22 October 2013, 05:39
Hello Roland
I hope that you well will receive the mails with the pics.
JiP
22 October 2013, 21:36
Dear Jean-Paul,
I did...- what a plenty of information and what rare and informative pictures! That is all I need- you have saved my day!
Thank you again for your work and the time you invested in collecting this material. Roland
23 October 2013, 15:33
I think that with these pics you can made good things from the Nichimo (LoL).
I look forward to seeing the suite your build.
23 October 2013, 17:21
I will do my best, dear Jean-Paul! 🙂
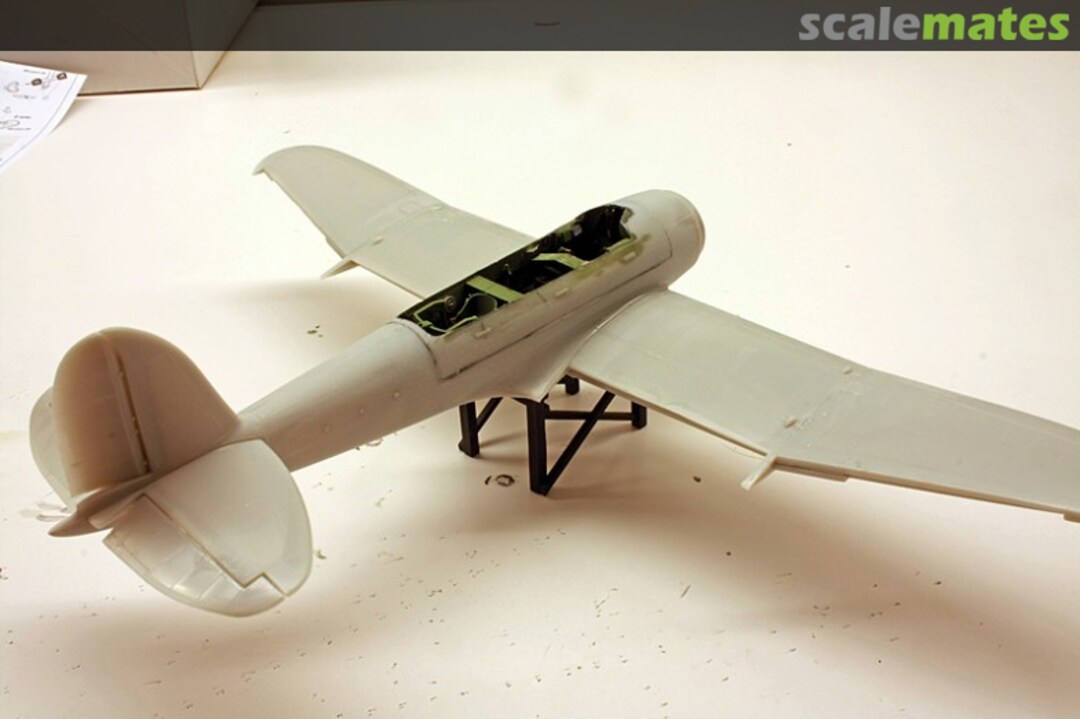
Two major modelling-sessions later, the interior has been freed from Nichimos gags. Thanks to Jean-Pauls informations I had an idea, what the interior should look like, so I could collect, modify and trim parts which I borrowed from other kits. (a Fine Molds "Judy", also a Tamiya A6M and lot of plastic and etched spare parts donated for this interior.)
Looking at the outcome I apologize by all E13A-afficionados for the incorrections, but I hope most of the cockpits configuration could be recognised. As a solace: I guess nearly everything is better than the original condition. 🙂
The interior will be weathered a little bit and I guess some more etched parts will find their way into the E13As cockpit.
25 October 2013, 05:29
This is a great job and you were quick to do so. It was not too difficult to adapt it in the kit??
25 October 2013, 06:26
Thank you very much! The main challenge was to compose all the different "frankensteined" parts to a coherent appearance. And, of course, to blend this parts-mix into the contour of the opening I had cut out.
Surprisingly the cutting out itself was rather uncomplicated.
26 October 2013, 06:08
Fuselage und floats have been assembled and, refering to wings and fuselage, sanded.
Next will be the masking of the canopy. When it is fixed a piming coat of paint will show me all those parts where I have to rework the sanding... 🙂
The kit quite has its merits, I am really looking forward to start the paintwork.
28 November 2013, 21:15
Thank you! You are perfectly right- there is a certain amount of modleing effort neede, to get that bird right.
To illustrate that: look at the gap between fuselage and canopy! I have glued that piece in place and bridged the distance with Revell putty. The next days will show if it has worked...
1 December 2013, 10:21
Filling the fuselage-canopy gap with putty seems to work. I have sanded the transition between both parts to a smooth and plain condition by now. There is some new filling and sanding work to be done concerning the floats, but overall I can say, Nichimo did a clever work on constructing the connections between floats and wings.
I am keen to start with the paint!
3 December 2013, 20:49
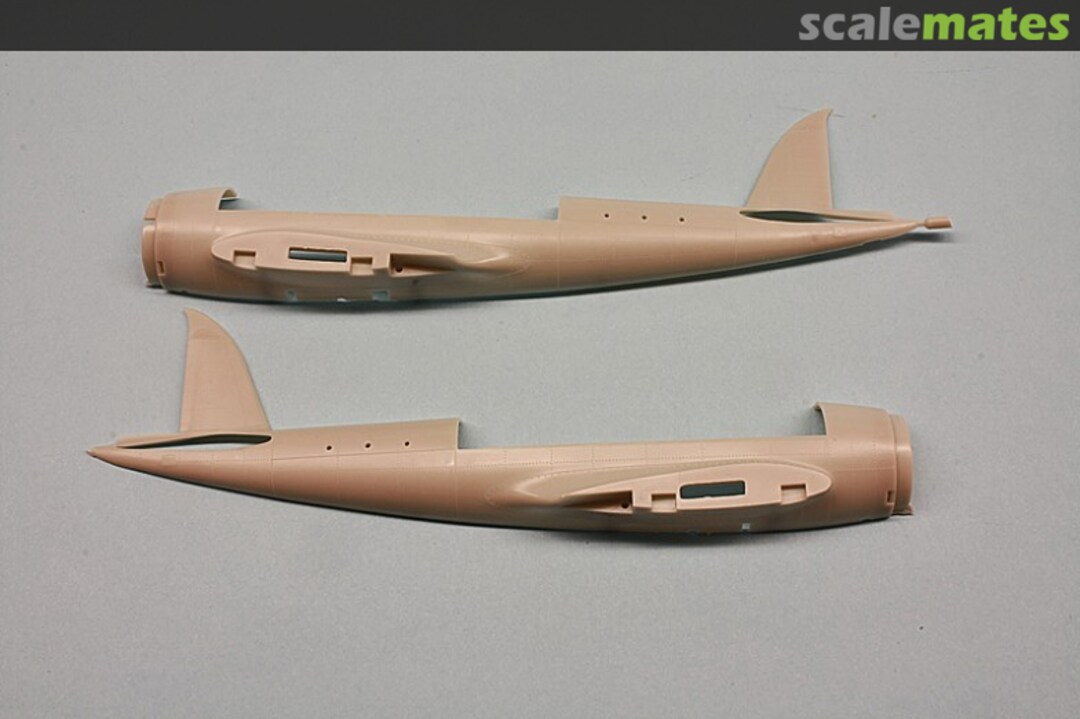
Here are some new pics; I have applied Gunzes "IJ Interior Green" all over as a base for the metal paint.
Two conditions are shown: one before- with filler applied- one after the sanding work. Next step was reshaping the contours of the canopies sliding parts and painting of Gunzes White Aluminum...
The pictures make viewable, what a streamlined outline the E13 "Jake" had!
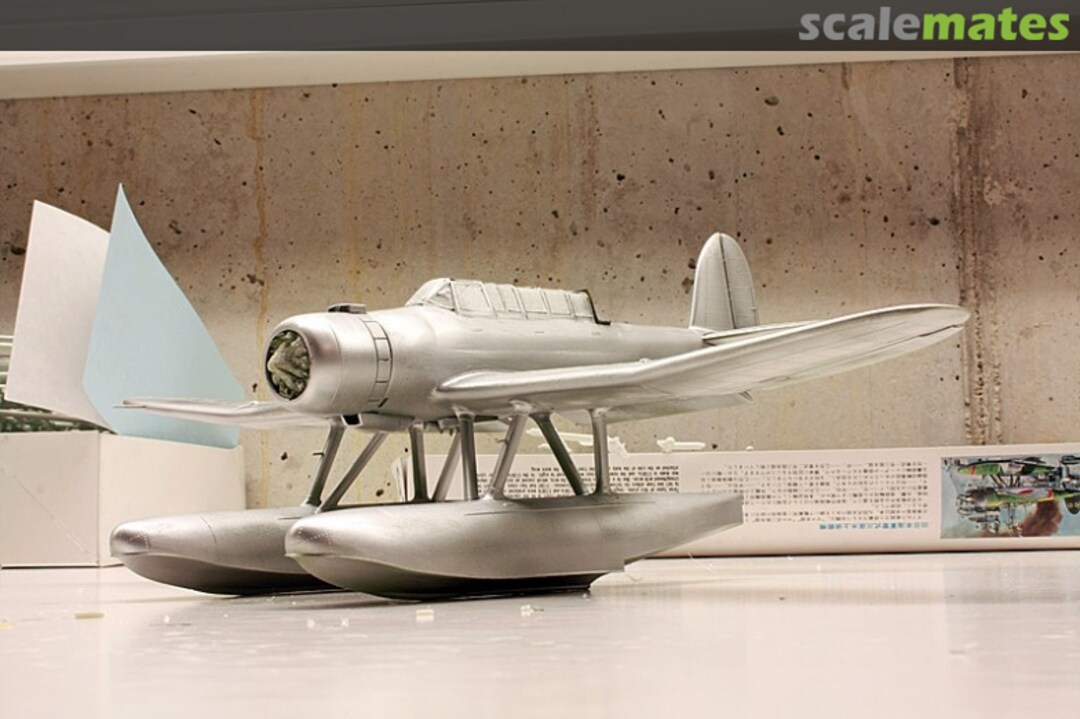
7 December 2013, 16:55
added some pictures of the "metalized" Jake; as you see in two pictures, the "Maskol" painting mask has been allready dabbed on.
Next will come the preshading and the painting of the planes underside colour.
10 December 2013, 08:19
Da war aber verdammt viel Spachtelarbeit rund ums Cockpit notwendig. Aber Du hast das ordentlich erledigt. Bin auf das Endergebnis neugierig.
14 December 2013, 18:48
Ich muss sagen ich habe da nie im Leben so viel Geduld mit spachteln und schleifen, aber Du hast das bis jetzt meisterlich gelöst. 👍
Ich bin sehr auf das Ergebnis gespannt. Aber bis jetzt ist das vielversprechend ...
14 December 2013, 18:59
Hi Roland, ich hatte den Bausatz selbst mal, aber nie gebaut. Ihn jetzt in seinen Bauphasen zu verfolgen bestärkt mich, dass ich es damals richtig gemacht habe, als ich ihn verkauft habe.
15 December 2013, 09:04
Hallo zusammen! Vielen Dank für Eure Worte, Spachtelmasse und Schleifpapier muss ich nach diesem Projekt wohl wirklich nachkaufen... 🙂
Arne, ich kann nur sagen, dass dies bis zu seinem Ende eines meiner aufwendigsten Modellbau-Erfahrungen geworden sein wird.
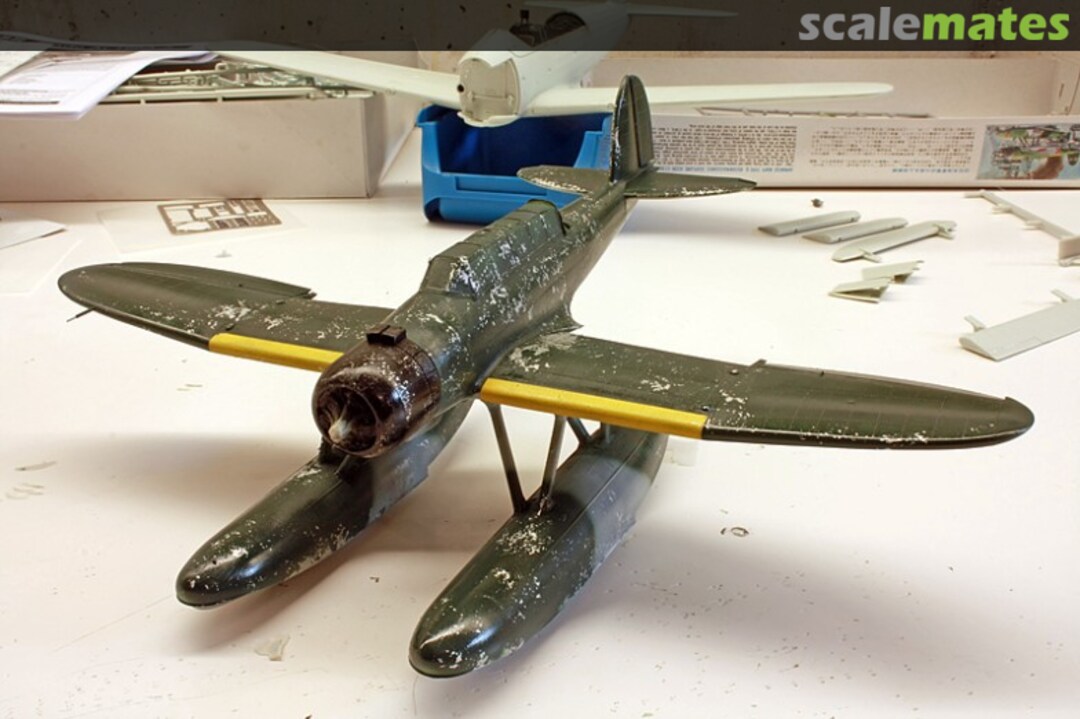
Der aktuelle Bauzustand sieht die wichtigsten Farbtöne aufgetragen und das Maskol runter gerubbelt- jetzt wird mit Pastellfarben und trocken gemalten Gunze-Aquarells ordentlich der "Zahn der Zeit" aufgetragen.
The surfaces have been freed from the Maskol masking- now it´s time to do some "wear and tear" with pastells and oil-colours.
15 December 2013, 16:47
Thank you very much Chris,
it´s a dimension bigger than your recent naval masterpiece but nevertheless a fiddling and intricate matter 🙂
16 December 2013, 17:45
The project is slowly nearing completition. Decals -"frankensteinized" from various sources- have been applied and the sealing layers of Gunze clear have been sprayed: the surfaces are finished.
Next will be a bunch of details to add; for example the struts between the floats will be made of heated polysterol, further the antenna mast will be errected. The beaching dolly has still be to reworked.
19 December 2013, 20:23
Ich bin sehr auf das fertige Modell gespannt. Sehr beeindruckend was Du aus diesem Bausatz rausholst ... aber du beweist mir, dass es nicht immer Tamiya oder Hasegawa sein muss ... mich schreckt einfach der Mehraufwand mit Spachtelmasse ab ... aber wie gesagt es lohnt sich zwischendurch schon 🙂 ...
19 December 2013, 22:22
Danke Albi!
"Tamiyagawa" muss es tatsächlich nicht immer sein, da stimme ich Dir zu. Ab und an ein Ausflug in die raueren Gefilde des "shortrun" oder der Machwerke exotischer Hersteller erfrischt und lässt einen zufrieden in die heimelige Modellbaustube zurückkehren... Dieses Projekt ist auch eine nette Spielwiese, um mit dem Inhalt der inzwischen ganz gut gefüllten Ätzteil-Restekiste zu improvisieren.
Last but not least bin ich allerdings froh, wenn das Projekt langsam in die Zielgerade einläuft 🙂
20 December 2013, 13:19
Hej Roland, sehr schön! Sagenhaft echt sieht der Wagen inkl. Alterung aus. Was hast Du als Basis unter der rotbraunen Farbe verwendet?
20 December 2013, 13:31
Hallo Bernhard, vielen Dank! Unter das Gunze-Rotbraun habe ich mit Schwarz-glänzend grundiert, dann wurde mit "Maskol" maskiert. Freut mich, dass es Dir gefällt!
21 December 2013, 06:35
This project has been finished. I am a little bit proud I could cope with Nichimos freaky parts- that means: cope to a certain degree... because it´s not an end result like from a Eduard or a Tamiya kit.
The dufficulties and troubles have been described during building the "Jake", what is to be praised are for example the kits razor sharp trailing edges on all wings and rudders. Fit was not so bad, to say at least. The inter-float struts have been made by stretched sprue, some smaller parts on the rudder originate in spare etched parts.
I hope you like the pictures- merry Christmas!
23 December 2013, 14:21
Wow! Aus dem Bausatz hast Du echt das Maximum herausgeholt. Gratuliere!
23 December 2013, 17:56
Auch Dir und Deiner Gattin schöne Weihnachten. Du hast ja jetzt Ferien - also happy modeling! Bin gespannt, was du in dieser Zeit so raushaust.
24 December 2013, 09:24
Vielen Dank Stefan! Auch Dir und den Deinen erholsame Festtage! zumindest anfangen werde ich ein paar schöne Projekte... 🙂
Thank you a lot Es-haq!
25 December 2013, 19:56

