bughunter The result of my new method is great. No need of thin drills and the sandwich of wood and metal is even more robust than wood alone.
This will be enhanced to a full build report soon! May be you guess the type already from the Eduard strut on the last picture.
bughunter @Urban No, no Pup. The only Pup was the old Eduard one with brittle grey plastic, here iit is the newer beige. The Pup is already in my cabinet.
@Christoph 👍 It is only a useful arrangement of tools in my workshop. 😉
David - full hit!
I'm still waiting for decals of the Nieuport Triplane project, so I started something different. But not a Stripdown this time, a normal Profipack to put a finished plane beside the Stripdown.
16 March 2022, 21:51
Mona necessity is the mother of invention ..be creative , you are so skillful 👍
16 March 2022, 22:29
Urban Gardini No worries mate, it's even better with a DH.2
17 March 2022, 00:10
bughunter Thank you mates!
Now the paint decision. Eduard provides paint schemes in linen and PC10. But I have already a lot of models with that paints in my cabinet!
I know the nice paint shades of PC10 and PC12 (on my Sopwith Triplane) provided by Mr.Paint and lately I discovered they offer a PC8 too! After I noticed the PC8 paint scheme of the DH2 with serial 6000 it was clear to me to do that bird 👍
17 March 2022, 08:48
Hans-Jürgen Haag Proxxon sei Dank! Gute Idee! Bin schon gespannt wie es weiter geht.
17 March 2022, 14:54
Elias Korompilis Wonderfull job!
The precision vise you are using to make the groove on the veneer strut is it the proxxon precision vise?
17 March 2022, 14:59
Giannis Kaltapanidis WOW! With some of you guys I'd like to be behind your back and watch the way you are working!
17 March 2022, 16:22
Alec K Another great project. I like your strut fabrication process ( I tried something similar, but with styrene, in my current biplane build). I think there is an opportunity for a manufacturer to offer blank struts (metal wire inside extruded resin or plastic) in various profiles. I believe something similar was available in times past.
bughunter Thank you mates!
@Elias, it is called "Precision steel vice PM 40" and is originally accessory for the Proxxon mill MF70. I have two of them, one mounted on the mill, the second one for squeezing brass tubes as struts, or just hold parts during scratch work or simply as weight during glue drying 😉
Here you can found it on the english Proxxon mill page: proxxon.com/en/micromot/27110.php
@Giannis I think that is the reason why we are doing those build reports here? So we let you virtually view over the shoulder 😉 Have fun, there are a lot of free seats in the first row!
17 March 2022, 17:49
bughunter Ooops, I nearly missed your answers Alec and Villiers due to my typing in parallel. Welcome to the show!
Alec, I only heard about the streamlined brass wires called "Strutz": STRUTZ Streamlines Brass Wire (Skybirds '86 , 1:72)
But plastic and resin needs to be painted, which I want to avoid. My way would work also in 1:72, with 0.2 or 0.3mm wires and fine grain veneer like boxwood.
BTW, we have a huge problem with boxwood in Germany. Some years ago the Box tree moth was accidentally imported from Asia, so we should have a lot of wood now, but nothing in some years. See en.wikipedia.org/wiki/Cydalima_perspectalis
17 March 2022, 18:07
Elias Korompilis Thank you Frank, I have the same set with your photo, the MB200 stand and the micromot 60/E and I wanted to make sure the PM 40 vise fits and works with this stand.
17 March 2022, 18:08
bughunter Oh, no it do not fit the normal way. I hate this stand, because it do not slide exactly so I can't drill with it (for drilling I have now the TBM220). But that stand allows to rotate the head, that's why I use it here. I fitted the PM40 in a creative way, because I was not able to press the wood by hand against a edge and move it. That is what I tried at first.
But the vice is not really needed. Another solution could be a piece of wood in the same with as the stripes with wood or metal added to both sides.
Elias Korompilis OK thanks, anyway I will have to buy the PM 40 some day, I have the MS 4 but it is uselles for precision work.
17 March 2022, 18:42
bughunter Let's continue with rotary and airscrew. This was only my third 4-blade airscrew, but it turned out well. I need to add ignition wires to the engine and prop boss and grey tips to the airscrew.
18 March 2022, 07:25
Dietmar Bogatzki Engine and airscrew looking fantastic, bughunter 👍
18 March 2022, 09:13
Robert Podkoński This propeller you've carved is a masterpiece in itself!
bughunter Thank you mates 👍 and a warm welcome to the new guests!
I'm working full steam on this project so I hope I can show as next step the tail booms soon.
18 March 2022, 21:14
Neil Hi bughunter. I believe Villiers summed it up! As an OOB modeller I don't feel worthy to comment! However it's always a pleasure to see your work in this feed. Truly masterfully executed lovely work everytime.
18 March 2022, 21:32
bughunter Neil, thank you very much for your kind words! Every comment is highly appreciated 👍 OOB or scratch building or something in between - most important is to have fun and do what you like!
My working area "old struts and biplanes" is something special for me, because here it works to use real material like wood and metal (honestly I am lazy, so I do not need to paint the parts 😉 ) but this would not work on e.g. jet models or helicopters. In addition, the technology was quite simple, so you can understand these solutions and follow their development on the models. Together with the colorful paint jobs, that's what makes it so appealing to me.
18 March 2022, 22:33
bughunter The thin plastic tail booms are too flexible for my taste. The good thing with this project is, that I don't need to invent new solutions but just replicate the way I found for my DH2 Stripdown. So I made two new tail booms from brass.
19 March 2022, 18:32
Ben M Very fun stuff, I appreciate you sharing your techniques.
19 March 2022, 18:39
David R. Meizoso Amazing. I guess you drilled the booms before soldering all the parts? I would also like to ask which kind of drill bit you used? The ones I have would certainly break when trying to bite into brass.
19 March 2022, 20:59
bughunter I use cobalt micro drills (shaft 1mm), which I found years ago on ebay.
The trick was here to drill the 1mm bushes first, slide them on the long tubes, find exact position and use the hole in the bush to guide the drill, so I drilled trough the long tube.
19 March 2022, 21:42
David R. Meizoso Thanks for the explanation! I'm afraid my question wasn't accurate at all, since I was referring to the holes for the turnbuckles. Those holes seem easier if done before everything else (such a tight space around, and they're not perpendicular to the main shaft!), unless you're some kind of wizard, which you are for me btw...
19 March 2022, 22:16
Alec K Amazing metal and wood work all around 👍 👍 👍
20 March 2022, 02:53
Jv Very impressive
Thanks for sharing all your build pics
bughunter Thank you mates!
After the great trip to the Euro Model Expo I spent some time on the bench and can show the next parts which I prepared for the cockpit to be able to close the fuselage.
bughunter Thank you very much mates! Your comments are highly appreciated.
Spanjaard, my motto is: Live long and learn! The next model will be better and at the same time reduce the stash.
You don't have to make the mistakes yourself to learn from them 😉
8 April 2022, 16:01
Ricardo Reis Very nice, following another of your great builds!!!
gorby Fantastic!
Looks like I'm going to enjoy this - my favourite WWI aircraft gets the Bughunter magic. 🙂
9 April 2022, 14:28
bughunter A warm welcome to you gorby!
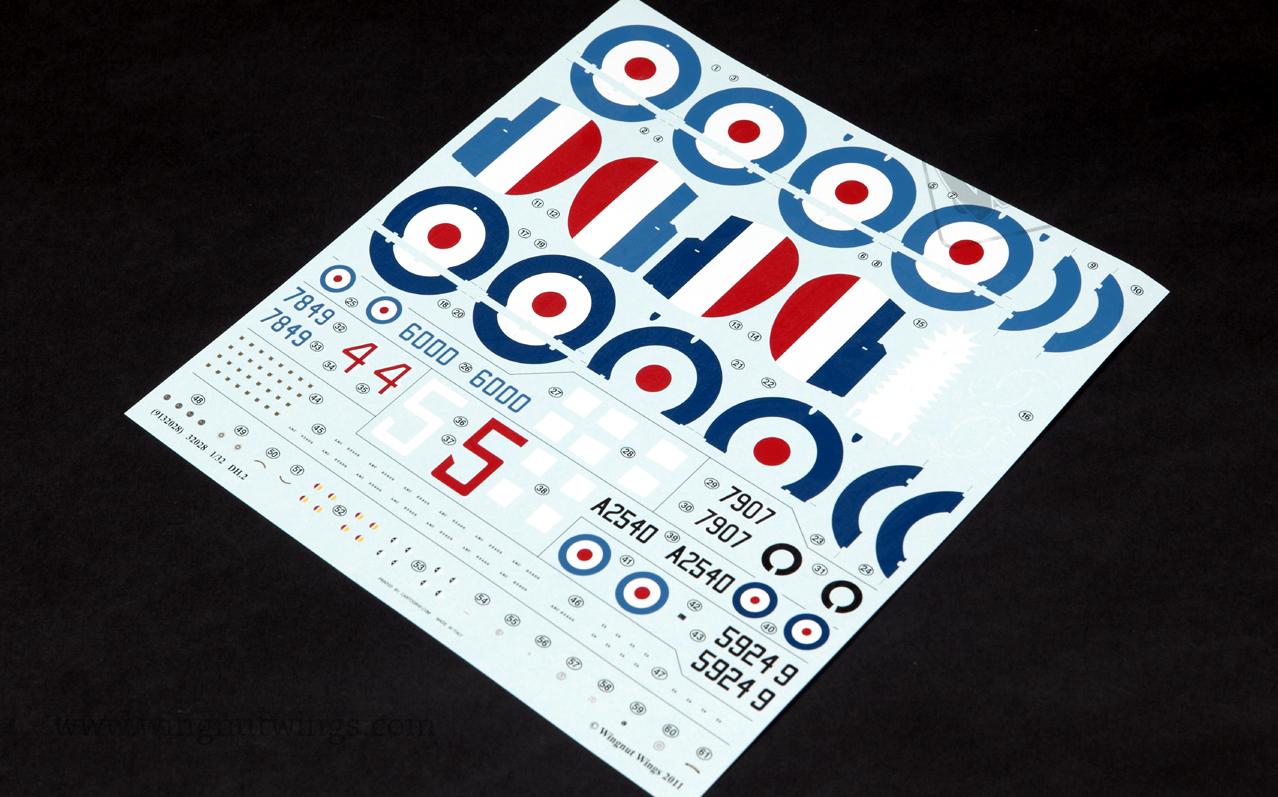
I have not tried to cut the numbers, but I found a Aircraft font page for download: volareproducts.com/blog/?page_id=2343
It's a WWII one, but if I compress the numbers a bit, it looks the same.
Alec K Regarding the font: if you have a scan of the decal sheet, you could upload to website below (there are others) for ID: myfonts.com/WhatTheFont/
bughunter Thank you Alec for this nice hint 👍
I think the RAF font from my link above is very close, but I had to position the numbers individually in Inkscape. Then I wondered during the cut process - what the hell the cutter is doing here? The I saw the result: Each of the arches from which the letters were composed was cut individually! Of course, this is not visible when printed out: black on black, but it is counterproductive when cutting. In Inkscape it was easy to fix with "Union".
Goodland would alse be an option accoding to your WhatThe Fontg page, is more close then your USSR suggestion.
The nice thing in Inkscape is font manipulation too, so I could change the angled edge of the number "6" 😉
Stay tuned ...
10 April 2022, 10:01
Alec K Good to hear. I use CorelDraw (assuming it's similar to Inkspace). I find it easier sometimes to just draw the codes instead of trying to figure out what the font is, but this is only practical when there are few different characters.
bughunter Alec, I love Inkscape! That is a very powerful tool, and I'm still learning. As I'm using Linux, I run the cutting plotter with a plugin directly from Inkscape.
At the end I started with the mentioned font but manipulated it further. The numbers are only 4mm high and there is a limit in very fine structures to be cut. But I'm happy with the outcome! 😉 Pictures soon ...
Nathan, a warm welcome!
10 April 2022, 19:00
bughunter The tail looks ok now, in comparison to the wonderful Ronny Bar profile: [img1]
bughunter After a short Easter trip I'm back at the bench.
I thought about the tail skid a while and decided to replace it. That work needs a while, but now it is very robust and looks nice.
If you're always cheered on like that here, it doesn't remain without consequences. 😎
Neil Still following this with great interest and yes... I'm with Lochsa, I struggle to see at my preferred 🔍 of 1/48, constantly swapping glasses. I'm always astonished at your detailed, skilled and impressive builds. 👏👏
23 April 2022, 11:31
Alec K One annoying thing about macro photography is how it mercilessly reveals lack of detail on a scale model. Most of us just shrug our shoulders at this "annoyance" and move on. Not Bughunter: he just goes back and re-builds the offending detail so it matches its 1:1 inspiration. Sigh…
23 April 2022, 15:03
bughunter Thank you very much mates for your wonderful, creative and motivating comments!
@Lochsa River
I'm short sighted, so for the work I remove my glasses. But I must admit as I'm getting older the eye sight changes. The trick is to use long handles, e.g. sand the end of a longer piece of wood into the needed skid and cut only after finish. See pic 55: long wood and long axle on the right.
@Alec
Not always, as my DH-2 stripdown has the kit stick. But there was a PE to mount the booms. And here it started, that I wanted a safe mount of the tail booms, so finally I replaced a lot.
bughunter I'm happy, that some problems are solved and like the look of this biplane!
25 April 2022, 19:40
Thomas Bischoff I have to admit that your perfection always makes me speechless. Incredibly details .. and the tips and how to's you give are also priceless 👍
Boris B Ooops, I was away and I missed another masterwork inthe making ! Joining now to catch up, especially since I have one of these in the WWI stash !
bughunter Thank you mates for the motivating feedback 👍
@Thomas and Robert
I don't have patented my tricks, but "priceless"? Some friends say in german the funny word "gebierenpflichtig", which means chargeable in the form of a beer, so feel free to offer a beer, if we meet once on an exhibition 😉
@David
Next will be the completion of the Nieuport Triplane, as the decal problem is solved now.
I got the Royal kit of the SE.5a as birthday present long ago, but only the night fighter was built until now: SE.5a Nightfighter | Project by bughunter (1:48)
The plan is to build the second one with different options: Hispano engine, 4blade, different undercarriage. And this time a better rigging. The RAF wire terminals from Gaspatch were not yet existing during the build.
This terminals are used on my Sopwith Triplane, Dolphin and the Camel recently. And now on the DH-2 here. Nearly half of the wing rigging is done 😉
26 April 2022, 17:31
Robert Podkoński When I will be next time in Munich, I will contact you and offer a beer or two for sure, Bughunter 😄 (and I am really going to visit Munich soon 😉 )
26 April 2022, 18:08
Hans-Jürgen Haag Absolutes Spitzenhandwerk! Ne astreine 10 von 10!
27 April 2022, 09:20
bughunter Robert, you are welcome!
Hans, Thanks! I hope the judges see it the same way, if I put it to the contest on next years EME! 🙂
In mean time the wing rigging is finished, much much more to come.
27 April 2022, 14:18
bughunter And continue under full steam!
I really love the moment when all prepared subassemblies comes together 😎
The colors are so beautiful, what a model ...
27 April 2022, 19:30
Christoph Kunz Pic 88 "looks ok" he wrote...
lol
Another perfect one
bughunter Thanks mates 👍
@Christoph I have not mentioned that I had to shorten the metal booms a bit, and that "ok" was related to the geometry after that. It is somehow hard to match the drawings because all is in different angles in all directions.
The best thing is, that the DH-2 is total robust now, even without a functional rigging (e.g. with fishing line). The metal in the struts and the metal booms forms a sturdy bird.
Still a lot to do: rigging, control wires and details like weapon.
28 April 2022, 18:52
Boris B The look of the rigging is simply amazing !
And I like how you simply have it done from one day to the next... How many hours are in your day, btw ? Or do you have 48x24 hours in each ? 🙂
Or have you also reproduced a factory's worth of scale figures that have -- of course -- come to life in the meantime ? Everything is believable in Bughunter 1:48 world !
29 April 2022, 08:30
Robert Podkoński We have already established that Bugunter has a flock of trained spiders, Boris 😄
29 April 2022, 10:21
bughunter Robert, you mean this picture? Siemens-Schuckert D.III Work in Progress | Album by bughunter (1:48)
Boris, glad that you like the rigging! It is so great to have such nice accessories - we live in Golden Modeling times 👍
One explanation is, that the pictures and updates are not in sync with the progress. I'm writing the same build report in another forum and release the update in batches.
When things are going really well and every move is right, then you also achieve something. Here the holes were prepared already (see pic 40), and to put the line into the hole and secure it with CA is really quick. On other days I have hardly made any progress in many hours.
But yes, I put a lot of time into modeling.
@all Have a nice weekend! Frank
29 April 2022, 10:38
Robert Podkoński Of course, Bughunter, this very photo tells the whole truth 😄
bughunter Thank you very much mates 👍
Jose, a nice model, yes. But I assume not my masterpiece.
The number of remaining parts becomes smaller. There is a light at the end of the tunnel ... May be this is finished after 2 month.
Here on a DH-2 a reload of the Lewis was a safe action! The problem with the airscrew and gun was the reason to develop pushers like this DH-2.
A lot of aircraft types had the Lewis mounted on top of the wing, typical on a "Foster" mount (see my SE.5a project), to fire over the airscrew arc.
To reload the Lewis on this mount, the pilot can move down the MG on a rail to change the drum. But the pilot needed both hands to do this, had to let go of the stick and hold it with his knees, which was a dangerous situation in a fight!
Indicative of the risk is an experience of the British pilot Louis Strange. When he wanted to change the magazine of his Lewis MG, which was mounted on the wing of a Martinsyde S.1, he lost control of the stick. The aircraft then changed attitude and Strange was ejected from the cockpit, but managed to hold on to the magazine. He eventually managed to climb back into the cockpit.
This is mentioned in a German wikipedia article about the Lewis, but not in the english version.
Ah, found it here too. And yes, at that time 1914 there were no belts! Also the Sopwith Schneider (winner of the Monaco air race 1914) had no belts and dropped the pilot into cold water at the first test. en.wikipedia.org/wiki/Martinsyde_S.1
But yes, to fly in open cockpit of the DH-2 in winter with -20°C or colder, with a big four blade fan in the back, was a hard job!
5 May 2022, 18:55
Kyle DeHart Excellent history lesson and this continues to look fantastic. I'm speechless.
5 May 2022, 20:13
bughunter Thank you for your nice words Kyle!
That history part of the hobby is a big fun for me, and with engineering background I learn a lot with every new build. Also on the models you can see the developments within and between the manufacturers.
There are now a huge amount of great accessories which makes the build of the actual model fun and great, but sometimes I want then to remake or rework my older models (older means 5 years ago) if I see what I have done. Also because you learn with every model 😉
5 May 2022, 20:41
bughunter Now control wires and some rigging, but the detail work should be finished.
6 May 2022, 15:01
Kyle DeHart Agreed bughunter. I, too, love the history behind each and every model I build. Very cool part of it for me. No doubt about learning with every model both between the history and different techniques.
6 May 2022, 18:27
bughunter After a lot of work all control wires and rigging lines are in place 😎
With a bit of luck you will get a new pics today.
12 May 2022, 13:51
bughunter New pictures added 😎 Used a gray background to show all the rigging.
That was a lot of work, but the project is very close to the finish line now.
12 May 2022, 16:29
Robert Podkoński I am just speechless... it feels like rigging a tall ship. Watching this I am absolutely sure that if I ever try to build a I WW plane, this only can be a Fokker D.VII (as it featured minimal rigging 😉 )
12 May 2022, 16:44
gorby Just caught up with your build and that's pretty damn fabulous work Frank!
I found that by the the last photo my jaw was hanging open in amazed wonder. Looking forward to final pics. 🙂
Capt Bellinger Wilky, the Dr.I has *almost* no external rigging; don't forget the cross-bracing of both the cabane struts and the undercarriage.😉
13 May 2022, 10:06
Mike Daniels Looks great! The only kit i have ever destroyed. Man, that tail boom is hard to fit. Great job.
13 May 2022, 10:12
Robert Podkoński @wilky and Capt Bellinger - I am aware that D.VII also features cross-bracing of the cabane struts and undercarriage, but has lesser number of wings than Dr. I... what reminds me of D.VIII 😄
13 May 2022, 10:27
bughunter Wow mates, thank you very much for your comments, highly appreciated!
@Capt Your words about the best DH-2 - Wow, thanks! Now I need to ask Tim for a red face smiley.
@Mike that was the reason to create metal tail booms, I would not be able to do it with the kit ones.
I noticed a mistake, see pic 112. The drum handle is in wrong direction, as there is a lock on the left. I was able to fix this.
All remaining sub assemblies are mounted now, some weathering added, last details added (oh, sometime I really hate CA!).
Hope for good weather beginning of next week for the final outdoor pictures.
13 May 2022, 12:13
Hanno Kleinecke And there it happened again : The inevitable jaw-drop when looking at Bughunters wip - pics…… totally extraterrestrial rigging 👍
13 May 2022, 13:49
Boris B Amazing rigging job, indeed, Frank... Sorry for the repetition, but it has to be said. All sense of scale is lost, I mean, it's a model, but who could guess its scale ?
One question about your documents, though : on picture 98, the wheel on the photographed aircraft has a shape that is a lot more conical that the (eduard?) kit wheels. Is that because the aircraft in the document has unusual wheels ?
Marius That's all insane! Fantastic results! How do you even get the rigging so tight? (sorry in case it was already answered)
14 May 2022, 09:15
Harvey H.W. Can I just click "like" one more time? Superb details !
14 May 2022, 12:01
bughunter Thank you mates for your wonderful comments!
@Boris The Eduard wheels matches the drawings of the Datafile perfectly. The most used wheels was 700x75, but some DH2 used 700x100. And more funny: the 24 Squadron turned the wheels (the flat side outside) - a simple change to increase the gauge. I think in the picture you mentioned this looks more wide due to perspective error.
@Marius The rigging is done with rubber lines, EZ Line for "RAF wire" main rigging, this one for the other lines and control wires: Elastic Rigging Thread (Uschi van der Rosten 4005, No)
Since the rubber does not give the model stability, it must be stable in itself. So metal booms, metal/wood struts, ....
14 May 2022, 13:54
bughunter After two month of hard work this project is finished. After some last small details, weathering and detail painting the final pictures are done now and can be found in a new album. Don't miss it! Downscaled original Airco DH-2 6000 | Album by bughunter (1:48)
I think the topic DH-2 is now done for me after two models, but not planes in pusher configuration. The FE8 and the FE.2b to follow. The FE.2b seems to be most complicated with 8 struts on each side, let's see ...
Thanks to all for watching and commenting through this build 👍 See you in next project.
16 May 2022, 09:20
Urban Gardini It's been an marvellous journey to follow this build!
bughunter Thank you mates!
@Lochsa No, I use EZ line only for the simulation of the main flat RAF Wire rigging, and those going through straight through the resin terminals (which is very hard by the way), so no loop back. See Gaspatch manual of the terminals.
For the rigging using turnbuckles with looping back see posting two above yours.
16 May 2022, 16:05
Alec K Another amazing and inspiring build! Rigging alone is worth a medal. Looking forward to your next modeling journey 👍


 6+
6+")
,%20A%20flight,%2024%20Sqn,%20July%201916%20%20(7%20victories).jpg)
")