

RF-8A over Cuba project

First thing was to make a lot of pieces out of two wing halves

Next I made the folded section as it was the most interesting

I acquired some stencils that arrived today

Bottom side of raised wing. I put some styrene to make the missing underwing part and made antennas from soldering wire

Top side of raised wing. All is drooped as supposed in raised wing configuration. It was more work that I thought, but you can't rise the wing unless you droop slats and flaps..

I robbed top of the engine bay (under the wing part) from Academy kit and added some details to it

Engine top side in the fuselage half.

I added some details to main wheel well too. There are good details in the kit wheel well, but I added some more.

There is no decal for instrument panel, but there is some raised details, so it can be painted (although no dials, but they are so small you wouldn't see them anyway)

Resin seat out of the box is nice with harnesses.

Camera bays got some details. Walls and some wires and lens and back wall. I don't know how much this would be visible on finished model, but this is the last chance to add the detail

All the inside parts glued to the one fuselage half

Fuselage halves glued together

There is clear bottom plate where the camera windows are, note also the opened camera bay and steps in fuselage

Everything ready for paint. Masks for windows are out of the box.

There are masks for all the windows out of the box

I primed the kit with AK white and grey primer with micro filler. And I made some per-shading with Tamiya hull red, as it is not too dark for light paint scheme as this

I painted crusader with MRP paints using insignia white and light gull grey (and Swedish army black). I painted with free hand demarcation between top and bottom colors.

Pre-shading is still showing under the top paint

The kit decals are on. They worked nicely and are in register. But there are no any stencils, so next I put the aftermarket stencils on.

There is only national insignia decal for bottom side

One side with stencils and other side without. Are the stencils worth it..?

Both sides has the stencils now. There is an option to remove the carrier film from the stencil decals, but I only did that on wing decals.

If you put the kit only decal picture beside this one you can find some differences...

Kit has wrong wheels for RF-8A version. First I thought that I didn't mind and painted them, but I couldn't live with those after all and I had to correct them...

I scratch built camera on the nose out of left over resin parts (and something for camera bay)

Finished. More pictures later

Here you can see the forward camera which I scratch built

This is supposed to show the details that I added behind the cockpit

Right side view

Left side view

Here you can see the wing fold area

view to landing gear bay and camera bay

Wing is off to show the engine duct area

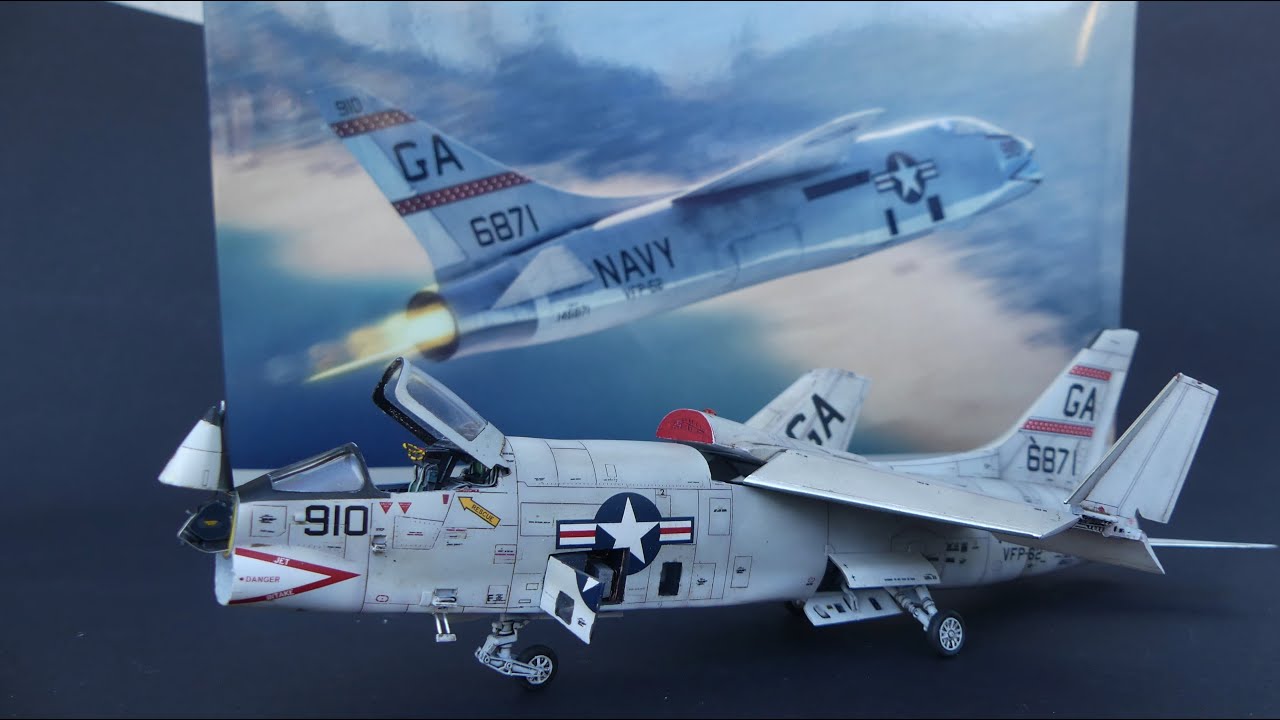
Sword RF-8 Crusaders, RF-8G out of the box and RF-8A with some scratch built features
Hozzászólások
104 6 January, 14:32
These arrived in the mail today partly thanks to your inspiration and recommendation, TV.
18 January, 16:06
I did, it's my favorite plane so I figured what the heck. They indeed look like nice little kits considering they're short run
19 January, 14:46
nice start 👍 I love the cut up wing and the homemade wingfold looks great
19 January, 14:54
Rando: They are very nice and the only thing that you can notice it is limited run kit are ejector pin marks that you must remove and aligning the inner parts as there is no locator pins.
Thomas: Thanks, I start to regret that I cut everything apart as I have to droop the flaps and slats, it is not as fun as making the wing folds..
19 January, 15:34
Hey where did you get those stencils? Definitely could use some of those myself. And thanks, I'll definitely be referring back to your build video when I get started on one of these 👍
19 January, 16:19
Rando: I got those stencils from eBay: https://ebay.com/itm/3543431..vNNrh%7Ctkp%3ABk9SR4CF_amkYw
19 January, 16:49
Awesome to see what can be made from the wing. This is almost scratch-building!
27 January, 14:59
I inserted the Academy top engine duct into the fuselage half, but it was 1 to 2mm too narrow, so I made additional floor to that. I also added forward bulkhead from Academy kit. It also had to be modified so that it is in center.
Wheel wells got some additional details although they are quite nice out of the box, but as I add some other details hey would look too empty.
4 February, 11:31
Very nice job so far 👍
How was the fit of the belly and the transparent part?
10 February, 20:22
Cuajete: thanks! The transparent part fit was very good. From air brake to main wheel well plastic part needs some attention though.
11 February, 09:50
Michael Kohl: here you go... I think pre-shading works well with these colors.
18 February, 09:57
I love it, this is inspiring work, I'm going to build one of the Sword RF-8s in flight and another dirty like this.
23 February, 22:01
Thanks all!
Rando: Sounds like a plan..
DerMattes: Thanks, I think stencils liven out the plane, but it is a pain to put all of those individual markings
25 February, 19:32
Thanks for input Rando, Jennifer and Cujate! There was an option to remove the carrier-film a'la Eduard as the carrier film is on top of the printing. But these decal film is so thin that I decided that it is not worth double the work. I tried it with wing decals and it worked as advertised though. In these all the decals are on one big sheet, so you have to individually cut all near the real text so no additional film is put on.
29 February, 14:50
All the decals really add to the appearance of this model. I'll definitely be applying stencils to my 1/72 F-8s as well. As long as the decals are good quality, it's a part of modeling I really enjoy, even in 1/72
29 February, 15:01
Rando: I also like putting on decals, but individual stencils are always a little too time consuming and focus stars to slip. These are good, but you have to keep in mind that the printing is on the bottom side and moving the decal in situ is always a risk to destroy the decal. Numbers are in order in this stencil decal sheet, so the needed decal is quite easy to find although there is no any division like fuselage and wing etc.
29 February, 17:32
How to say, I can't find the words to express my fascination with the result. It's just beautiful.
8 March, 07:50
Fantastic work mate and good video as well. Bonus points for your homage to PLASMO at the start of the video...
8 March, 14:12
Thanks all for kind comments and likes! I uploaded some more final reveal pictures.
8 March, 14:54
Love the photos, amazing attention to detail especially for 1/72. The open nose and camera port especially are fantastic. I will definitely be taking copious notes from your video when I build a Sword kit similar to this.
8 March, 15:32
Rando: Thanks! It is easy to make something if you have reference. In side camera bay I only had some worse pictures so there is some artistic license. Free feel free to copy the ideas!
8 March, 16:16
Your detail work is outstanding and inspiring. And you accomplished all of that quickly. The end result is really amazing! 👏👍
10 March, 18:18

