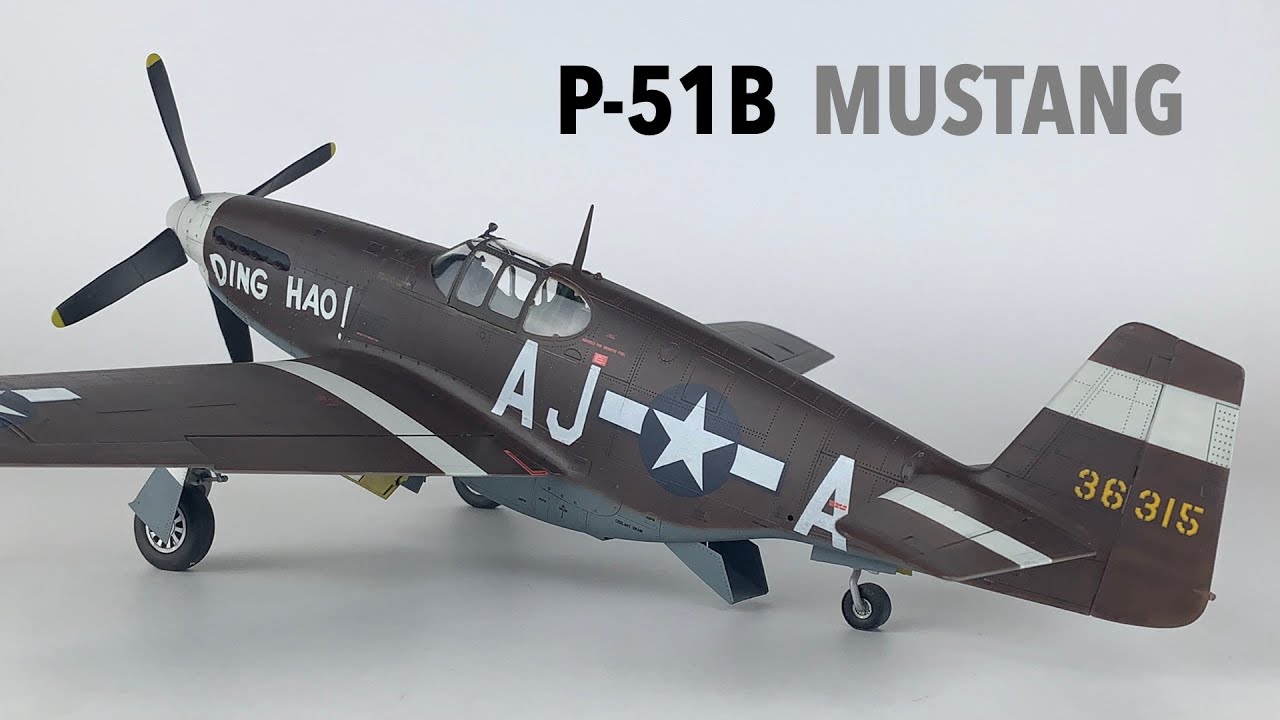
P-51B Mustang


Comments
17 14 August 2021, 14:30
David,
Very nice build. I watched the video you did. Thanks for doing that, I'm sure that's a lot of work to do that. Concerning the painting of the decals, what technique is that your doing? What is the benefit of doing that? Is there an instructional video demonstrating that that you are aware of? For me, I'm not sure it's worth the effort to do that. Maybe you could explain the advantages of it. Again, it's a beautiful P-51 f an iconic battle it was engaged in.
Paul Moore
24 April, 12:37
One more question, what is the white glue you are using? You use glue very sparingly and there's certainly no glue marks left behind!
24 April, 12:40
Your "mottling" technique was certainly very subtle. So subtle I don't think I can see any on the finished product. What are your thoughts David? And I learned a new technique of filling a gap with spare plastic sprue and breaking it off. That's very helpful.
24 April, 13:19
Nice job David, especially tackling the Trumpeter fit issues. I am a profound hater of putty in all its forms so I'll go to extreme lengths to avoid using it and plastic card is definitely a useful tool to fill gaps. Putty, being a different material, never seems to behave all that well.
Paul, I won't speak for David but for me, one of the advantages of "rolling your own" with decals is that you can eliminate most if not all of the decal film (depending on how you do it) and not have it show up on the finished product. For the mottling, I can see it in the video more than the still pics and more on the grey underside than the OD topside. I have found that the undercoat on darker colors requires A) a little lighter touch on filling in/blending and B) some lighter colors on the undercoat to peek through but not too much or you can get a checkerboard effect, or have to cover it so much that it becomes monotone in other areas.
24 April, 15:26
@paul moore: re: decals. this is not really a decal technique. this is what is referred to as a wet transfer. you can check this company hgwmodels.cz/en/ if you are interested more (I have no association with them). they manufacture a bunch. on some earlier builds i successfully applied this technique but using a laser printer and only in black. this was a progression but using masks. the advantage over spraying with masks is that on complicated surfaces masks can get tricky, when this wet transfer should adhere to to surface better. another advantage is that you do not gloss coat under the decal and you do not have to fight with shifting the sheen to gloss and back to matte. for me personally decals were and still are a bane. i am getting better at applying them. this this was just exploring alternative routes. if you don't experience any issues with decals, this is most likely an overkill...
28 April, 02:30
@paul moore: re: white glue: it is microscale krystal klear. it is like a PVA glue but dries matte and has a more stickiness to it
28 April, 02:32
@paul moore: re: mottling. this comes from the black basing technique where you apply so called "marbling coat" (here you called it mottling) over a black paint and then a blend coat. the problem I experience with the black basing is that the black shifts the color tone. typically, this happens with lighter tones like yellow. i picked the brown tone just to learn how the color would work with it. you are right that one cannot see the effect that would be obtained by techniques like pre-shading. and I did not do any "post shading" to lighten the panels. the model would benefit more from additional tonal variation, that's for sure. also as @john mentions, one should be careful to avoid the checker-boarding effect
re: plasticard: i learned this technique from watching youtube videos, so glad to pass this onto others 🙂
28 April, 02:46
@john: i am with you on the issues with putty. one technique i learnt is so called "sprue goo". you take the sprue of your kit, chop it in small pieces, and dissolve it in tamiya liquid cement (in some jar aside - i use tattoo ink cups). do not make it too thin. try to opt on the thicker side. then you can fill gaps basically with the material your model is made of. however, one must be careful with application, this will destroy surface detail, since it will melt the plastic a little bit. masking the models with tape can help in many instances. also, if it is too thin it will take a long time to dry. on the other hand, it creates a great surface if you need to re-scribe panel lines and such. IDK, if you know about this, just thought i would share this. may be it will help you in your model building...
28 April, 02:55
Thank you for informative reply David. I have heard of sprue goo and I tried it once or twice but did not find it worked for me very well. I think I probably made it too thin because it did take a long time to dry. I've been sticking to super glue because it can be sanded and scribed if you do it carefully but I may revisit sprue goo with your caution about keeping it thick to speed drying.
28 April, 16:23
Album info